Pennsic

Attack of the Drawstring Pants

16 July 2011

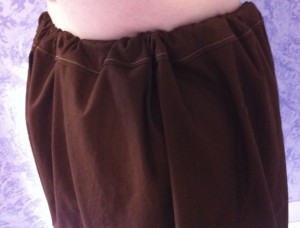
Today’s Garb-A-Day project is a pair of drawstring pants for Gregor. After looking at a lot of different methods to make these online, I settled on what appeared to be simple directions from DawnPages. I made the pants out of a simple brown twill, hemmed and French seamed it all. Then I tried them on. Now let me preface this by saying I am shorter and smaller than Gregor, but …. goodness, these pants are huge! I followed the directions, I swear I did. I even tapered the leg a bit. All I can do is hope they work better for Gregor. They are definitely very roomy! But I’m making him try these on before I make him any more!

“Do these pants make me look big?”

Fitted Breeches for My Pirate

15 July 2011

Little Boy Breeches

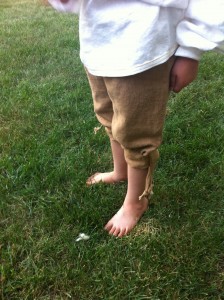
Today’s Garb-A-Day project is pants. So far I’ve made Alexander a pair of linen, fitted breeches to go with his Elizabethan shirt. They aren’t necessarily constructed in any historical manner — I doubt they will last that long knowing my kid anyway. I also made them exactly to his size, rather than a bit larger, as I didn’t want his pants falling down on him while he was playing! I think they look quite nice, though.

I got the directions on how to make these fitted breeches from Dawn’s Costume Guide — I simply used a pair of Alexander’s pants as a guide for the measurements. I used drawstrings for the waist and legs rather than buttons or snaps, just to give us more flexibility.

Oh … and Alexander likes them! And he’s already managed to get a grass stain on ’em. That’s my kid!

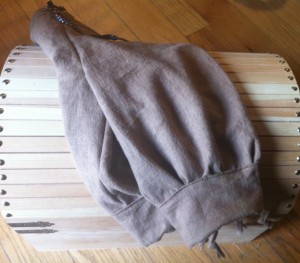
As for the other pair of pants I wanted to make today (for Gregor), I’m still waiting on a style and measurements. I think we’re leaning toward linen, full-length pants with a drawstring waist, such as those found at these links:

http://www.al-barran.org/newcomers/pants.php

http://www.caitlinsclothing.com/generic.html#Generic%20Pants

http://www.linengarb.com/all/linen-pants.html


A Pirate Shirt for My Son (Shh… It’s Really an Elizabethan!)

15 July 2011

My 6-year-old announced yesterday that he’d like me to make him a pirate outfit to wear at Pennsic. I’d already explained to him on several occasions that pirates weren’t really what we were going for. Then he proceeded to show me a pirate fact book he has that shows that pirates were around in the time period that the SCA covers. Sure enough, he was right. Since he did “research” and is attempting to satisfy the “rules” of the SCA, I feel I should try to make him something a pirate would wear. Of course, his idea of what a pirate would wear (think Jack Sparrow) is different than what a pirate actually wore. But I just wasn’t sure what to make him that he’d like, that would be reasonably accurate, and wouldn’t be time-consuming to construct.

So I asked the helpful folks over at SCA-Garb and they came through with several ideas for me! The first idea is to make him an Elizabethan shirt, as they are similar to “poet” shirts that are commonly depicted on pirates in popular media. Plus, pirate captains were mostly nobles or gentlemen (how else could they afford a ship and crew?), and it’s likely captains during Elizabethan times work similar shirts. I looked about and found a web site that had a shirt pattern from The Museum of Costume, circa 1585-1600. Perfect! I adapted it to my son’s measurements and, with the approval of my son, went to work!

Alexander tries on the shirt

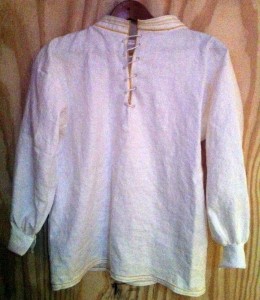
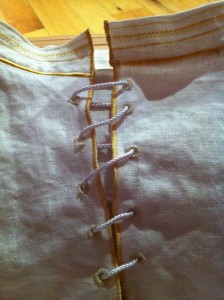
We did change two things from the pattern. For one, we didn’t do blackwork, but did use some gold thread around the collar and the shirt bottom. My son LOVES anything gold, and in his mind it goes along with being a pirate (gold, gold pieces, treasure, get it?). Sure, it’s not accurate, but who cares! Also, I put lacing at the top of the shirt to help it fit him better, as I’d made it larger than necessary so the shirt would be wearable for longer.

Actually, now that I think about it, I made two more changes — no drawstrings at the neck and wrists and no slits on the side. But other than all that, it’s the same as the pattern … including neckline gores! Those are a first for me.


Here’s what the shirt looks like now that it’s all done:

A shirt fit for a swashbuckler!


And here is a close-up look at the eyelets and collar:

Spiral lacing on the Elizabethan shirt

I can’t wait to show Alexander the finished shirt in the morning! Update: He loves the shirt .. and looks quite dashing in it!

And that completes today’s Garb-A-Day goal … yay!

Dragon Army Tunic for Gregor

14 July 2011

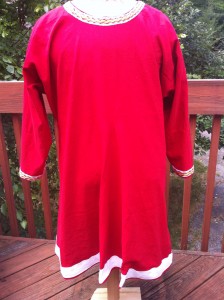
Gregor's new red tunic

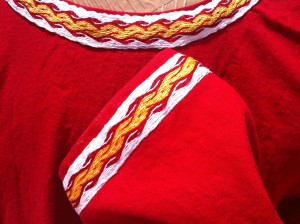
In keeping with my Garb-A-Day project, I completed Gregor’s red tunic yesterday and I’m very pleased with how it turned out. I used the Bochsten Man’s tunic for the pattern (customized to Gregor’s measurements, of course) in red, unlined linen. I added some of my tablet-woven trim around the neckline and wrists (what I call the “Dragon Army” trim, hence the name I’m giving to this tunic). I’m really impressed at how nice the trim looks on the red!

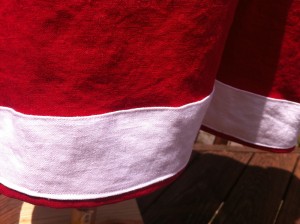
That was all nice, but I decided the tunic needed a little something extra, so I added the white band of guarding around the bottom. I think it’s going to look great on him! Red and white are his chosen colors — when he decides on a device, it will employ those colors. I can’t wait to take a picture of him actually wearing it!

Note: The tunic will drape much better on Gregor’s tall frame with broad shoulders. I just put it on my dressform so I could take a better picture of it (though I did turn it around so no curvy bits would show!)

Tablet-woven trim around the neck and wrists White guarding around the bottom

Garb-a-Day Project: Push for Pennsic!

12 July 2011

We now have exactly three weeks before we hope to depart for Pennsic. And between the three of us, we each have maybe 1-2 outfits appropriate for camping.

Whoooop! Whoooop! Whoooop! (those would be emergency sirens!)

It’s time to crackdown and make our garb! So I’m setting a goal for myself — one piece of garb a day for the next three weeks. I’ve even made myself a little schedule…

Sunday Monday Tuesday Wednesday Thursday Friday Saturday
Cauls x 2 Cotton Smock Tissue Linen Smock Red “Dragon Army” Tunic (G) White Linen Elizabethan Shirt (A) Fitted Breeches (A) Drawstring Pants (G)
Gold Doublet (A) Nothing! Full day of mundane stuff. Apron Green/Red Doublet (G) Blue Tunic (G) Tissue Linen Smock and White Shirt (G) No sewing — took a break and made benches
No sewing — took break and stained benches Red/Brown Kirtle + Hat Red Schlappe Hat Light Blue/Dark Blue Kirtle Tie-On Sleeves x2 and Partlet x2 Plum/Black Overdress (OR a Kirtle instead … still deciding) Tunic? Smock? Understuff?
Cloaks (maybe), hems Whatever else I didn’t finish DEPART FOR PENNSIC!

There we go…. if I meet my goal each day, I will have enough garb for the three of us for Pennsic! I think this is doable — I’ve done each of these things in one day before, and I certainly didn’t spend all day doing them (which is good, as I’ve got my day job to do, too!) If I am good, I will move a little ahead in my schedule and buy myself some extra time so I’m not sewing sleeves the night before we leave.

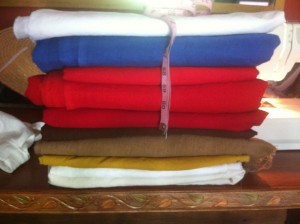
I must turn this stash into wearable garb!

Can I actually do it? Well, as I’m big on goals and rewards, here’s my plan. Each day I complete my goal, I’ll cross it out on the chart above and post about it on Facebook and/or here on my blog, to keep myself honest. And if I complete my goal, my reward is some truly awesome thing from a Pennsic merchant — not sure what I’d get yet, as I need to see what they are selling, but I’ll know when I see it.

I just placed a big order for linen from fabrics-store.com (theyir new doggie bags came out today — good discounts!)

So, here we go … today’s goal: a smock for me made of tissue linen (it’s already prewashed and ready for cutting).

A Pint-Sized Gothic Chair

5 July 2011

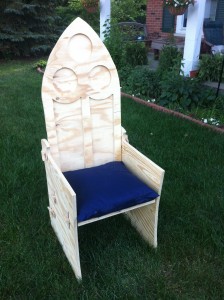
So after I made my Gothic Chair for camping, my son asked for one of his own. And it’s a good idea, because if he doesn’t have a chair, I’ll be constantly shooing him out of mine. So I made him one, but sized it down for him. It’s four inches shorter and two inches narrower. Here’s what it looks like so far…


Pint-Sized Gothic Chair

My son designed the backrest with the three circles and curved-top panels — I like how it looks similar but different from the other one. What’s left to do? Cut out the designs in the sides, woodburn a diamond symbol (my son’s choice) in the top circle, sand everything, and stain it. And I also have to do the same to my own.

Oh! And my son asked for, get this, a cupholder. I’m thinking about that one.

My First Dye Job: Dying Linen Apple Green

4 July 2011

Today was my first foray into dying fabric, believe it or not. I’ve thought about it many times over the years, but never managed to find the motivation. But this time around, I needed a light green linen — you can’t get that color at Joann’s, and I couldn’t find the right shade of green at Fabrics-Store.com (Midori comes close,but it looks too “lime” yellow green, and Willow seemed a bit lighter than I wanted). I would have been willing to settle for the Willow linen, but … I need this dress done in 5 days and there’s just not time to get an order of linen shipped. So I got a bottle of RIT Apple Green dye from Joann’s and gave it a whirl. Directions say to mix half a bottle with three gallons of hot water and a cup of salt, and stir constantly — finding something to stir with that wouldn’t turn the same color as my dye or hurt my linen was a bit challenging, but I settled on a stainless steel spatula.
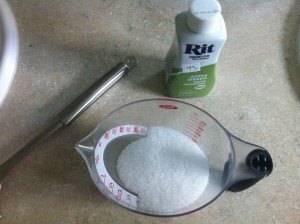
Supplies for Fabric Dyeing

I put the dye, salt, and water into a big tub. I used the hottest water I could get from the tap plus a pot of boiling water fresh off the stove. I also filled my bathtub a few inches full of hot water, hoping that would keep the water in the tub hot. Before I put in my linen, I washed it but did not dry it — I read that if the linen is wet when it goes into the dyebath, it is less likely to dye unevenly. Once the dyebath was ready, I put in the linen, trying not to bunch it up too much (again, something I’ve heard can cause splotchy dyeing).
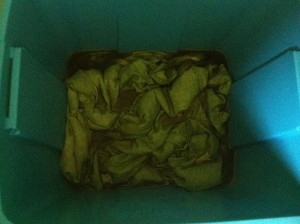
The Dyebath

I stirred, or attempted to stir, the linen in the tub for 30 minutes. 3.5 yards of wet linen is not an easy thing to stir! So I half-stirred, half agitated the water … then every 5 minutes or so I took the linen out, let it fall flat, and put it back in the water. I was hoping that would unbunch/uncrease any folds of fabric so that, over the 30 minutes, the fabric would touch the dyebath relatively easily.

After 30 minutes, I took out the linen and rinsed it. I was supposed to rinse it until the water ran clear, but this proved hard to do, so I just did what I could. The next step called for me to wash it with detergent, so I just took it to the washer, added a little detergent, and washed it. Then I dried it in the dryer. I wanted maximum shrinkage before I began cutting and sewing, as I would like to be able to just machine wash and dry this dress in the future.

How did it turn out? See for yourself …

Apple Green Linen

It looks delicious … and just the color I wanted. The linen took the dye evenly and it all seemed to work great. Interestingly, I noticed that when I ironed the dyed linen, the color lightened just a bit, but darkened again when it cooled, though perhaps not quite as dark. I wonder if that will happen everytime, or just the first time.

Well, now the fabric is laid out and ready for cutting into my kirtle pieces!

Drafting Patterns for Smocks and Kirtles

3 July 2011

I finally got the chance tonight to begin my Pennsic garb sewing. I decided to start with the simplest garment, the smock, and work my way out. I drafted a pattern based on my measurements and the instructions at http://www.elizabethancostume.net/smockpat/. I cut out some inexpensive muslin, sewed it, and it worked!! The smock was surprisingly easy to make and looked good. The only thing I’d change from my original pattern are the sleeves — I want them to be a bit wider and a bit longer — I think an inch at least.

So after my success with the smock, I moved on to the kirtle. I didn’t have any muslin for that, so I raided my stash of cheap fabrics procured from Scrap Box (recycled materials shop) which cost nearly nothing to me. I found some ugly brown twill that I think must be at least part polyester (but it wasn’t stretchy!) and used it to make a kirtle. Again, I drafted a custom pattern from my measurements and these directions: http://www.elizabethancostume.net/kirtlepat/gored.html. I decided to go with an A-Line Kirtle because I like the option of wearing my farthingale under it. The first try worked pretty well, though I think the shoulder straps need to be a bit shorter and the waist narrower. Those are both very easy to fix when I go to use the actual linen for the real kirtle. I tried my farthingale under it and it looked good.

Unfortunately, I didn’t measure the brown fabric before I cut it, so I’m not sure how much material I needed. If I were to guess, I’d say between 3 and 4 yards. The circumference of the skirt bottom is 132″, but I pieced it to make the most of the material. I think I’ll take apart the brown test kirtle apart and lay it out on my linen, using it as a pattern.

All in all, great progress for the evening! Once the patterns are down, I think I’ll be able to cut and sew these pretty easily.

The Flemish Gown

28 June 2011

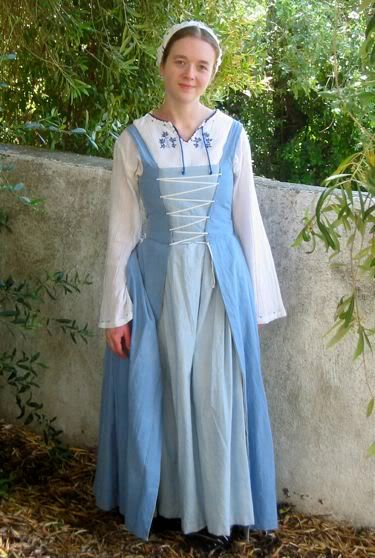
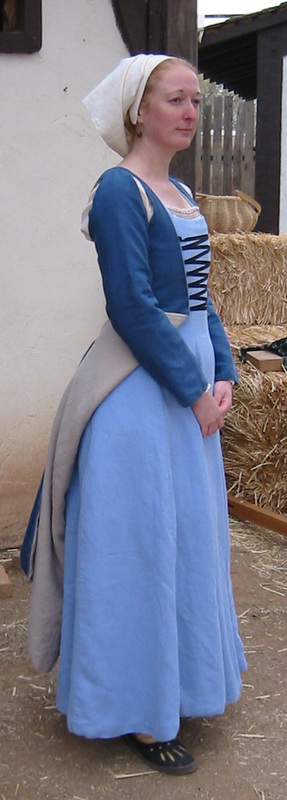
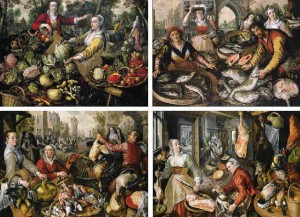
It’s time to set aside the woodworking and start making garb for Pennsic! I’ve been trying to find the right thing to sew for some time now — my requirements are that it be cool, comfortable, historically accurate, and aesthetically pleasing to ME. I’ve had a few frustrating days, but I think I’ve finally found a simple style that will work for my Pennsic garb: The Flemish Gown. The gown is based on dresses worn by Flemish woman in the 15th century, so I’m in the right timeframe for my persona, albeit a wee bit off geographically. But I was never planning to stick to one culture or time period for my garb — I plan to branch out as that exploration interests me anyway. But still, I really like the way the Flemish Gown looks — here are some photos:

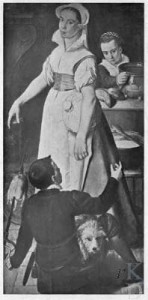
And here are some original sources that depict the dress:


The Four Elements (Joachim Beuckelaer)

Two Cooks and a Boy (Huybrecht Beuckeleer)


Besides the fact that this dress is very appealing to me, it is also very versatile. The underdress (kirtle) and overdress (gown) are separate, so if I chose my colors well, I could pair them together in different ways to achieve different outfits. If I managed to make three kirtles and three overdresses, that would give me nine different-looking outfits! That would suit me well, I think.

And as you can see by the photos above, the skirt can be worn tucked up (kirtled) or pinned back, further changing it. Of course, I’m not yet sure how hard it will be to make, but this is the best idea I’ve had yet, so I think I should try it. Here are the best directions I’ve found on how to make it: http://www.elizabethancostume.net/lowerclass/makeflem.html

So for my future reference, here are a whole bunch of links to other blogs from seamstresses who have made this gown:

Heather’s Pages (she made the kirtle reversible, which I think is a great idea!)

icklesevvy’s Flemish Front (she made everything fully reversible)

The Dreamstress

Philippa’s Wardrobe

Festive Attyre

I should probably first try to make the kirtle and underdress in an inexpensive muslin to avoid wasting any expensive linen. I shall report back as I work on this!

A Gothic Chair: Making Progress On My Camp Chair!

25 June 2011

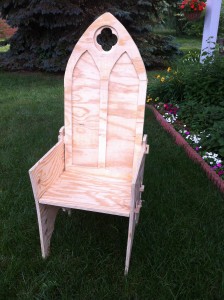
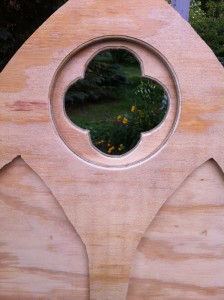
Have a seat, pull up a chair … my chair! I now have a gothic chair that breaks down for flat transport and goes together with just bits of wood (tenon keys). After deliberating for a while over what to do about the 12 mortice holes and how I was going to make them, I finally came up with a solution … the Dremel TrioTool. I LOVE this tool, It does everything necessary to make these woodworking projects — cuts, routs, and sands. You can even do a nice rounded edge for decoration. If you’re thinking about doing some projects and aren’t sure what tools to get, get the Dremel TrioTool — it only cost me $89 by using a 10% discount coupon from the post office (normally $99).

Anyway, enough about power tools … here’s the chair so far:

My Unfinished Gothic Chair


Side view of the chair

A closer view of the quatrefoil in the chair back

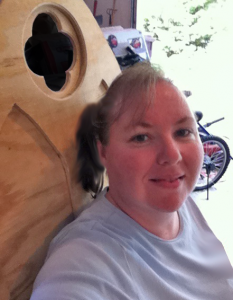
Me sitting in my new chair ... it works!

Things left to do:

  • Cut out quatrefoils in the sides of the chairs.
  • Make armrests
  • Make better tenon keys from oak
  • Sand everything
  • Stain it

But all in all, not bad for a day’s work! I spent a couple of hours yesterday, plus about five hours today.

« Previous PageNext Page »