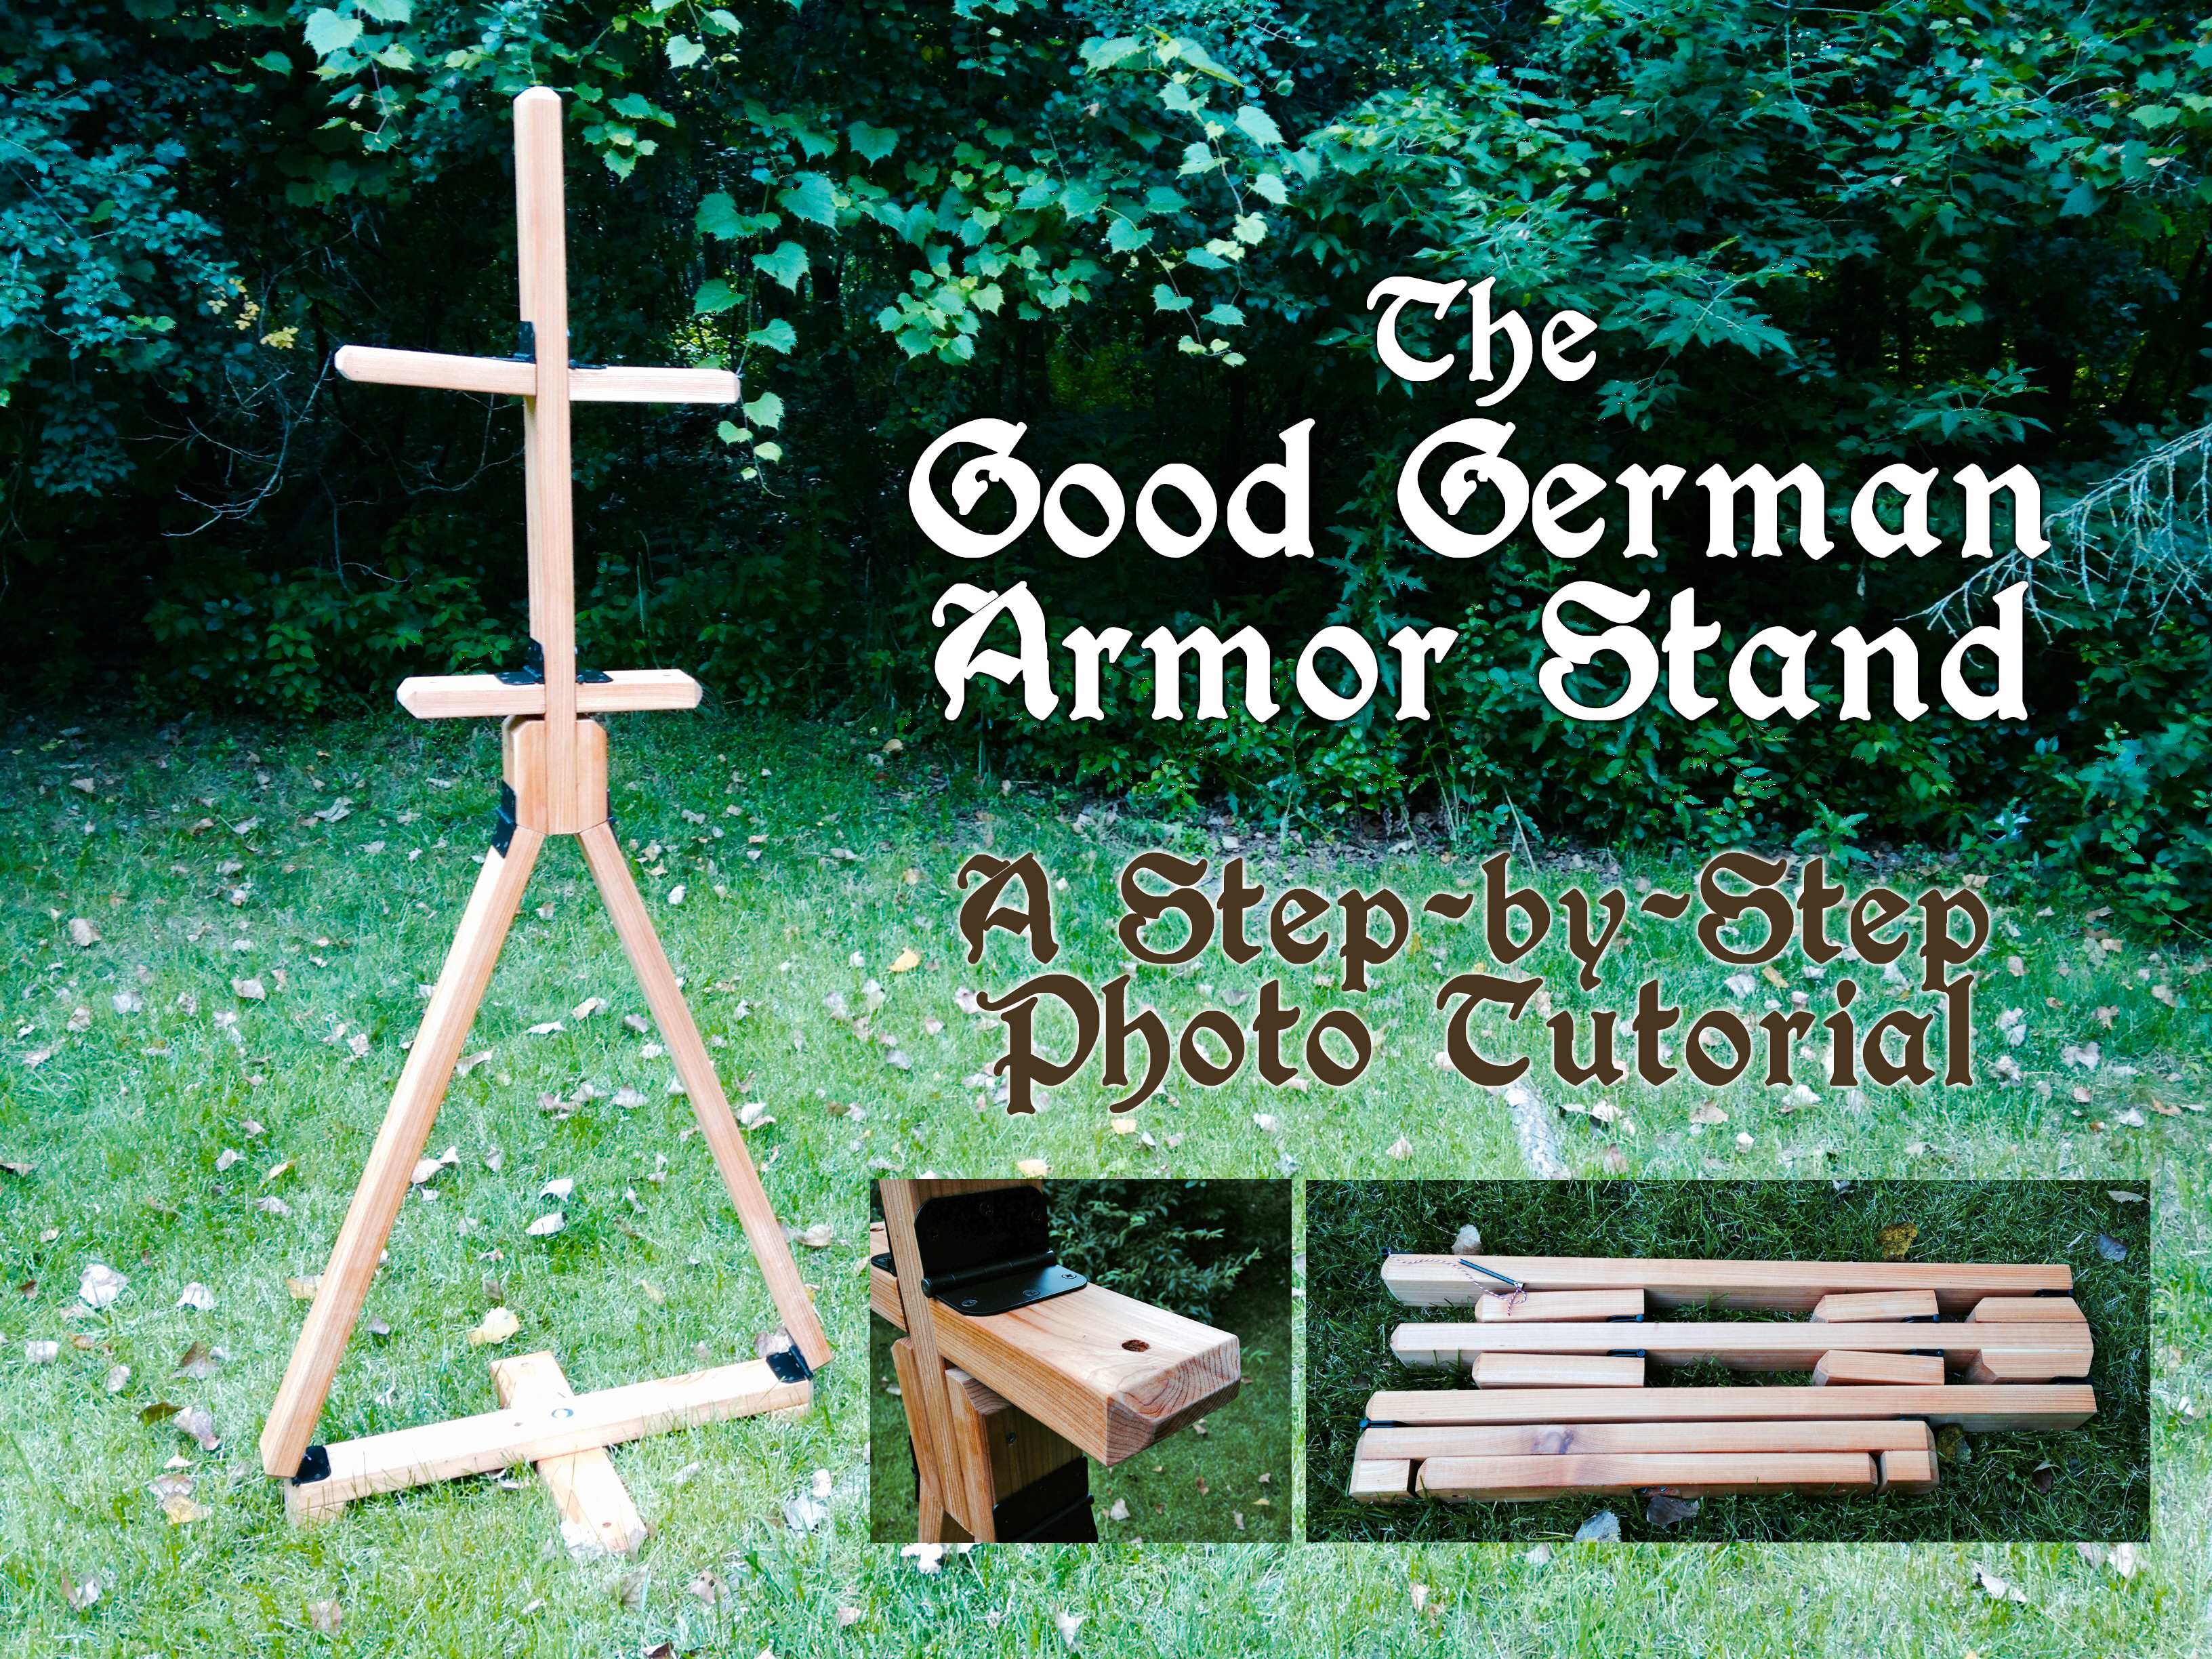
 At our first Pennsic four years ago, we attempted our first armor stand. It was a bunch of 2x4s screwed into the semblance of an armor stand on site. Sadly, it couldn’t hold the full plate armor Gregor had brought with him and it had a tendency to fall over.
The next year at Pennsic, Gregor noticed Baron Jasen Irenfest’s gorgeous (and functional) armor stand and asked how he made it. It turns out Jasen’s armor stand was based on a 1990 article that appeared in Tournament Illuminated, “A Barbarian Armor Stand,” by Sir Timoch of Nordhem. So, armed with the plans and materials, we set out to make a Barbarian Armor Stand. We found Sir Timoch’s general design to be good, but made our own improvements to key design details, as well as corrected the material list and modified some instructions. We updated the original plans to our liking and present them here with steps and photos. Many thanks to Sir Timoch, wherever he may be, for the original idea!
Notes: These plans will produce a custom armor stand that will fold down for easy transport. It can be setup inside or outside, and optional stakes can be inserted in the base when used outside for windy conditions. The stand will support most parts of your armor, and, so far, is quite sturdy and stable. We’ve used the armor stand at Pennsic for two years, as well as at various events around the Middle Kingdom. It’s continuing to work great!
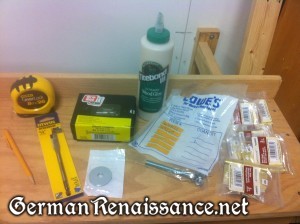
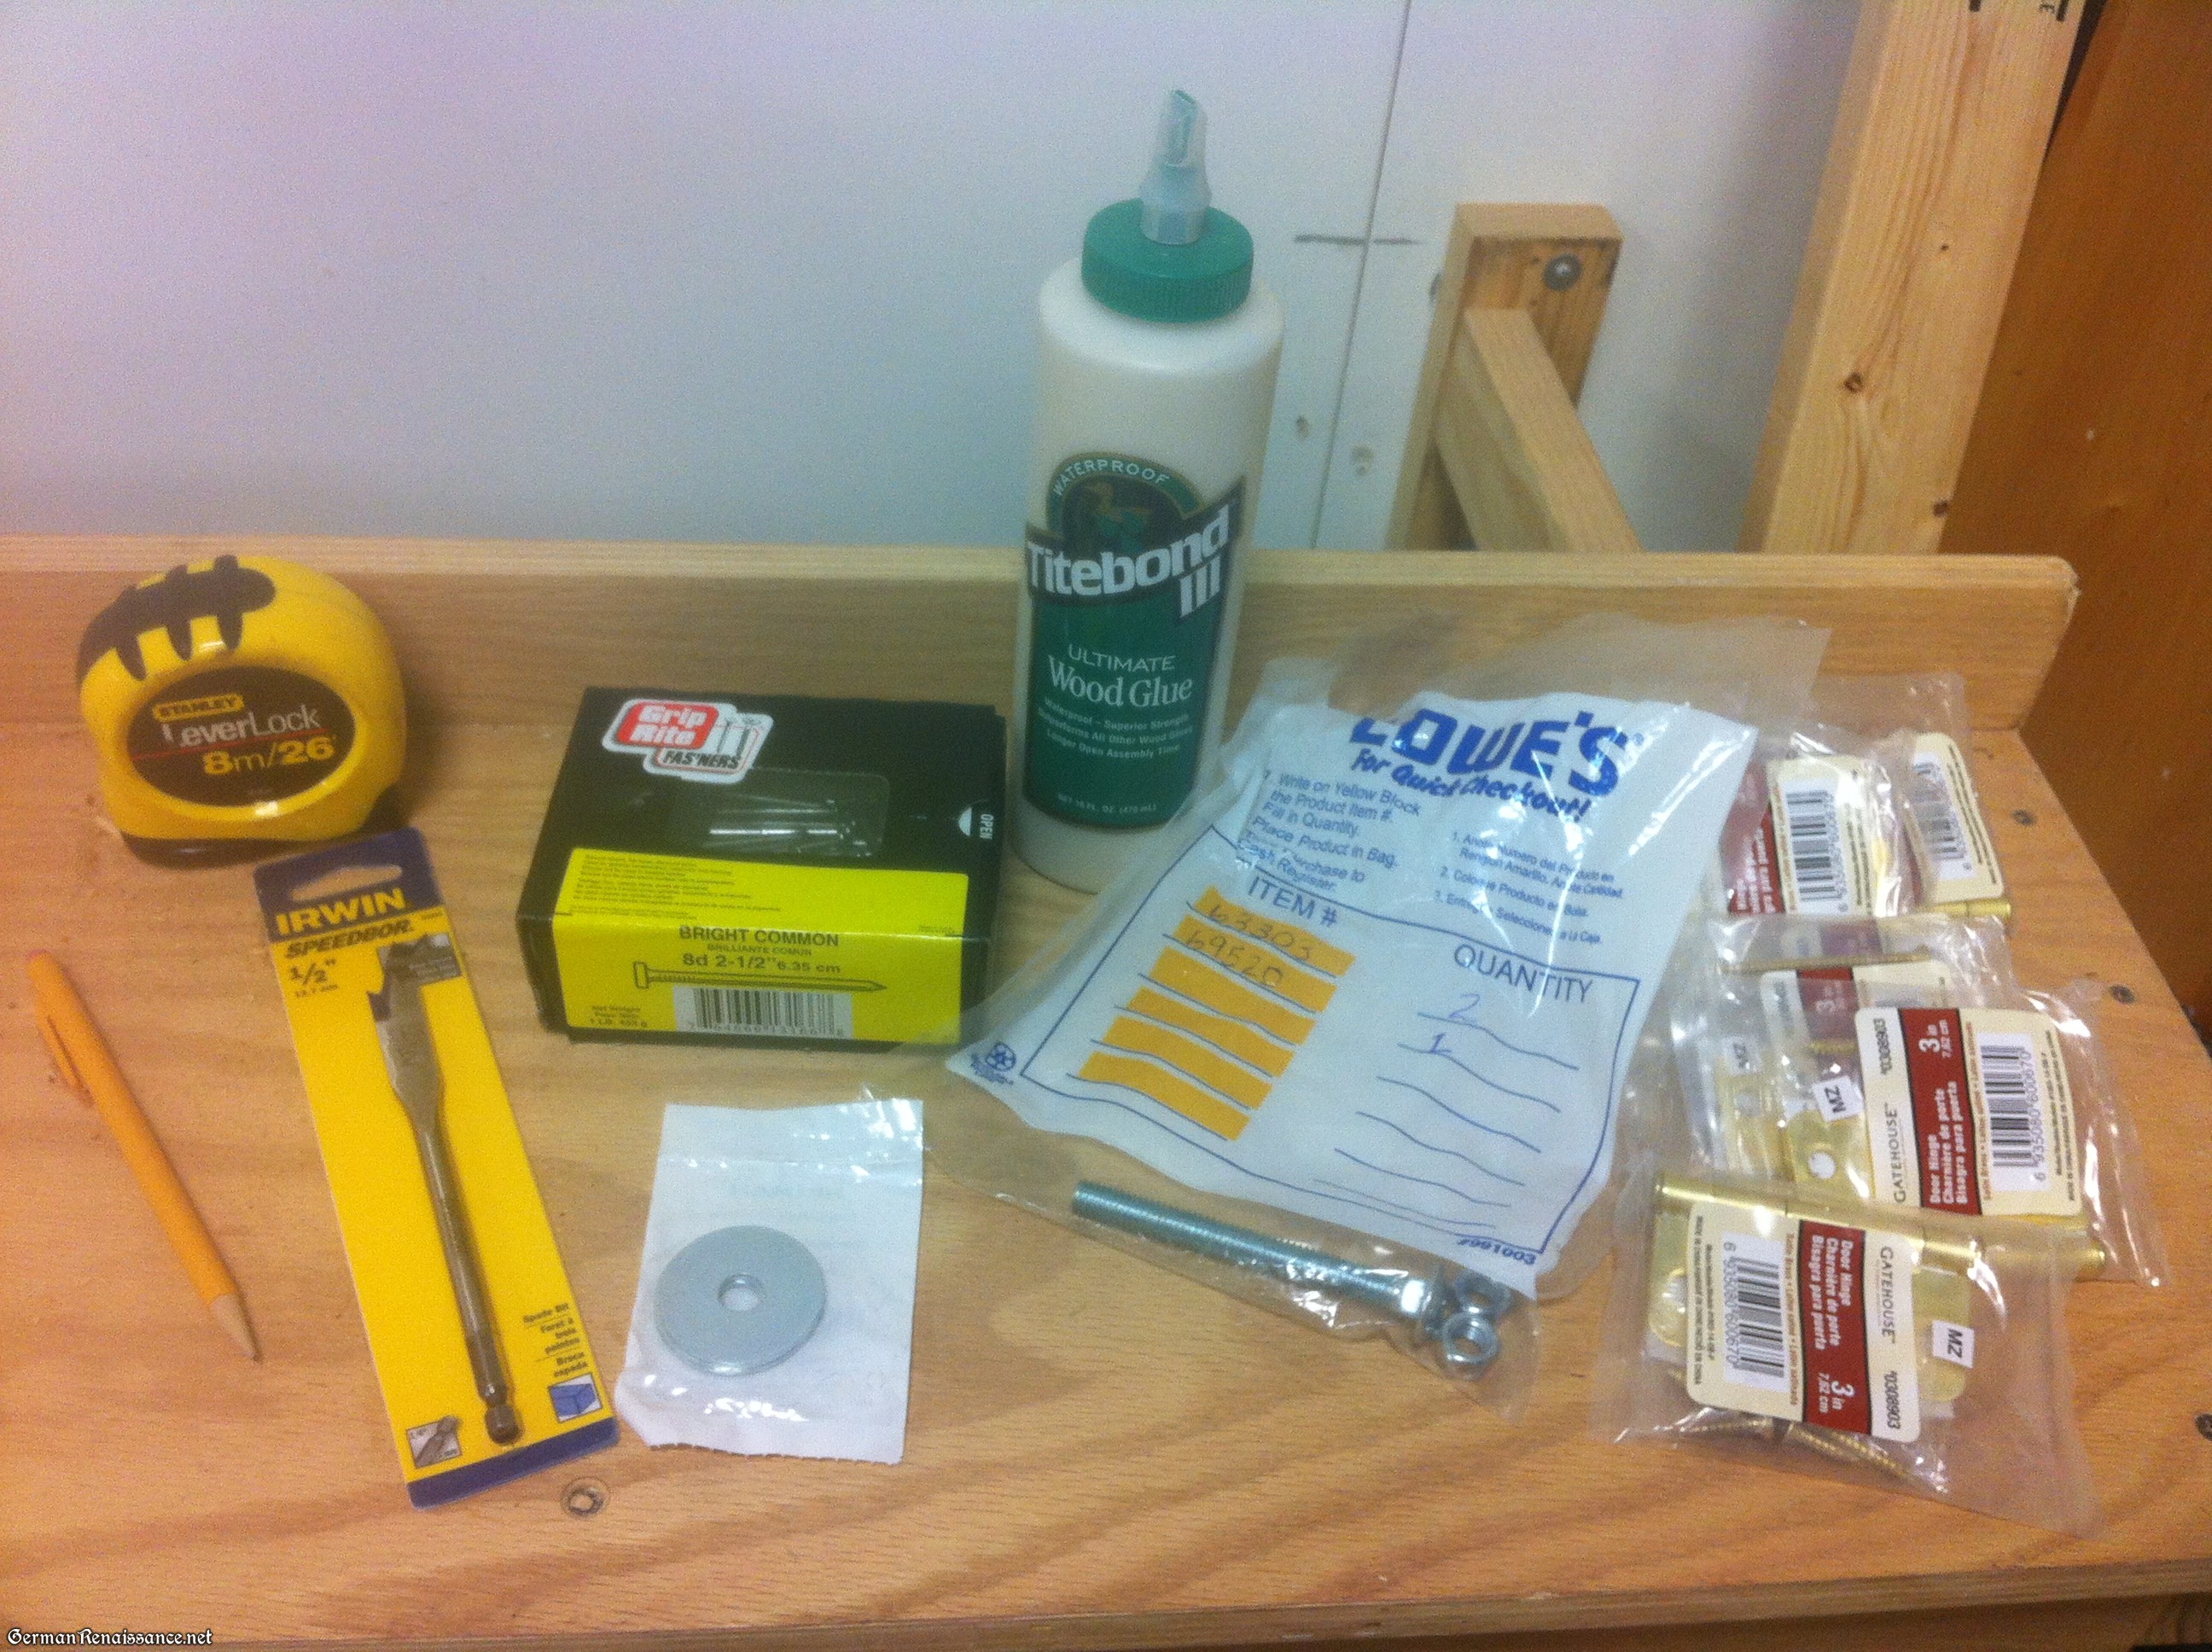
Armor Stand Materials:
- Three 8-foot-long 2″x4″ lumber (currently $3.57 a piece from Lowes)
- Eight 3-inch-long hinges (currently $2.17 per hinge from Lowes)
- One bolt 3/8” x 31/2” long
- One 3/8” wingnut (make sure it can screw onto the above bolt)
- Two 3/8” x 11/2” washers (make sure hole is big enough to go over the neck of the bolt)
- Eighteen 8d nails or 2 1/2″ wood screws
- One small bottle of wood glue
- One 18″ length of string
- Optional: small cans of wood stain and polyurethane
Armor Stand Tools:
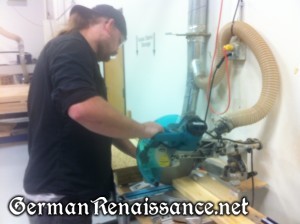
- Hand saw or other cutting device like a mitre saw or jigsaw
- Hammer
- Drill
- 1/2” bit
- 11/2” spade bit
- Screwdriver
- Measuring device (tape measure or yard stick)
- Pencil
- Gummy bears (okay, those are optional, but yummy!)
Armor Stand Instructions:
Step 1. Take the measurements of the person whose armor will hang on the stand. You need three measurements:
- Crown to crotch
- Hip to hip
- Shoulder to shoulder
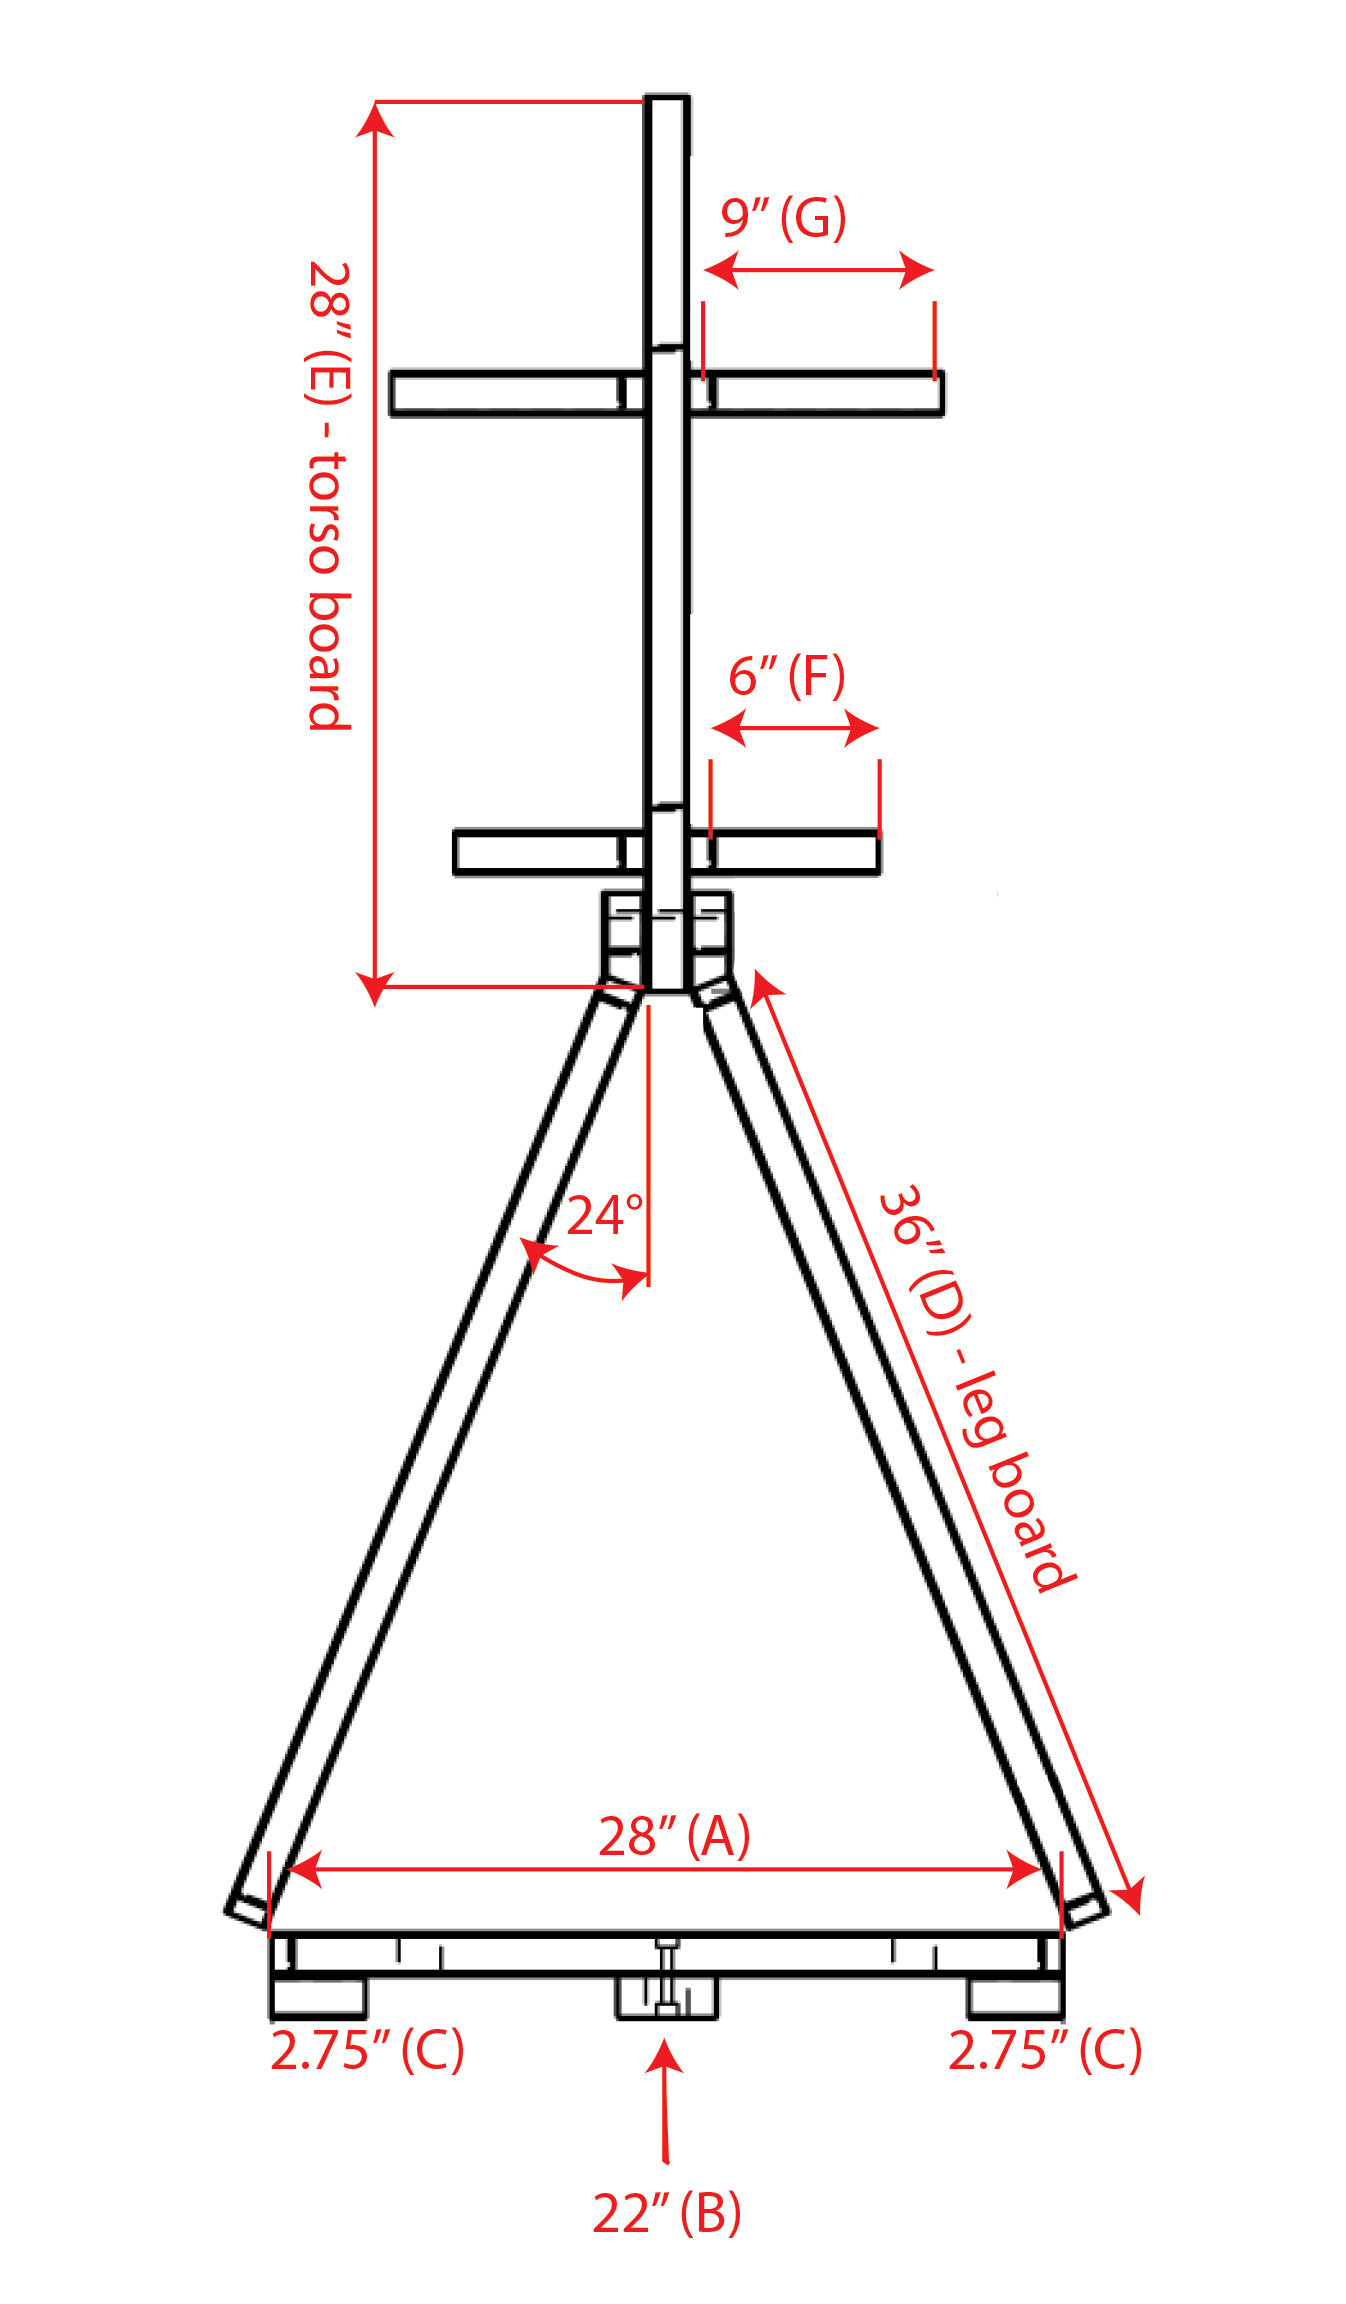
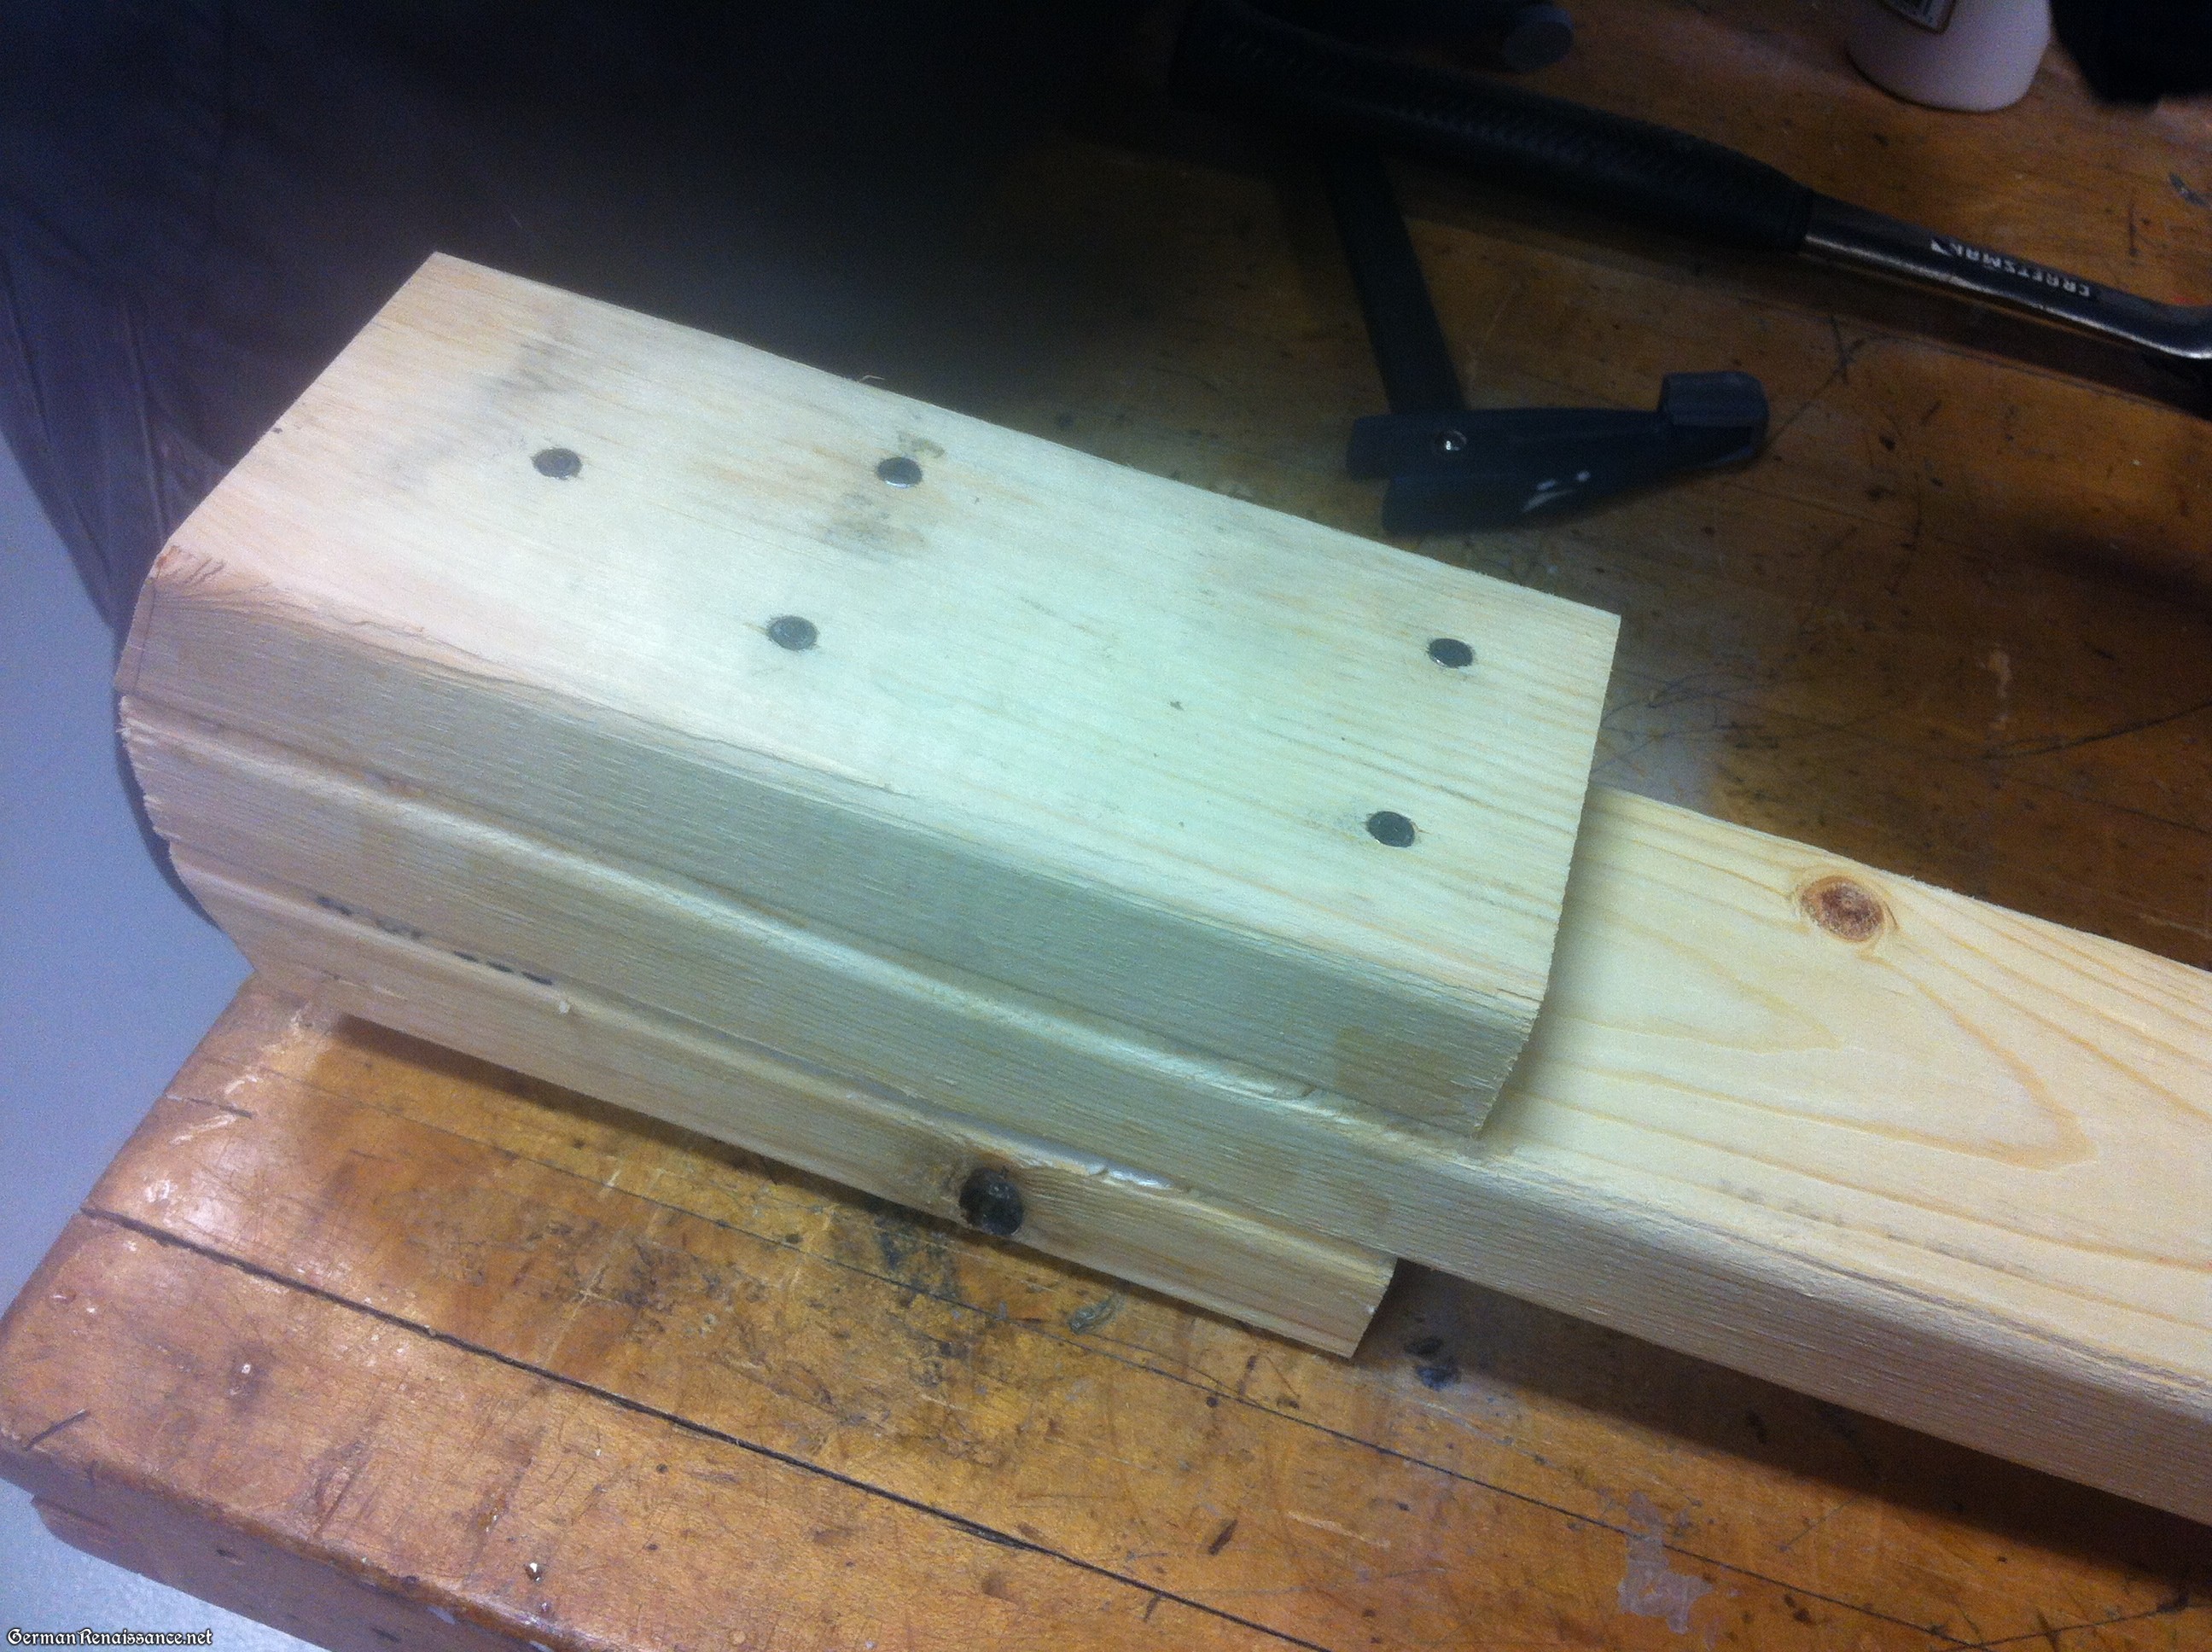
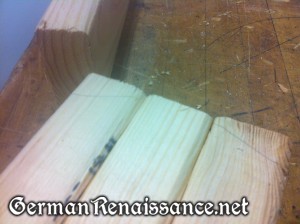
Step 2. Cut your 2x4s down to the following dimensions:
- Cut one (1) at 28″ long (A)
- Cut one (1) at 22″ long (B)
- Cut two (2) at 23/4” long (C)
- Cut two (2) at 36″ long (D)
- Cut one (1) of your crown to crotch measurement, or 36″, whichever is shorter (E)
- Cut two (2) of your hip-to-hip measurement less 1″ and then divided by 2 (we cut 2 at 6″ long) (F)
- Cut two (2) of your shoulder-to-shoulder measurement less 1″ and then divided by 2 (we cut 2 at 9″ long) (G)
- Cut two (2) joint boards at 8″ long (H)

Tip: If you intend to sand, stain, and/seal your armor stand, you may wish to do this now before you begin assembling it. It will be easier and the finished stand will look better if you complete sanding, staining, and/or sealing before assembly.
Good German Option: We recently bought a table saw with the ability to do angled cuts, so when Gregor made a second version of this armor stand recently he made fancy beveled edges. It looks sweet. If you want to do this, do it now, before assembly!

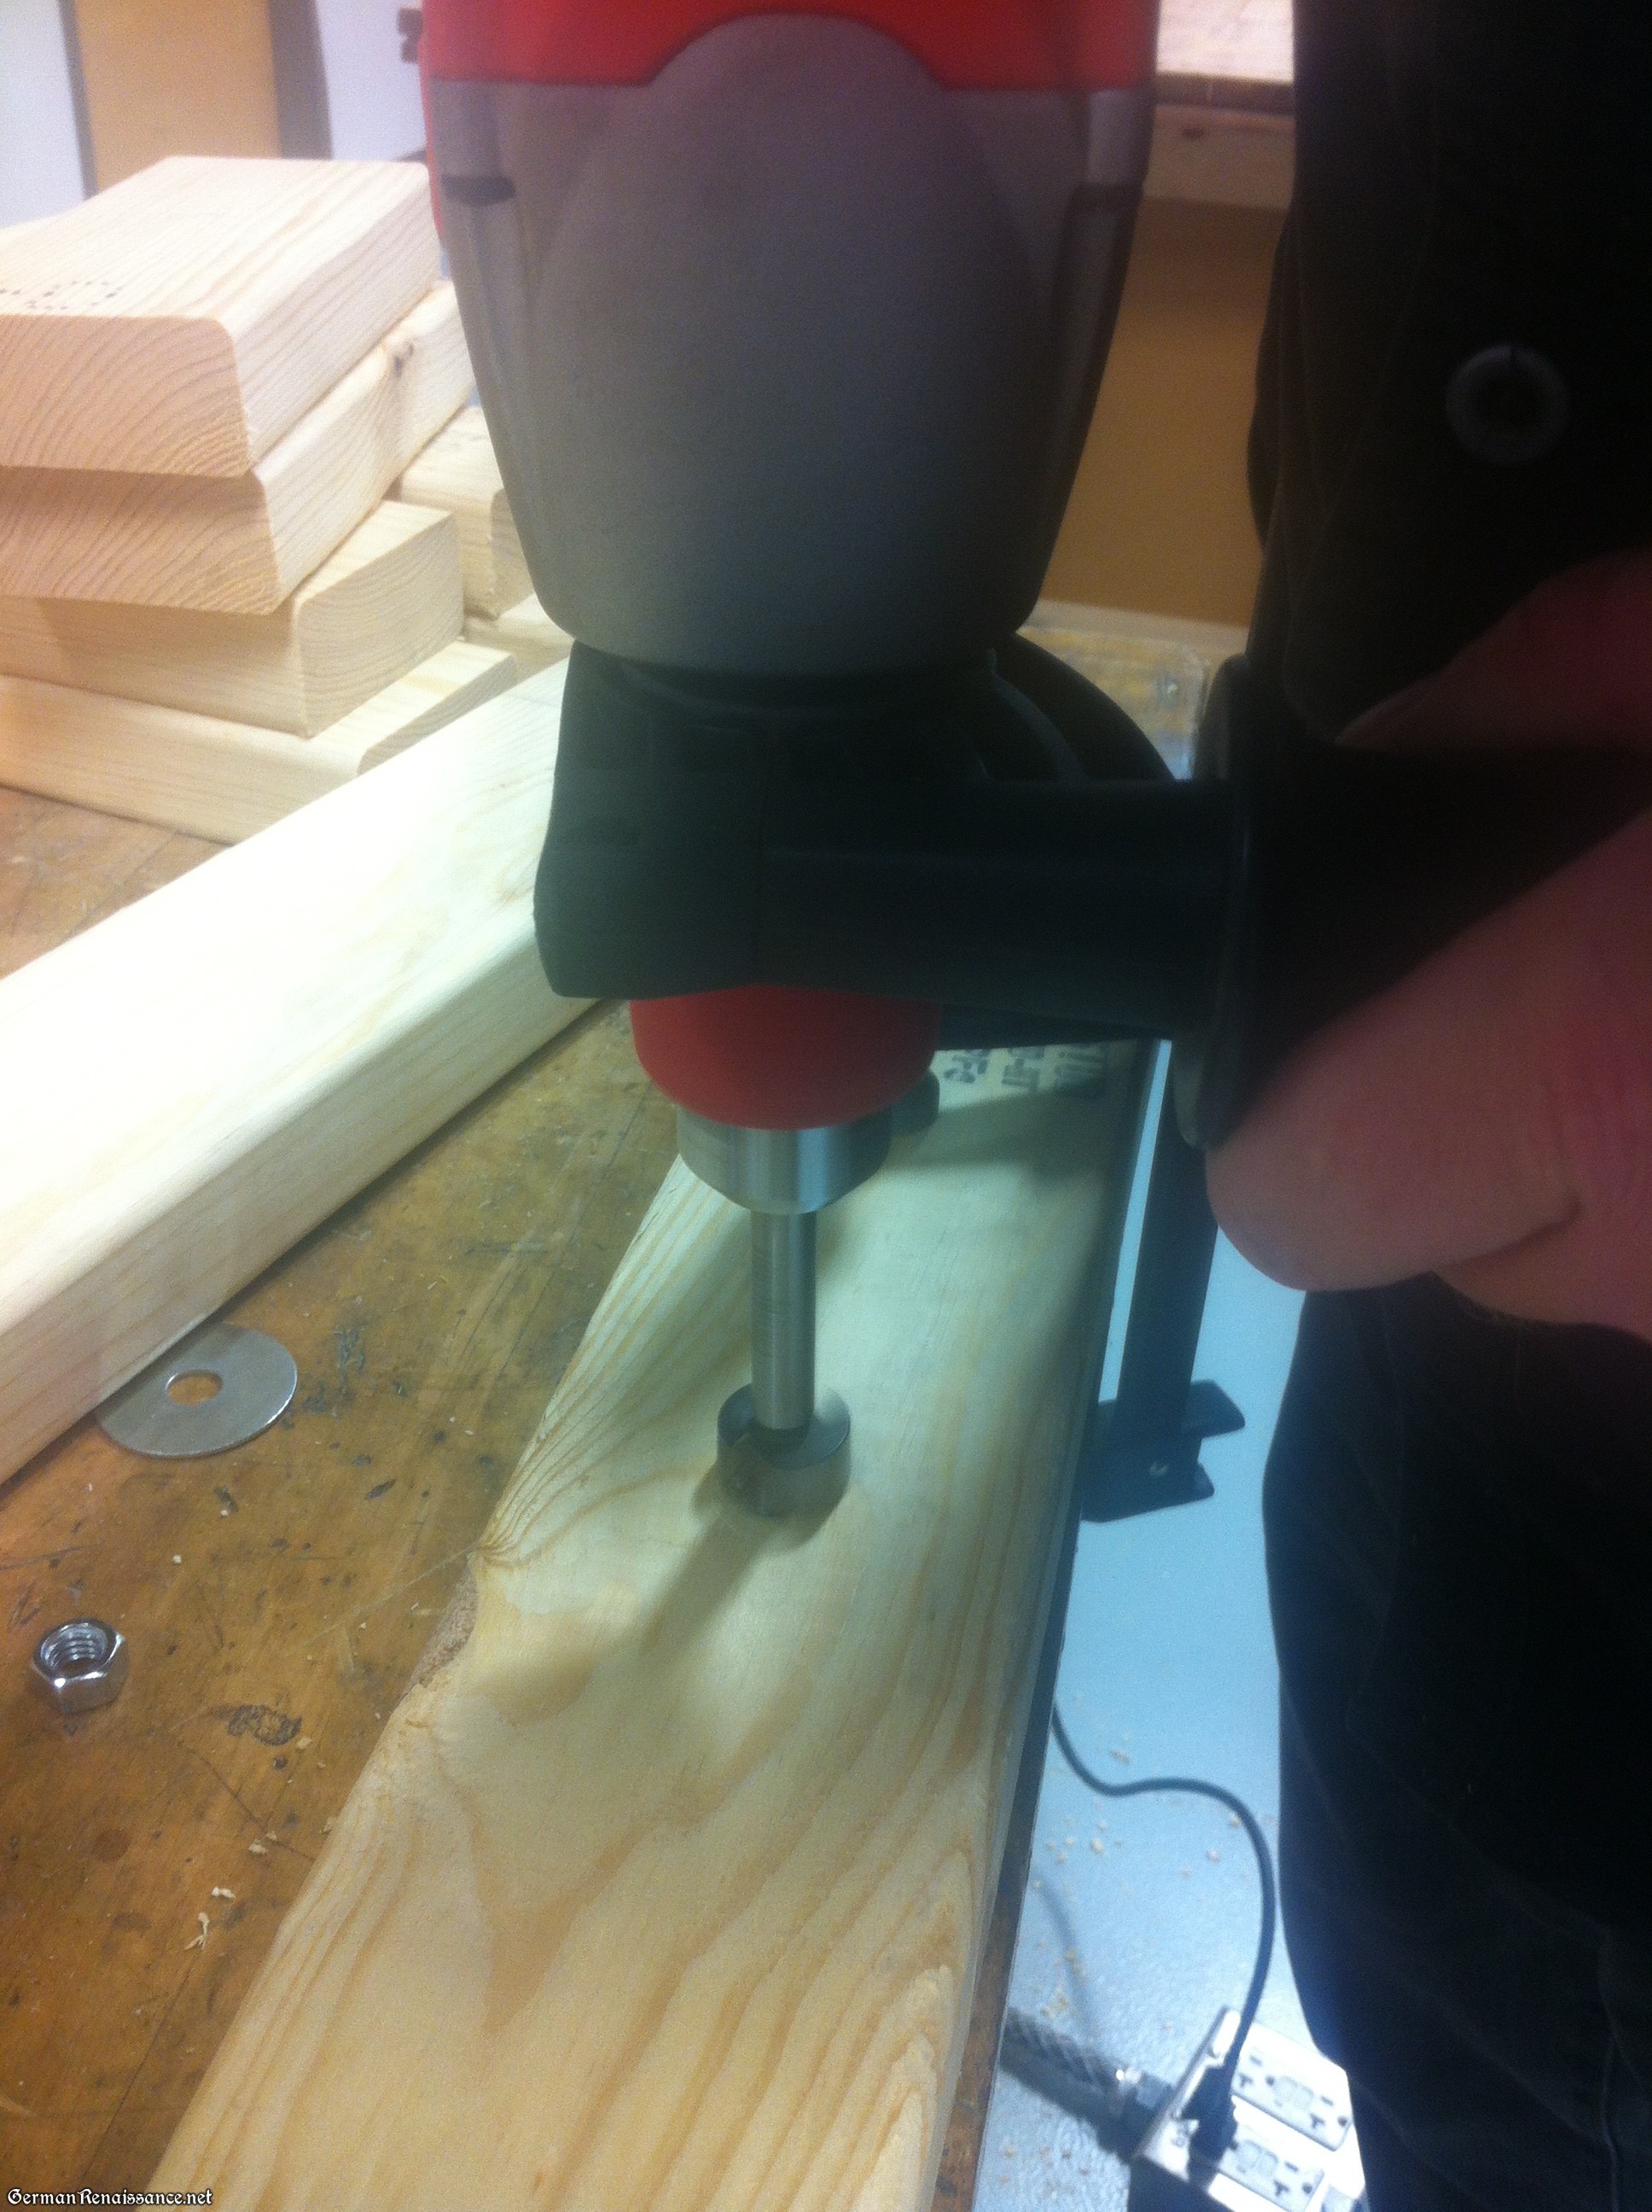
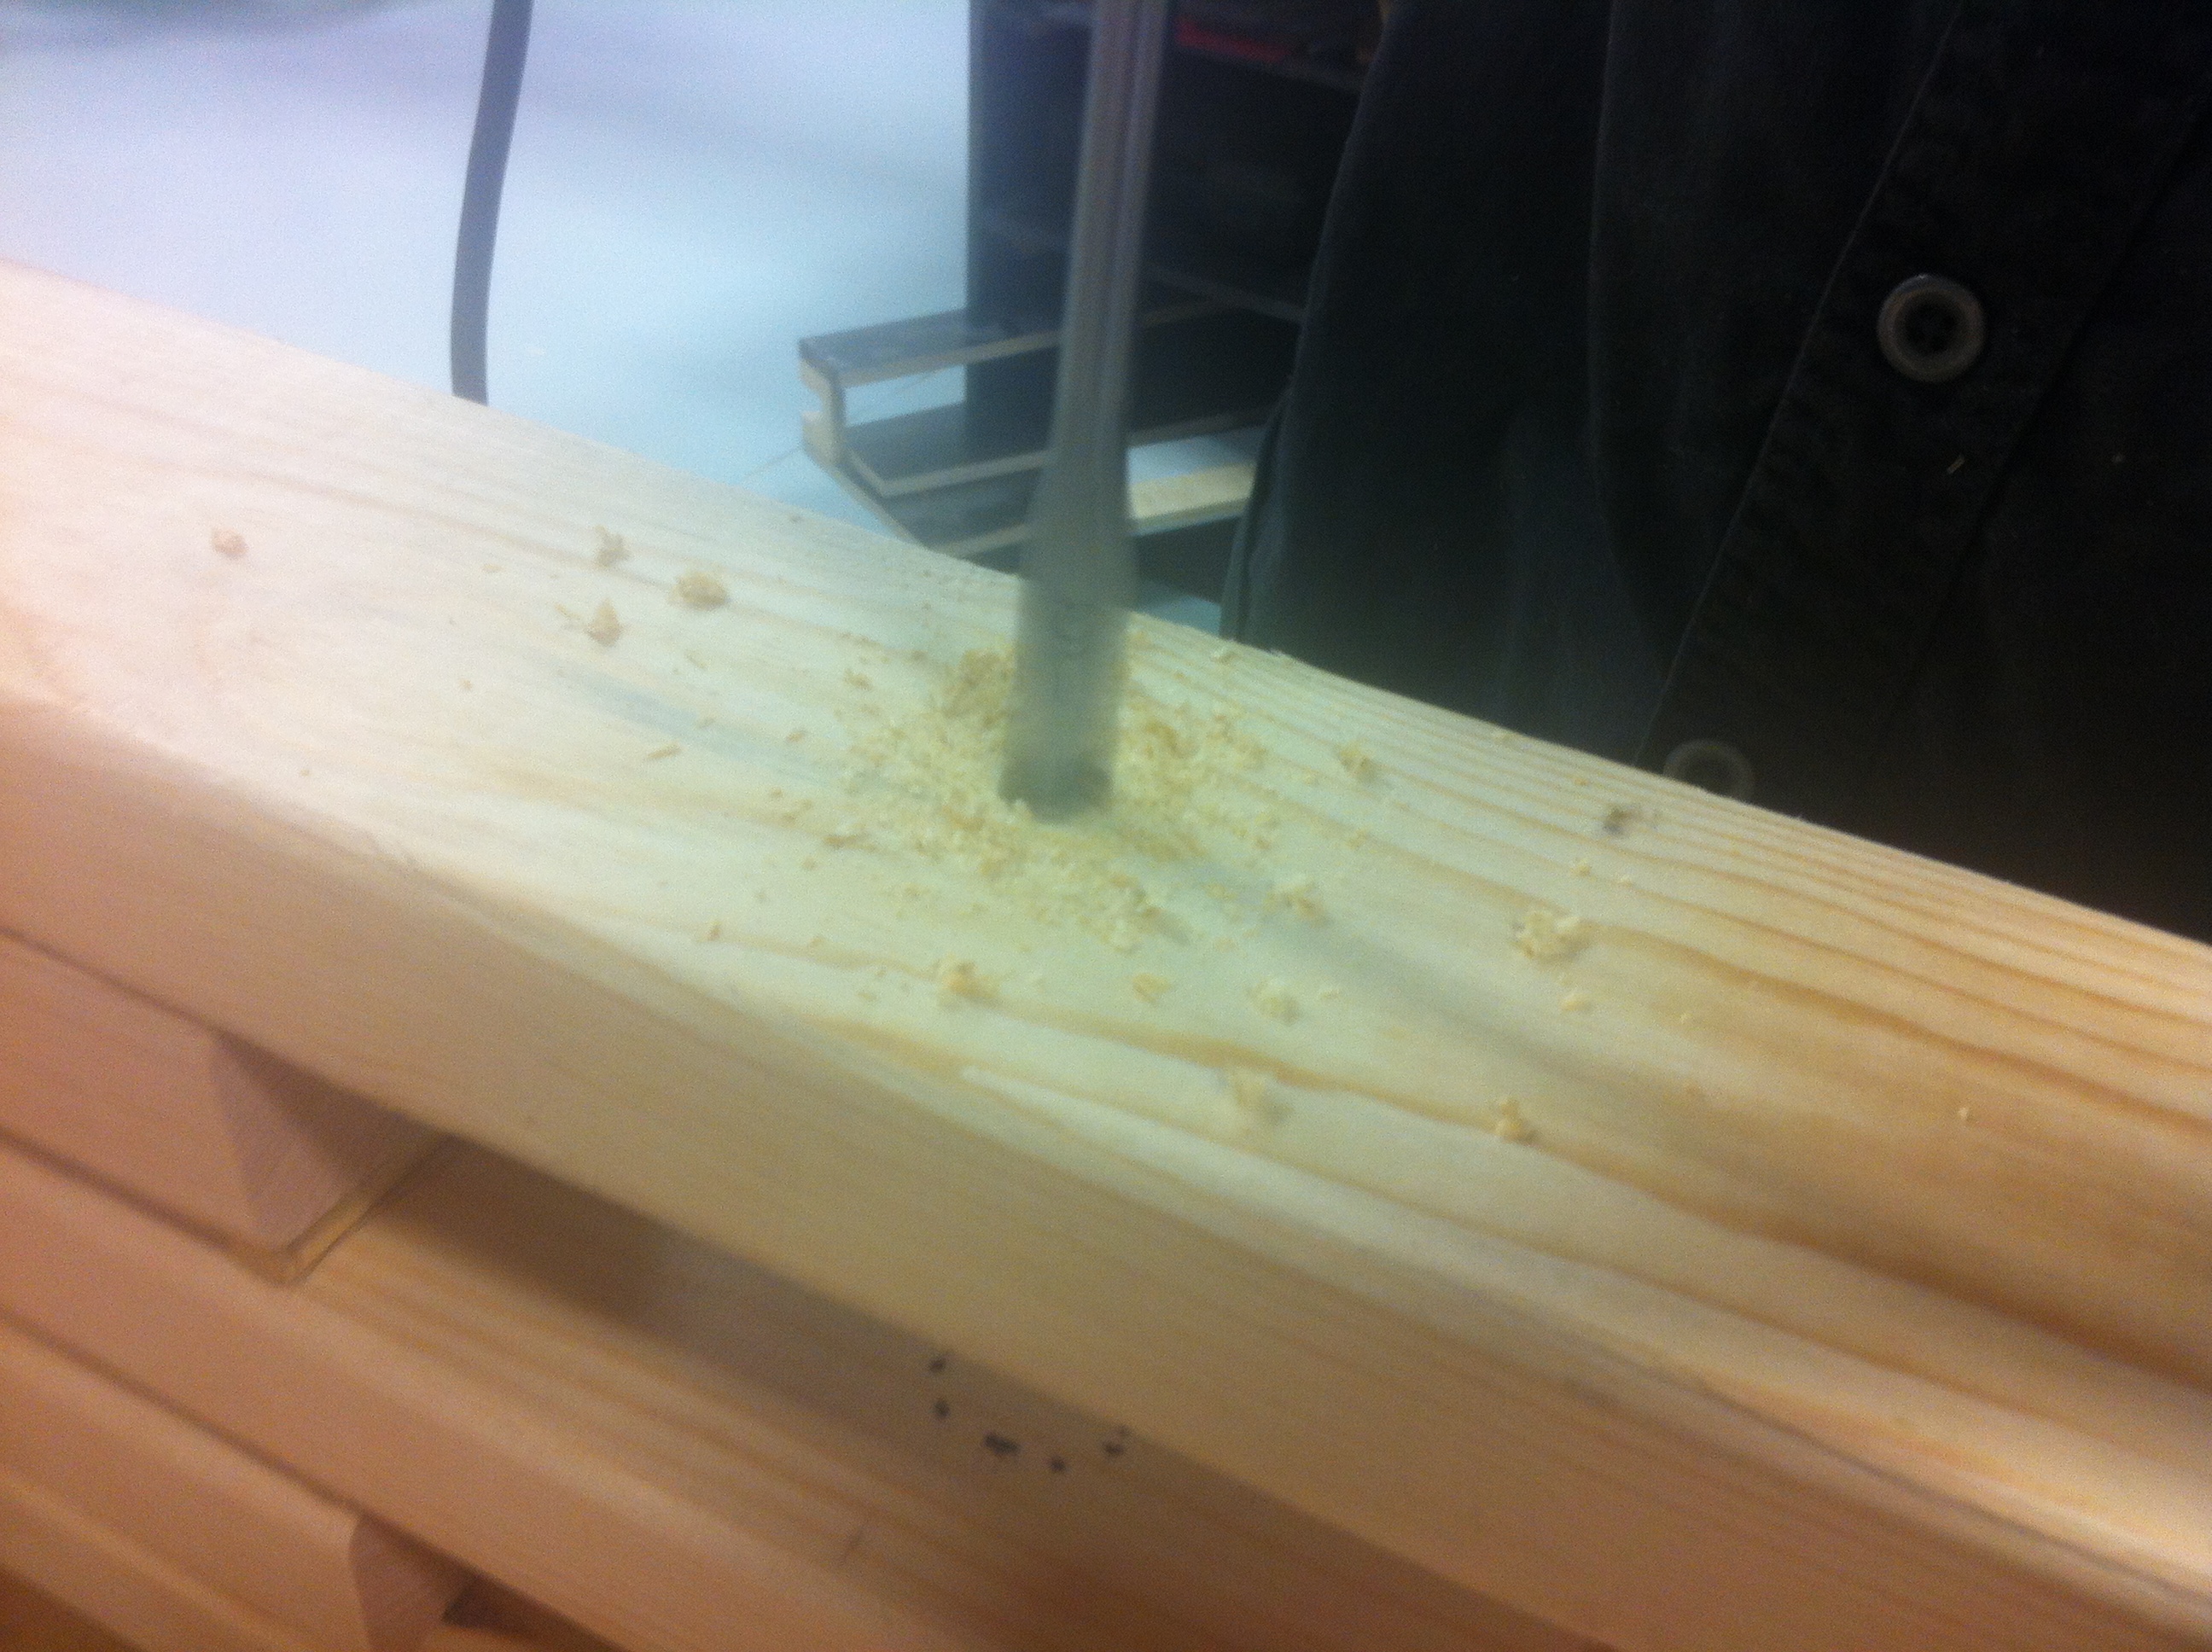
Step 3. Take board A, find the exact center of the board lengthwise, and drill a hole all the way through the board using the 1/2″ bit. On one side of this board, use the 11/2” spade bit to create a recess about 3/4” deep around the hole you just drilled. (This will accommodate your washer and wing nut.)
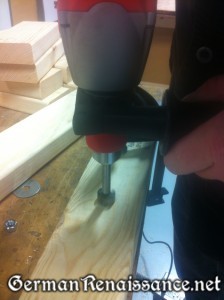
Step 4. Take board B, find the exact center of the board lengthwise, and drill a hole all the way through the board using the 1/2″ bit. On one side of this board, use the 11/2” spade bit to create a shallow recess (deep enough to accommodate your bolt tip and the other washer) around the hole you just drilled.
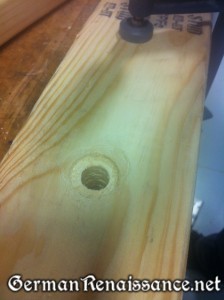
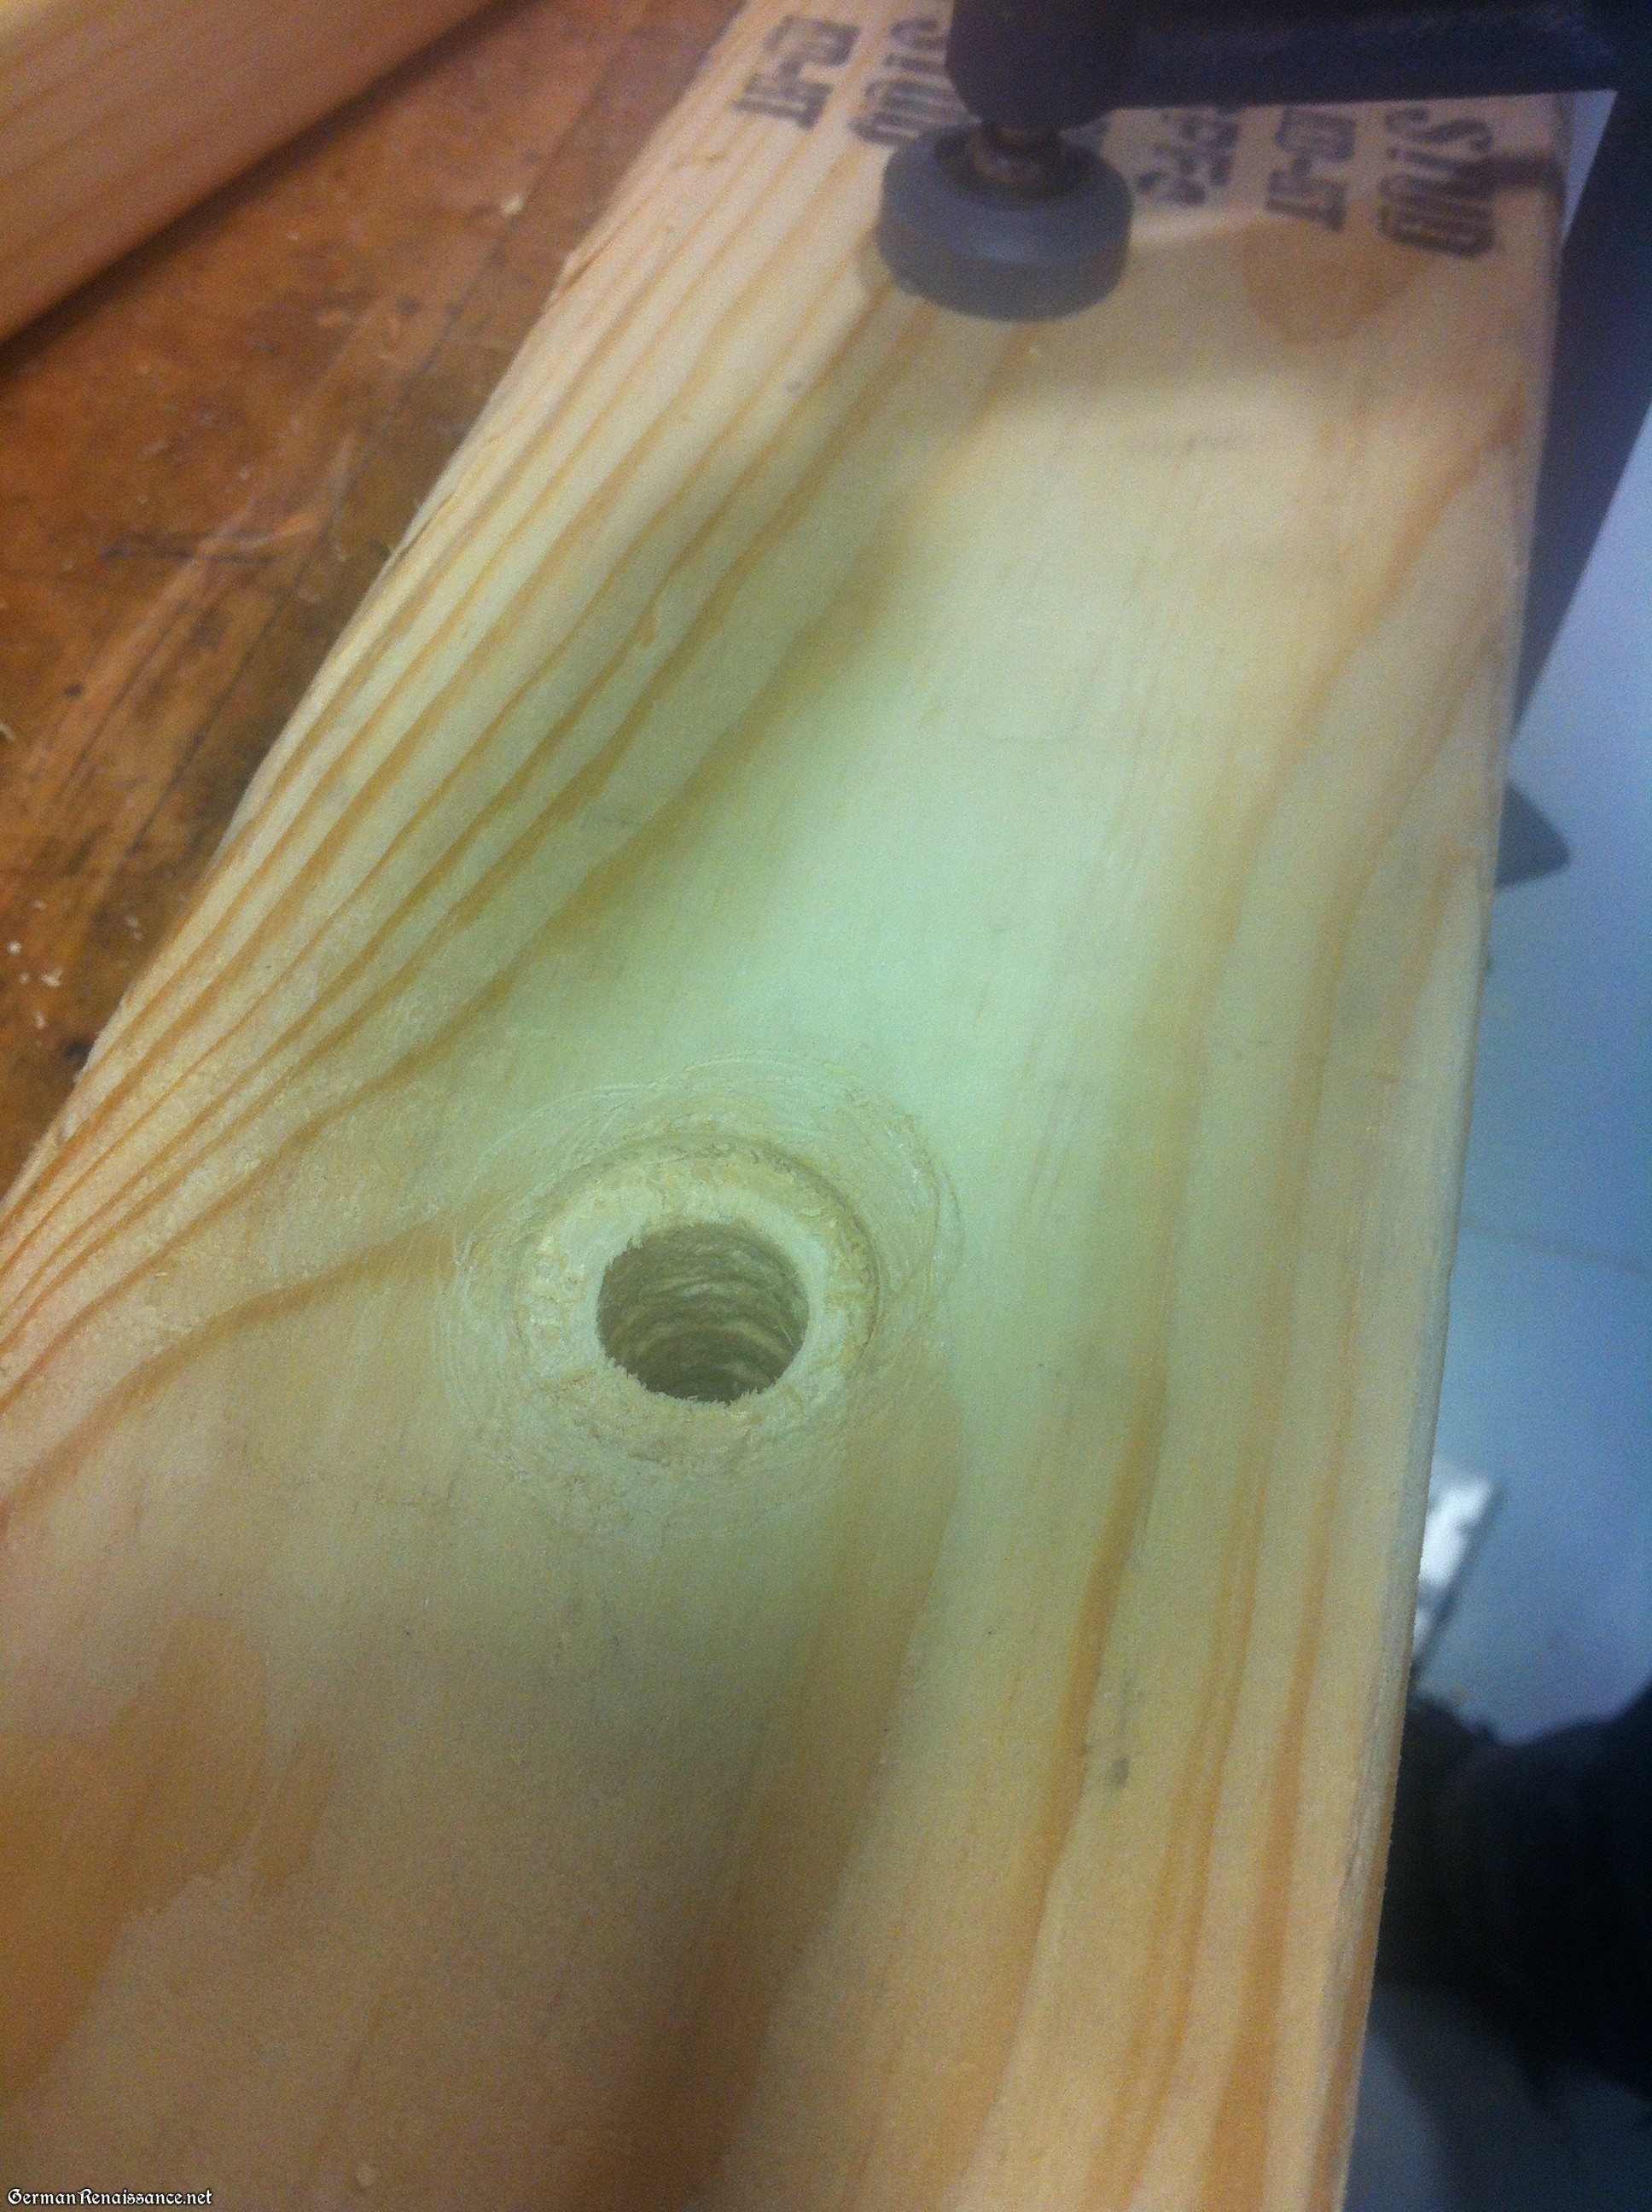
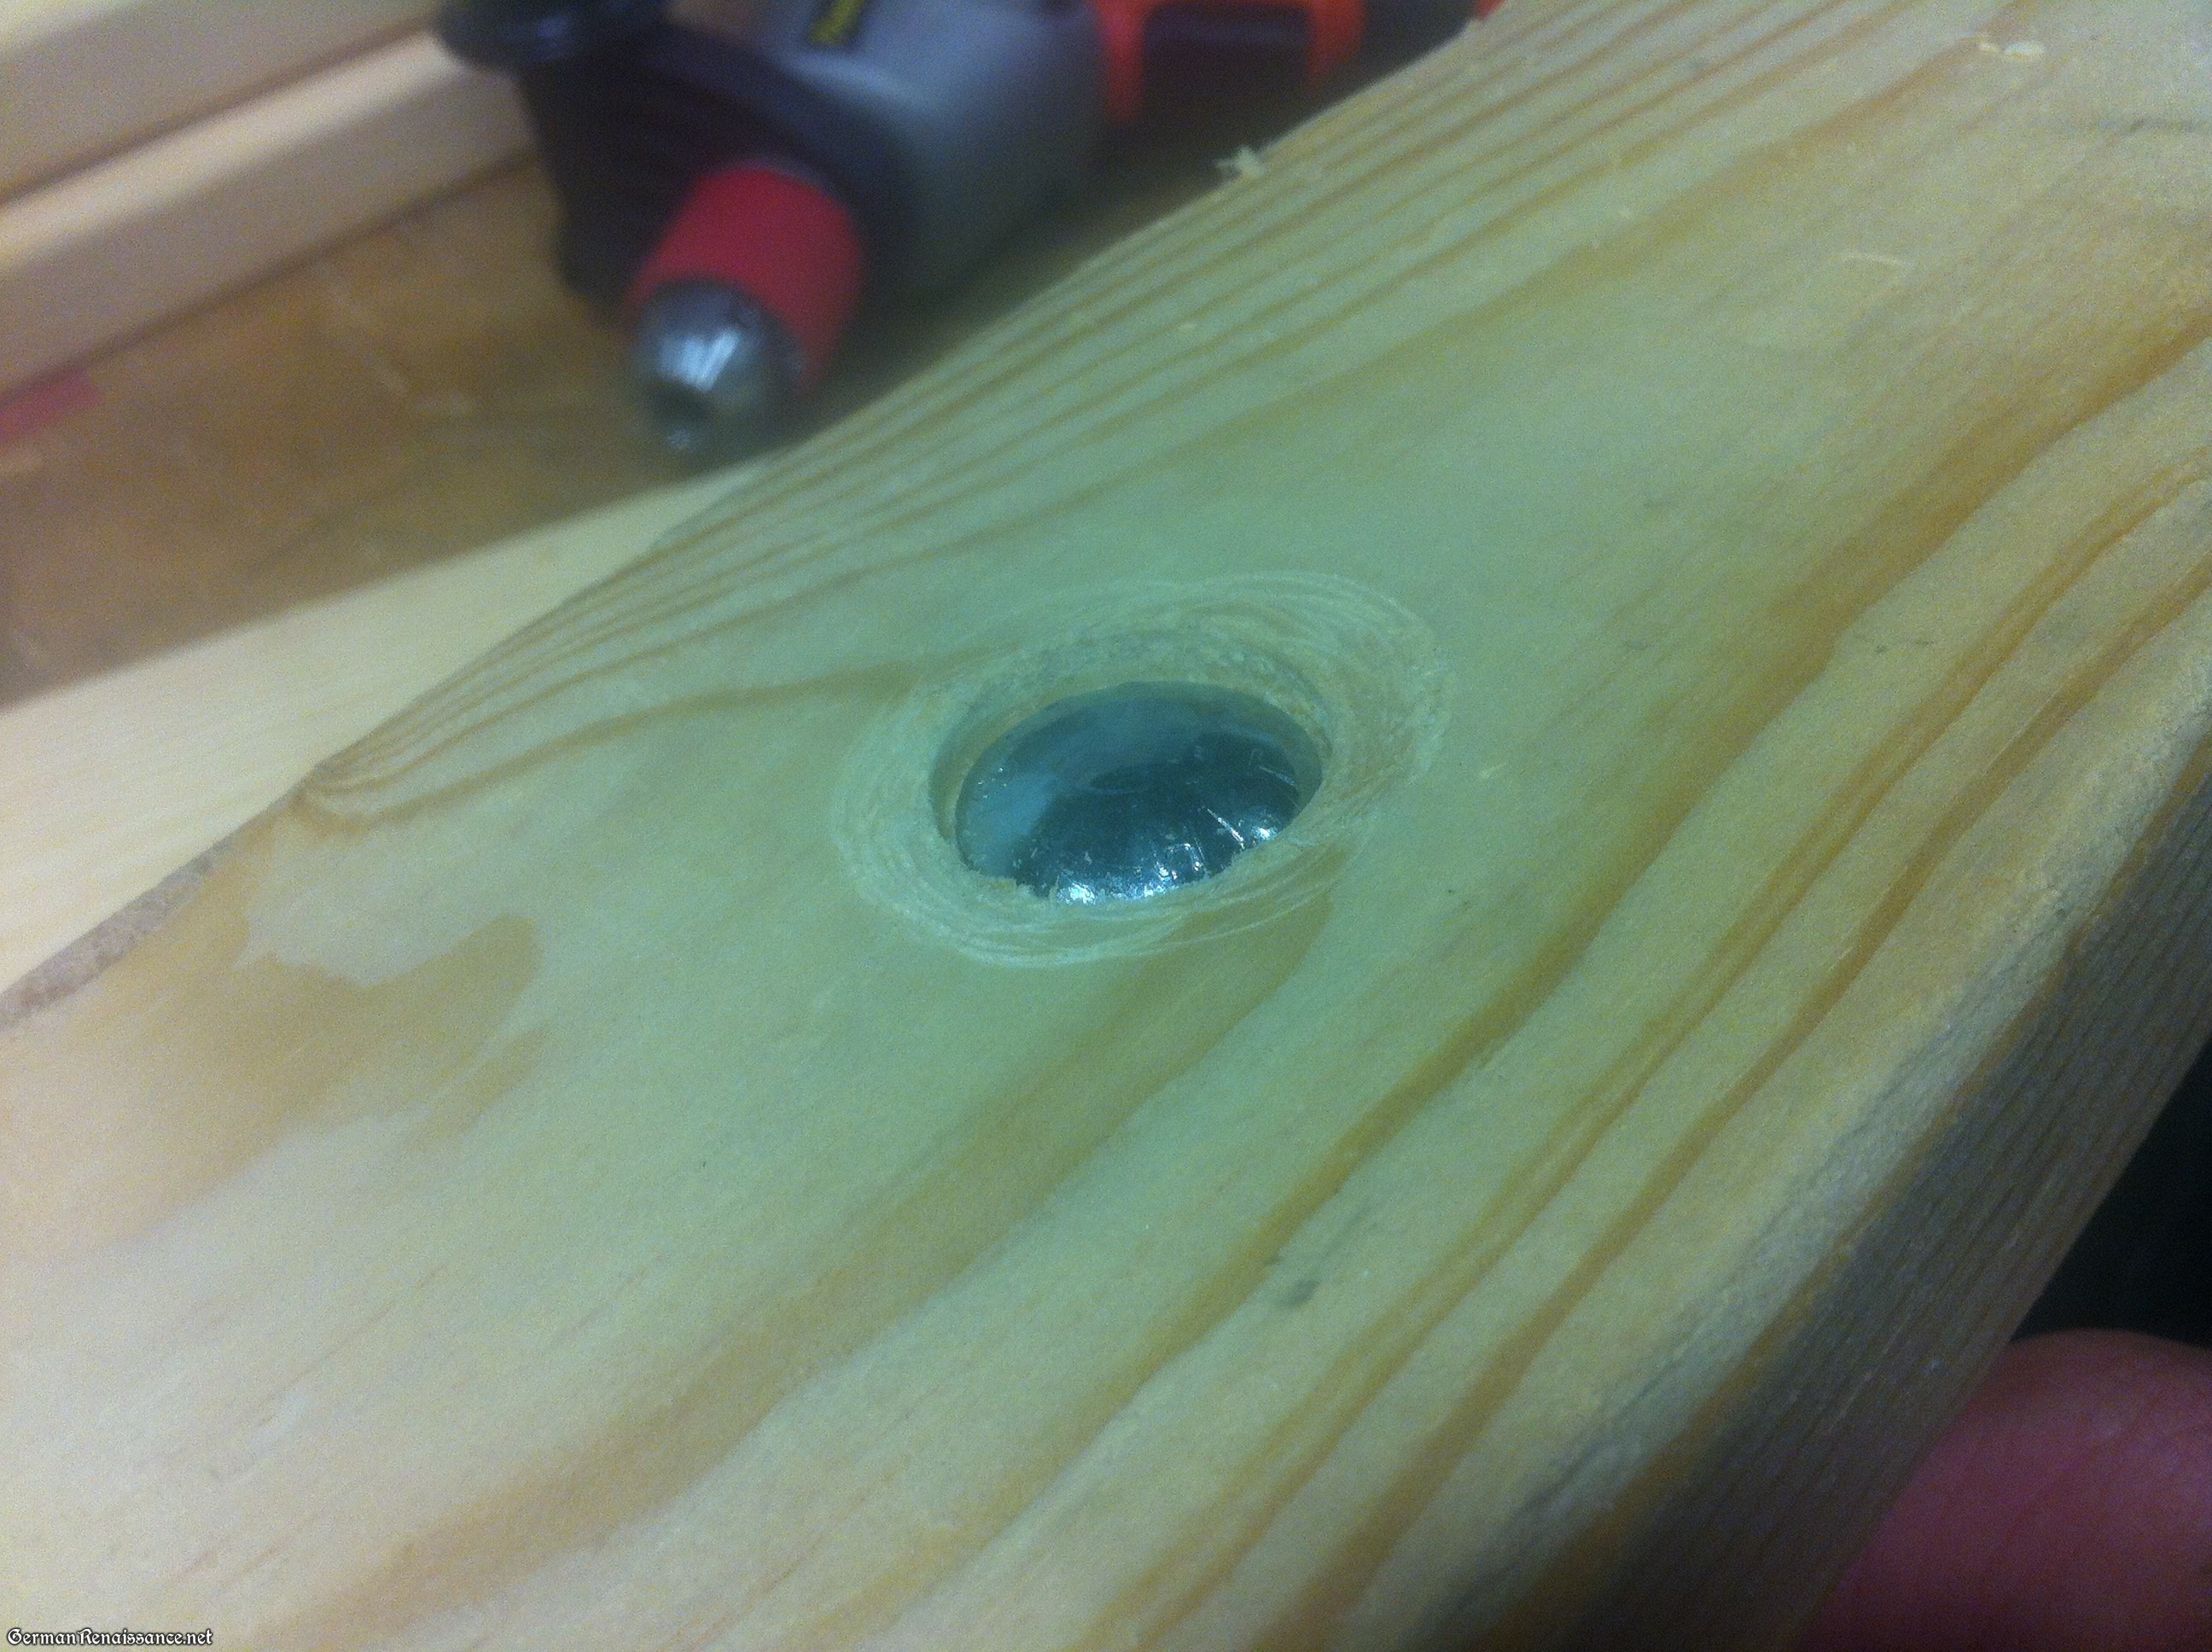
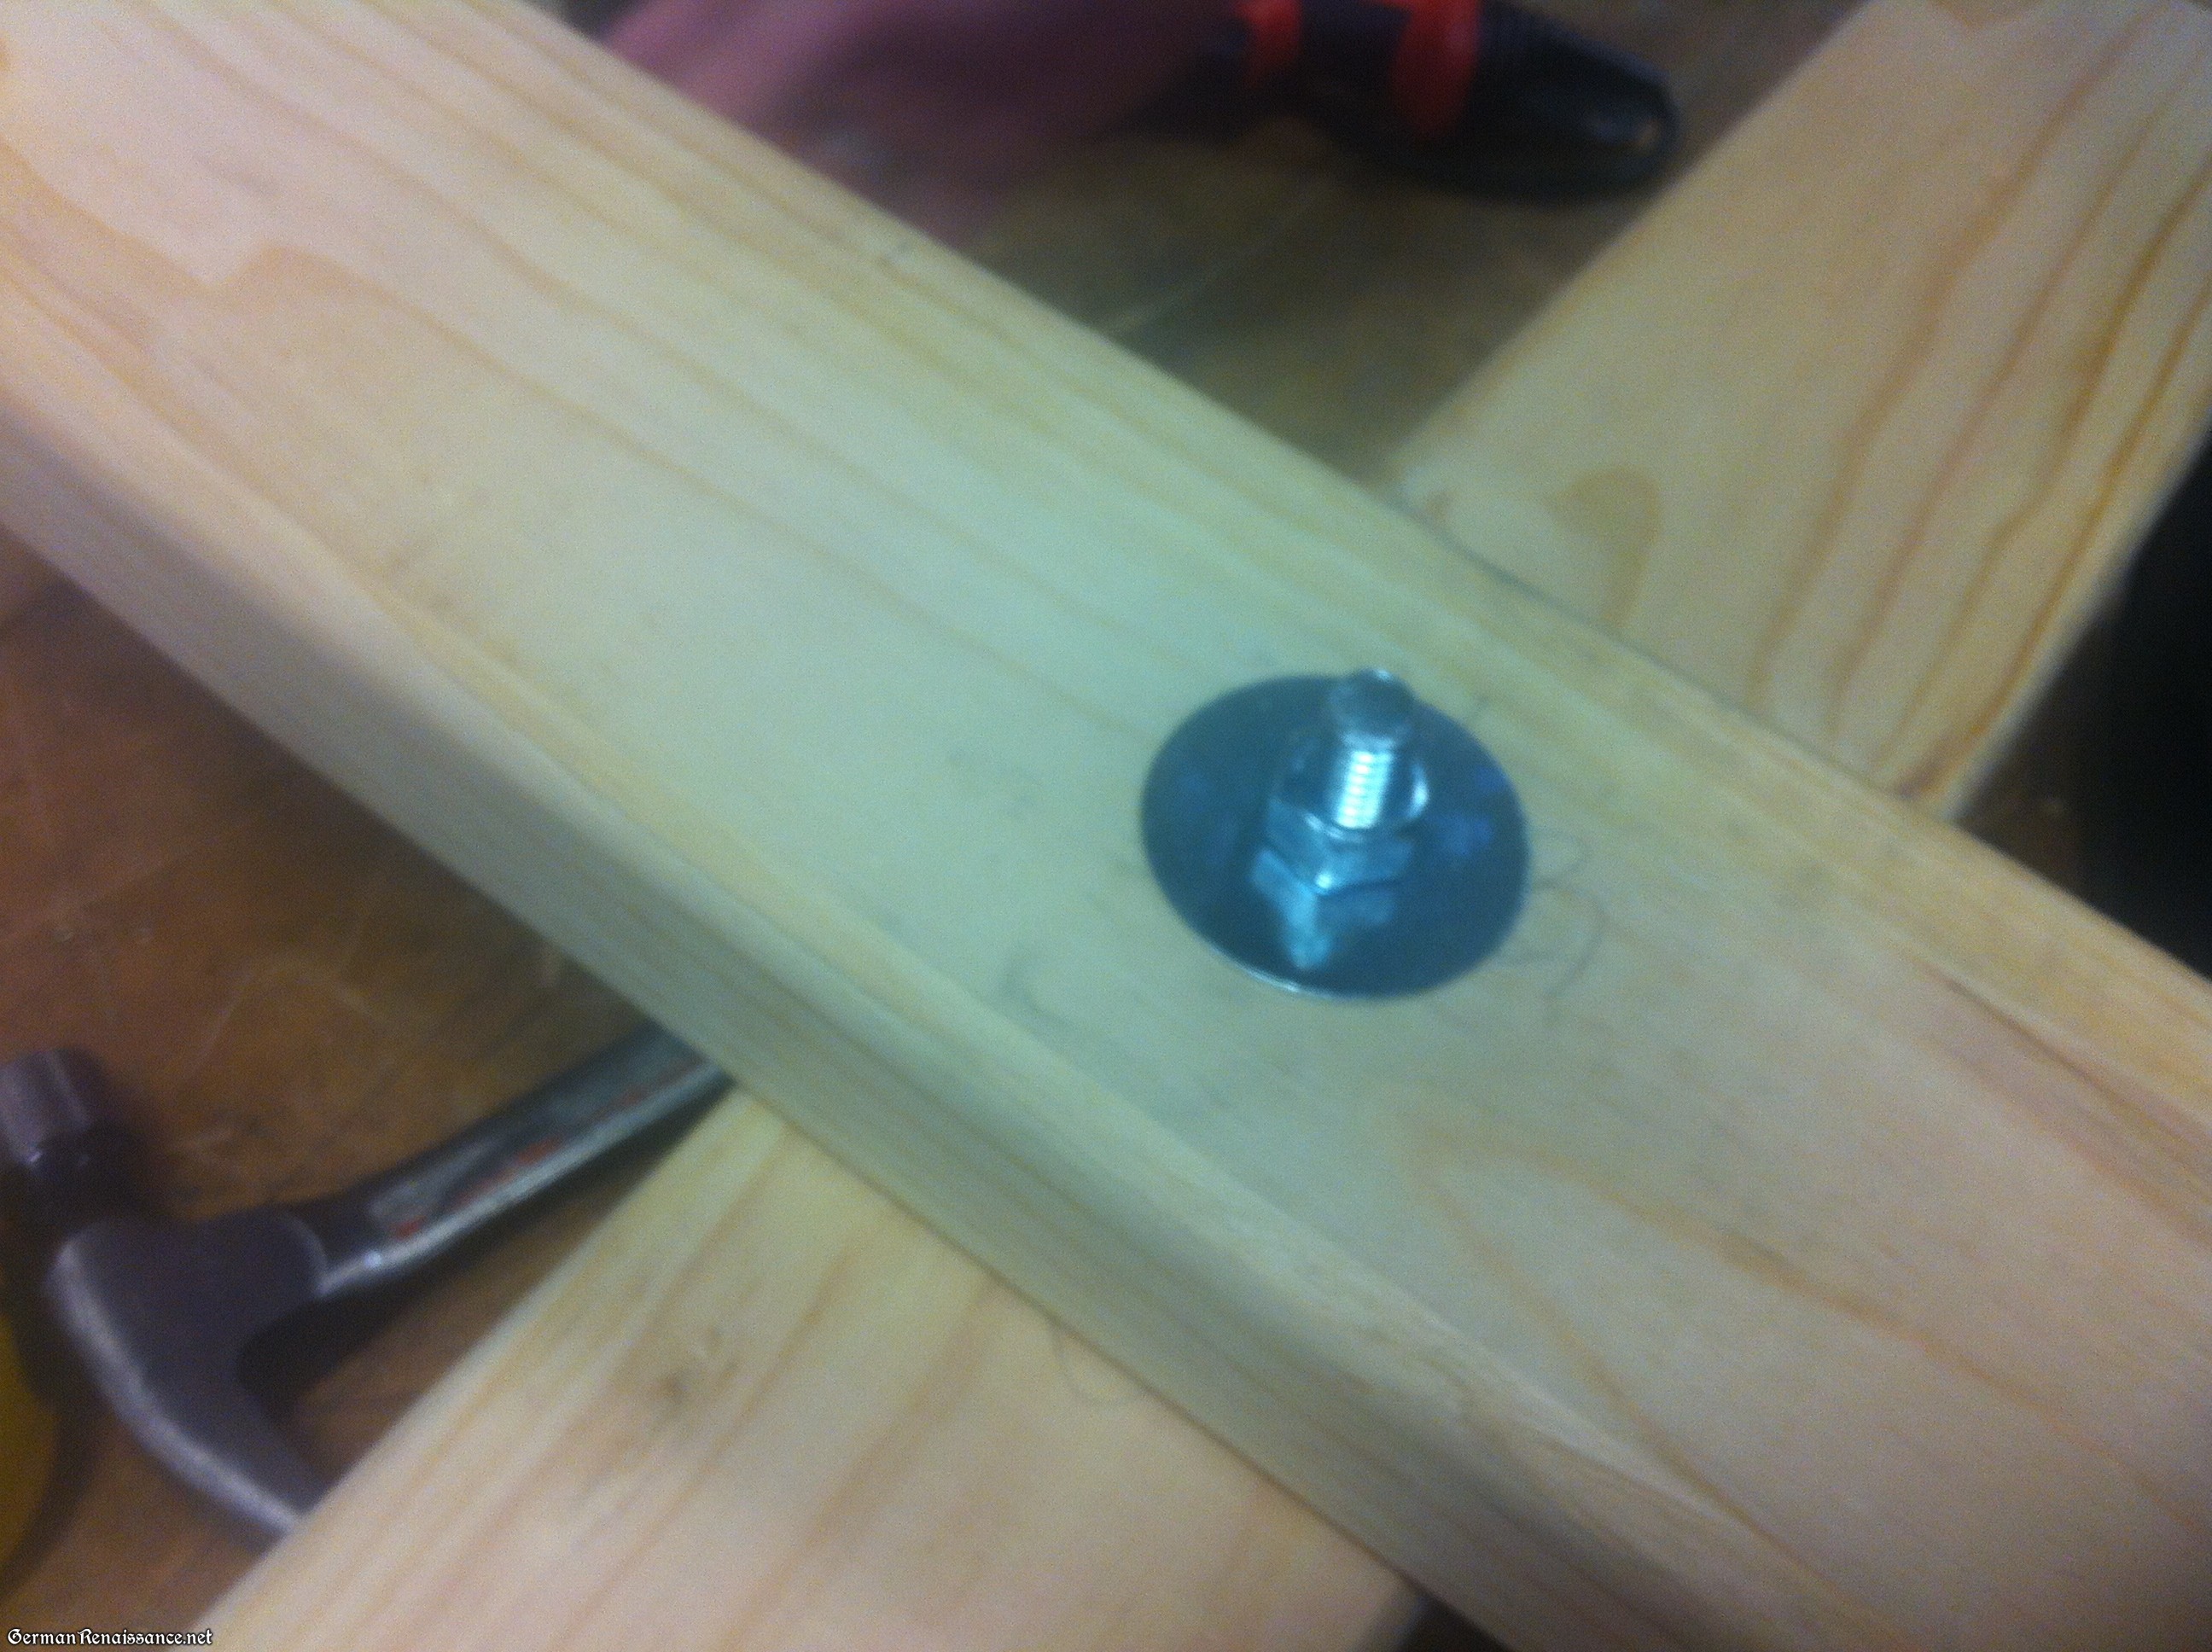
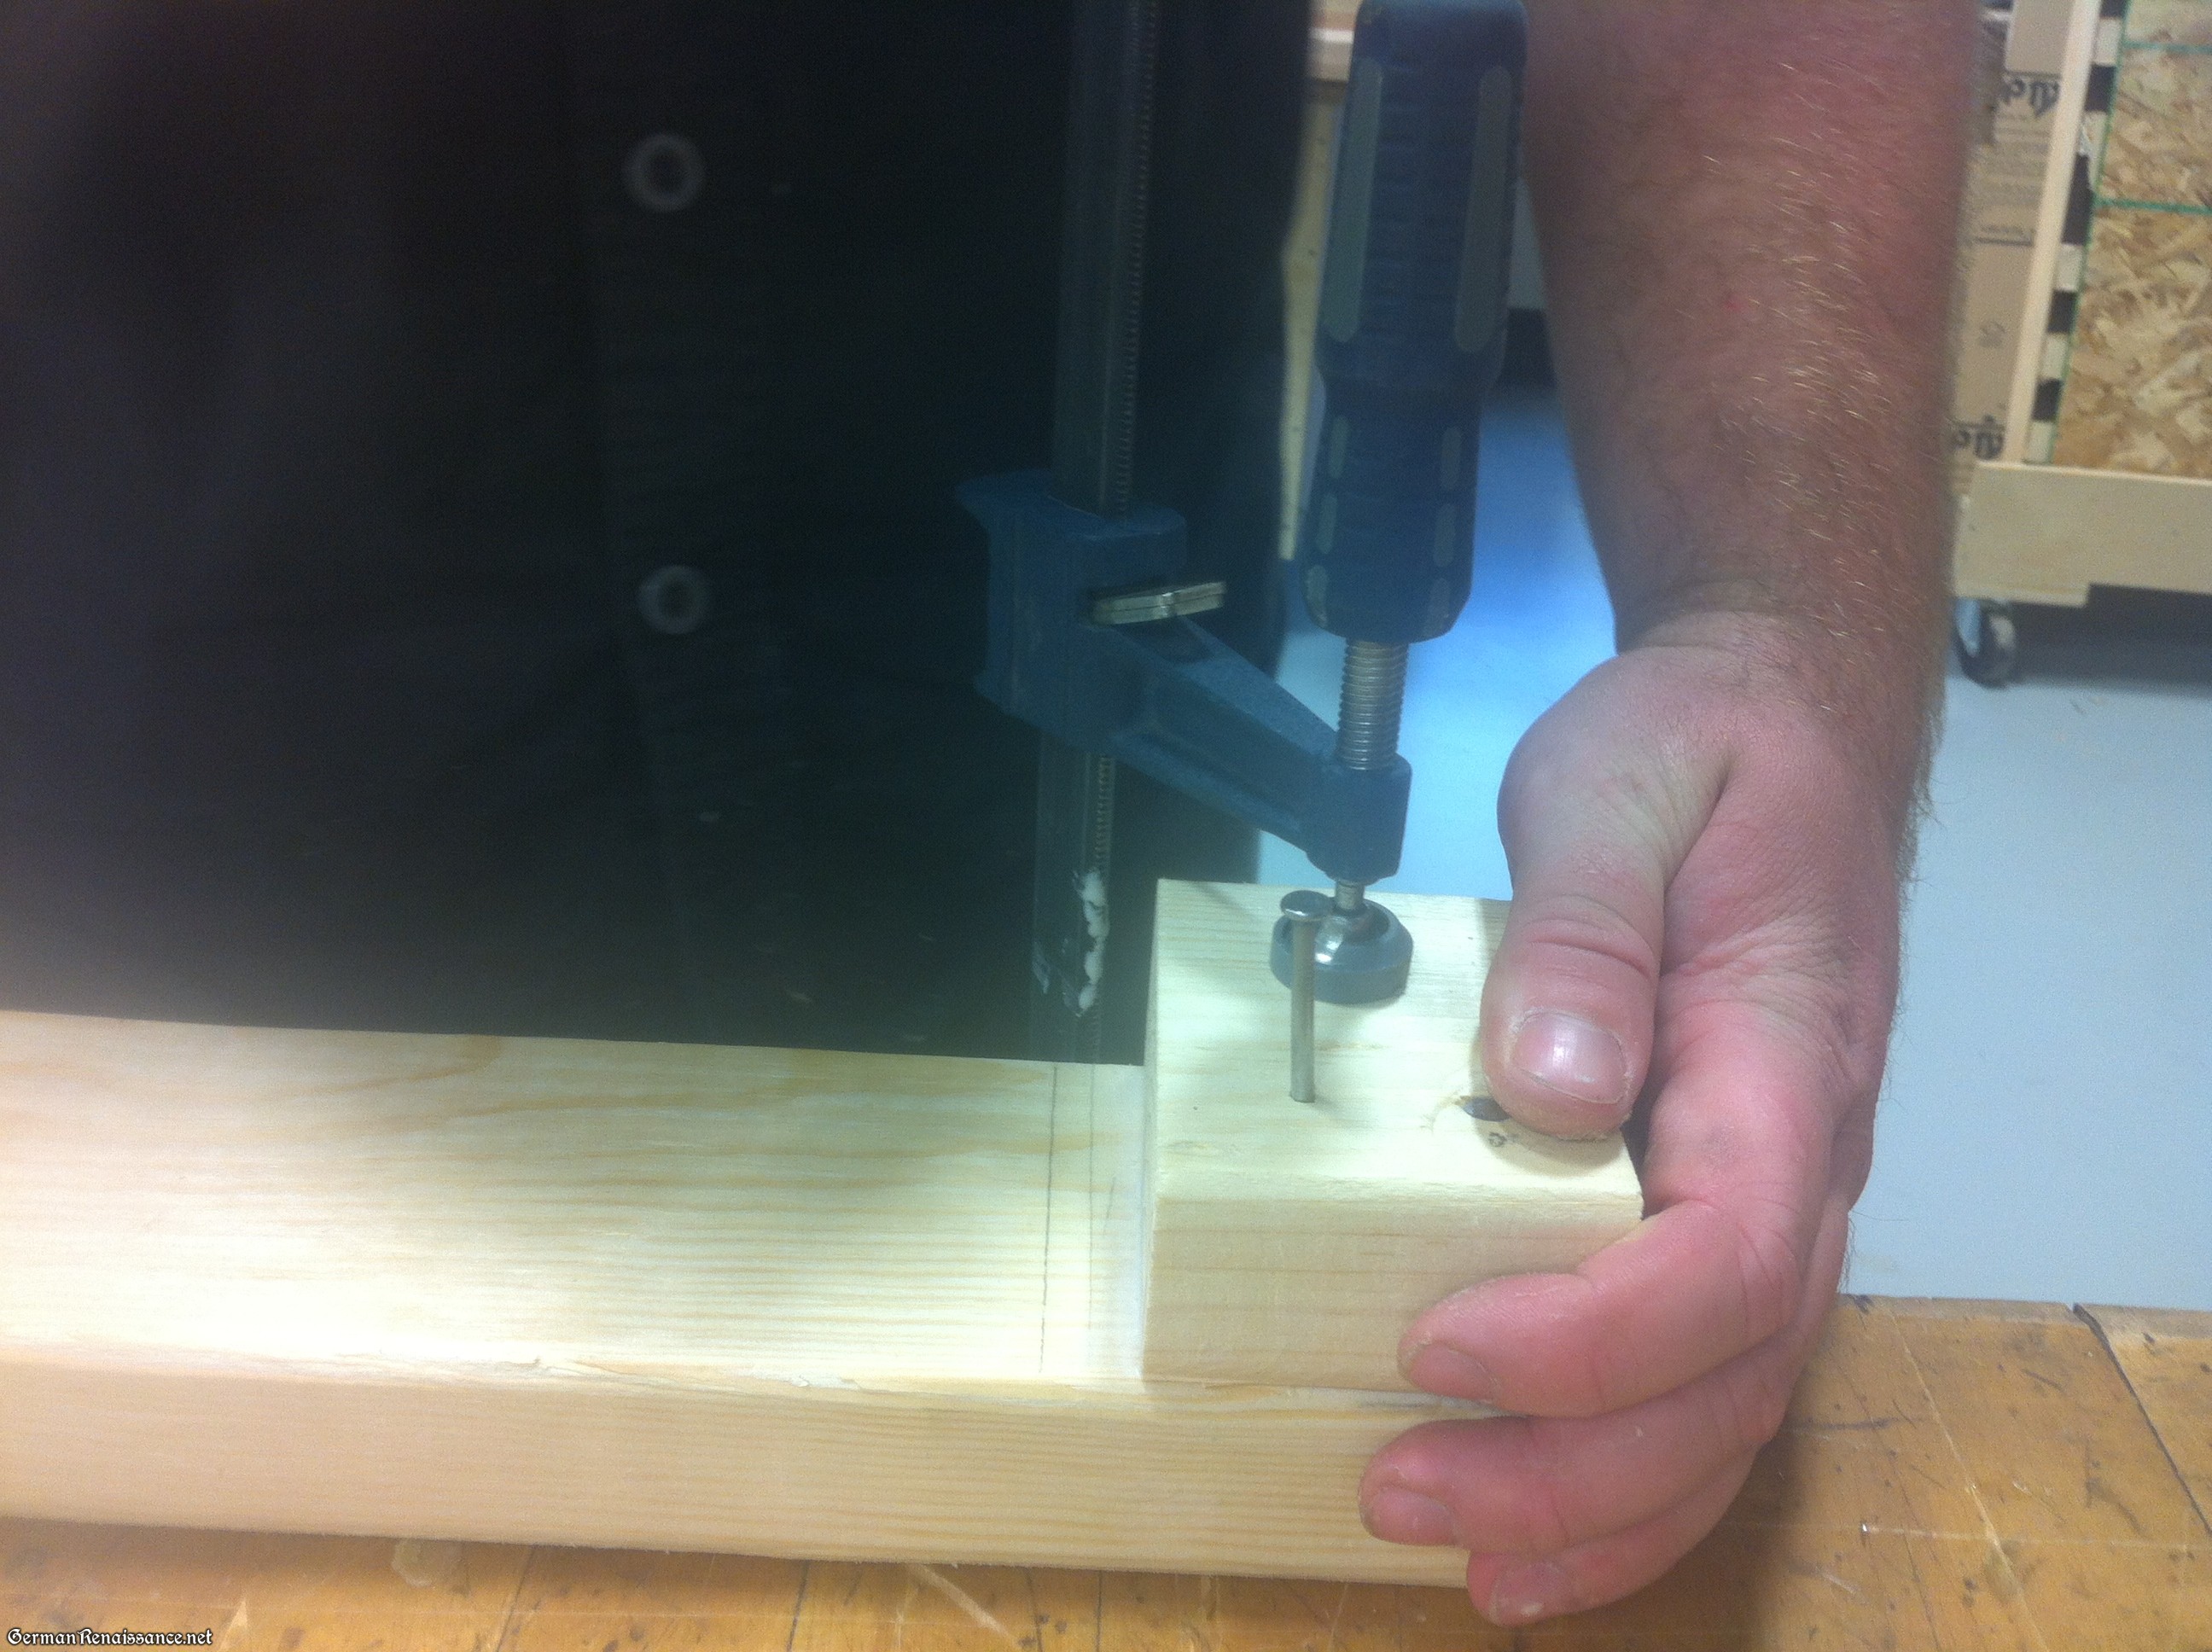
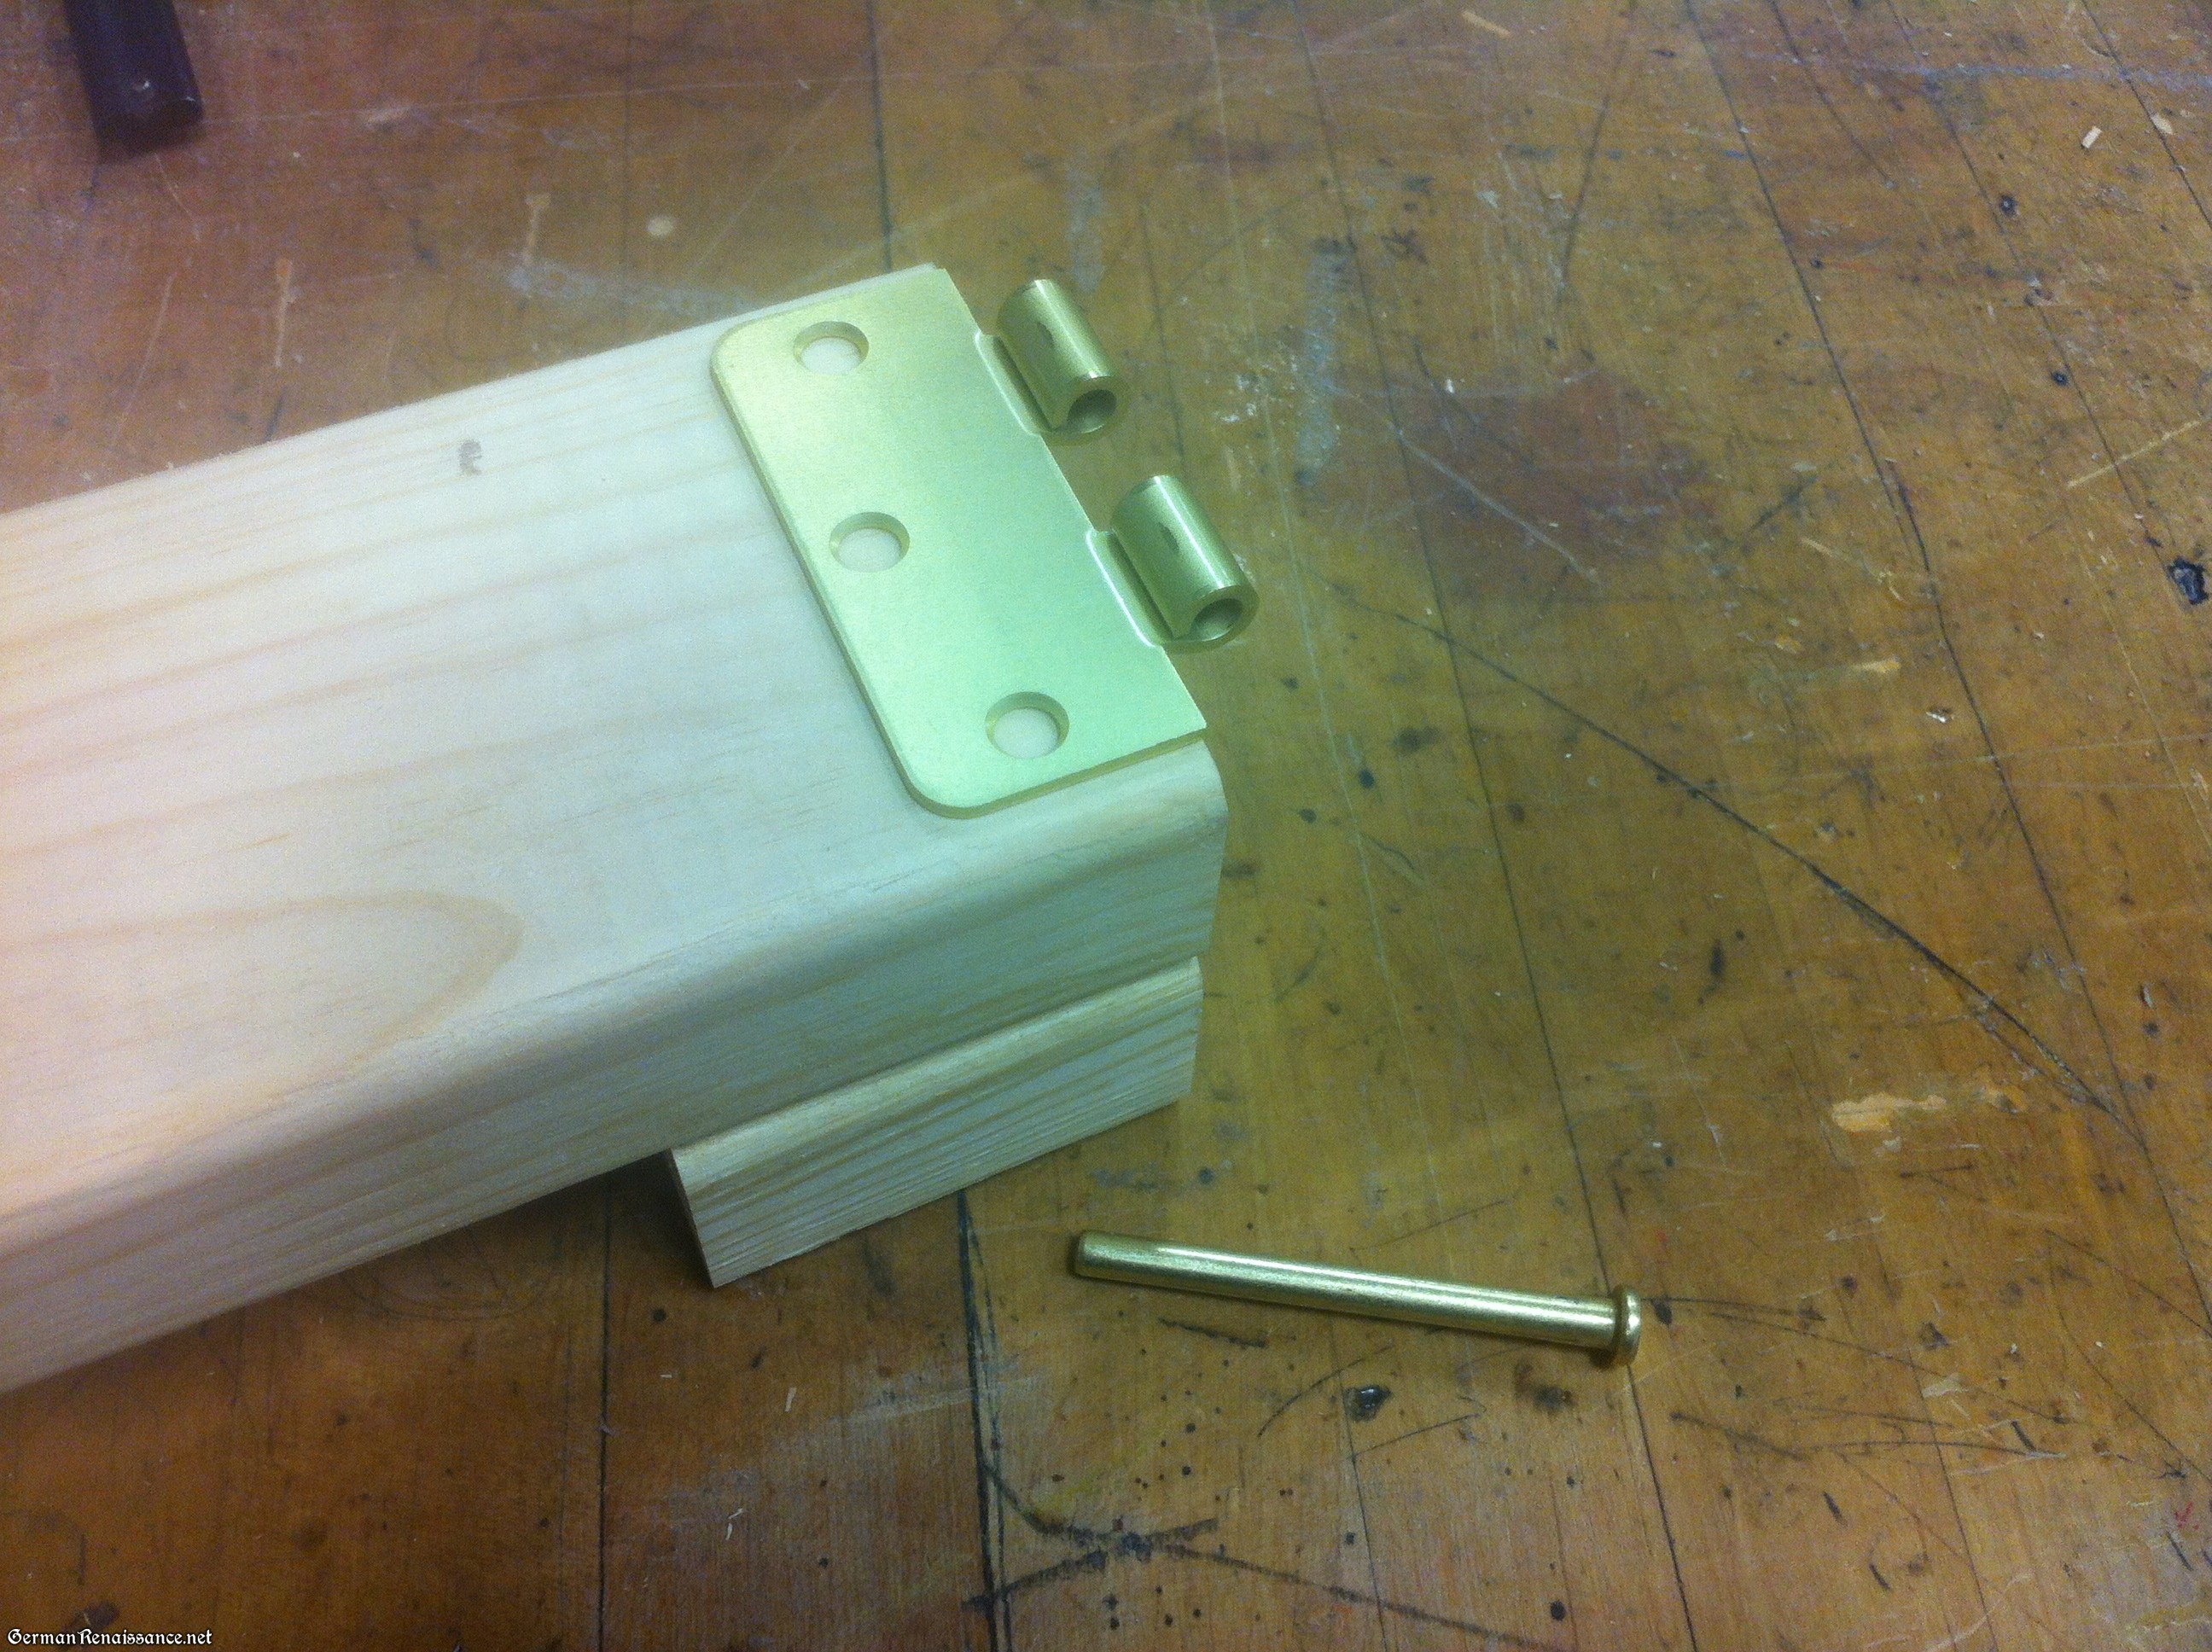
Step 5. Attach board A to board B using the bolt, washers, and wingnut. Note: You can choose to put the bolt downward or upward through the holes — what’s important is that hardware be recessed into the bottom of board B so that it can sit flat on the ground.
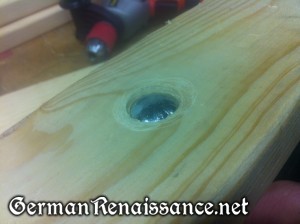
Bolt recessed into the bottom of board B.
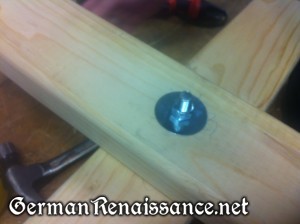
Top of board A, with bolt and wingnut accessible.
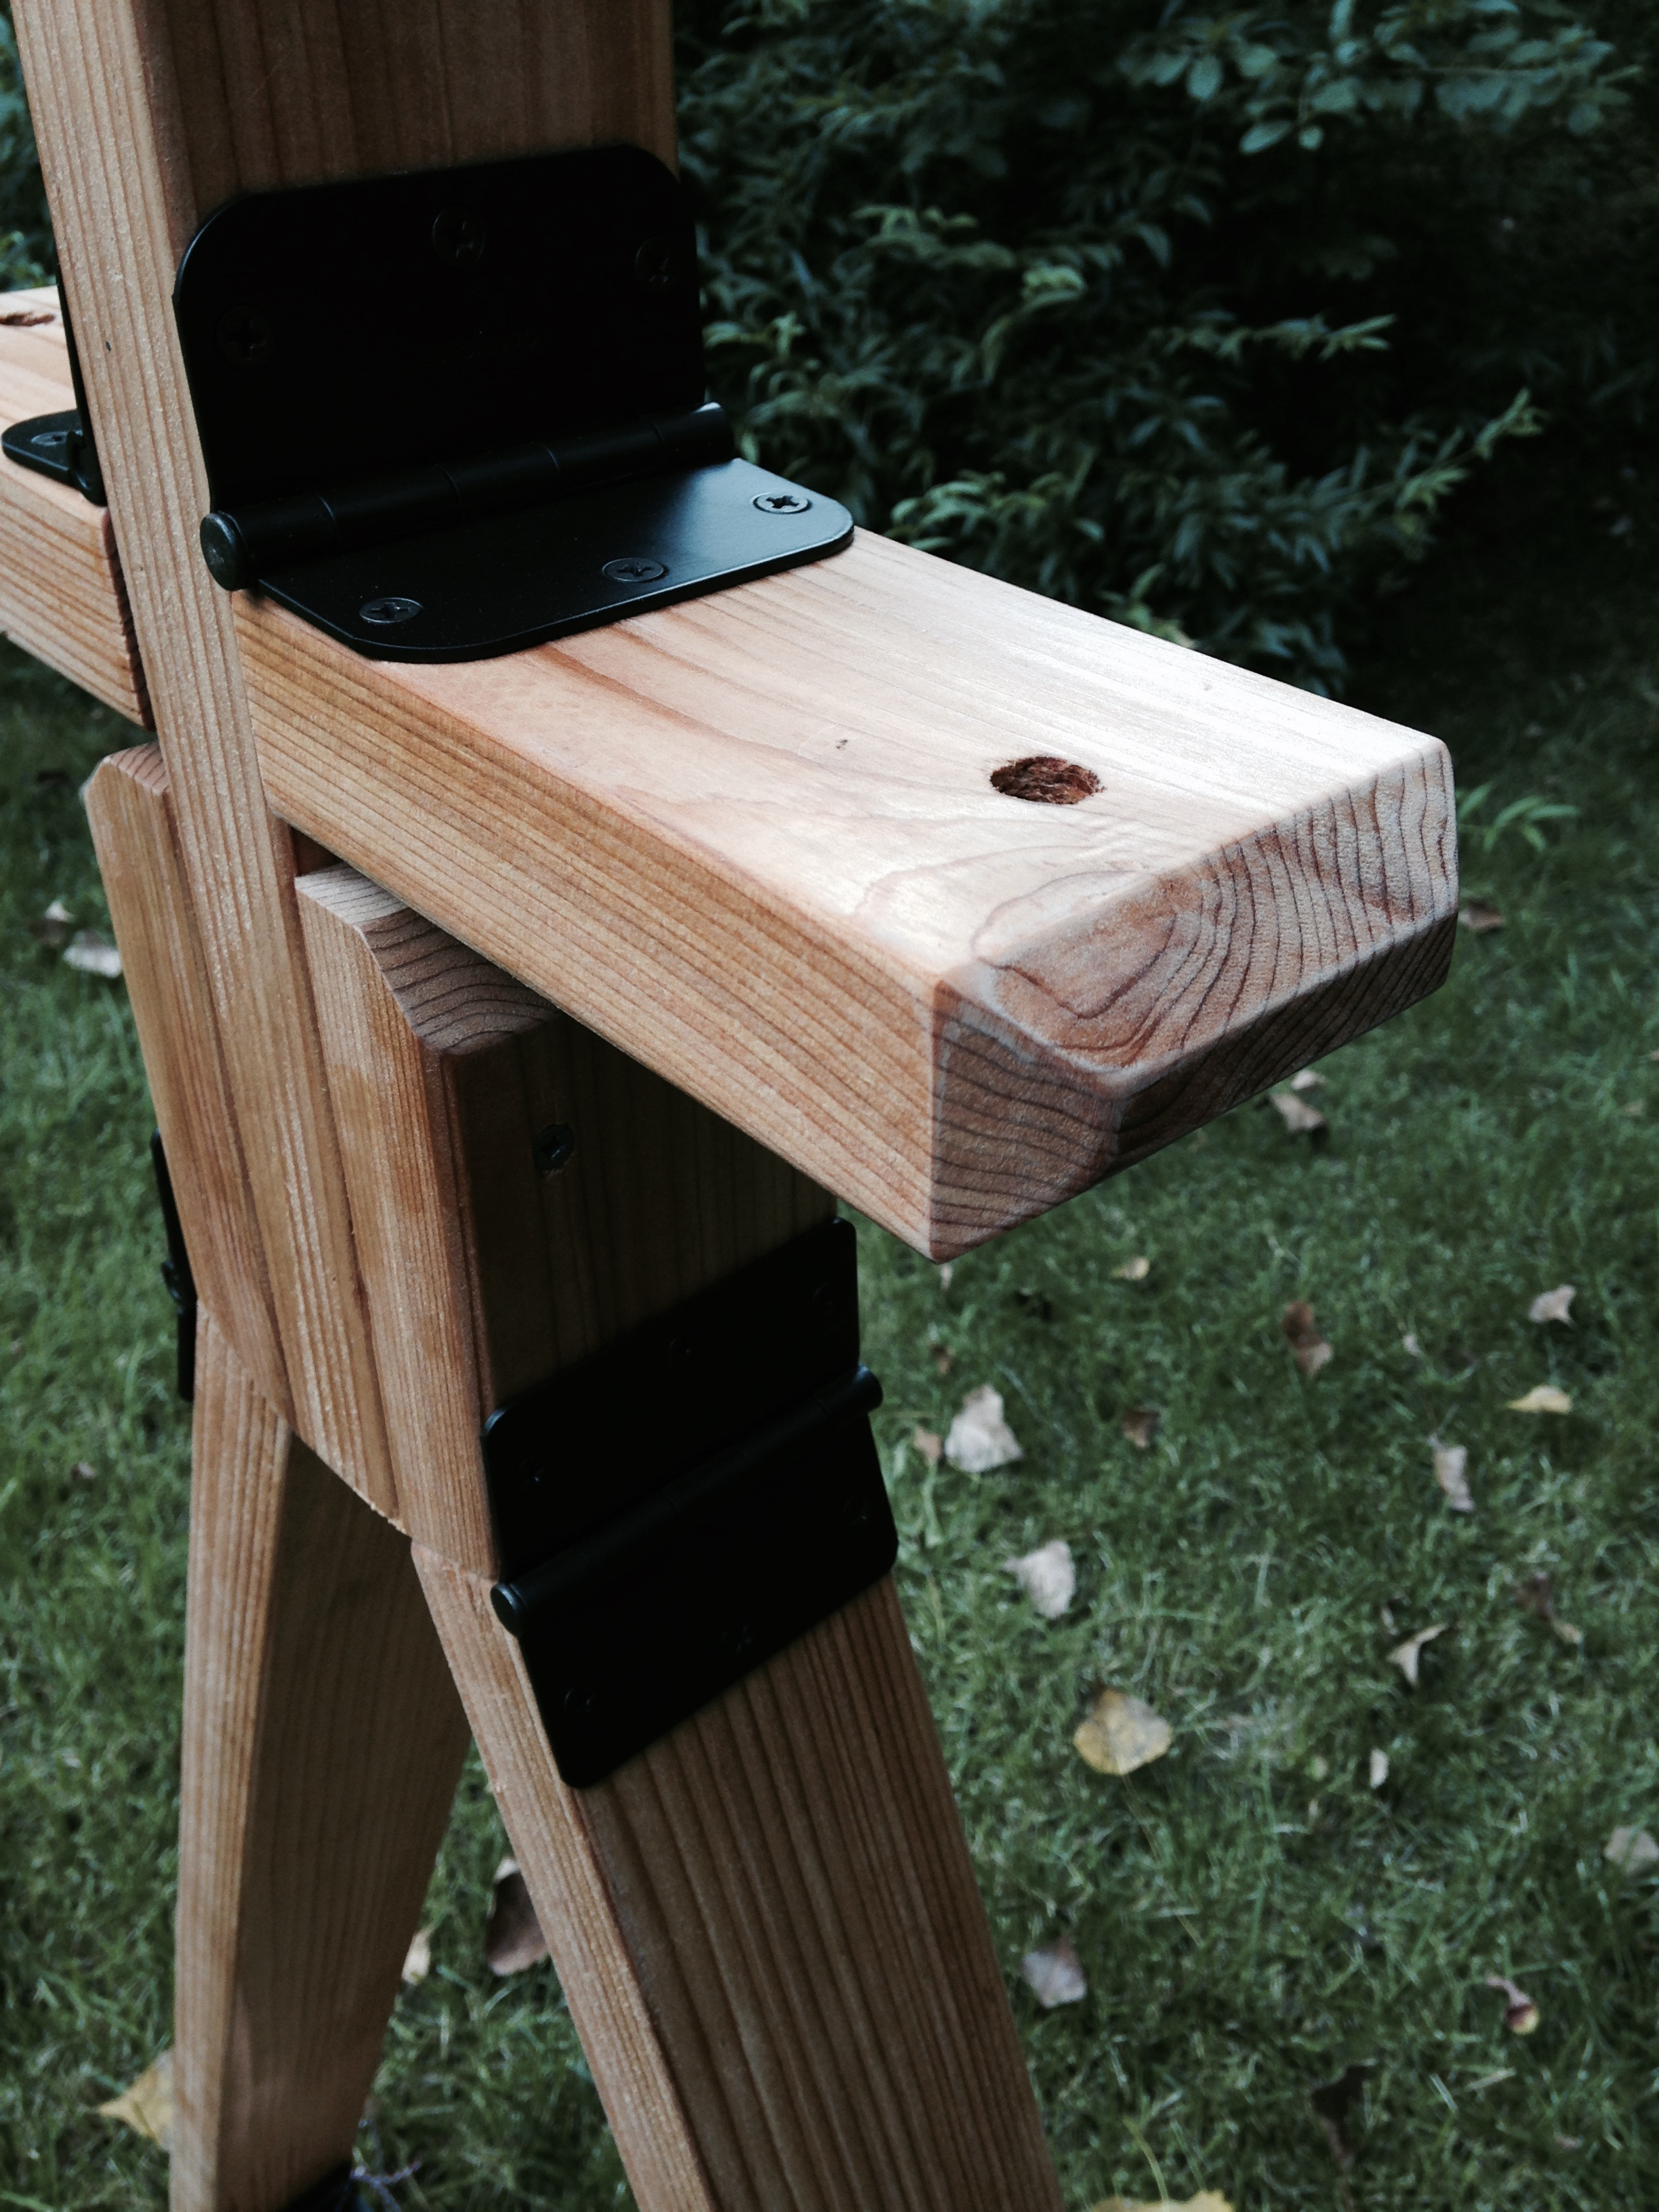
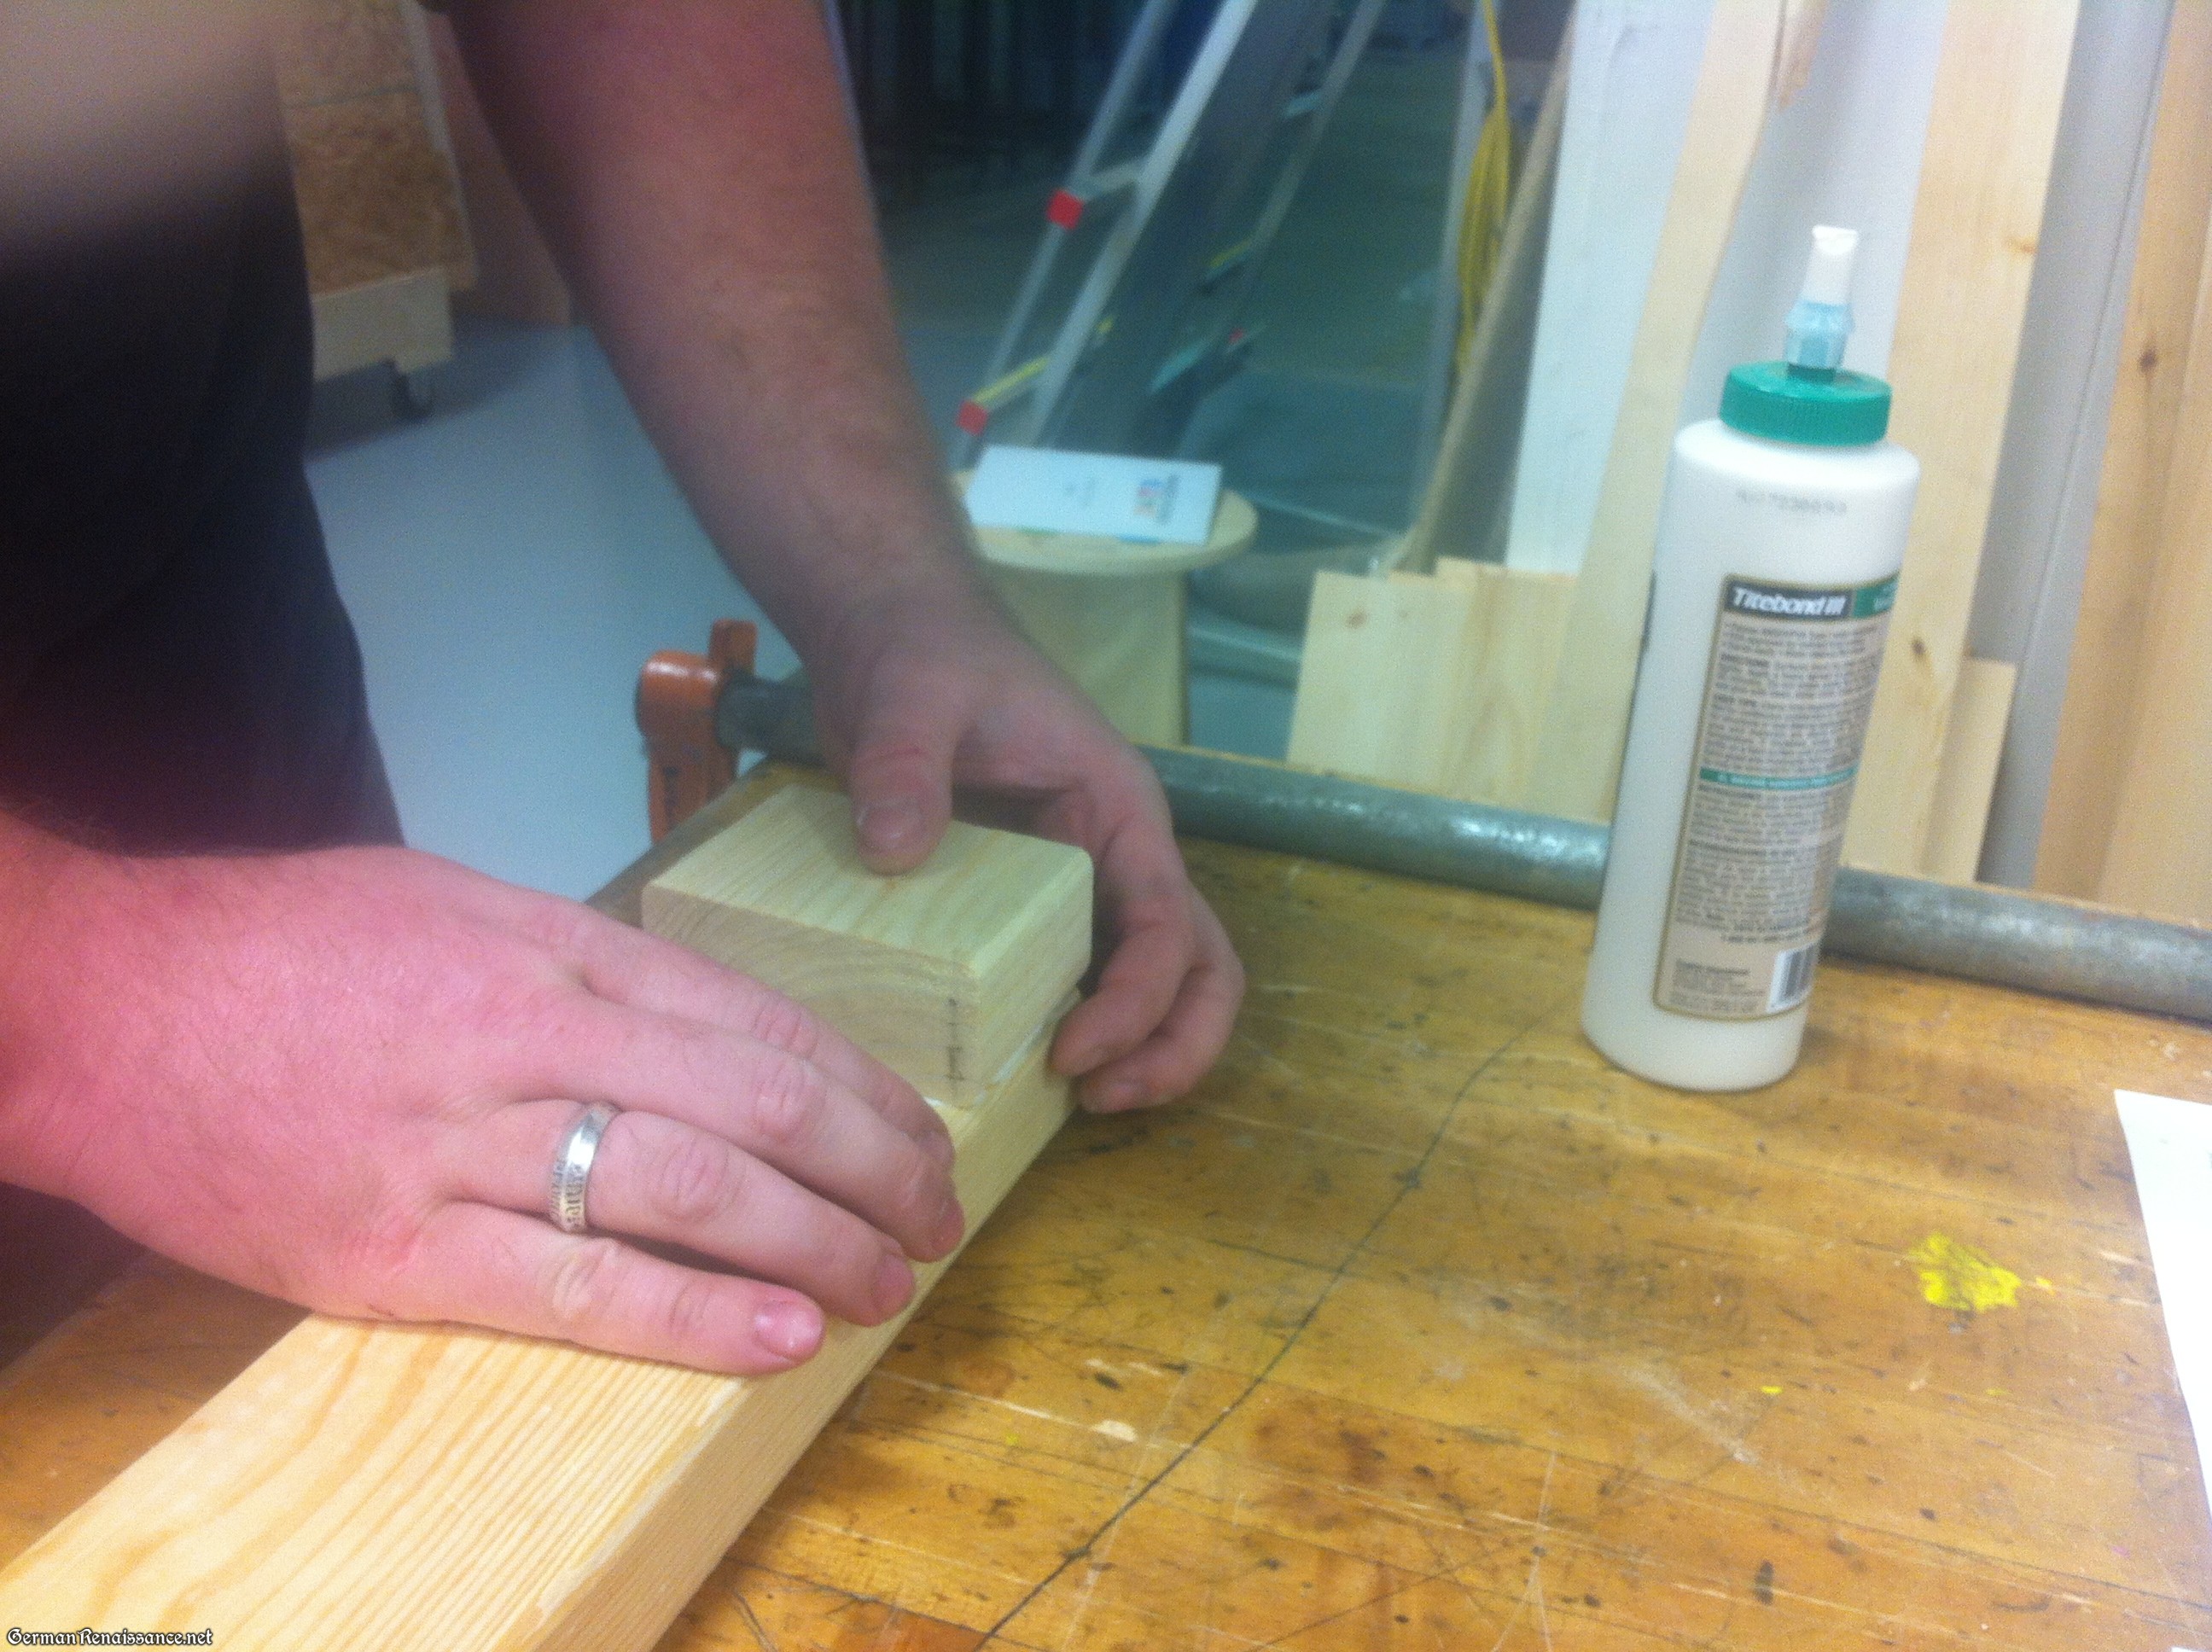
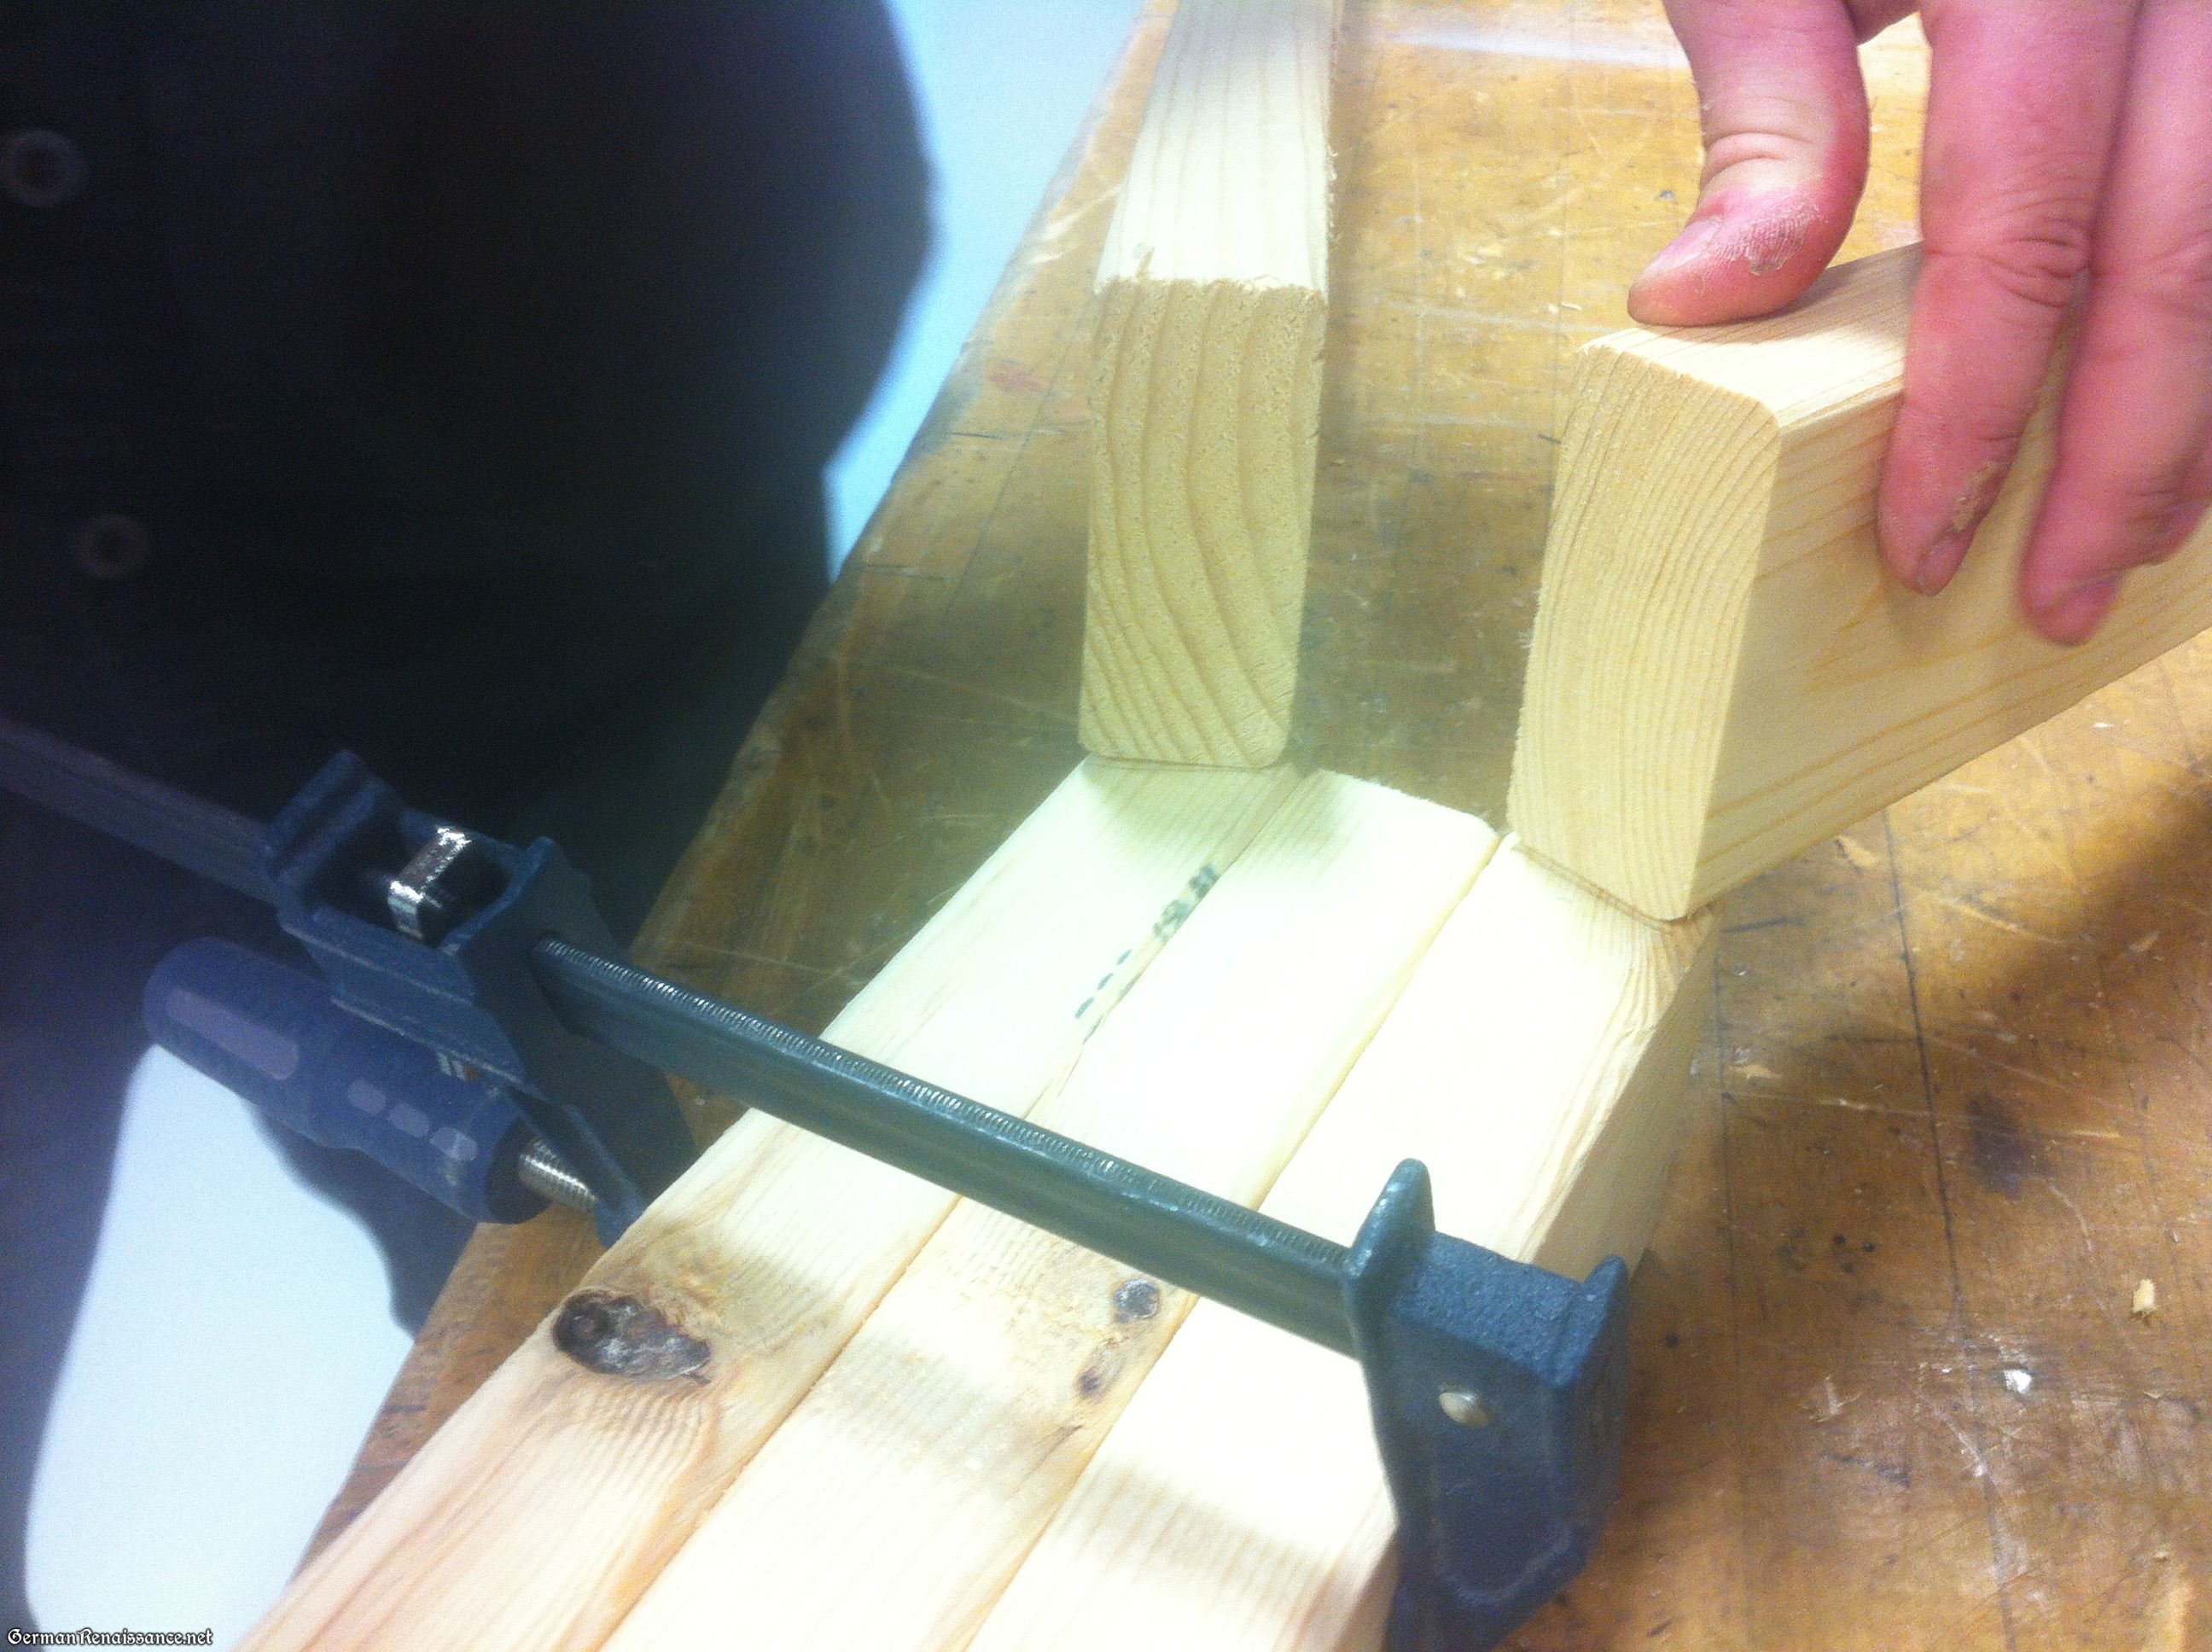
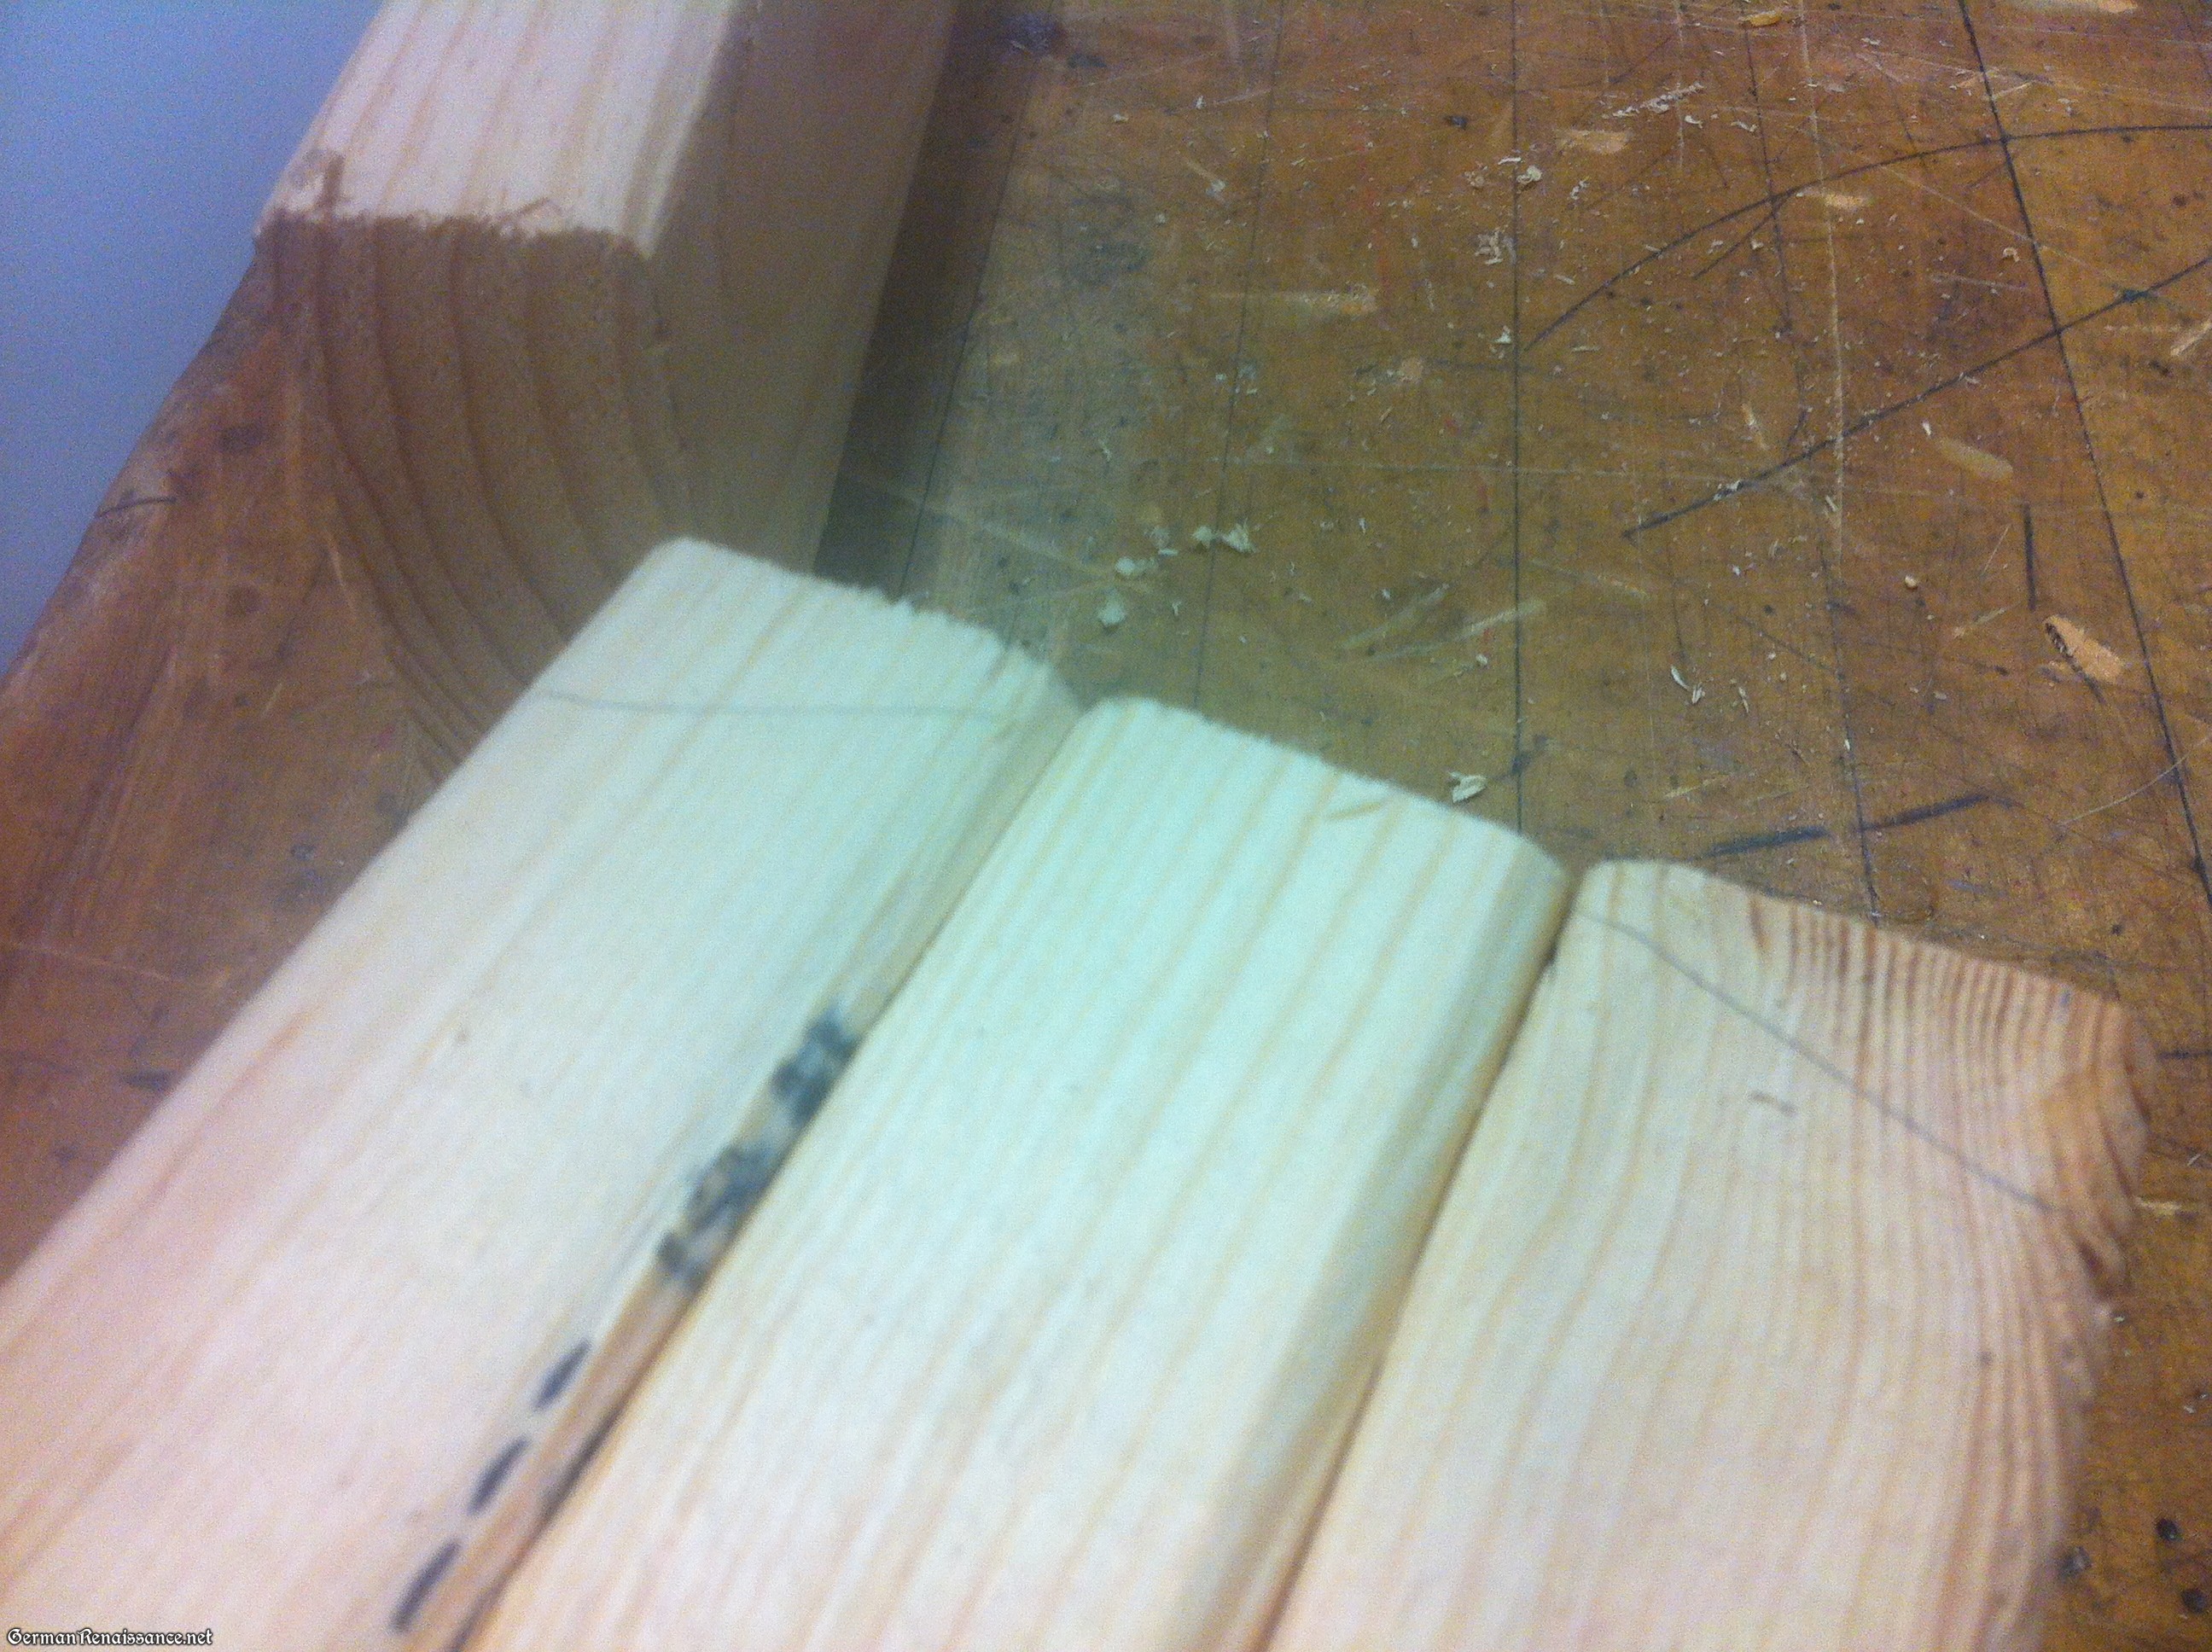
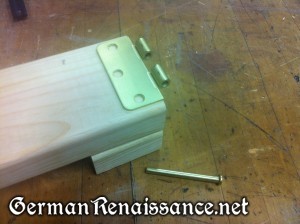
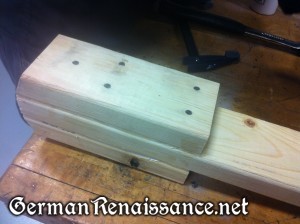
Step 6. Apply wood glue to the underside of the two C boards and attach them to the ends of the A board, making sure that you can swivel and rotate the attached B board without hitting the C boards. Clamp and nail (or screw) C to A. These are now the feet of your armor stand.

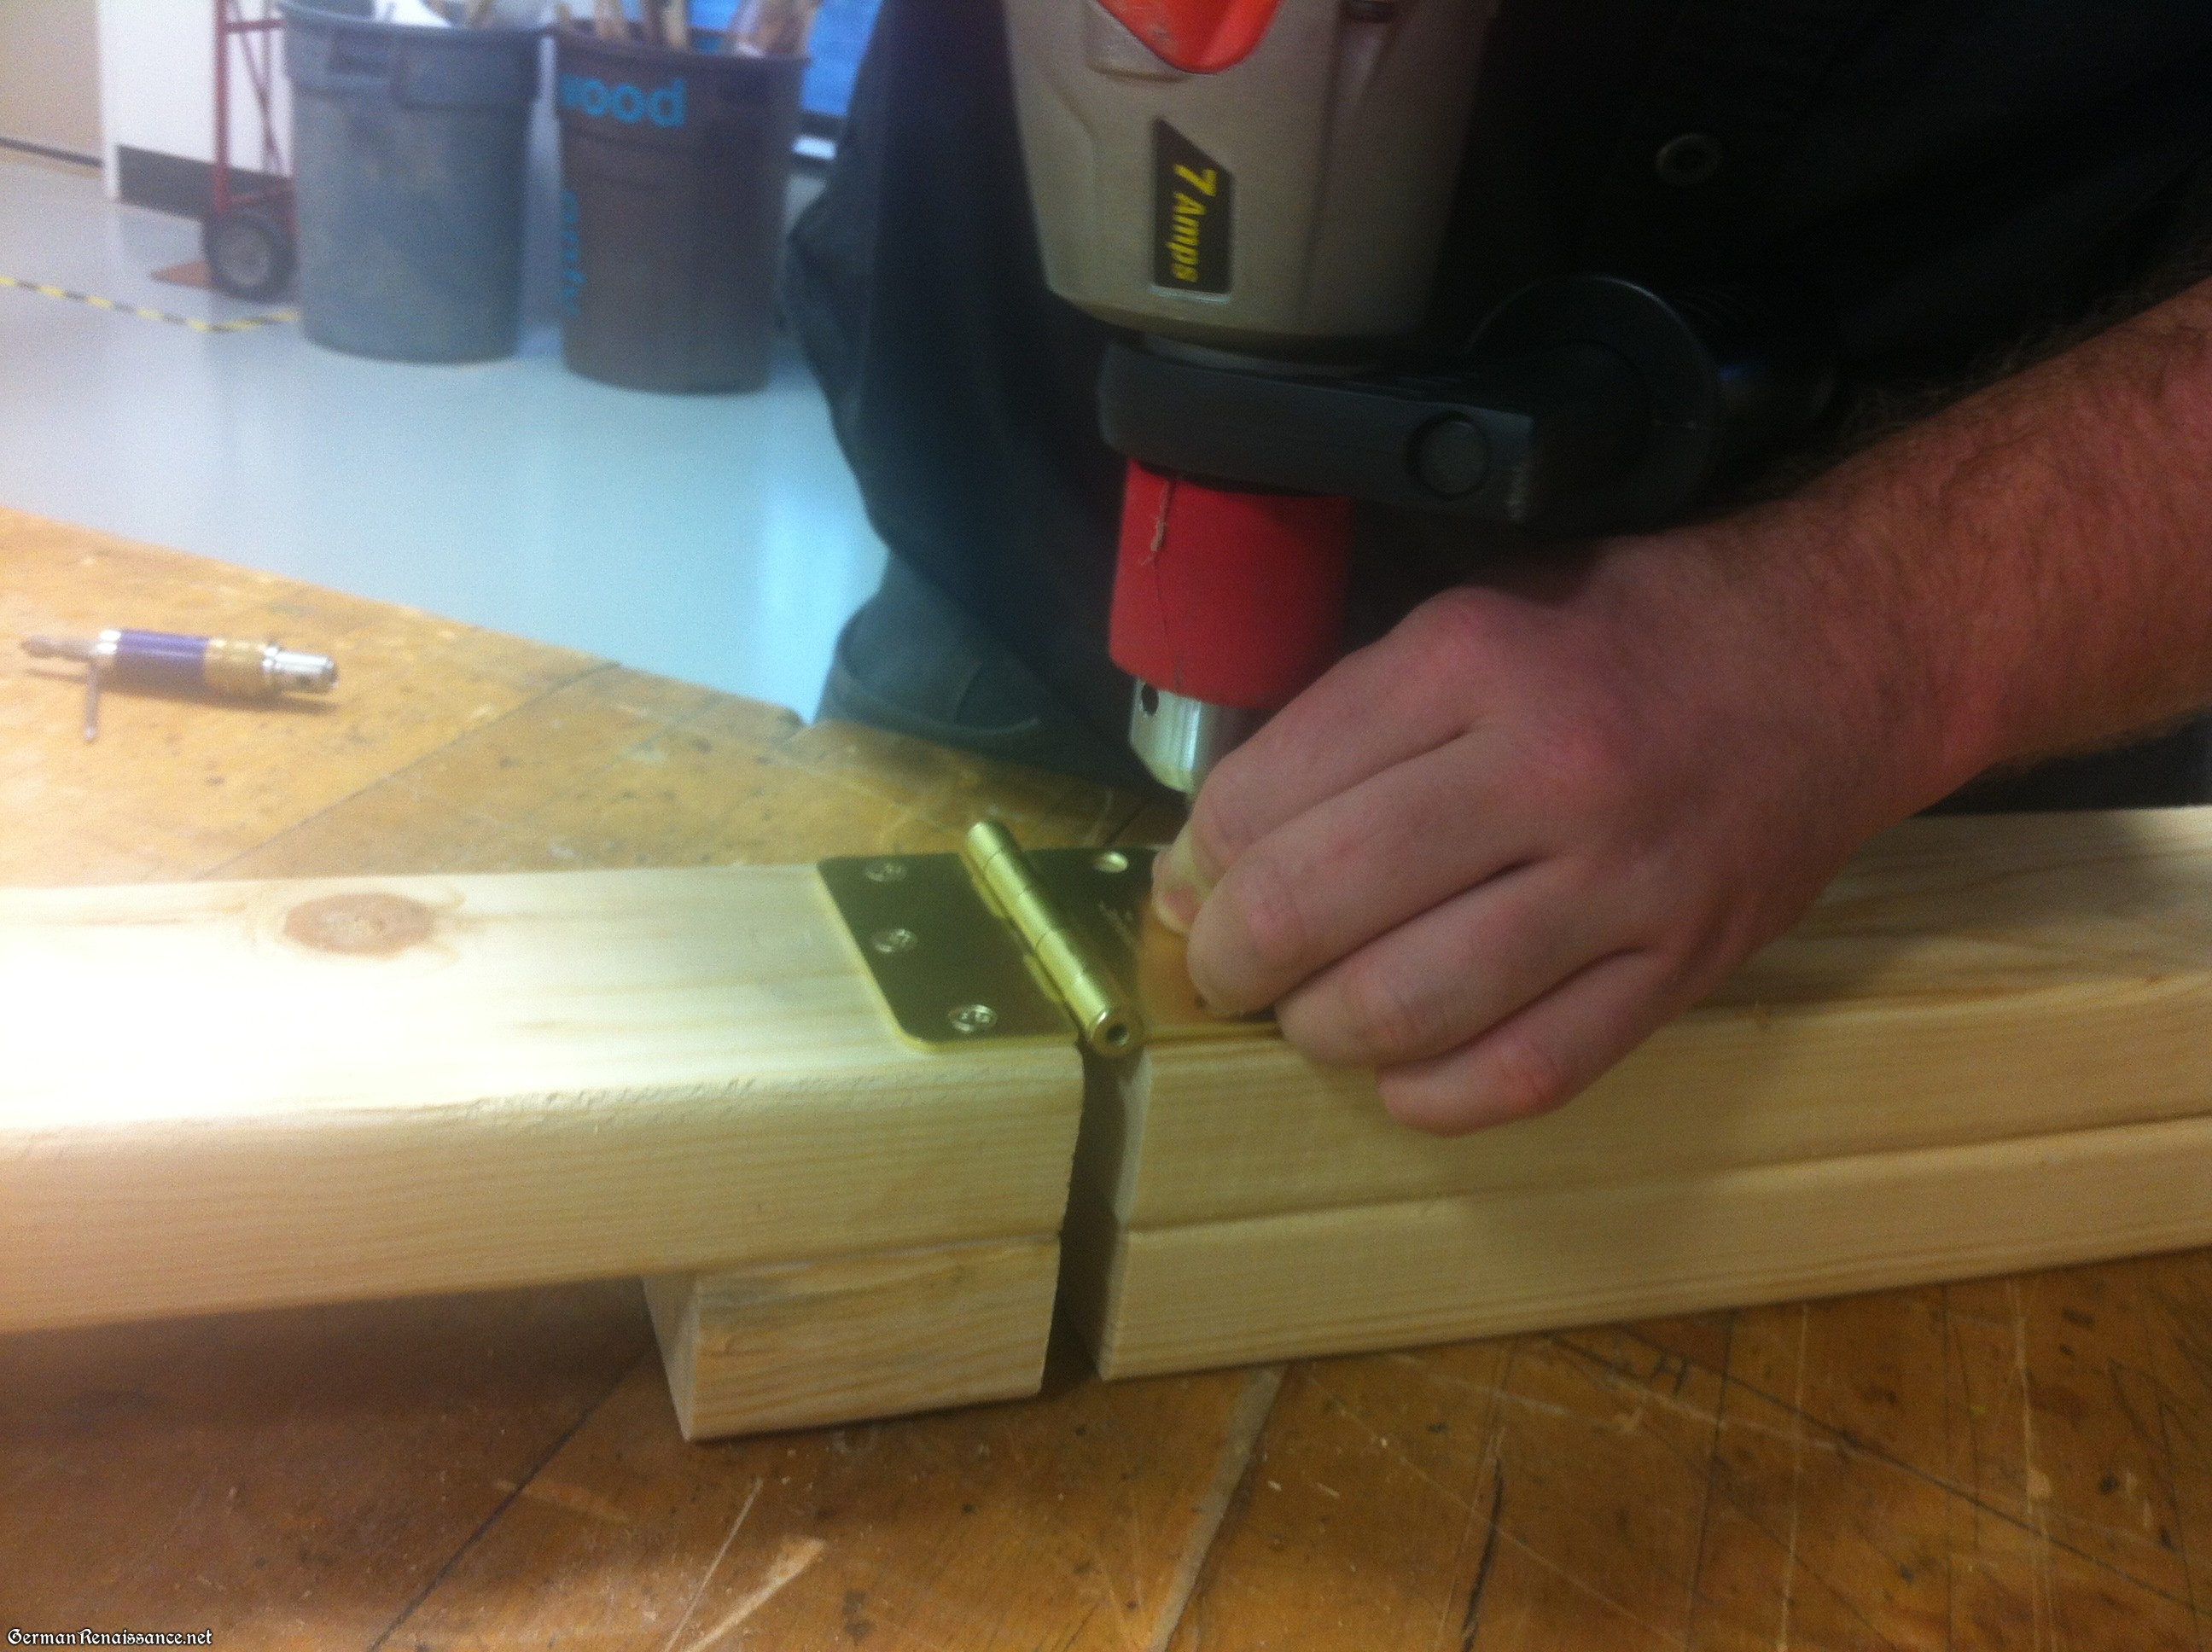
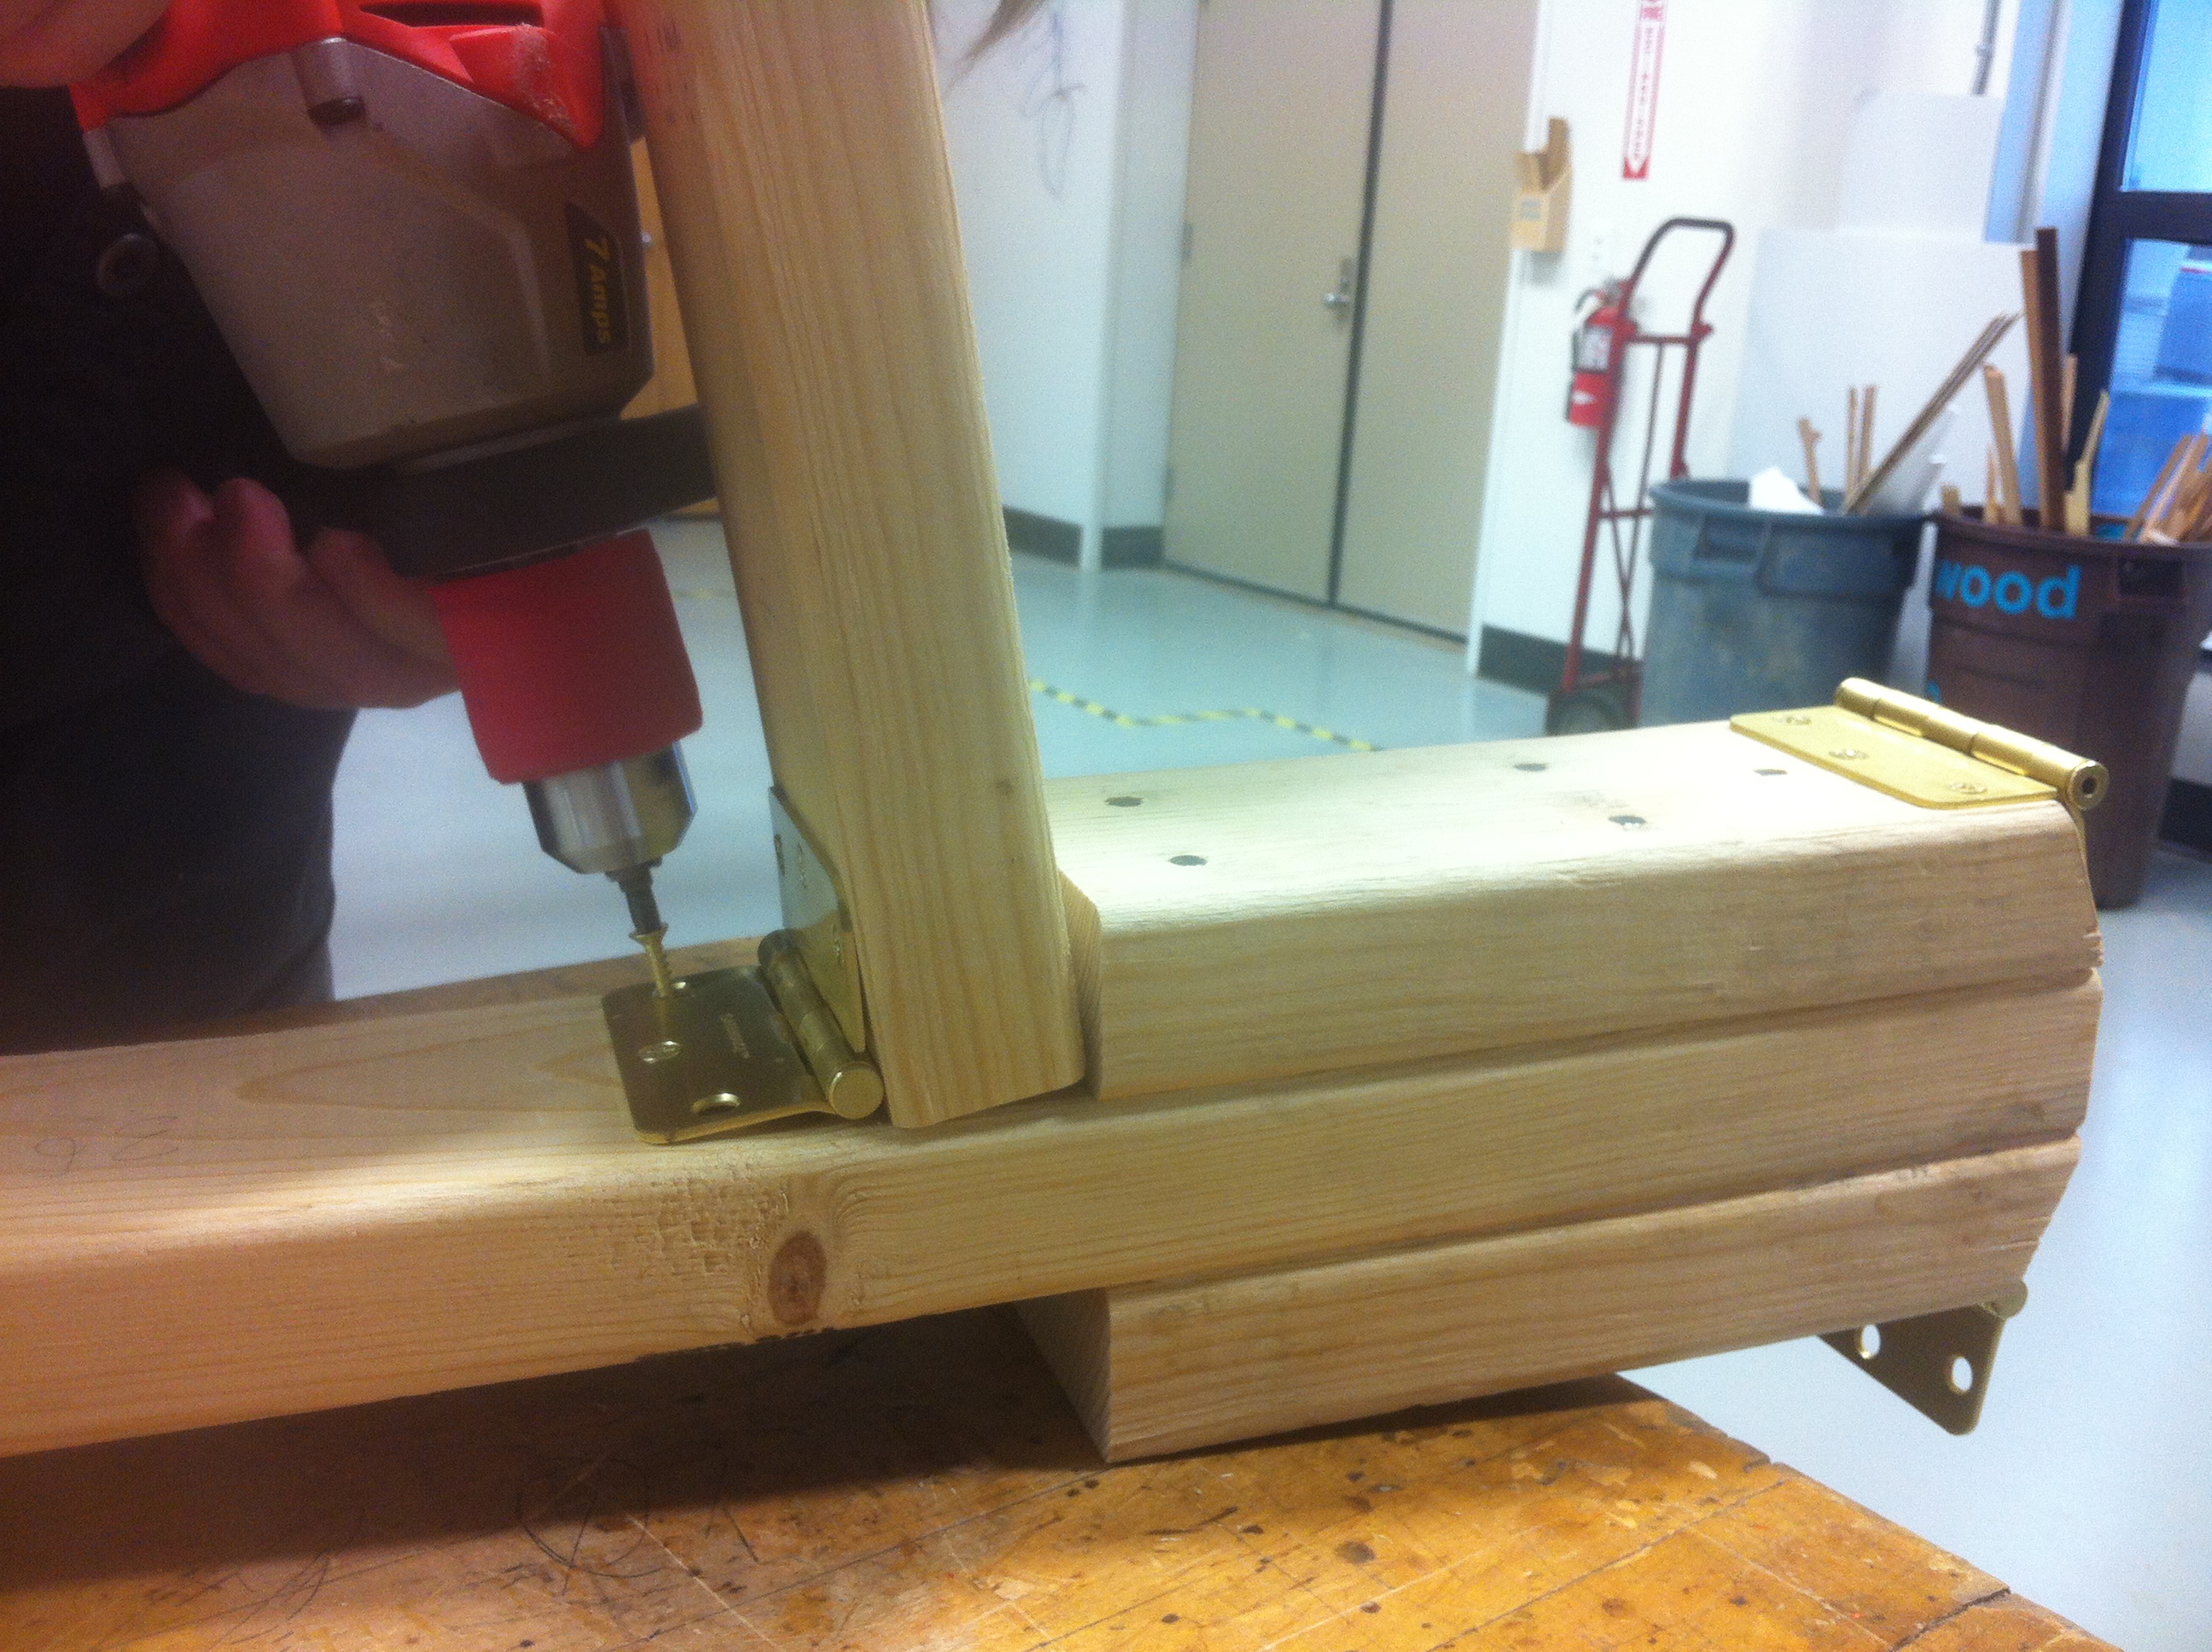
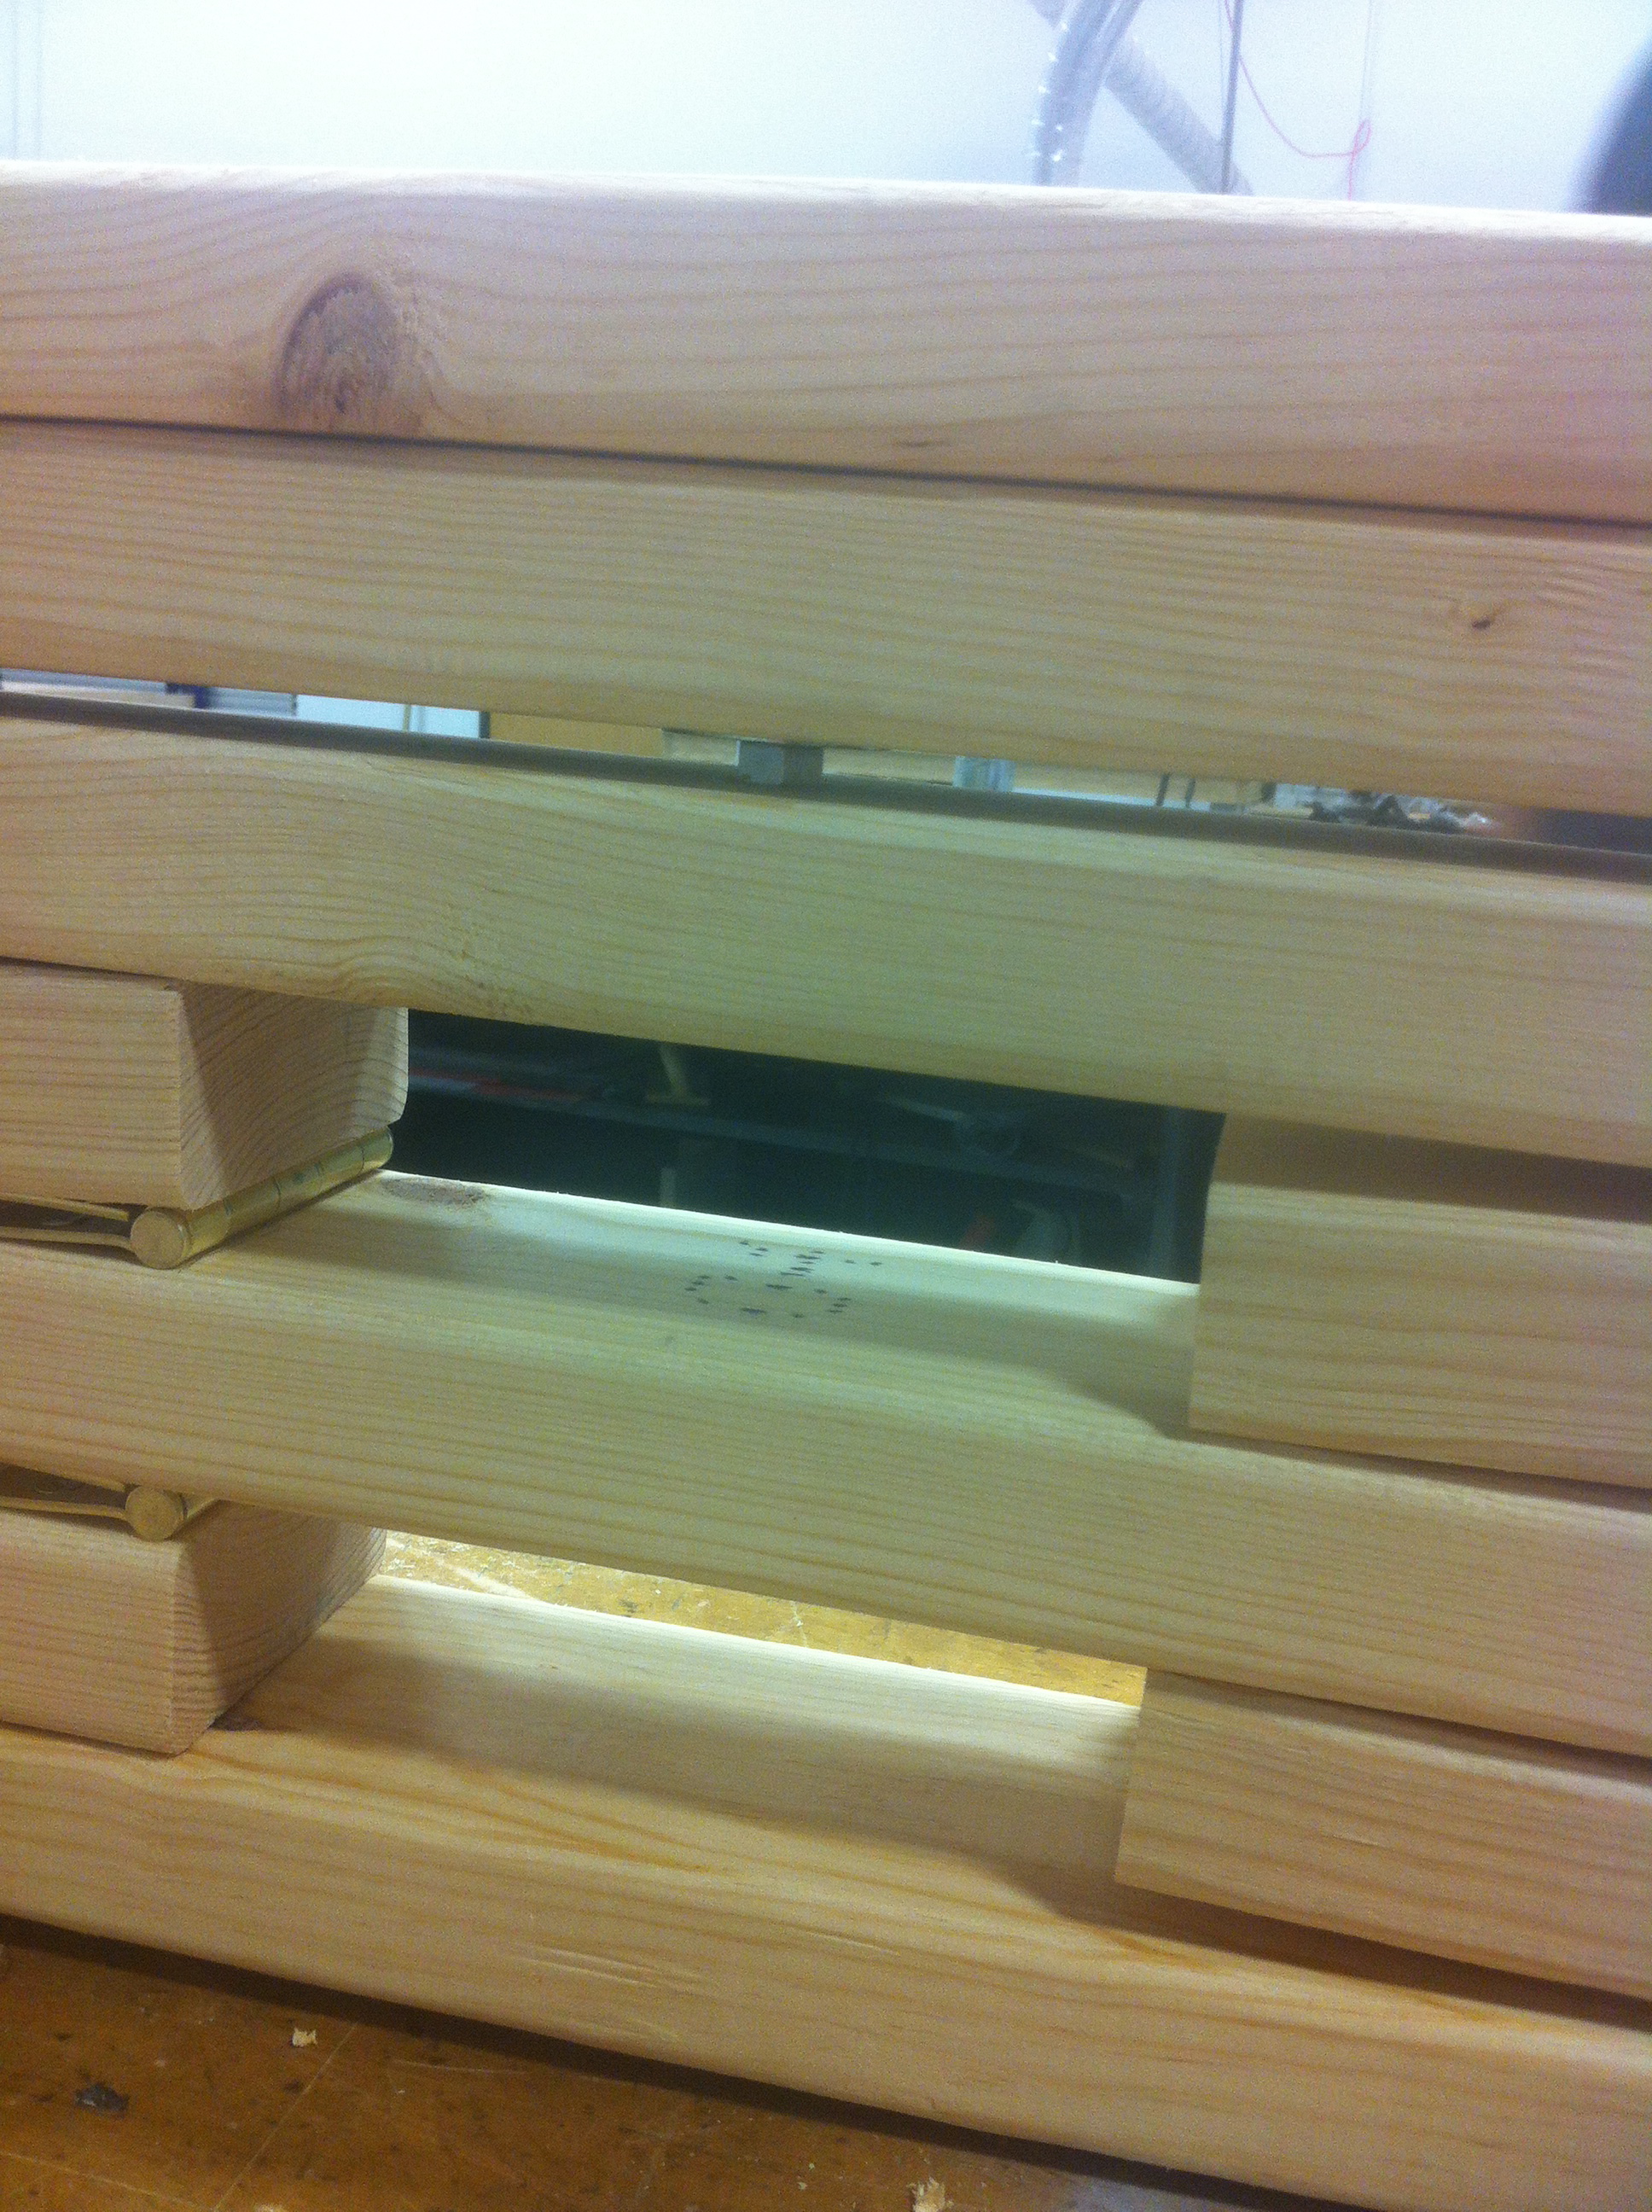
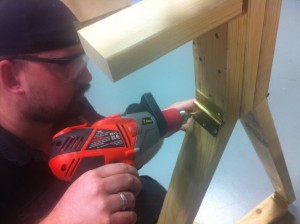
Step 7: Attach a hinge between the end of board A and the end of one of your D boards. You’ll want to position the plates so that the hinge itself sits just beyond the edge of the boards — this allows you to fold it more compactly.
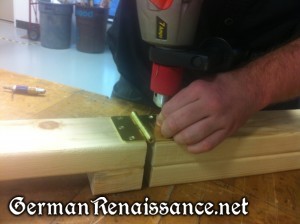
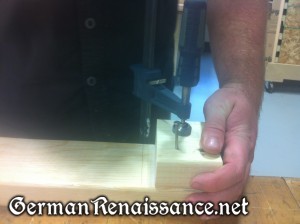
Step 8: Remove the pin from another hinge (insert a nail into the bottom hole of the hinge and hammer it down a bit to release the pin). Put the pin back into the hinge loosely, then repeat step 7 by attaching the hinge between the other end of board A and the second board D.
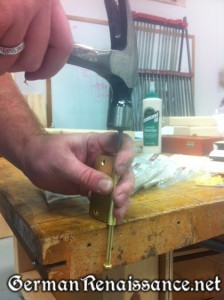
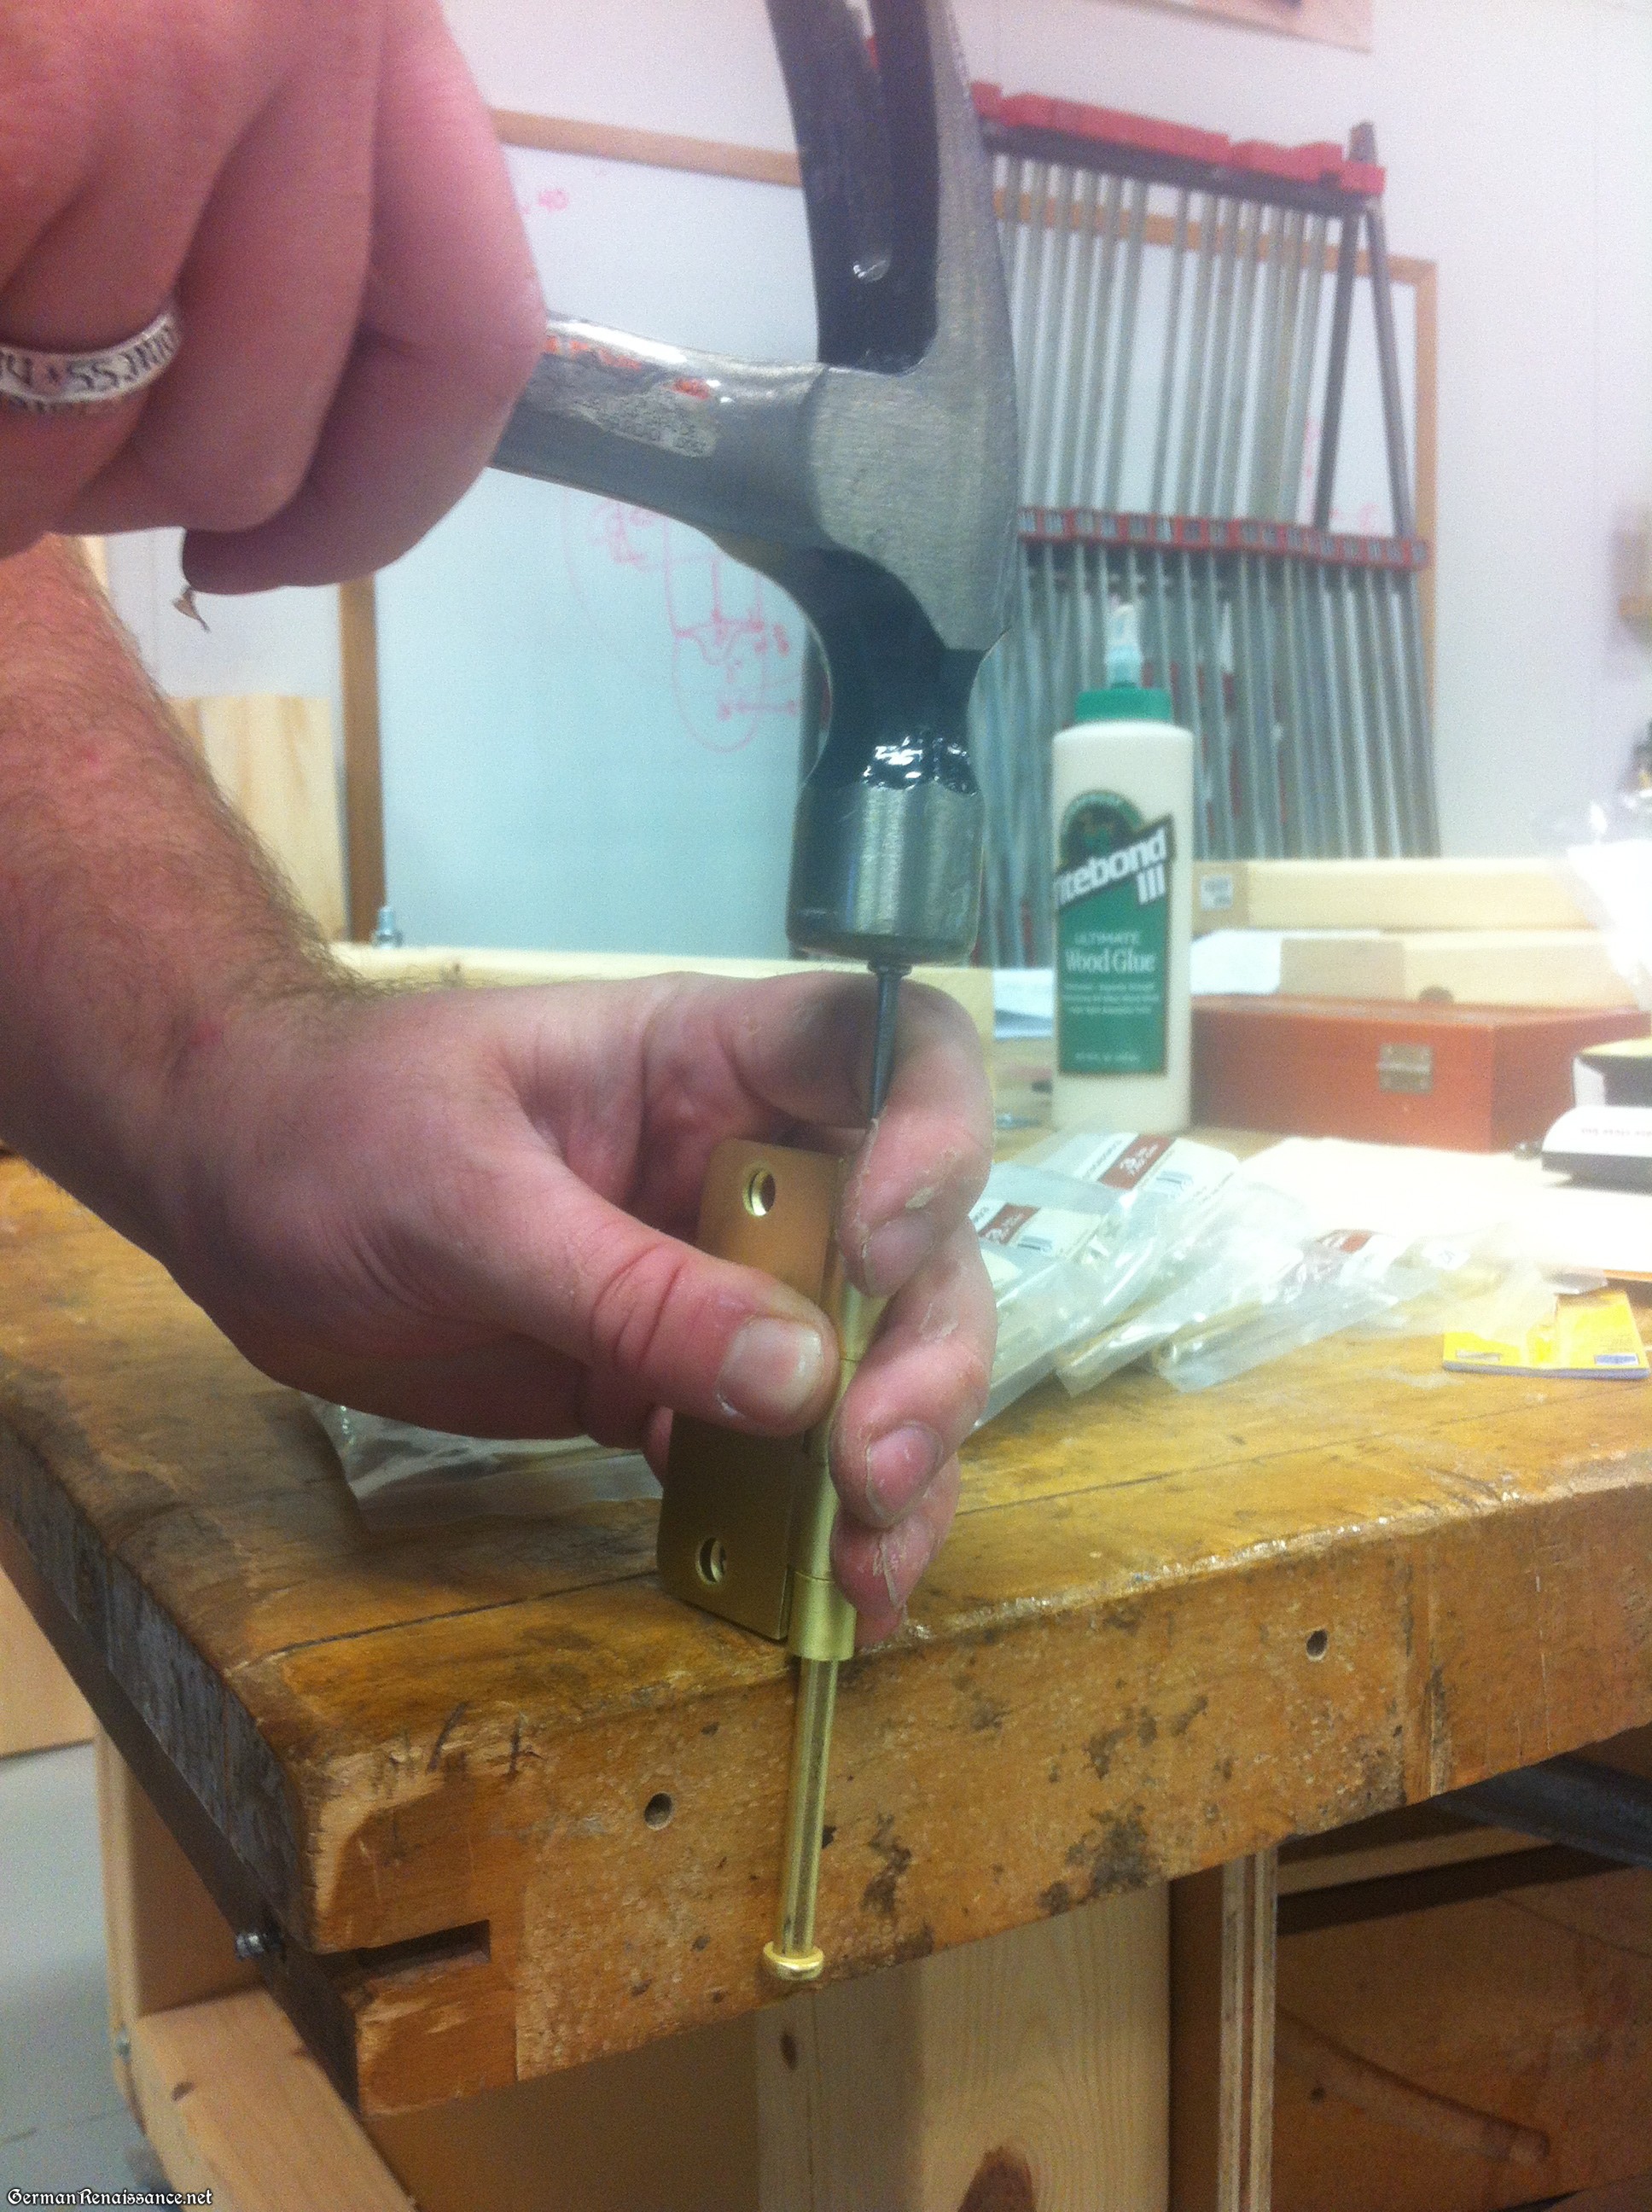
Removing the hinge pin
Hinge with pin removed
Step 9: Remove the pin again from the same hinge as in step 7 and tie a piece of string around the pin, then attach the string to board A. This ensures you never loose that pin. Re-insert the pin for now and set this assembly aside.
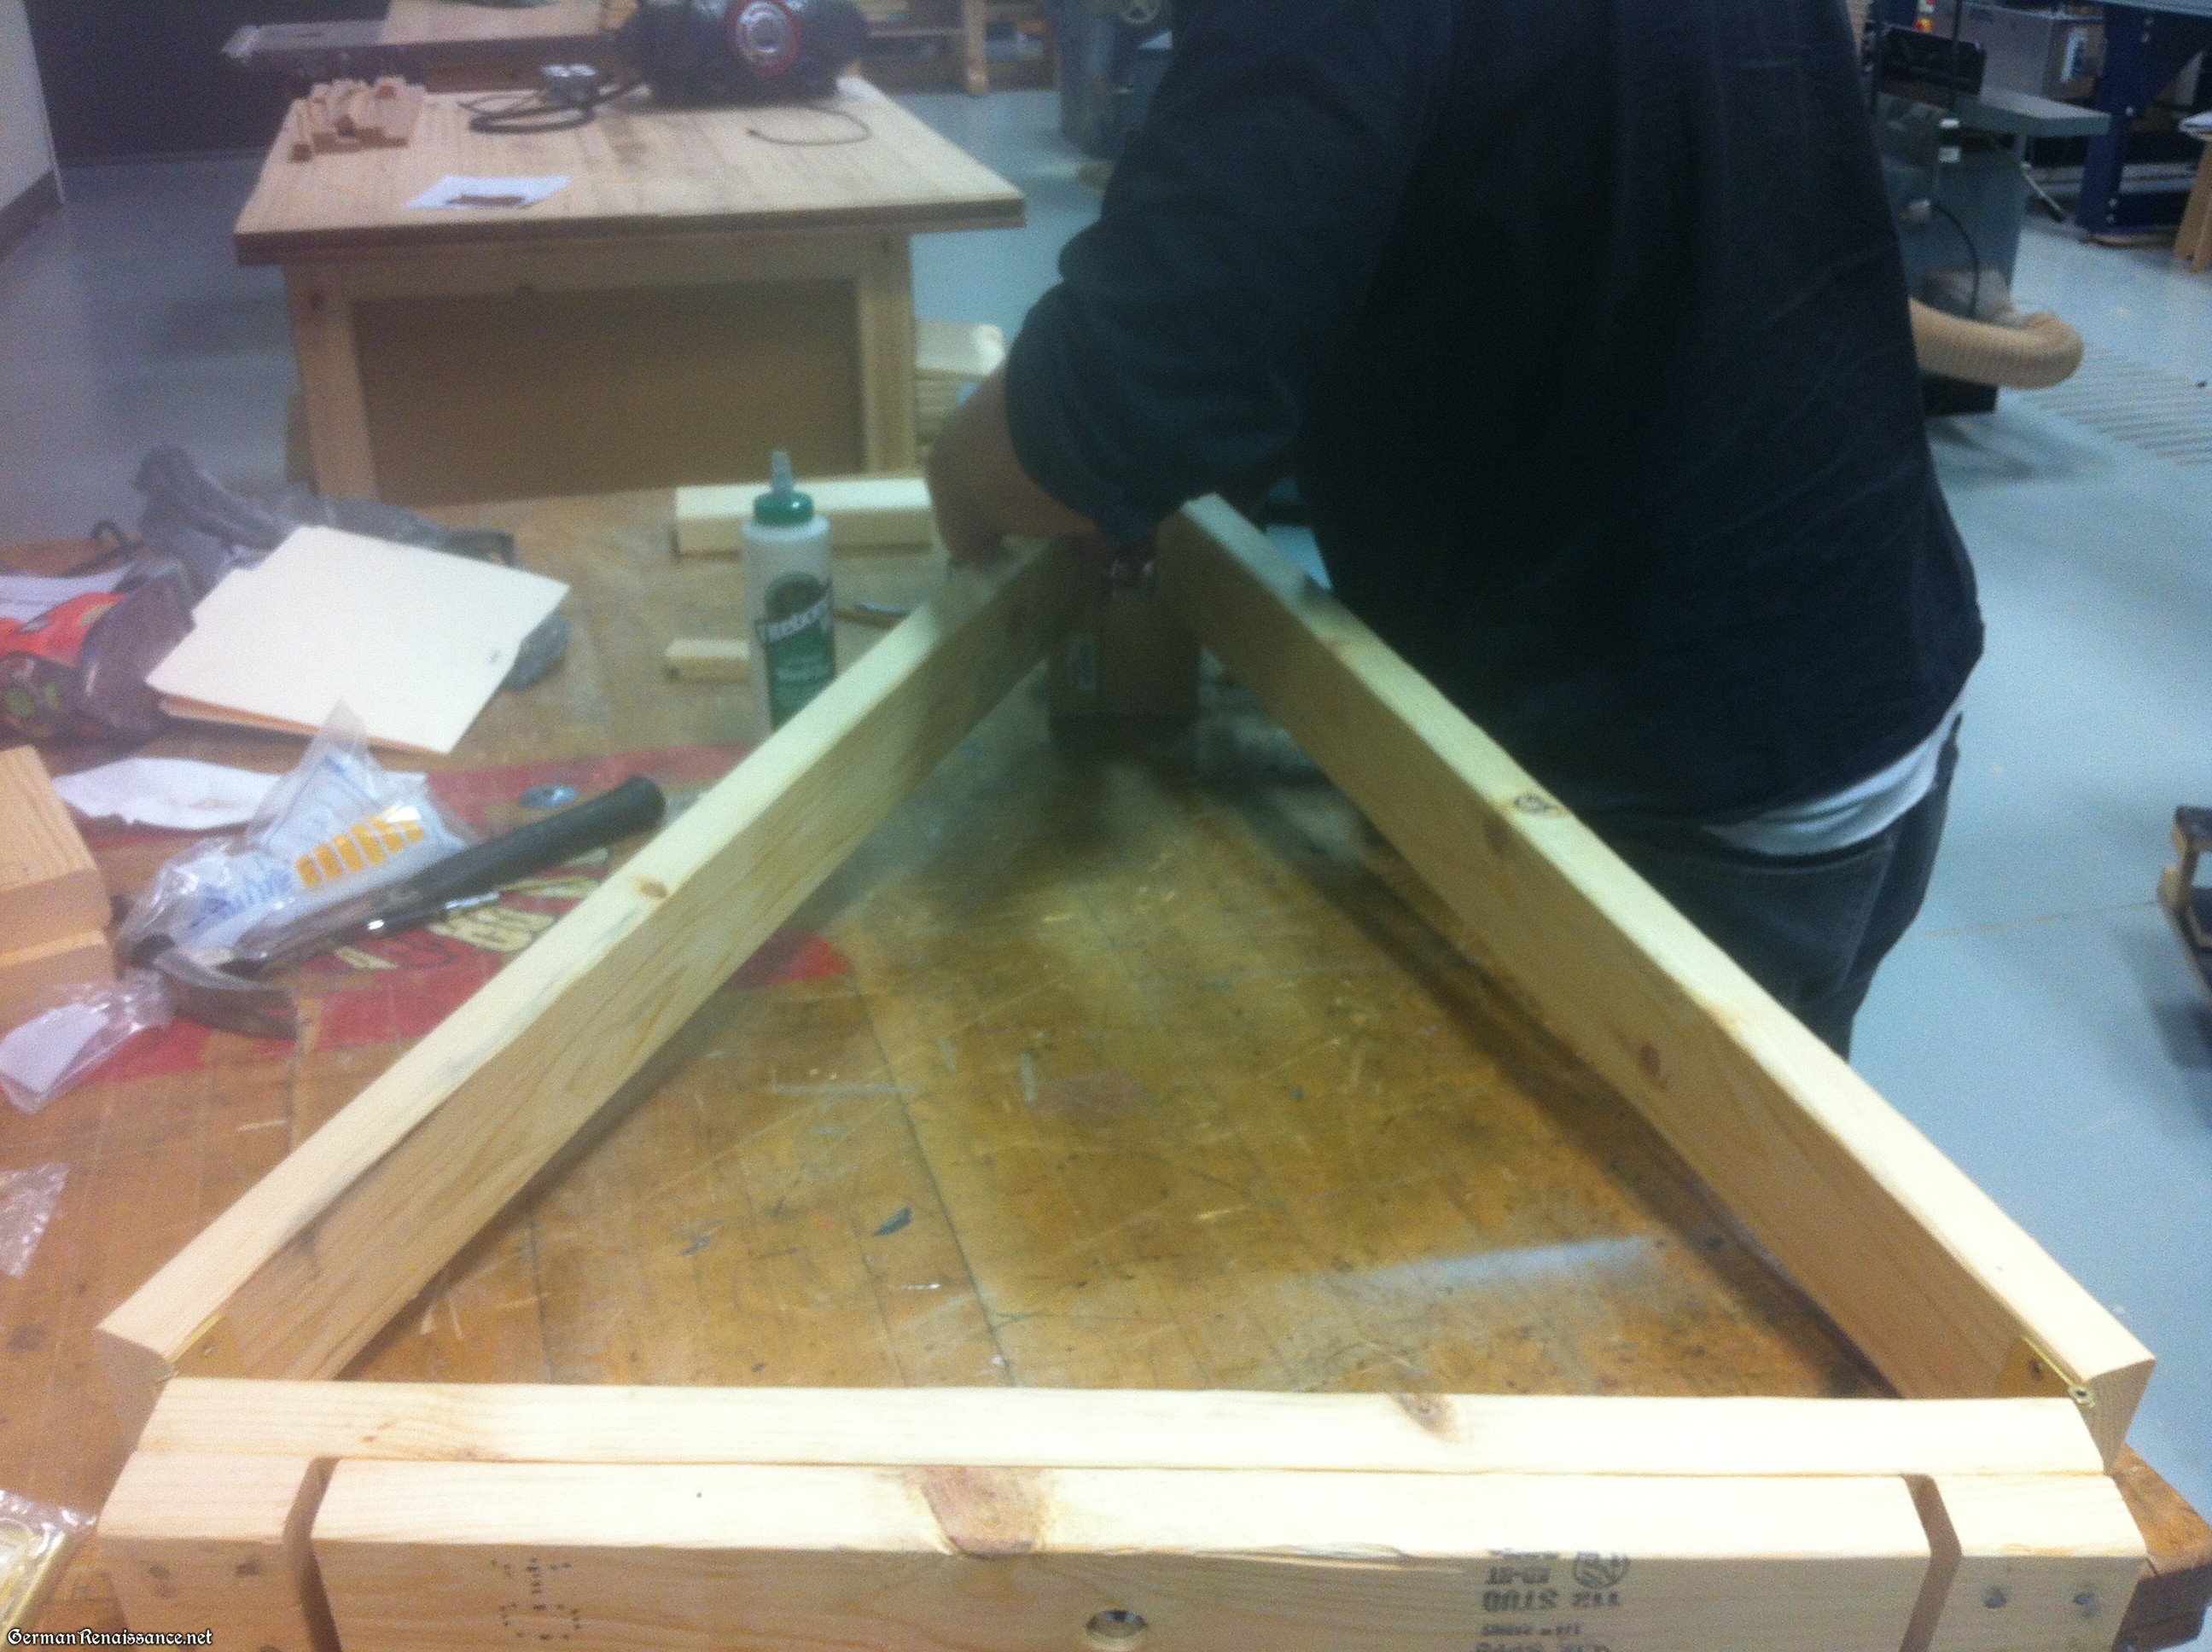
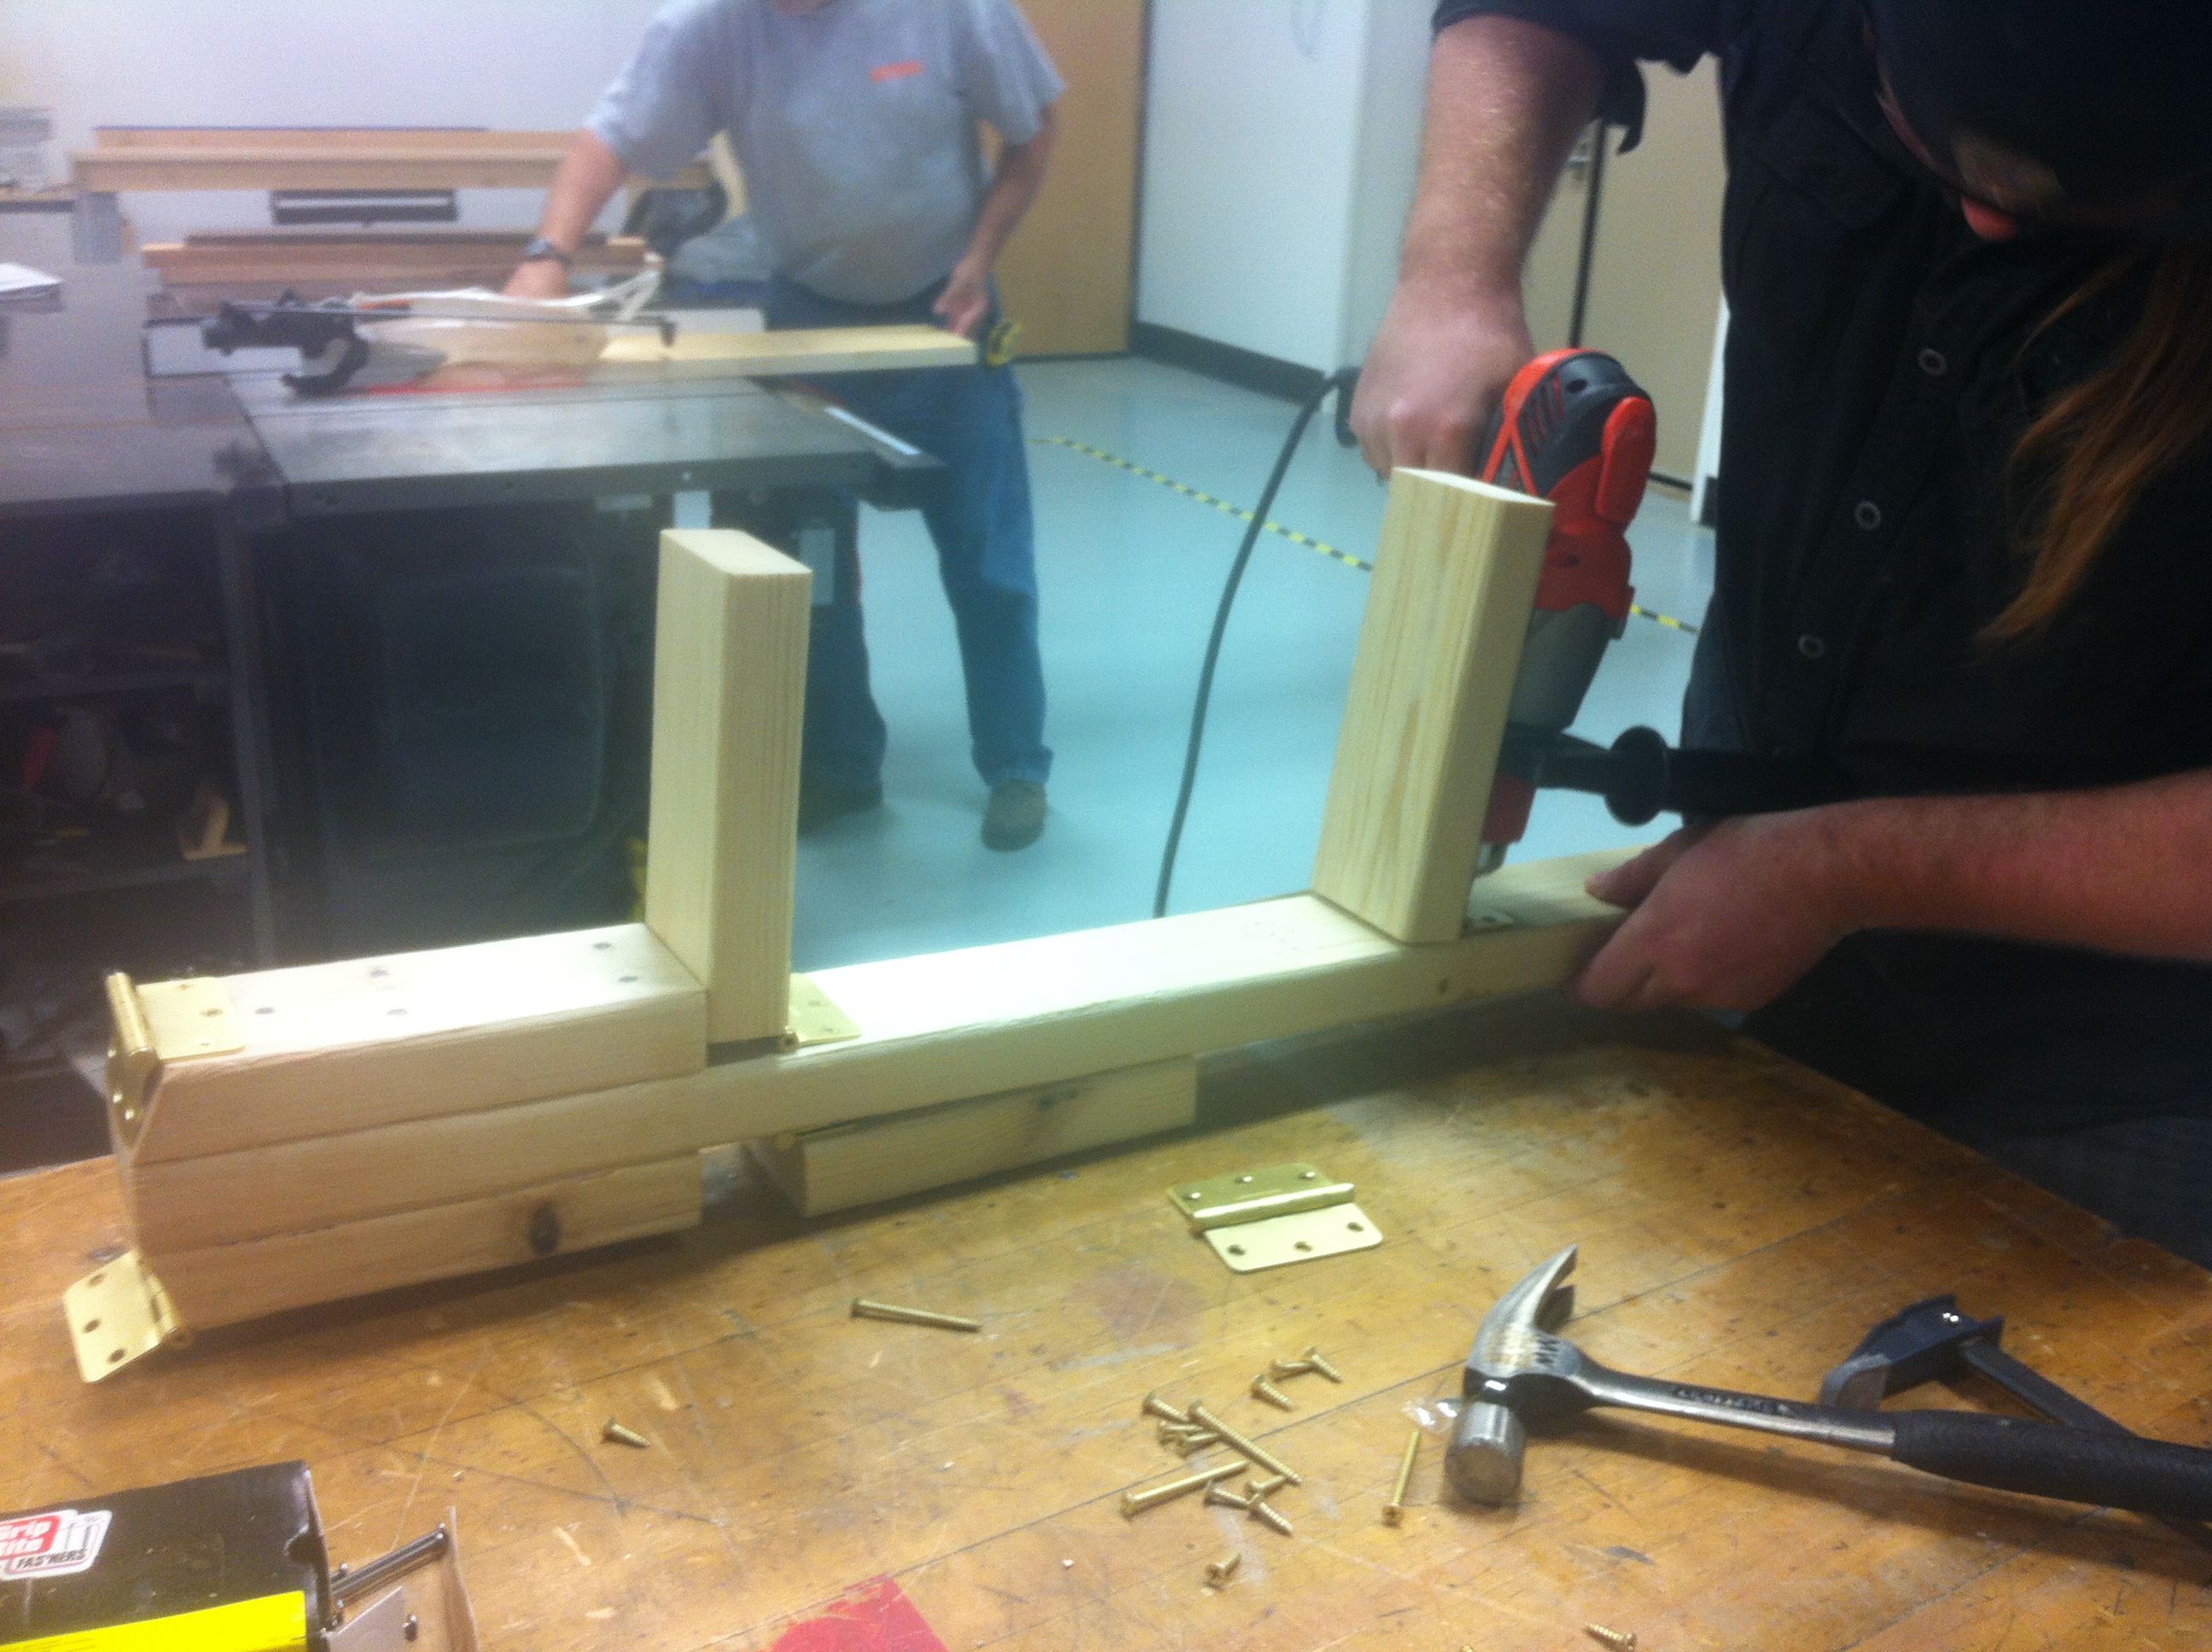
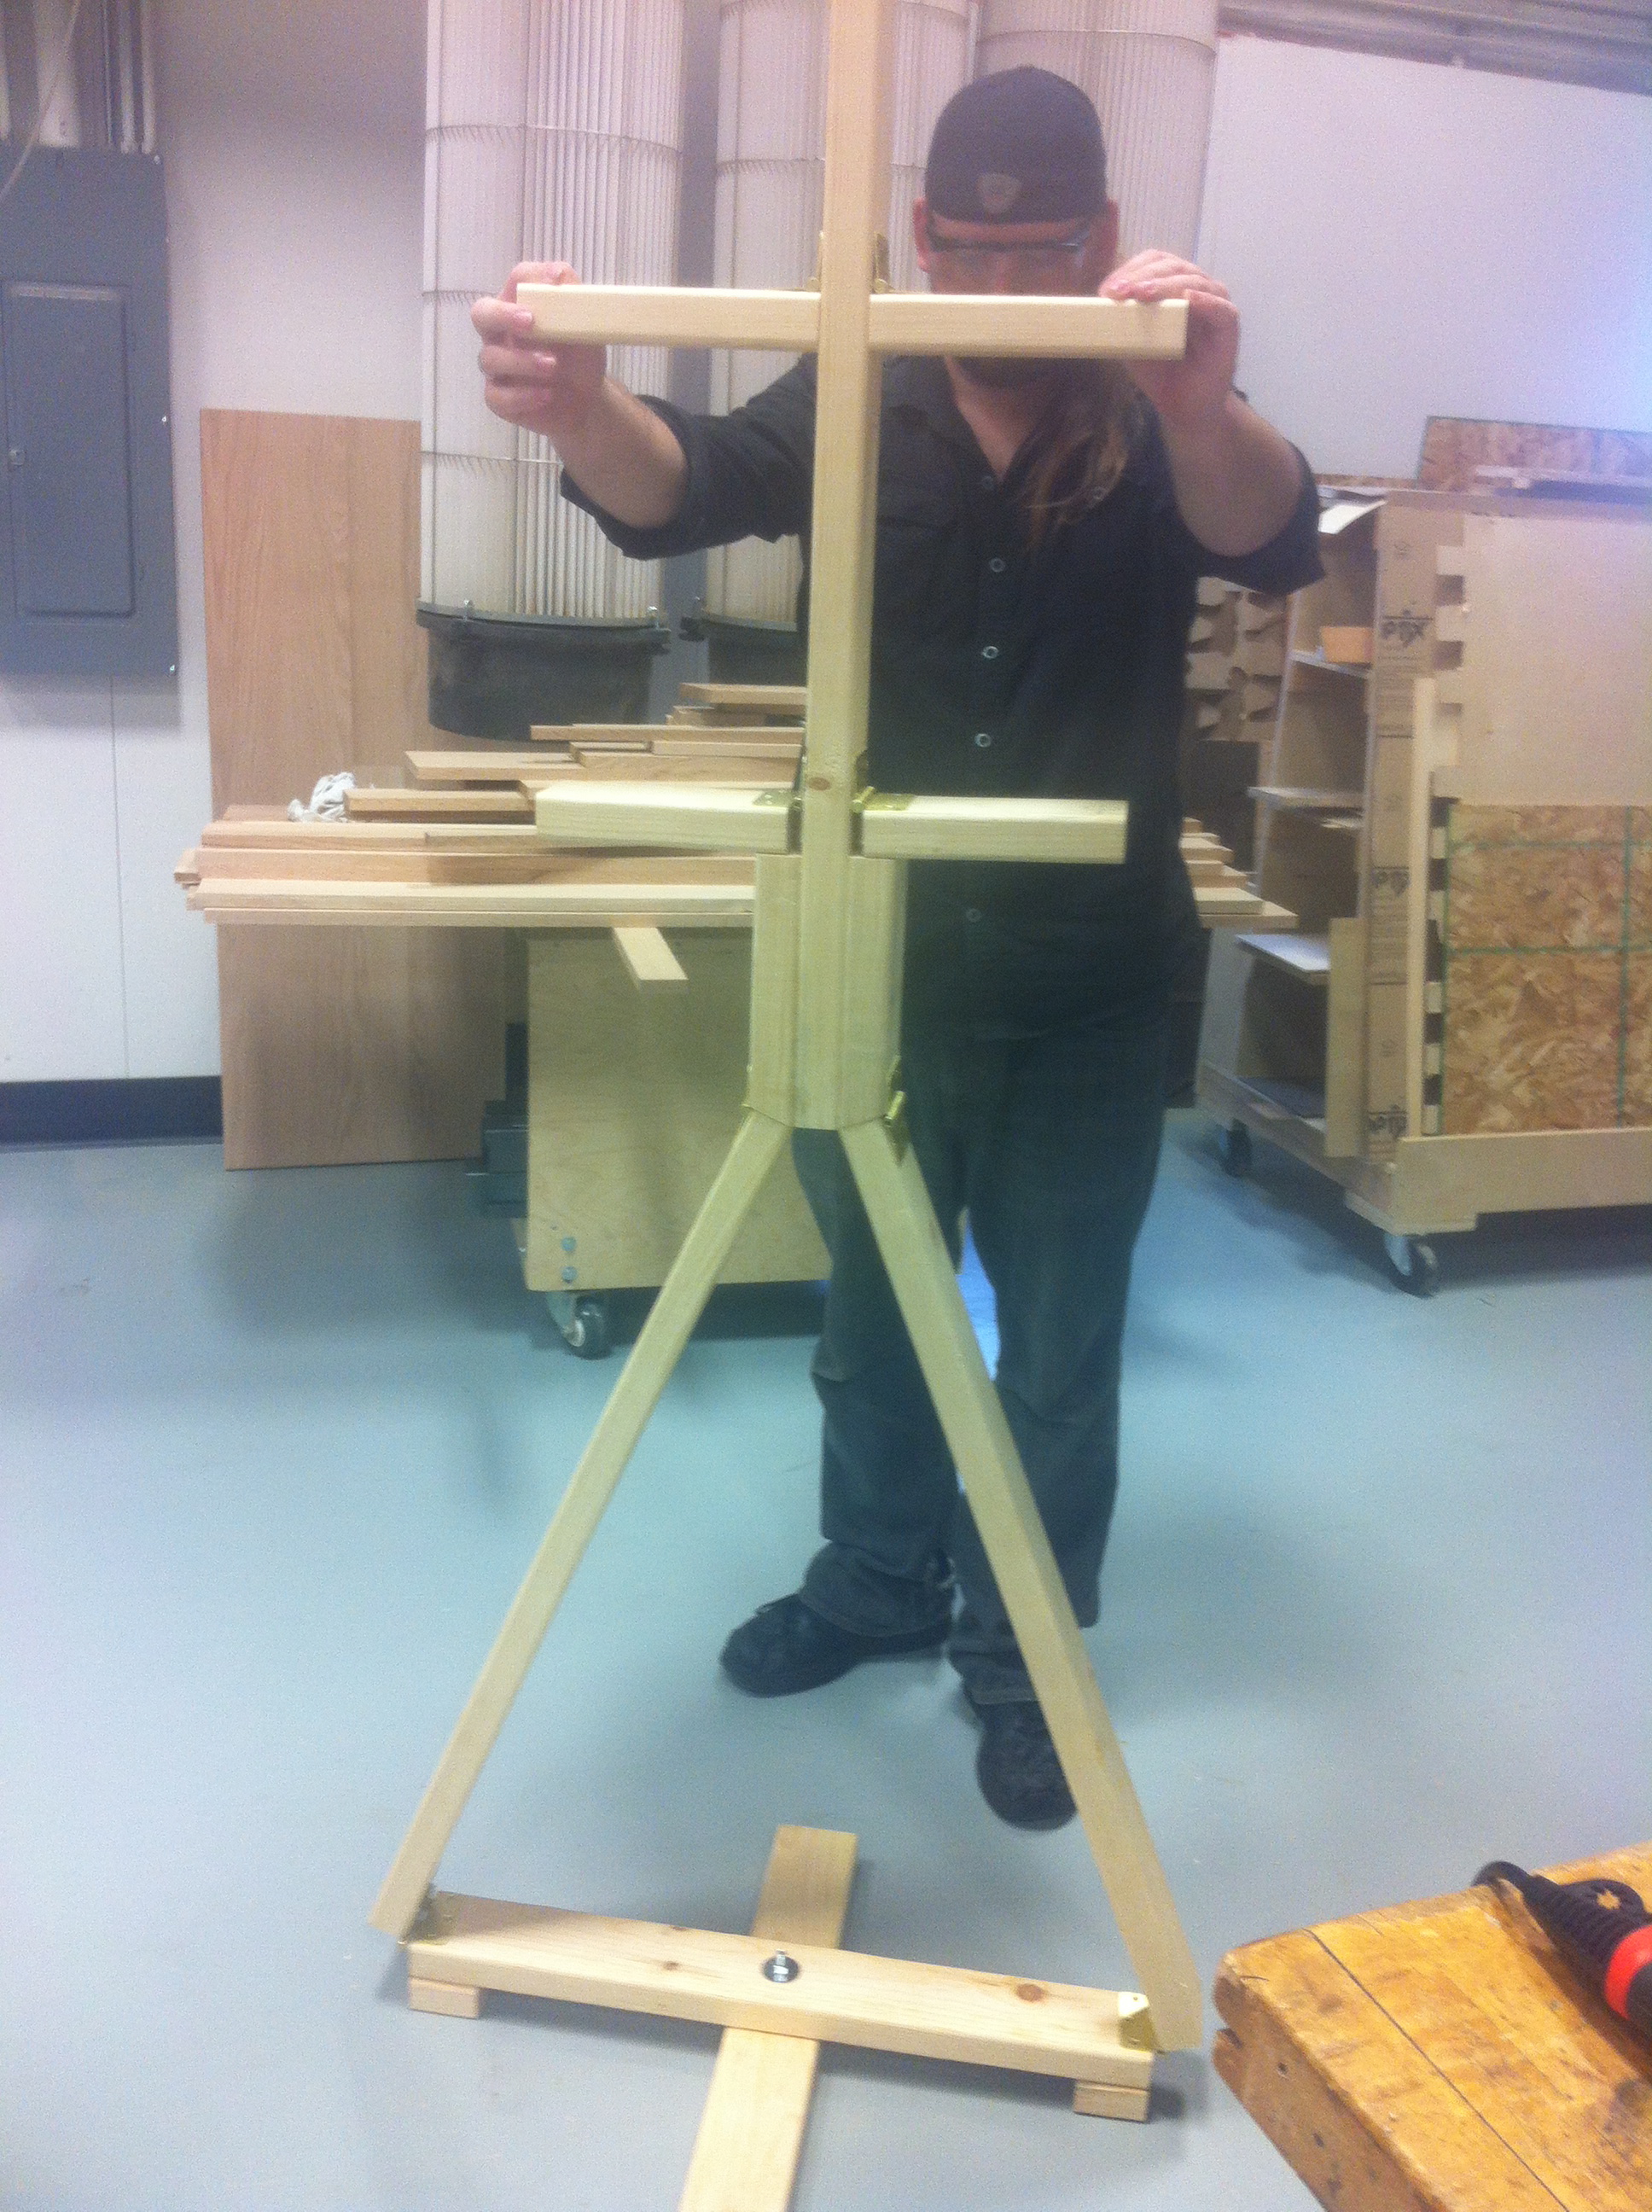
Step 10: Now that you have the base and two legs assembled, lay them flat on the ground and place board E (the torso board) in between at the top, flanked on either side by the H boards (joint boards). Lay them in a position relative to the legs as though it were all set up. Do not mount or attach hinges to boards E or H yet, but check their placement to insure no other screws will block the pre-drilled holes in the hinge plates. Now mark on the H joint boards the appropriate angle where the legs meet the H boards. A typical angle is 24°, but yours may vary if you significantly changed the measurements of your boards or with the placement of your hinges.
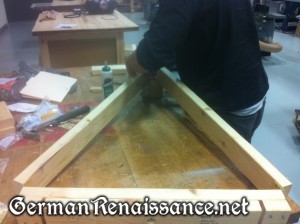

Step 11: Cut the joint boards (H) at the angle you determined in step 10 and attach them to the bottom of board (E).
Step 12: Attach the hinges to the joint boards (H). Make sure that when everything comes together that it fits snugly — if it is too loose, your armor stand will have a tendency to sway. Do not yet attach the other side of those hinges to your leg boards — it’ll be easier if you do that at the end.

Step 13: Attach the hinges between the hip boards (F) and the torso board (E), making sure to test fit them first. Leave about a 1/4″ between the F hip board and the H joint board, allowing the F board to fold down without being obstructed.

Step 14: Attach the hinges between the shoulder boards (G) and the torso board (E).

Step 15: Now finally attach the hinges at the joint boards (H) to the leg boards (E).
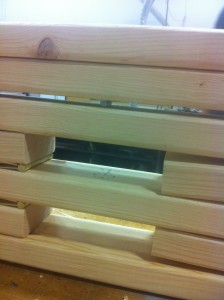
Step 16: Fold down your armor stand to make sure it folds neatly. If the bolt gets in the way of folding, as shown in the photo below, you may wish to drill a small recess in one of the leg boards so it folds flatter.
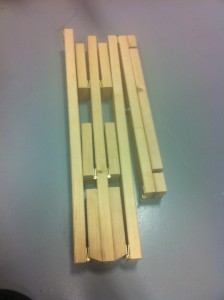

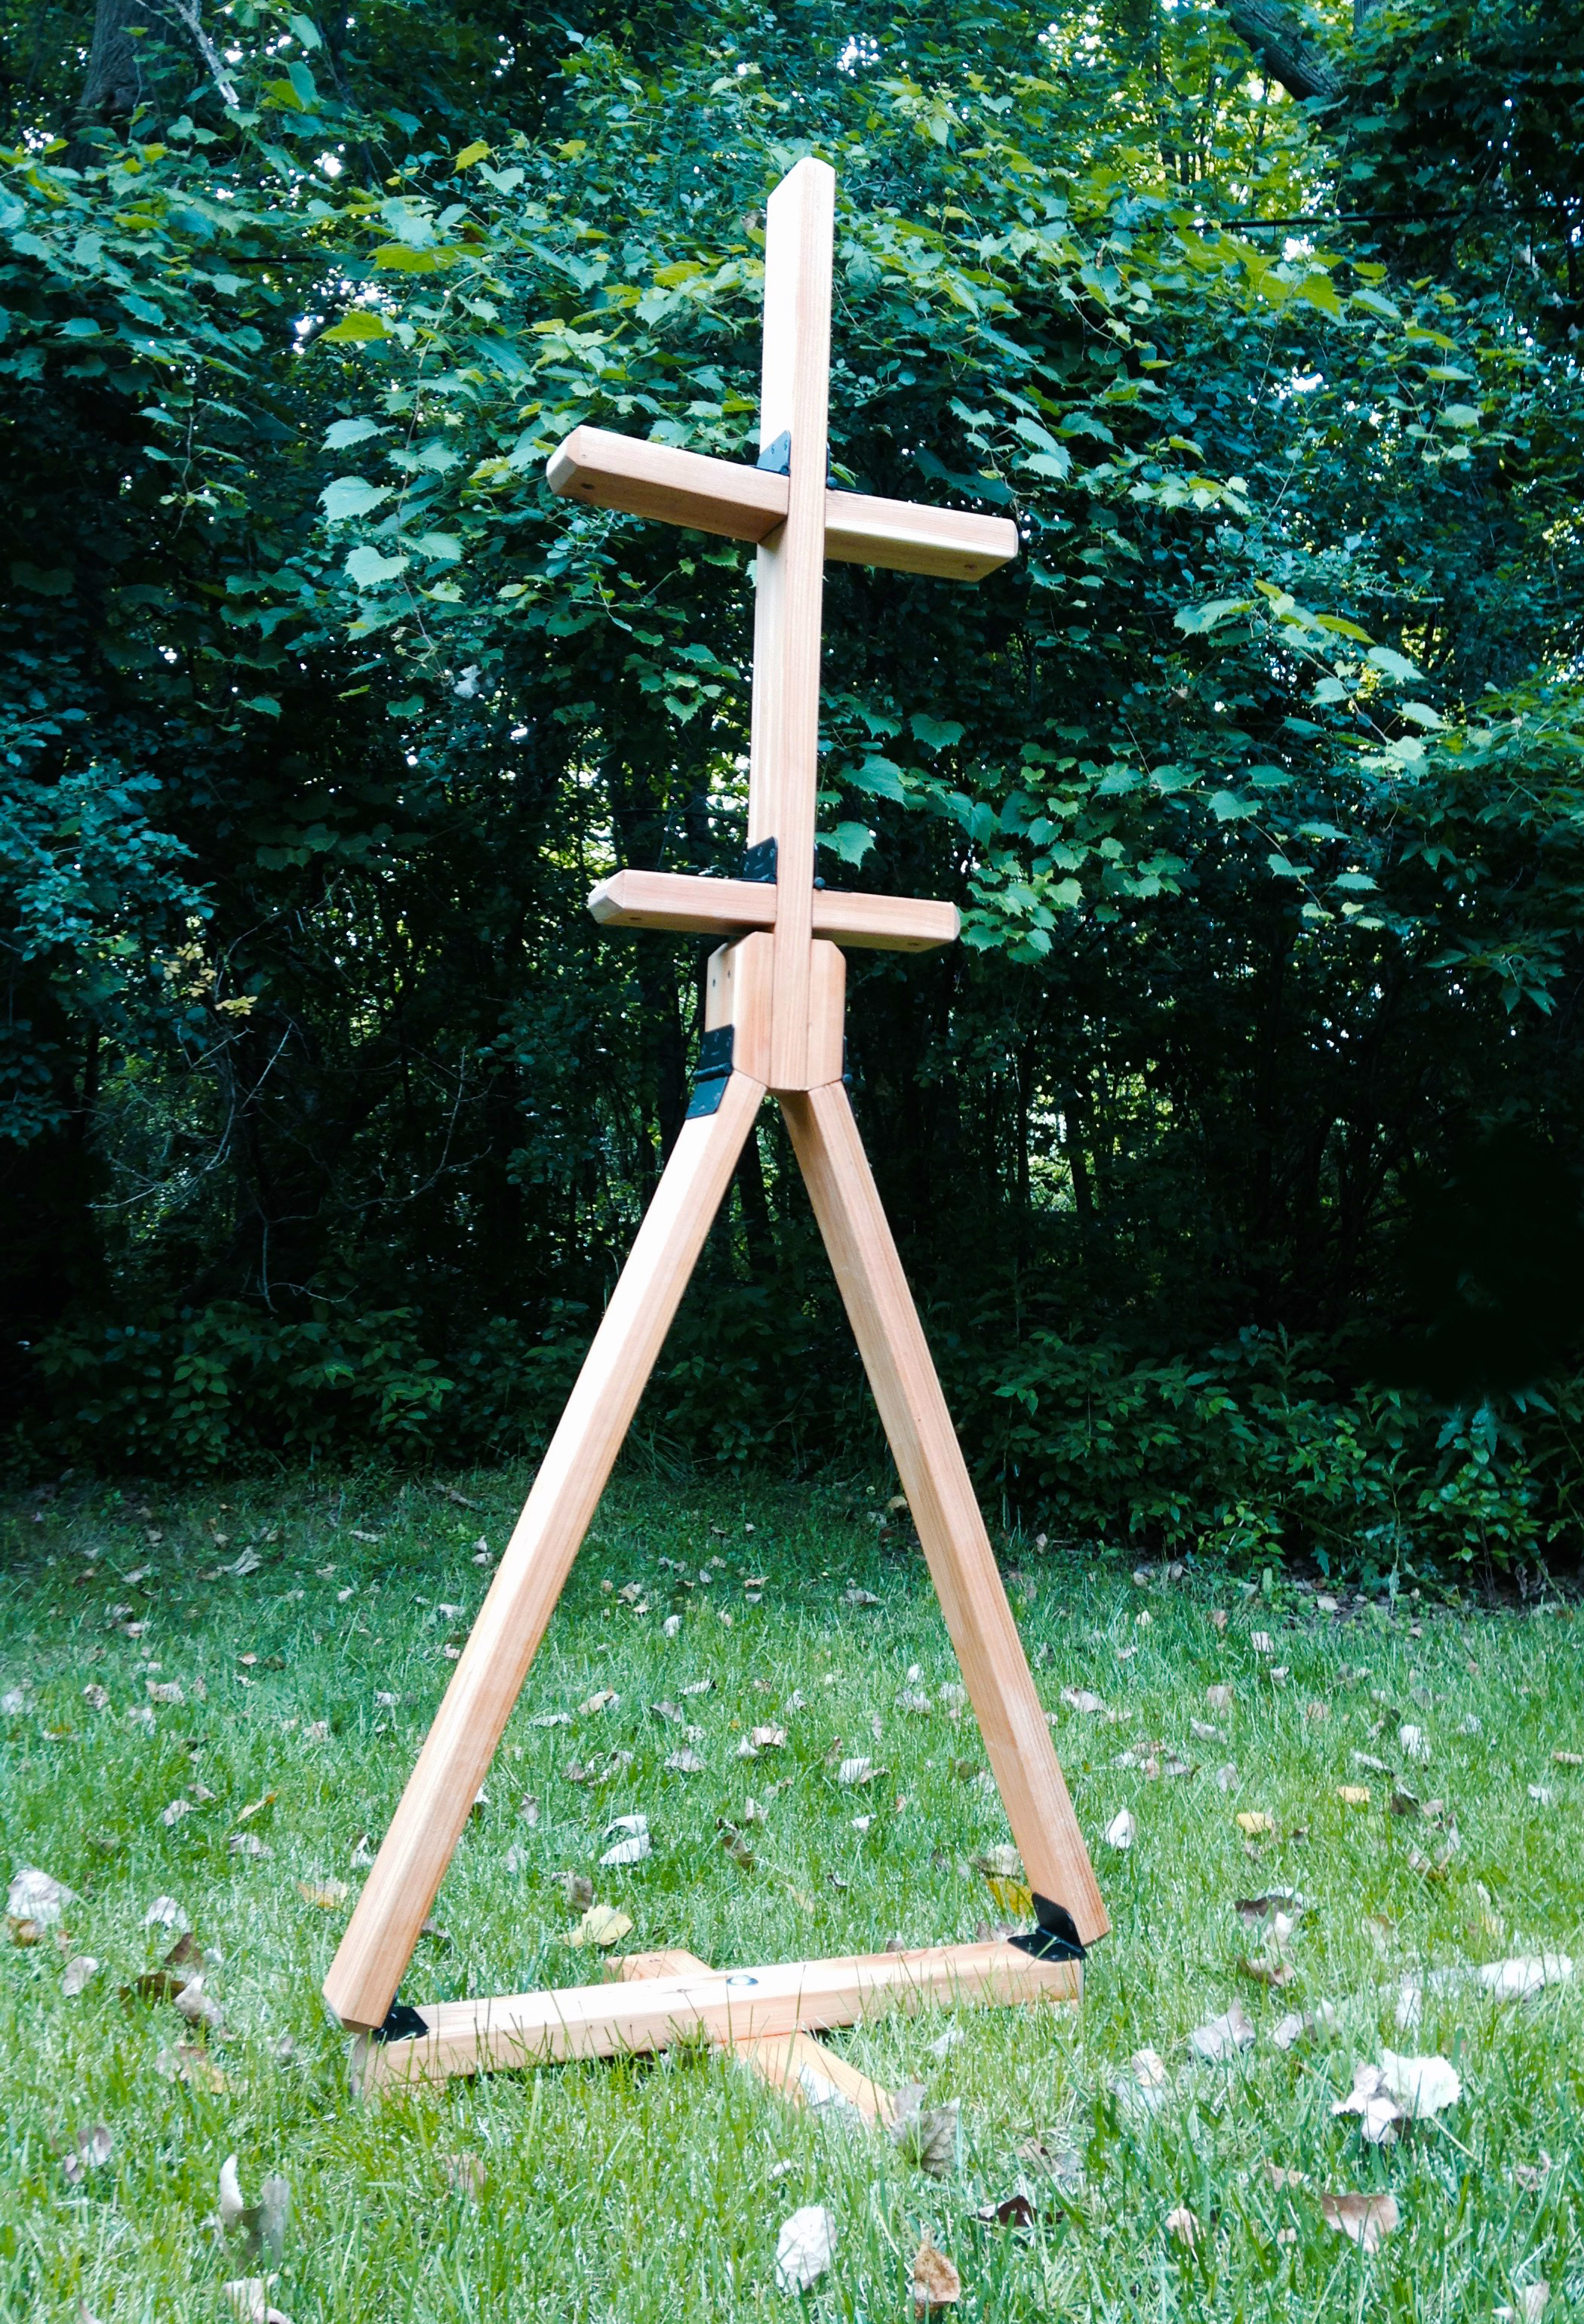
Voila! You have an armor stand.

Gregor’s armor stand made in 2012
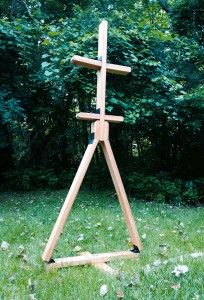
The armor stand Gregor made for Baron Ermenrich in 2015
Optional: Consider putting holes in the baseboards so you can stake it to the ground in windy weather. You may also want to add holes in the hip boards or shoulder boards if you have things you need to need to hang from your stand.
If you have questions, please let us know! The armor stand will be on display, along with handouts on how to make it, at Gregor’s “Enhance Your Camp” class on Thursday, July 30 at 4:00-5:00 pm, located in Camp Cynnabar (W02). Here’s the actual class description:
“Join us at our camp to learn about how to make personal camp improvements that can enhance both its appearance as well as your own quality of life. Most projects are made from wood with basic tools and do not require special knowledge, skills, or equipment. Handouts will be available for each camp project ($1/handout), including our camp cart, kitchen worktable, sink with foot pump, trestle table, benches, chairs, clothes rack, armor stand, canvas organizer, and more.”

 We’re just about to leave for Pennsic 44! Here are all the handouts we’ve prepared for our five classes this year at Pennsic — each one is in PDF format.
 round-pavilion-sides-straight-template