A Dressmaker’s Pell: Making My Own Dressform from Duct Tape!

3 July 2011

Last night’s pattern making went well, but this morning I decided I needed a way to see the muslin dresses better. I guess I wasn’t quite confident to cut out my linen without knowing that the dress really is constructed right. So this morning I got up and researched dressforms. I learned they are expensive to buy, but cheap to make if you have a bit of patience and a few easy-to-obtain supplies. So I went out and got a 60-yard roll of duct tape and some fiberfill (about $20 altogether). I put on an old t-shirt and began covering my torso carefully with duct tape.

Taping myself up

Notes: The t-shirt I chose was close-fitting, but not super tight. And it was important it be a bit long so I could continue the duct tape down over my hips. You want to tape yourself closely, but not so tight that it compresses or changes the shape of your body at all. This is NOT the time to suck in your tummy! The taping goes much faster and easier if you have a helper, but I did not … and I still managed to do it. The upper back was very difficult, and I couldn’t quite get it all. I just did the major parts (across the shoulders and over the shoulders) and that worked fine until later. For reinforcement, you’ll want to do on layer where the tape is mostly horizontal (wrapping around) and a second layer with the tape vertical — this will help your tape job keep its form after you later remove it.

Tip: If you try to do this yourself as I did, cut off strips of tape in advance and line them up on a safe surface. It makes the whole process go faster!

"Cross your heart"

You’ll want to pay particular attention to your curvy bits so you retain them properly in your dressform. I did the “cross your heart” method on my chest and it worked pretty well for me. You’ll want to use shorter bits of tape to stay true to your curves. I look like I’ve got some sort of weird duct tape armor harness on in this photo!

By the way, you’ll want to wear appropriate undergarments when you do this, or your dressform won’t drape your clothing in the way you want.

After I was all taped up, or at least as much as I could manage on my own, it was time to cut it off. If you have a helper, they could cut the tape and shirt up the back. As I did not, I cut it right down the front.

Note: Do not use your best scissors for this job. The duct tape will leave gummy residue on your scissors … blech!

Cutting off my taped shirt

Tip: Be really careful when cutting the shirt off that you don’t cut anything else you may be wearing. I thought I was doing well until I realized I’d cut a little snip out of one of my favorite skirts. I think I can mend it, but still … what a pain!

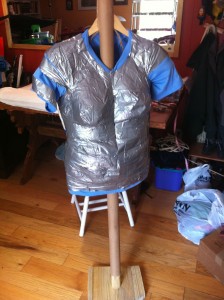
Once the duct taped shirt is off, you’ll want to tape the cut seam back up. Be sure this is well taped, because this seam will be under a lot of pressure later. Now you’ll want to stuff your dressform with fiberfill, or something similar. Before I stuffed mine, I mounted it on a pole (thick dowel from Lowe’s) which is screwed to a base made of leftover wood from my trestle table. I then attached a hanger to the top of the pole, making sure the “shoulders” of the hanger were at the same height as my own with my shoes on. It was important to me that the dressform be the same height as me so I could use it to hem my skirts!

My unstuffed dressform on a homemade stand


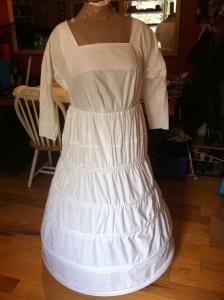
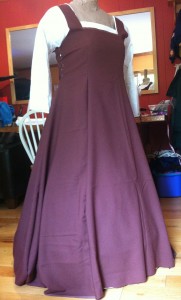
Once you’ve got your dressform the way you want it (you could also just put the hanger in it, close up the bottom, and not use a stand), it’s time to stuff it! I used cheap polyester fiberfill, but you could probably use whatever you had that wasn’t too heavy. Be sure to pack the stuff in well so you don’t have areas that are too soft or curves that are pushed in (or get pushed in later when you’re putting clothing on it). When I was done with the stuffing (it took me 2.5 bags), I made a neck out of a bit of leftover muslin and some duct tape. I then reinforced the top of the dressform with more duct tape, this time using a tan color (“cookie dough”) so it would look a bit more natural. I double-checked that the dressform was the same height as me, as well as double-checked its measurements against my own. It worked! I dressed it up in the smock I made last night and my farthingale… looks pretty good, I think! And when I tried the kirtle on it, remembering to pin up the straps a bit, I could see that the kirtle pattern I drafted does indeed look good, and I’m ready to make the real thing!

My completed dressform!


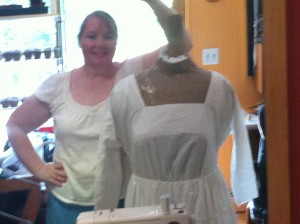
As I was making this dressform, I couldn’t help but think of Gregor’s pell and how he made it to his own measurements. Well, this is MY pell! I can use it to practice my art without fear of running myself through with a stick pin!

Me and my new dressform!


Drafting Patterns for Smocks and Kirtles

3 July 2011

I finally got the chance tonight to begin my Pennsic garb sewing. I decided to start with the simplest garment, the smock, and work my way out. I drafted a pattern based on my measurements and the instructions at http://www.elizabethancostume.net/smockpat/. I cut out some inexpensive muslin, sewed it, and it worked!! The smock was surprisingly easy to make and looked good. The only thing I’d change from my original pattern are the sleeves — I want them to be a bit wider and a bit longer — I think an inch at least.

So after my success with the smock, I moved on to the kirtle. I didn’t have any muslin for that, so I raided my stash of cheap fabrics procured from Scrap Box (recycled materials shop) which cost nearly nothing to me. I found some ugly brown twill that I think must be at least part polyester (but it wasn’t stretchy!) and used it to make a kirtle. Again, I drafted a custom pattern from my measurements and these directions: http://www.elizabethancostume.net/kirtlepat/gored.html. I decided to go with an A-Line Kirtle because I like the option of wearing my farthingale under it. The first try worked pretty well, though I think the shoulder straps need to be a bit shorter and the waist narrower. Those are both very easy to fix when I go to use the actual linen for the real kirtle. I tried my farthingale under it and it looked good.

Unfortunately, I didn’t measure the brown fabric before I cut it, so I’m not sure how much material I needed. If I were to guess, I’d say between 3 and 4 yards. The circumference of the skirt bottom is 132″, but I pieced it to make the most of the material. I think I’ll take apart the brown test kirtle apart and lay it out on my linen, using it as a pattern.

All in all, great progress for the evening! Once the patterns are down, I think I’ll be able to cut and sew these pretty easily.

More Thoughts on the Flemish Gown: Colors and Variations

29 June 2011

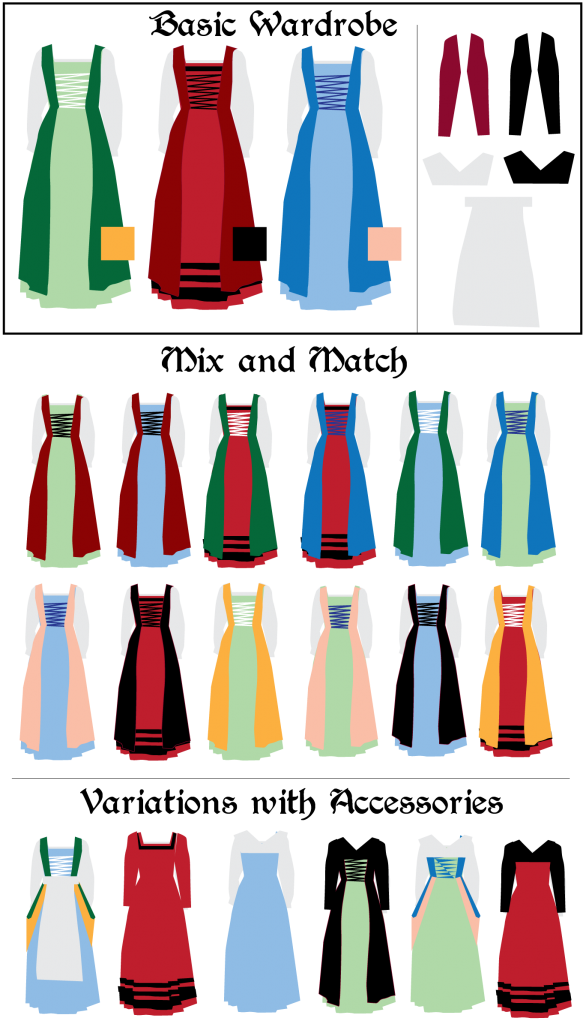
Thanks to the kind feedback at sca-garb, I am now feeling excited about making the linen Flemish Gown and excited about what I can do with it! If I make three complete reversible gowns and a few accessories, all in carefully chosen colors, I can actually get like 30 outfits out of it … maybe more, I didn’t keep going with all the permutations. Here’s what I have in mind right now — the color square next to each gown under the Basic Wardrobe is the reverse side of the overdress, and the accessories include two sets of tie-on sleeves, two partlets, and one apron.

I would like to put guarding on the bottom of the red kirtle, to give it a different look. I could also trim some of the other kirtles in various ways to dress them up a bit. I think this is really wonderful, and I can’t wait to get started! I think I will begin with the first outfit shown at the top, and have that ready for the Saline Celtic Festival demo in 10 days. I already have the linen I need in dark green, white, and gold — and I have extra white linen I can try to dye light green. Think I can do it?

The Flemish Gown

28 June 2011

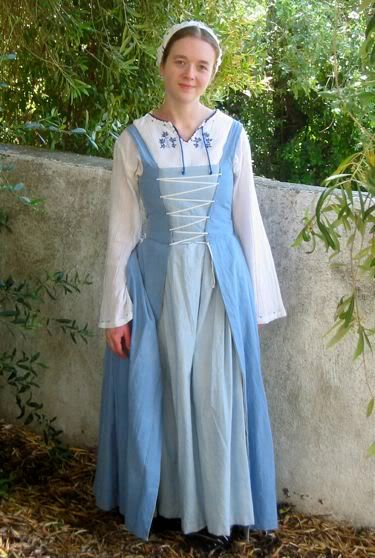
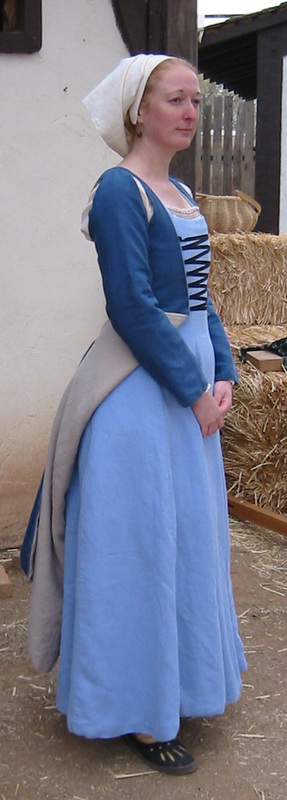
It’s time to set aside the woodworking and start making garb for Pennsic! I’ve been trying to find the right thing to sew for some time now — my requirements are that it be cool, comfortable, historically accurate, and aesthetically pleasing to ME. I’ve had a few frustrating days, but I think I’ve finally found a simple style that will work for my Pennsic garb: The Flemish Gown. The gown is based on dresses worn by Flemish woman in the 15th century, so I’m in the right timeframe for my persona, albeit a wee bit off geographically. But I was never planning to stick to one culture or time period for my garb — I plan to branch out as that exploration interests me anyway. But still, I really like the way the Flemish Gown looks — here are some photos:

And here are some original sources that depict the dress:


The Four Elements (Joachim Beuckelaer)

Two Cooks and a Boy (Huybrecht Beuckeleer)


Besides the fact that this dress is very appealing to me, it is also very versatile. The underdress (kirtle) and overdress (gown) are separate, so if I chose my colors well, I could pair them together in different ways to achieve different outfits. If I managed to make three kirtles and three overdresses, that would give me nine different-looking outfits! That would suit me well, I think.

And as you can see by the photos above, the skirt can be worn tucked up (kirtled) or pinned back, further changing it. Of course, I’m not yet sure how hard it will be to make, but this is the best idea I’ve had yet, so I think I should try it. Here are the best directions I’ve found on how to make it: http://www.elizabethancostume.net/lowerclass/makeflem.html

So for my future reference, here are a whole bunch of links to other blogs from seamstresses who have made this gown:

Heather’s Pages (she made the kirtle reversible, which I think is a great idea!)

icklesevvy’s Flemish Front (she made everything fully reversible)

The Dreamstress

Philippa’s Wardrobe

Festive Attyre

I should probably first try to make the kirtle and underdress in an inexpensive muslin to avoid wasting any expensive linen. I shall report back as I work on this!

Cynnabar Fight Song

28 June 2011

This weekend at Cynnabar fighter practice (a “Kill and Grill”) we learned the new lyrics to the Cynnabar Fight Song, as follows:


Go forth and fight for Cynnabar

Beneath the dragon’s wing

Go forth and fight for Cynnabar

For baron and for king!

Very easy to remember and quite epic! To help me remember it, and hopefully learn the rest of the fight song, I recorded it. Here’s several of Cynnabar’s talented musicians teaching us and performing the song:


Here are the lyrics in full:

A New Cynnabar-Style Song for Fighting
(To the tune of ‘Nonesuch’)

Red Black and White our colors fly
So proud upon our tower
They show to all who fight with us
Our courage and our valor

CHORUS:
Go Forth and Fight for Cynnabar
Beneath the Dragon’s Wing
Go Forth and Fight for Cynnabar
For Baron and For King

Our mighty giant elephant
strikes terror in our foes
Impaling knaves upon his tusks
Their meat shall feed the crows

[CHORUS]

Our sweet saint Cynnabarius
Does bless our shining steel
His relics we will bear on high
To force our foes to kneel

[CHORUS]

Our fortress shall protect the land
No rogue nor cur admit
Our Barony is great and true
It never will submit

[CHORUS]

The Dragon’s blood runs through our veins
As hot as any fire
The tide of blood left in our wake
Is rising ever higher

[CHORUS]

Approval was obtained from each of the five musicians recorded in this video (thank you!)

Sabaton! The Medieval Steel Toe Boot

26 June 2011

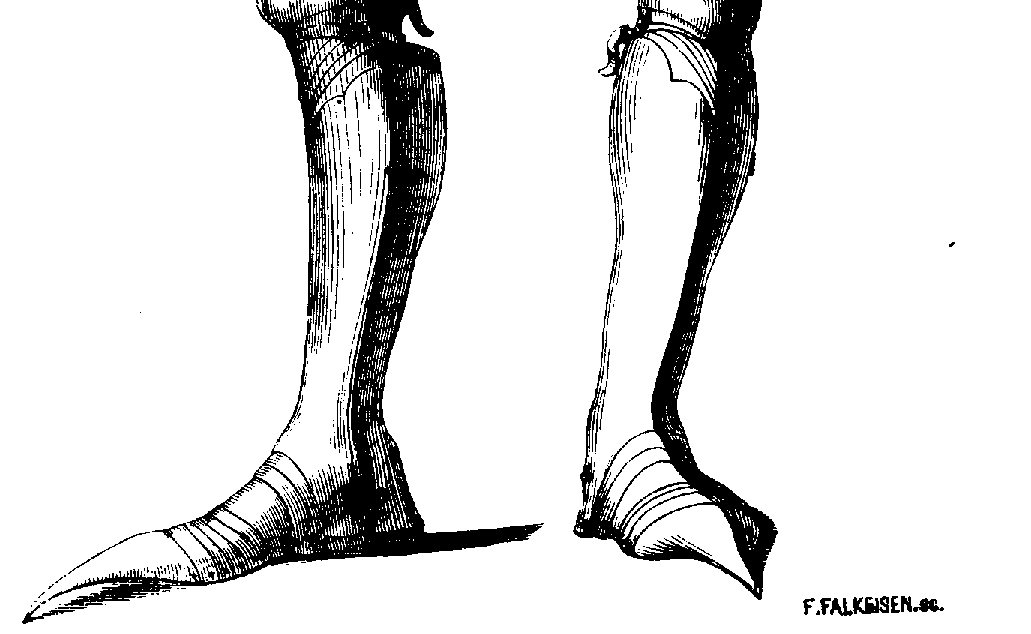
With mighty Pennsic just over the horizon, it’s time to buckle down and get some of my own projects done. First on my list is constructing a pair of medieval sabatons — I thought that they would be the perfect solution for not yet having historically accurate footwear and not wanting to show it! The sabotons shall, of course, be designed around German sabatons of the 15th century in shape, style and application of materials. However, I’ve never attempted to craft plate armor of any sort let alone a pair of curvacious and articulating plates shoes. Can I do it? Well, after seeing the great challenge that was the making of good period armor, and knowing of the vast quantity of modern tools and materials we now have at our disposal, I better be up to the challenge!

I shall be working closely with two shire brothers of mine — an experienced armorer, Master William the Sinister, and my good friend, Charles von Strausberg. I don’t want to cut any corners on this project and plan on using materials and tools as close as true to the period as possible: 16 ga. mild steel, quality leather, steel (or brass?) rivets and the like.

I have always liked the fully inclosing construction of the sabaton (except the bottom of course) and plan on doing the same. I started reading on just what exactly the armorer was looking for when they built the sabaton and just what sort of styles would have been correct. Lots to learn it seems. Amusingly, it turns out that the pointed toe sabatons of the 1300s and 1400s could be as long as 24″, but that the maximum length allowed actually was dependent on the rank of the wearer. As a combatant in the SCA, the concept of a long (absurdly long) toe would only get in the way and could be a potential safety risk to my fellow fighters. Thus I shall be adopting an modestly pointed toe for this particular project.

I choose to design sabatons that enclose the foot but that aren’t permanently attached to the boot. The concept of being able to change out footwear on a per event basis is quite appealing to me, to be honest. I also wanted to reinforce the gothic style of armor by running a fluted channel down the center to the toe.

After some simple sketches I choose to make a scale mock-up using cardboard. I ended up with a functional (and fitting!) design that ended up consisting of 8 overlapping components. I envisioned a belt and buckle design that will allow me to fasten the heel plate to the rest of the sabaton for reasons of convenience (not shown). So far I’m happy with the design, but its only cardboard — I’m looking foreword to seeing how well such a thing could be crafted in steel.

I’m still working on exactly how I want to attach the sabaton under the boot under. I’ve gone through a number of ideas, both modern and medieval, but have elected to take it step by step. I found it interesting that I choose to design functionality before historical accuracy but still ended up with a similar design in the end (imagine that!). For me first foray into armorworking, I’m seriously enjoying this.

PROJECT OVERVIEW

Current Time Spent: 1 hour 30 mins (for conceptual work and mock-up)

Current Cost: $ 0.00


A Gothic Chair: Making Progress On My Camp Chair!

25 June 2011

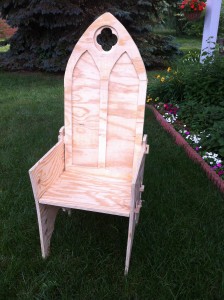
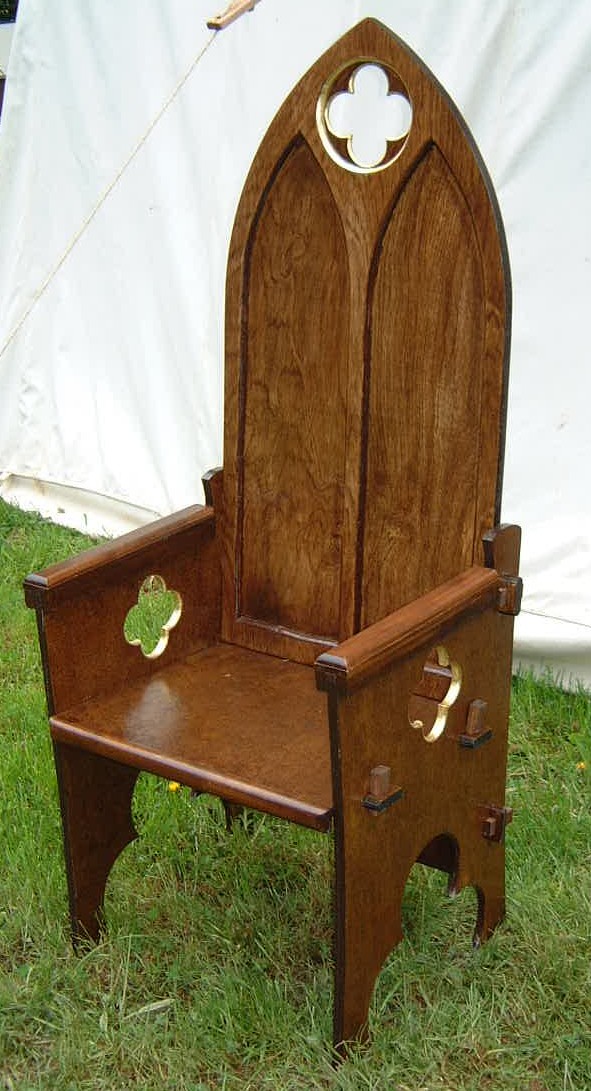
Have a seat, pull up a chair … my chair! I now have a gothic chair that breaks down for flat transport and goes together with just bits of wood (tenon keys). After deliberating for a while over what to do about the 12 mortice holes and how I was going to make them, I finally came up with a solution … the Dremel TrioTool. I LOVE this tool, It does everything necessary to make these woodworking projects — cuts, routs, and sands. You can even do a nice rounded edge for decoration. If you’re thinking about doing some projects and aren’t sure what tools to get, get the Dremel TrioTool — it only cost me $89 by using a 10% discount coupon from the post office (normally $99).

Anyway, enough about power tools … here’s the chair so far:

My Unfinished Gothic Chair


Side view of the chair

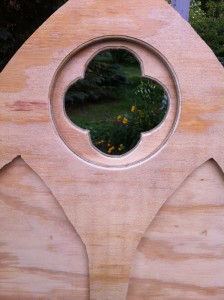
A closer view of the quatrefoil in the chair back

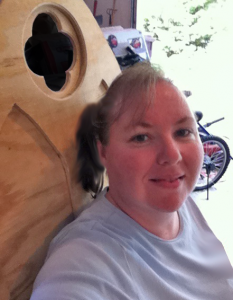
Me sitting in my new chair ... it works!

Things left to do:

  • Cut out quatrefoils in the sides of the chairs.
  • Make armrests
  • Make better tenon keys from oak
  • Sand everything
  • Stain it

But all in all, not bad for a day’s work! I spent a couple of hours yesterday, plus about five hours today.

A Gothic Chair: Making SCA Camp Furniture for Pennsic

23 June 2011

I think this weekend’s project will be to make some Gothic Chairs that come apart and fold flat for transport, like this:


Gothic Arch break-down chair by Master Rhys Terafan Greydragon

They look nice, fit in with our personas, and would appear to be comfy (especially with an added seat cushion). All the plans for them were generously posted by a fellow SCA member at http://www.greydragon.org/furniture/chairs/index.html

I will make my chairs from plywood, as he did. I don’t anticipate any problems, with one exception — the mortices! On my trestle table I had to make 8 and it was zero fun … each of these chairs has 12! TWELVE! Ugh. Still, these are the best looking chairs I see, so I shall try anyway.

How to Sew a Flat-Felled Seam (Making a Shade Canopy)

22 June 2011

To make our shade canopy, I needed to join two large 9′ x 12′ pieces of heavy canvas together. My research indicated a “flat-felled” seam would be the strongest for this type of sewing. The idea behind it is that it makes the join stronger  because two lines of stitches get run through each piece of fabric (plus it hides the raw edges to prevent them from unraveling). It took a while to wrap my head around how to do this seam, so once I figured it out, I took photos of each step. Here’s how to do a flat-felled seam:

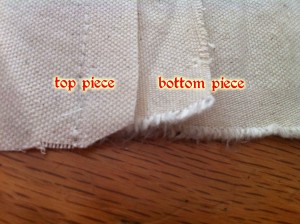
1. Place your two pieces of fabric (right sides together), but allow the bottom piece to stick out 1/2″ longer than the top piece. Stitch the two pieces together 1″ from the bottom piece (1/2″ from the top piece), as shown below:

Lay two pieces of fabric together, with the bottom extending out by 1/2" inch, and sew a line of stitching 1" in from the edge.


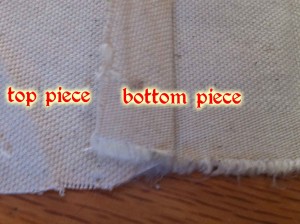
2. Flip the bottom piece out from under so the seam is lying flat, like this:

Flip the bottom piece out from under the top piece and lay flat


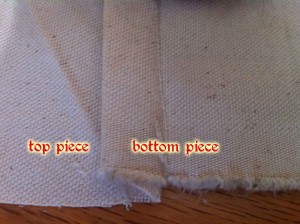
3. Lay the longer flap of the bottom piece over the shorter flap of the top piece, like this:

Lay the longer flap over the shorter flap


4. Now fold the longer flap over the shorter flap, and press flat, like this:


Fold the longer flap over the shorter flap


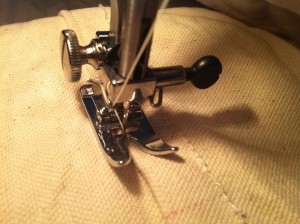
5. Sew a line to stitching to hold down the flap, like this:

Sewing the flap down


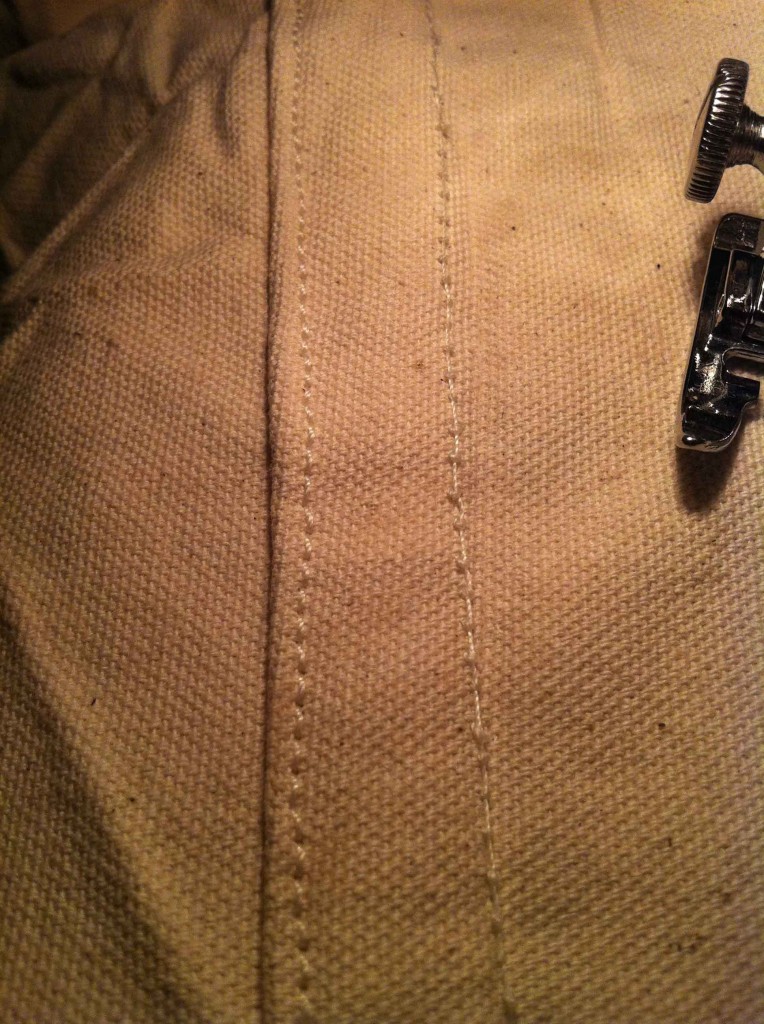
This is what the flat-felled seam looks like when finished:

A flat-felled seam

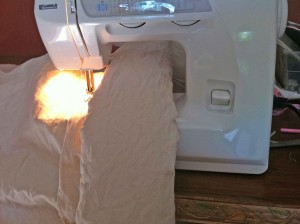
By the way, if you’re working with huge pieces of canvas as I am, you’ll find it difficult to maneuver all that material. So what I did was rolled up one edge of the canvas so it would fit into the sewing machine, and it worked very well. Here’s how I did it, in case it helps anyone else who is attempting to sew canvas with a regular, home sewing machine:

Roll or fold up one side of your material to sew the seam


By the way, I used a size 18 needle and extra-strength thread, and adjusted the tension on my sewing machine a bit, and it worked like a charm. No broken needles!

A Trestle Table for Under $35: How I Built a 15th-Century-Style Table for Pennsic From an Old Door and Pine Boards

19 June 2011

My Trestle Table

If you’re prone to dancing on tables, read no further. But if you want an authentic-looking, wooden trestle table that you can take to events, or even use as a craft table in your home, do I have some woodworking plans for you! You won’t be able to dance on this table, sure, but its lightweight tabletop is perfect for lugging about without breaking your back … or your wallet!


How did these plans come about? In 2011 I joined the SCA and I needed a table for camping at Pennsic, but I didn’t want to spend a fortune on it. I could buy a couple sheets of plywood, but I want to use this table year-round for crafts, so I preferred something that would look nicer. Alas, oak and even select pine is really pricey — $100 and up for the project. My solution? I combined an old recycled door (for the table top) with inexpensive pine (for the legs and spacers) for a 15th-century, St. Jerome-style trestle table that comes in at under $35.
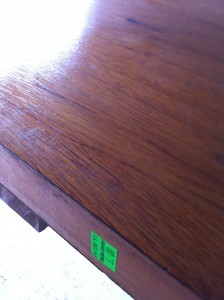
An Old Door for $5

What You Need:

  • 10 feet of 2″ x 4″ pine – $3
  • 10 feet of 2″ x 12″ pine – $10
  • 8 feet of 2″ x 10″ pine – $7
  • 1 36″ x 80″ hollow door slab – $5 at my local recycling center (or about $30 if you buy one new at Lowe’s)
  • Dowels- $1
  • 4 (four) 1″x 2″ x 8″ firring strips – $3.20
  • 1 12″ x 24″ x 1/2″ oak board – $3
  • Wood glue – $2

Total for the Table: $34.20

Optional Extras to Make Your Table Fancier:

  • Stain (Minwax Polyshades Antique Walnut Gloss) – $12
  • Moulding to put around the table edges – $20
  • Wood burning tool to make designs – $12

Equipment Used:

Jigsaw, circular saw, drill with boring bit, sander, chisel, mallet, pipe clamp, spring clamps, sawhorse, ruler, knife, permanent marker, safety goggles

Experience Required:

I’d say beginner-intermediate. I’ve only made a few things from wood (some benches, a two-step stair, some trellises), and I was able to create this table to my satisfaction.

So you may be wondering what in the Known World possessed me to use an old recycled door as a tabletop. I thought a door would be both inexpensive and light enough for me to carry on my own. I can’t very well use this table at Pennsic if I can’t even carry the tabletop to my camp site, now can I? A hollow door slab is really quite lightweight, but still strong enough to function as a great table. It’s true, no table dancing, but how often does that really happen anyway (oh, right, I’m going to Pennsic … )
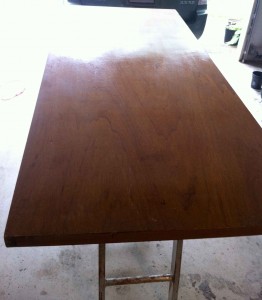
A door is the perfect size for a trestle table

As for finding an old door, my local recycling center had about 50 of ’em, all for $5-$10. I was able to find one that hadn’t ever had a door handle installed, too. And it was already stained a good color. Just needed a little dusting! You might have one hanging around the house from a remodel (or know someone who does). And I’m convinced that doing something like this is period — our ancestors recycled wood, including old doors, whenever it made sense. Wood was never wasted.

As to whether you can actually use a hollow door slab as a tabletop, yes, you can! This is a common practice among folks who need furniture on a budget, model train enthusiasts who need a place for their layouts, drafters who need a desk, and crafters who want a large workspace.

The Table Plans

So here’s how to make the trestle table — these plans are adapted from those posted by Charles Oakley and bits and pieces picked up from other online sources.

1. Join the Leg Pieces: Cut the 2″ x 12″ board into four 30″ long pieces. Cut the 2″ x 10″ board into two 30″ long pieces. Place one of the 2″ x 10″ boards on the floor or some other flat place, and flank it with two of the 2″ x 12″ boards, creating 34″ x 30″ of wood. Repeat with the other three boards. Drill holes in the edges of the boards where they meet, then insert dowels into them and glue them in place with wood clue. Clamp and allow to dry for 24 hours.
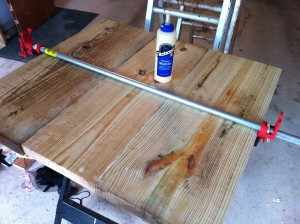
Join the wood tightly and securely

2. Size the Tabletop (Optional): If you want to use the full length of your door slab, just skip this step. I wanted my table to fit into a free space in my studio so I could use it as a craft table, however, so I’m shortening my door slab. Here’s how to do it: Measure 58″ inches on your door slab and score it with a knife (this prevents splintering when we cut it). Cut the door so it is 58″ long (I used a circulate saw). [Note: You can vary the length of your table, but be sure to change the length of your stretchers in step 3 accordingly.] Make room in the newly open end by pulling out/pushing in the reinforcements you’ll find there. Cut your firring strips to about 34″ long and place them just inside the open end of the door for support on the end, using wood glue to keep the strips in place. Clamp and allow to dry.
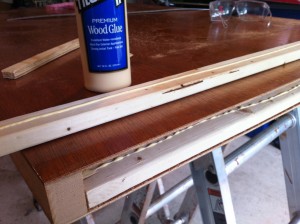
Plug the open end of your hollow door with strips of wood and glue

3. Create the Stretchers: Take the 2″ x 4″ and cut into two 51″ lengths (shorten or lengthen this if you have a shorter or longer table than me). Trim the end of each spacer according to the diagram below. To create the mortise (the hole in the end of the stretcher), use a boring bit on your drill to drill in two places (either end of the bit of wood you want to remove), then use a jigsaw and/or chisel to remove the extra wood and smooth it down.
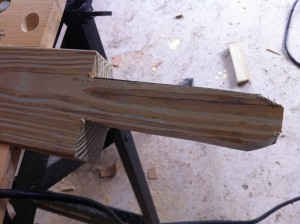
Cutting the ends of the stretchers
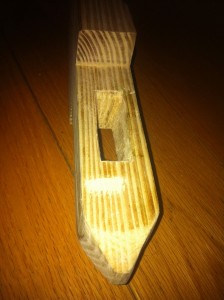
Mortise in the end of a stretcher


4. Create the tenon keys. The tenon key is the tapered bit of wood that will fit into the mortise and hold the legs and stretchers in place). You need four of them. Use the oak board (or just leftover pine) and cut the board into two 4″ x 7″ x 1/2″ pieces, then cut each of those boards diagonally in half and round the ends. Each key should be 1″ at the bottom and about 3″ at the top. You can this diagram (PDF file) to cut your tenon keys: trestle-table-tenon-key.pdf
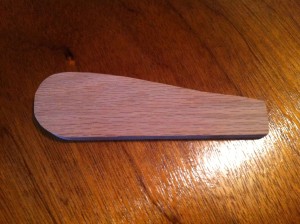
One of the tenon keys

5. Cut away the extra wood in your table legs once the wood glue has dried (wait at least 24 hours). Here is the diagram I used for my table legs. I drew the pattern in Adobe Illustrator, printed it out tiled, taped the pages together, cut it out, and drew the pattern onto my wood. Just flip the pattern over to do the other side of the wood. Here’s the pattern I used in a PDF: trestle-table-leg-design.pdf
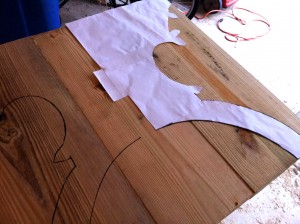
Marking my pattern on the wood
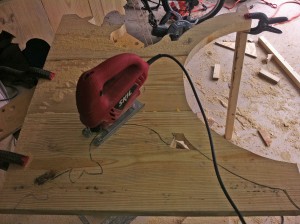
Cutting out the design on the legs

6. Assemble your table legs, stretchers, and tenons. Now that everything is cut out, put your table legs and stretchers together. You may find that some tenons don’t quite fit in some mortises, and now is the time to narrow/widen as necessary. Once it’s all put together just the way you like, take a permanent marker and write indicators on each board so you now how to assemble it quickly and easily next time.
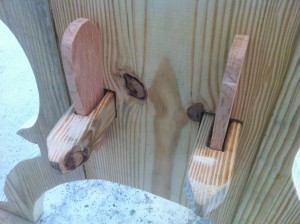
Assembled legs with tenons firmly wedged in mortices

7. Attach tabletop anchors. As the tabletop is so light, I want to avoid actually attaching the tabletop to the legs, just in case the legs were a bit too heavy for it when it was picked up or otherwise moved. So I attached simple 1″ x 2″ boards to the underside of the table, on either side of where the legs meet the table, to hold the table in place and prevent it from moving about when used. I attached the boards to the very sides of the door, where it is solid, for the most secure hold — and this has the added advantage of strengthening the underside of the door a bit. Now the tabletop just rests on top of the legs, but doesn’t slide or move thanks to the anchor boards. (Note: If I find the tabletop moves or tilts during use, I’ll simple drill holes through the anchor boards and into the top of the legs, then slip a dowel through for stability.)
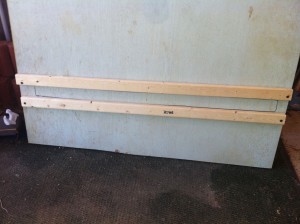
Anchor boards attached to the underside of the door/tabletop

And that’s it … the table is done!
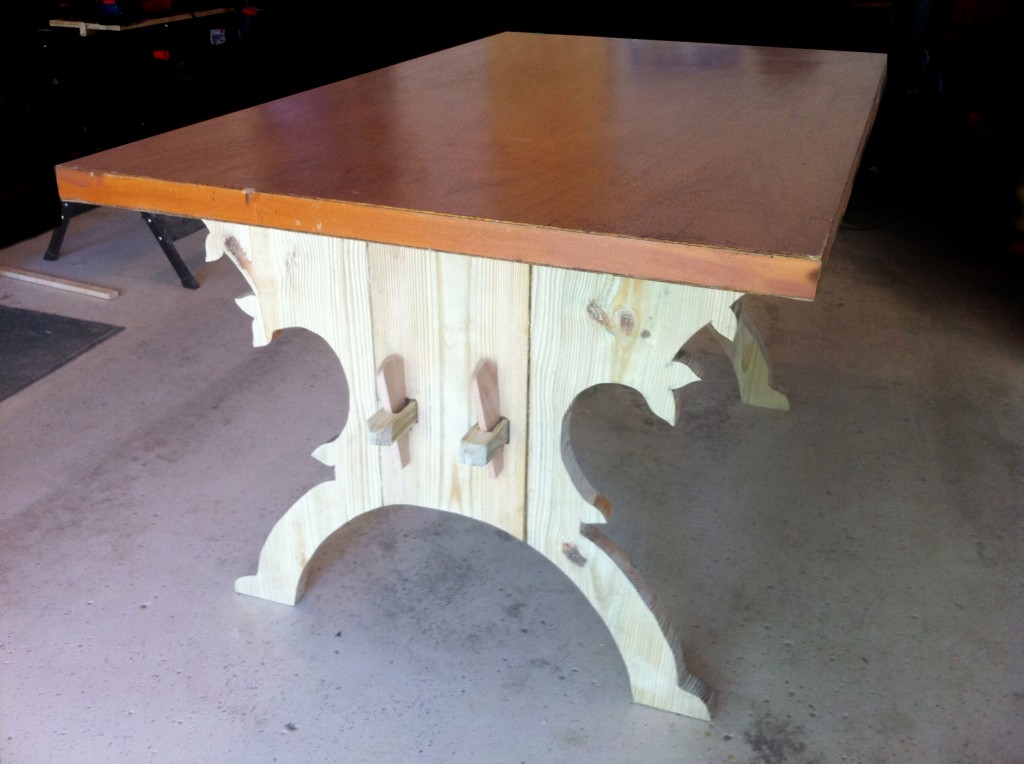
 

A functional trestle table for under $35!

Now you can fancy it up, if you like. Since I’d saved so much in the construction of the table, I decided to put moulding around the edges and stain the moulding, legs, stretchers, and tenons. That cost an extra $32, although I’d already bought the stain for another purpose (my cooler cooler and my benches). Here is my completed table:
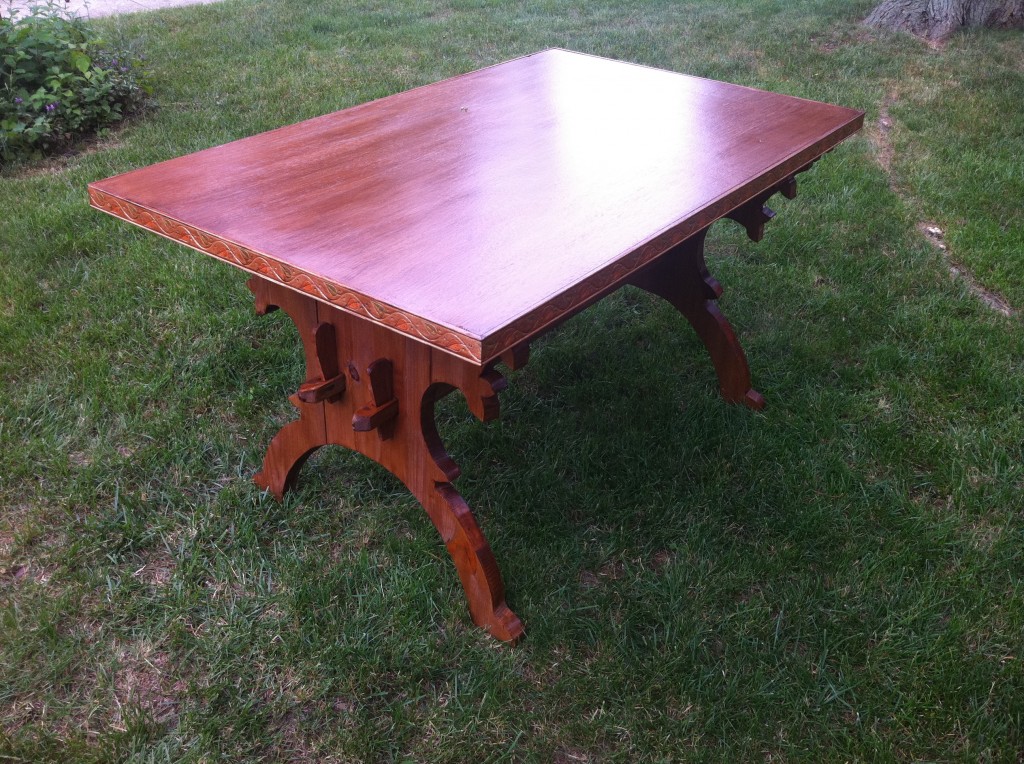
 

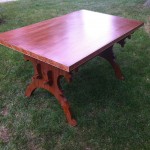
My inexpensive but lovely trestle table

Tips I Learned the Hard Way:

  • Buy dry wood. Wet wood is super heavy and hard to cut! And it won’t take any stain until it dries anyway.
  • If possible, smooth or otherwise plane the sides of the wood boards before you dowel and glue them together in step 1. This will really help the boards stay strong and stable.
  • When you apply any wood glue, put glue on all surfaces to be glued in a thin, even coat. And clean up any wood glue that beads or globs during the drying process — it’s really hard to get this glue off once it has dried.
  • When staining with tinted polyurethane like I did, keep a cloth handy to wipe drips — it gets tacky VERY FAST and is hard to wipe up later. Also, do not go back over previously stained areas (anything older than, say, 3 minutes) until it is absolutely dry because it will glob and gunk and look yucky. This happened with mine, and I got better at the staining thing as I went along (told you I wasn’t that experienced!)

All comments, questions, and suggestions for improvements most welcome!

Also, it’s probably not clear who wrote and made this table, but it was me (Genoveva), working on my own. Gregor was in another state at the time! He’s since helped with many other projects, but not this particular one.

Update 2/2014: This table continues to serve us very well and has survived six weeks at Pennsic so far. I am glad I used a hollow core door, especially now that we have quite a bit of stuff to bring to Pennsic and weight is an issue. The table gets near daily use at home, too, as my sewing table. Here are photos of the table in action:
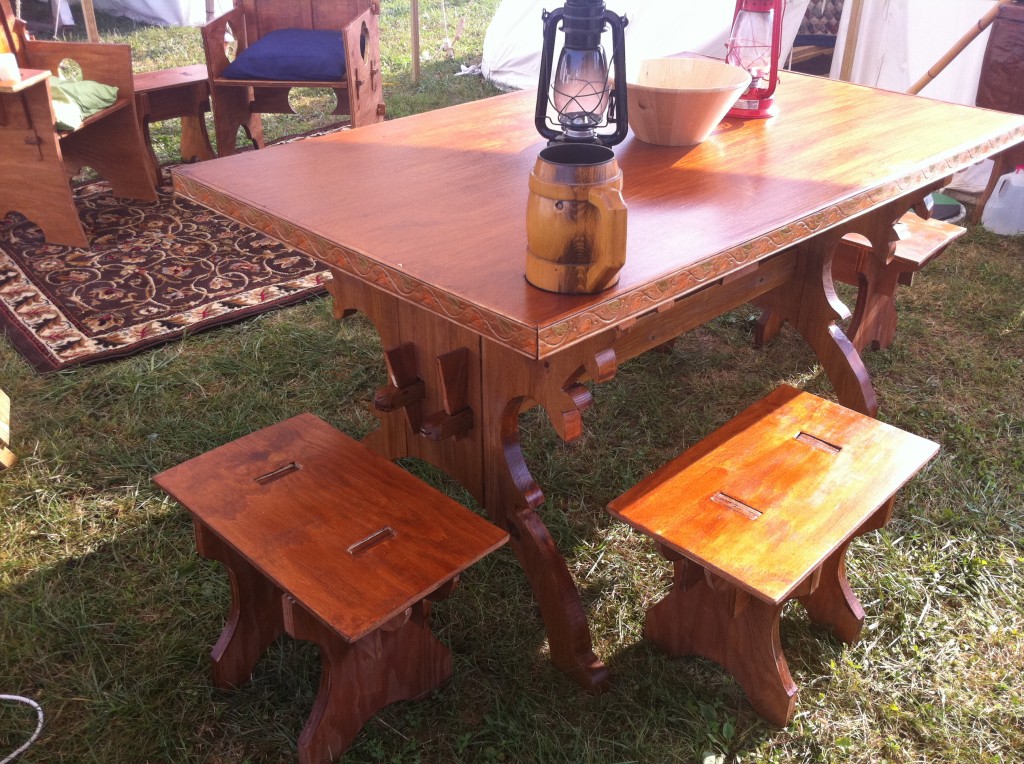
 

Our table at Pennsic 40
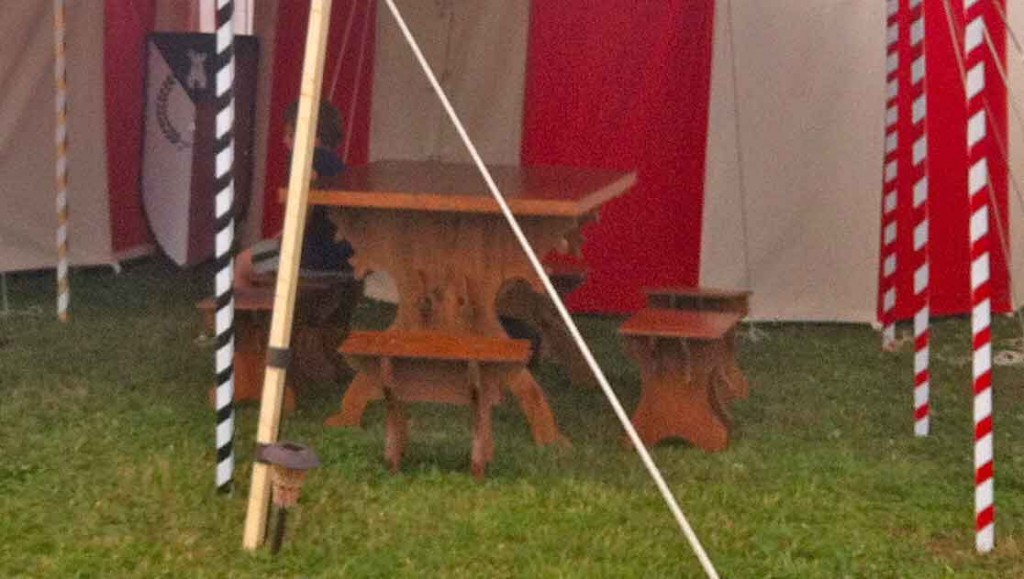
Table at Pennsic 41
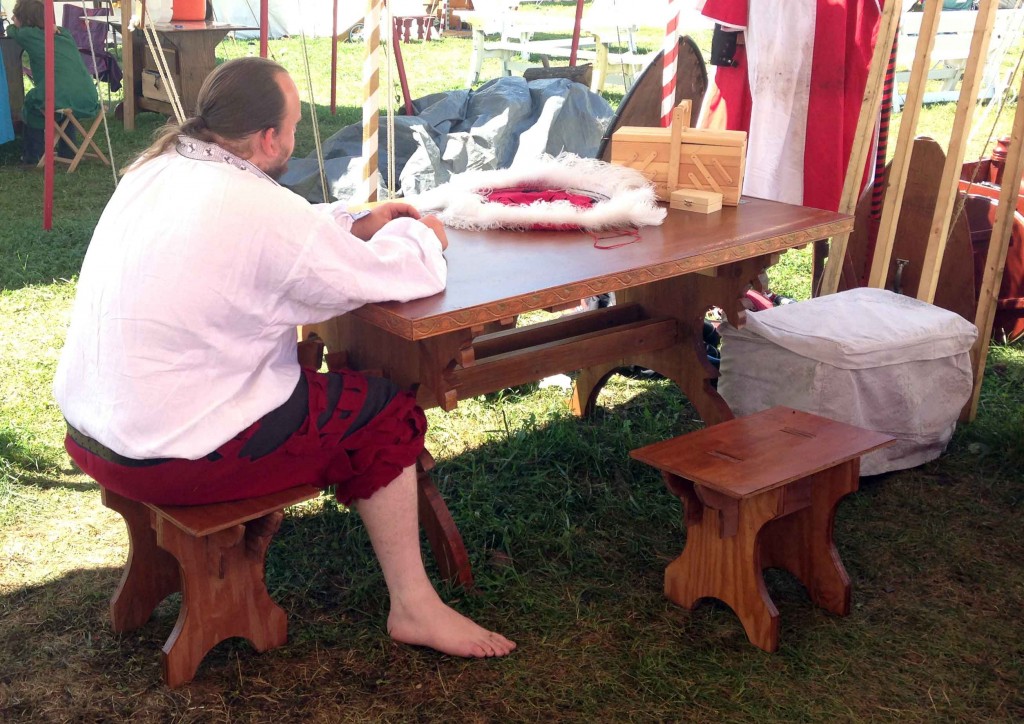
Table at Pennsic 42
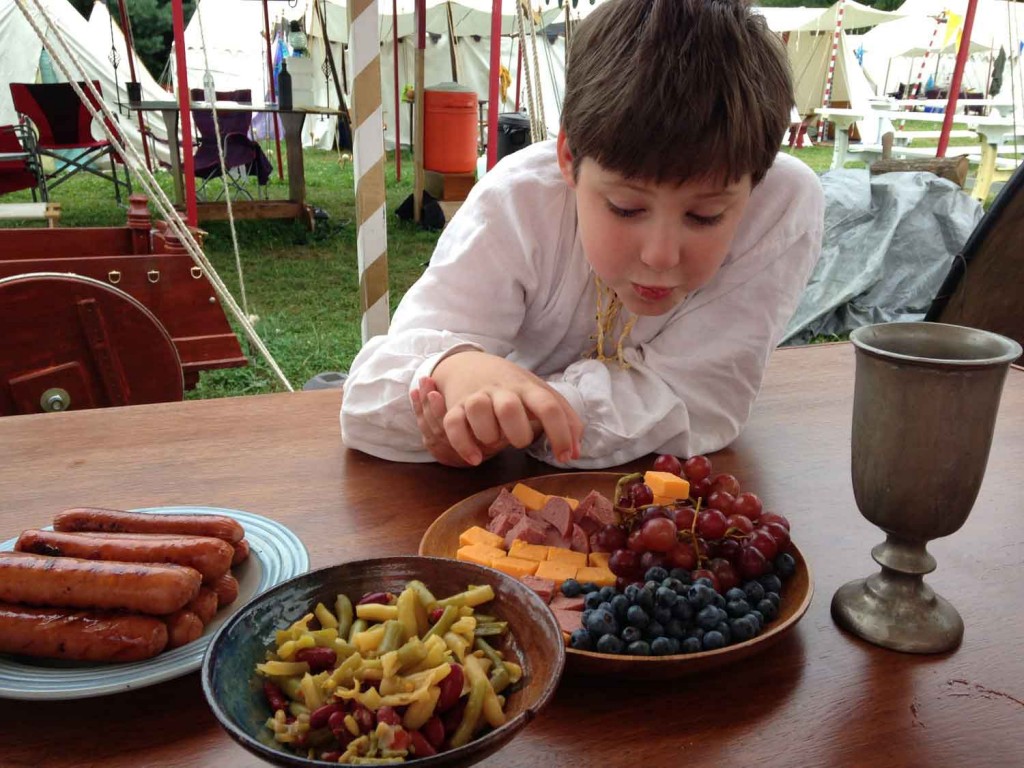
Our table gets a lot of use!
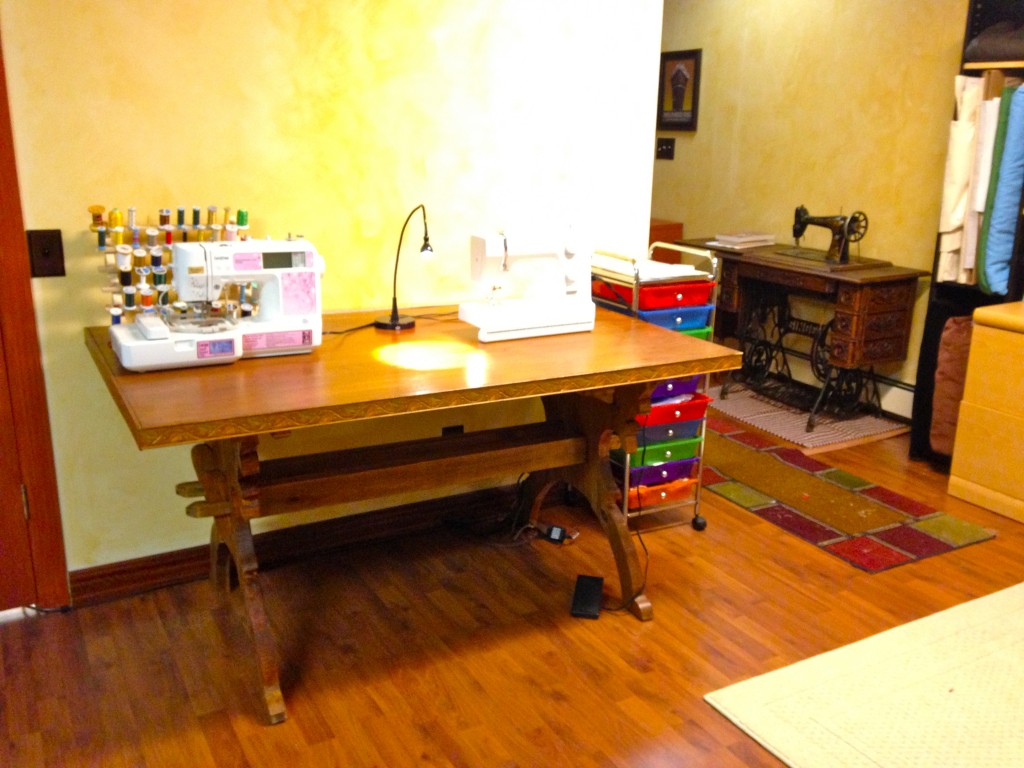
My table functions as a sewing table at home most of the time

And we’re planning to bring it to Pennsic 43! And if you’re interested in camp furniture, check out these other things we made:

« Previous PageNext Page »