Monthly Archives: September 2014

SCA Artisan Love: THL Sayyidah Asalah al-Hina (+Henna Tutorial)

27 September 2014

[This is the sixth in a series of articles on SCA artisans who inspire, teach, encourage, and/or make the Society a better place for us all! I learned so much through other artisans while preparing for the A&S Pentathlon, and now it is my turn to shine the love on them, learn more about their craft, and introduce them to you.]

Asalah

I write to you from a place of deep relaxation and contentment, put there by the amazing Asalah …. despite the fact that she is many miles away. How is this possible? I just applied her magical henna that smells sweetly of earthy lavender. It’s all over my hand, swirling in big hearts, exotic flowers, and adorable curly-qs. I feel light and happy and loved. I had no idea henna was so magical, and I may not ever have known had it not been for Asalah.

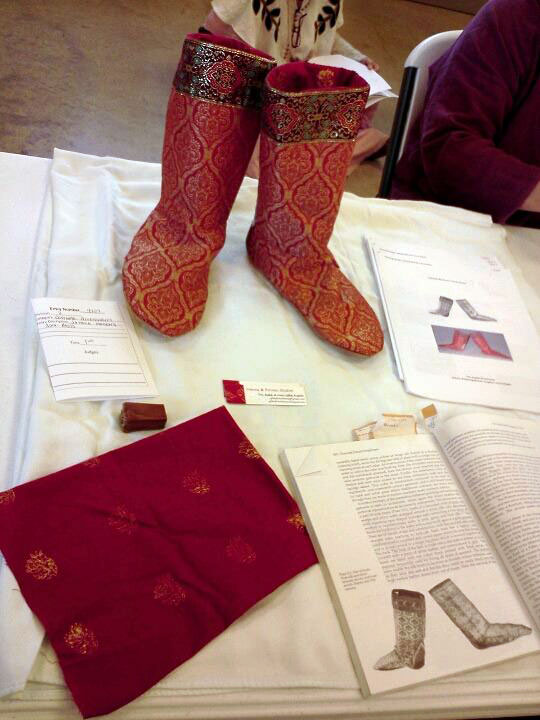
THL Sayyidah Asalah al-Hina (formerly known as Anabel de Berchelai) is an avid student of the Safavid period of Persia, making her a fellow 16th century enthusiast. Asalah is best known in our Society for her henna research and application, which she’s been doing for more than eight years now. She also enjoys making clothing and accessories, and in fact this year’s Kingdom A&S project were two pair of sock-boots.

sock-boots

When I asked Asalah why she does what she does, she told me, “I am inspired by many people and things, but my greatest inspiration is researching and documenting arts that, as of yet, have had little to no recognition.” I love this! It’s one thing to go down a well-worn path, but yet another to blaze a new one. She says this is what she loves most about her craft because “being a forerunner in research and experimentation really motivates me to do and try new things.”

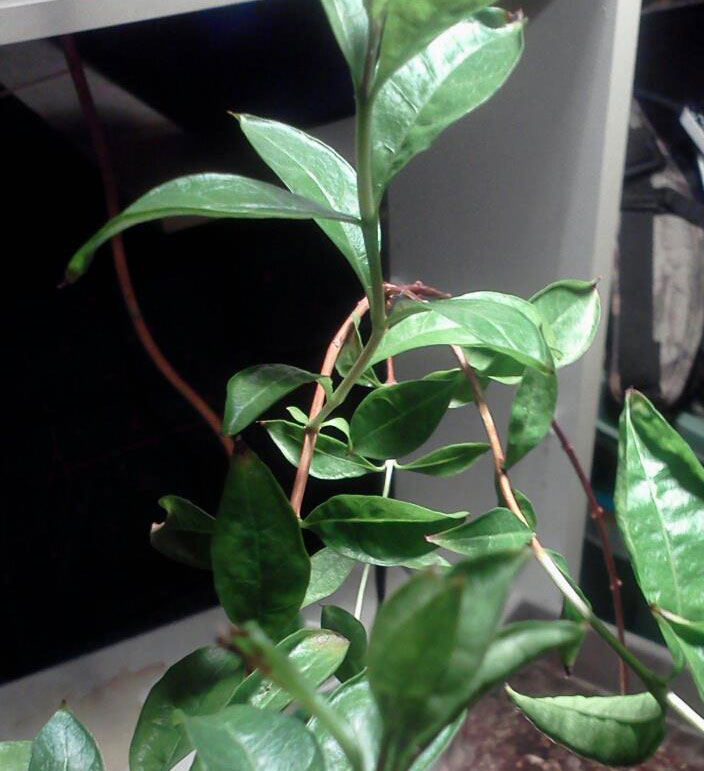
Her favorite project so far isn’t so much a created thing as a living thing. She is growing a henna plant, from which she’s created her own paste. She was able to compare her fresh henna against that of store-bought, which is what nearly every is using these days.

henna-plant

In addition to her three Kingdom A&S first place awards in 2012, 2013, and 2014, Asalah is the recipient of the Order of the Evergreen. She is apprenticed to Duchess Rebekah MacTiernan. Asalah makes her home in the Barony of Roaring Wastes in the region of Pentamere within the Middle Kingdom. You can see more of Asalah’s projects and photos at her blog at http://gildedlotushenna.blogspot.com.


Henna 101 Tutorial

IMG_7170This year at Pennsic I took Asalah’s Henna 101 class, and from this class I’ve made this simple tutorial. It turns out that applying henna had an easier point of entry than I initially believed. Here’s how to do it:

1. Prepare some henna paste and put it in a small cone. Asalah had already done this for her students, but she gave us this information on how to do it: As henna recipes and practices were handed down generation to generation, the basic recipe has probably not changed too much since medieval times. The basic ingredients include henna powder (dried and crushed leaves of the  Lawsonia inermis plant), something acidic to release the plant’s dyes (lemons and limes were found to be used in period), and something sweet and sticky to help the paste stay on the skin (honey was the most common and readily available sweetener in the SCA time period). Essential oils that contain monoterpene alcohols are added to help bring out the dye as well as make the paste smell good!

A basic henna recipe

  • Henna powder (Jamila brand is recommended and does not need sifting)
  • Lemon juice
  • Essential oils (Lavender, Tea Tree, Cajeput are all mild and work well — I recommend lavender for its soothing and relaxing scent PLUS it’s been scientifically proven that men are attracted by the smell of lavender… mmhmm)
  • Sugar (table sugar, sugar substitute, honey)

In a glass, ceramic or plastic bowl mix together 20grams (about ¼ cup) henna powder and ¼ cup lemon juice. Stir with plastic or wooden spoon as metal may react to the acidity in the lemon juice. The paste should be thick, about the consistency of lumpy mashed potatoes. Cover with plastic wrap (push wrap down over surface of henna so it is mostly airtight and add a second layer of wrap over the bowl). Let the paste sit in a warm area (70-80 degrees F) for 8-12 hours. Add 1-1 ½ tsp. of essential oils and about 1 ½ tsp. of sugar. Use a little less if using honey. Stir until smooth, cover again with plastic wrap and let sit again for another 8-12 hours, or until dye release. The surface of the paste will turn brown when it has achieved dye release. Stir in enough lemon juice, a drop or 2 at a time, until the consistency you would like is reached, similar to that of yogurt. Cone or bottle henna and use within 2-3 days or refrigerate up to a week or 2, freeze up to a year.
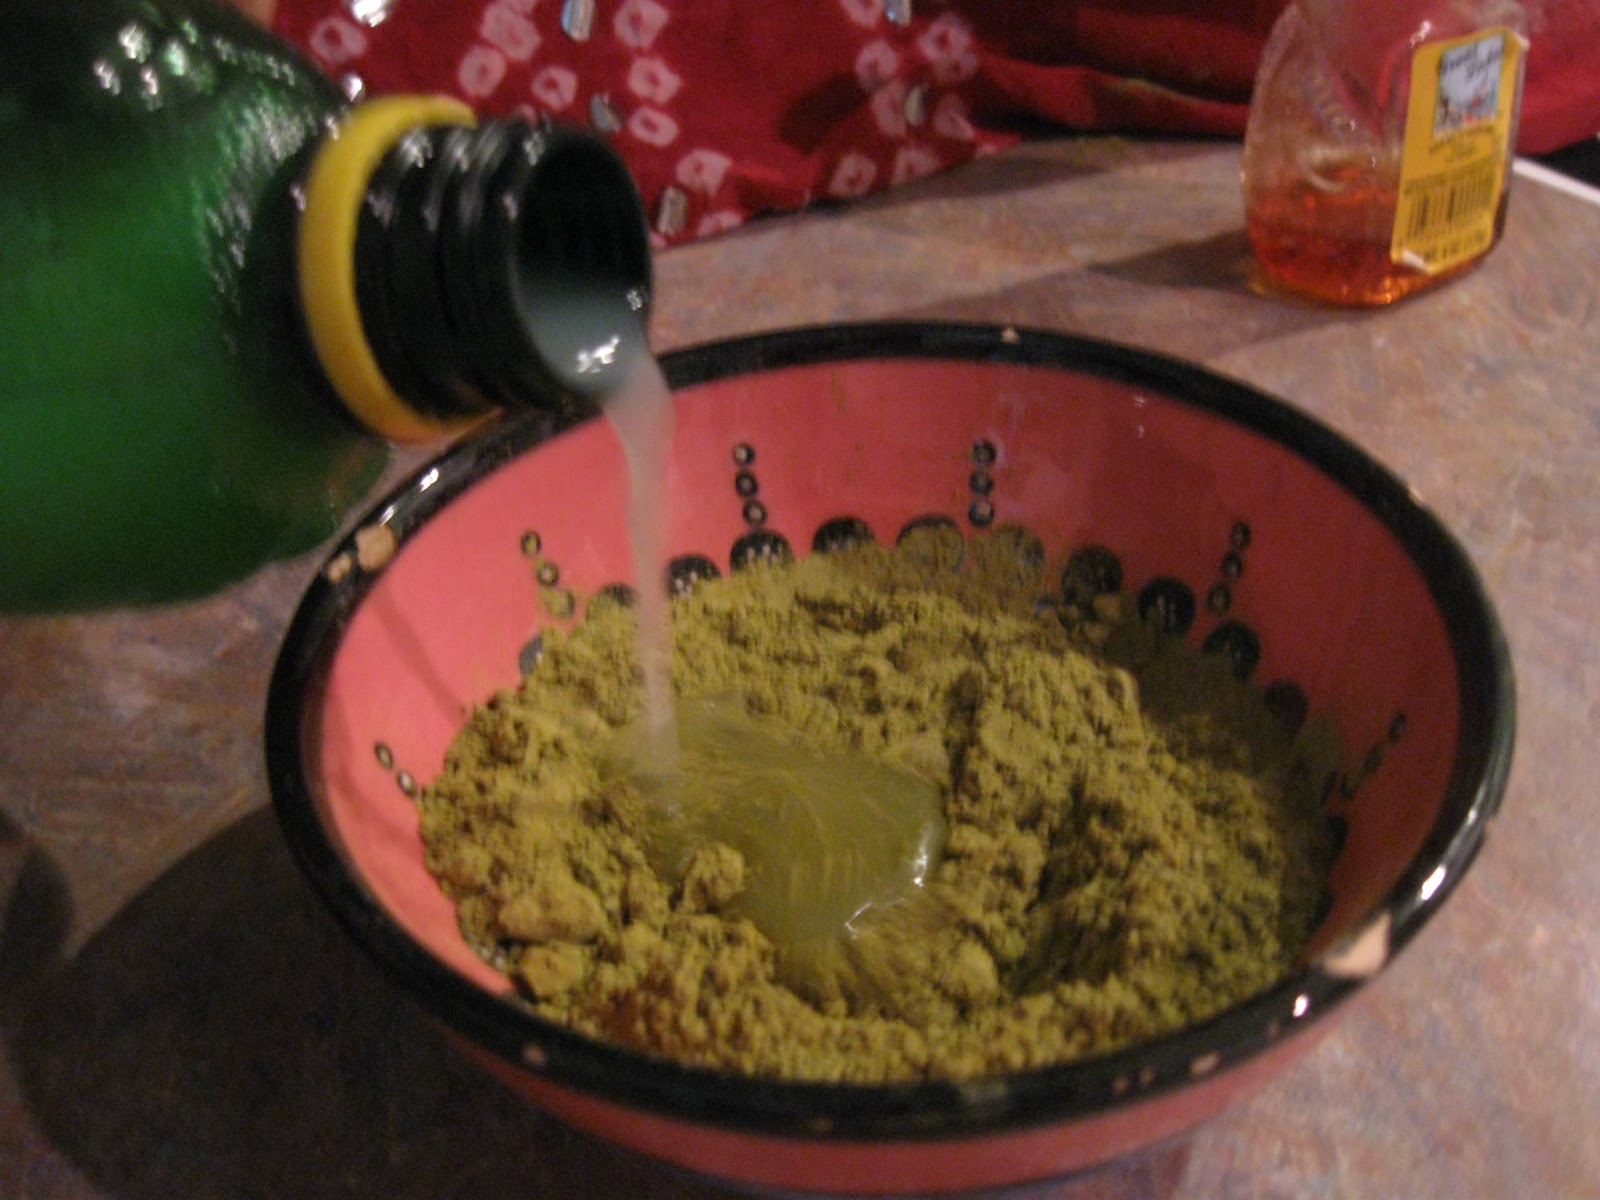
IMG_1335Mixing the paste

IMG_7165
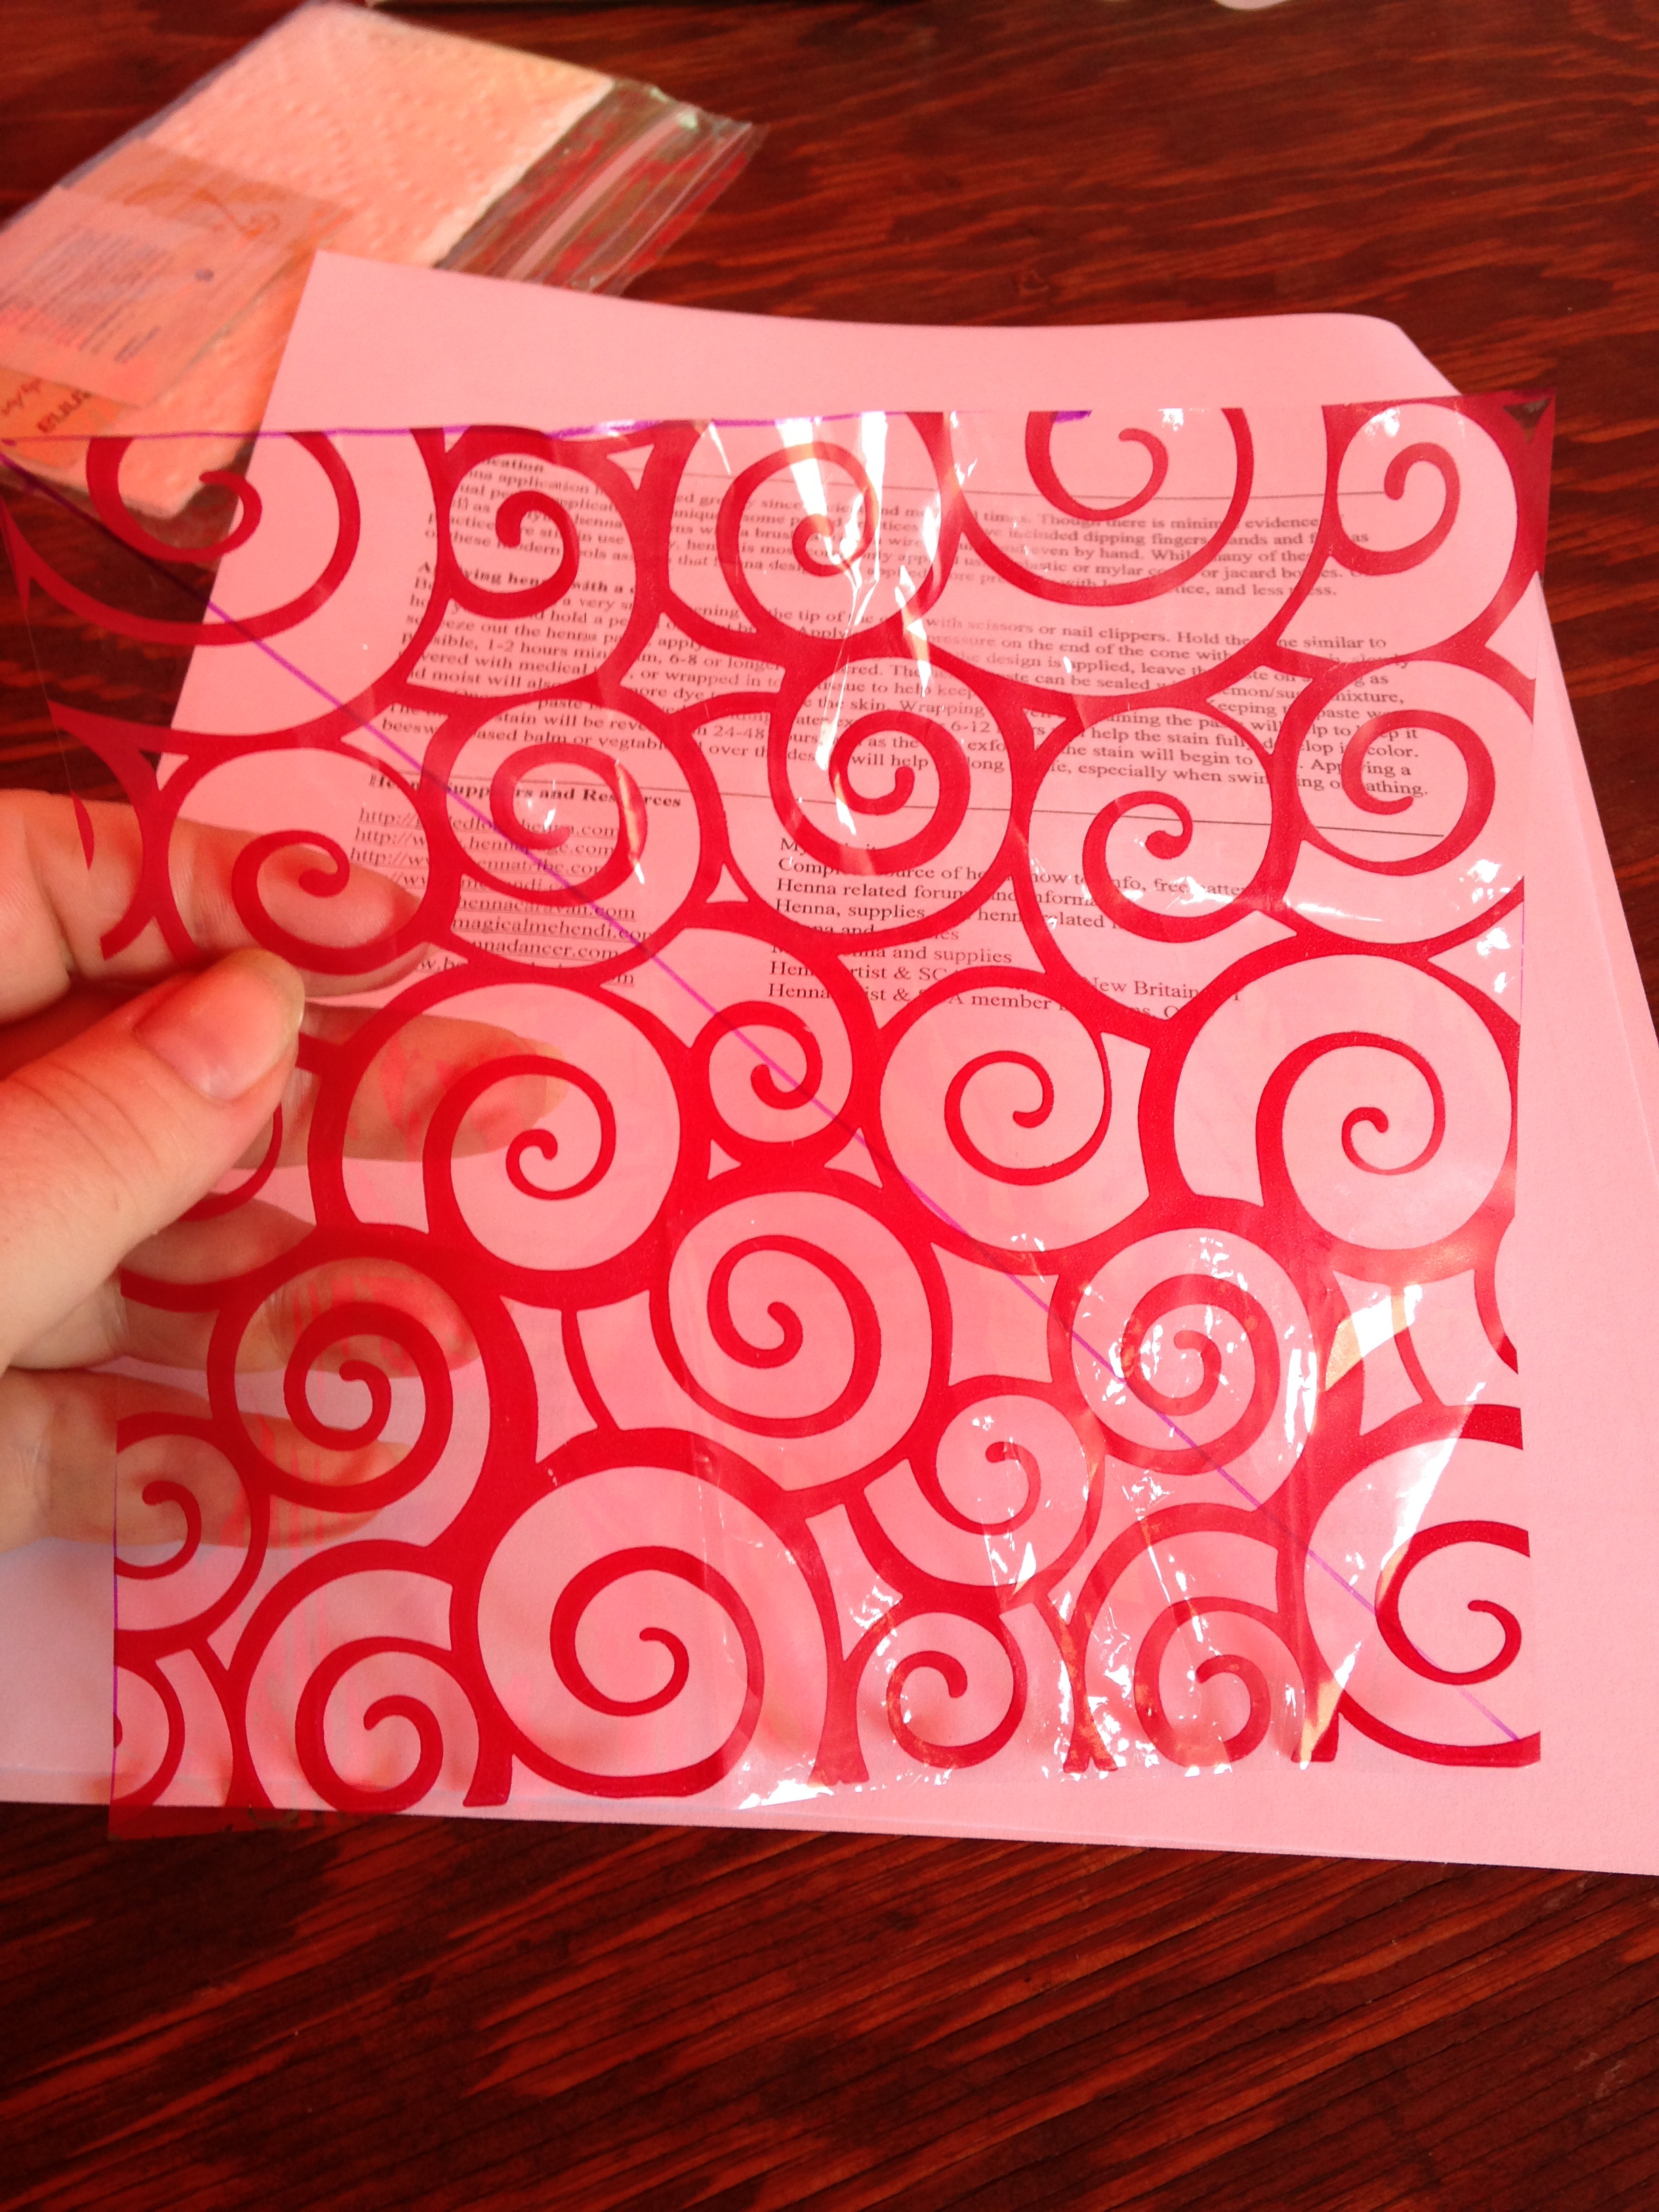
Mylar plastic with which to make a cone

Important Note: Do not ever use a product called “black henna” — these may contain chemical additives that can cause serious and permanent damage to your skin.

2. Wash the area you intend to apply henna to clear it of dirt and oils. If you’re not near a sink, an alcohol swab will do (that’s what came in Asalah’s kit). I prepared my left hand.

IMG_7750

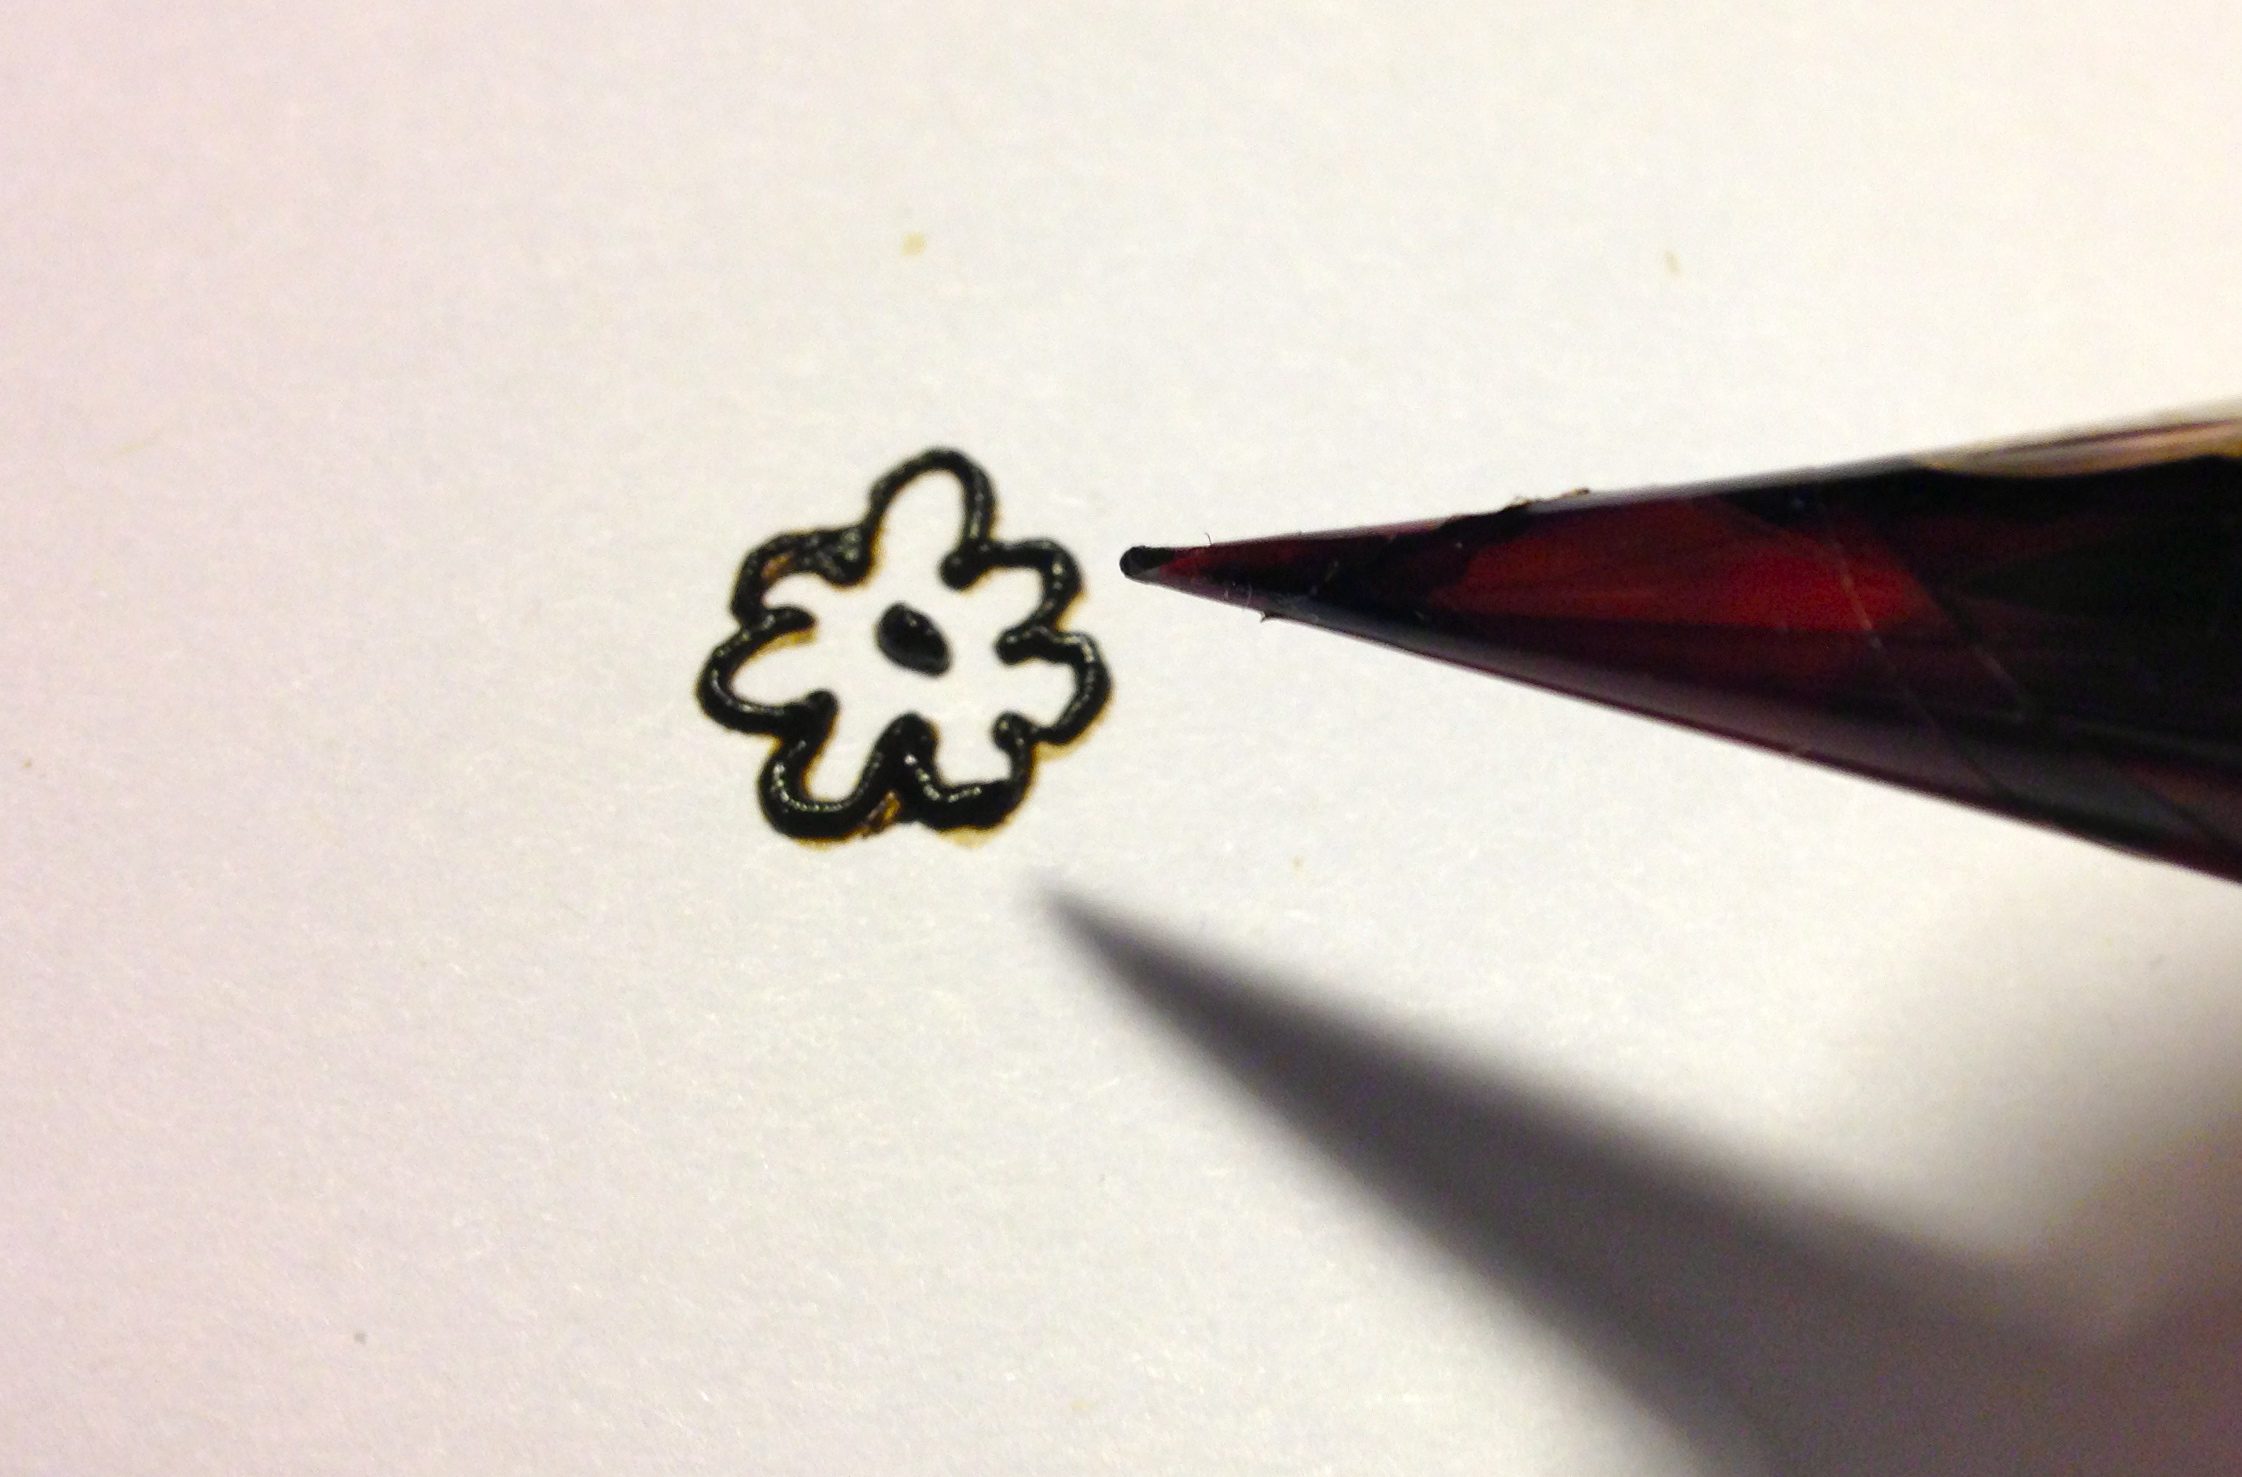
3. Cut off a very small bit of the tip of the cone. The smaller the hole in the cone, the finer you can apply the paste and get more details.

IMG_7751

4. Hold the cone like you would a pencil. Apply light pressure at the base to squeeze a small amouny. Practice tracing patterns on a sheet of paper first.

IMG_7752

5. Touch the henna to your skin and slowly squeeze the cone as you move. I found I had the best results when I kept the cone lightly against my skin and went carefully and fast enough that the paste did not bunch up. I recommend you start a design in the middle of your area and work outward — that worked best for me.

IMG_7753
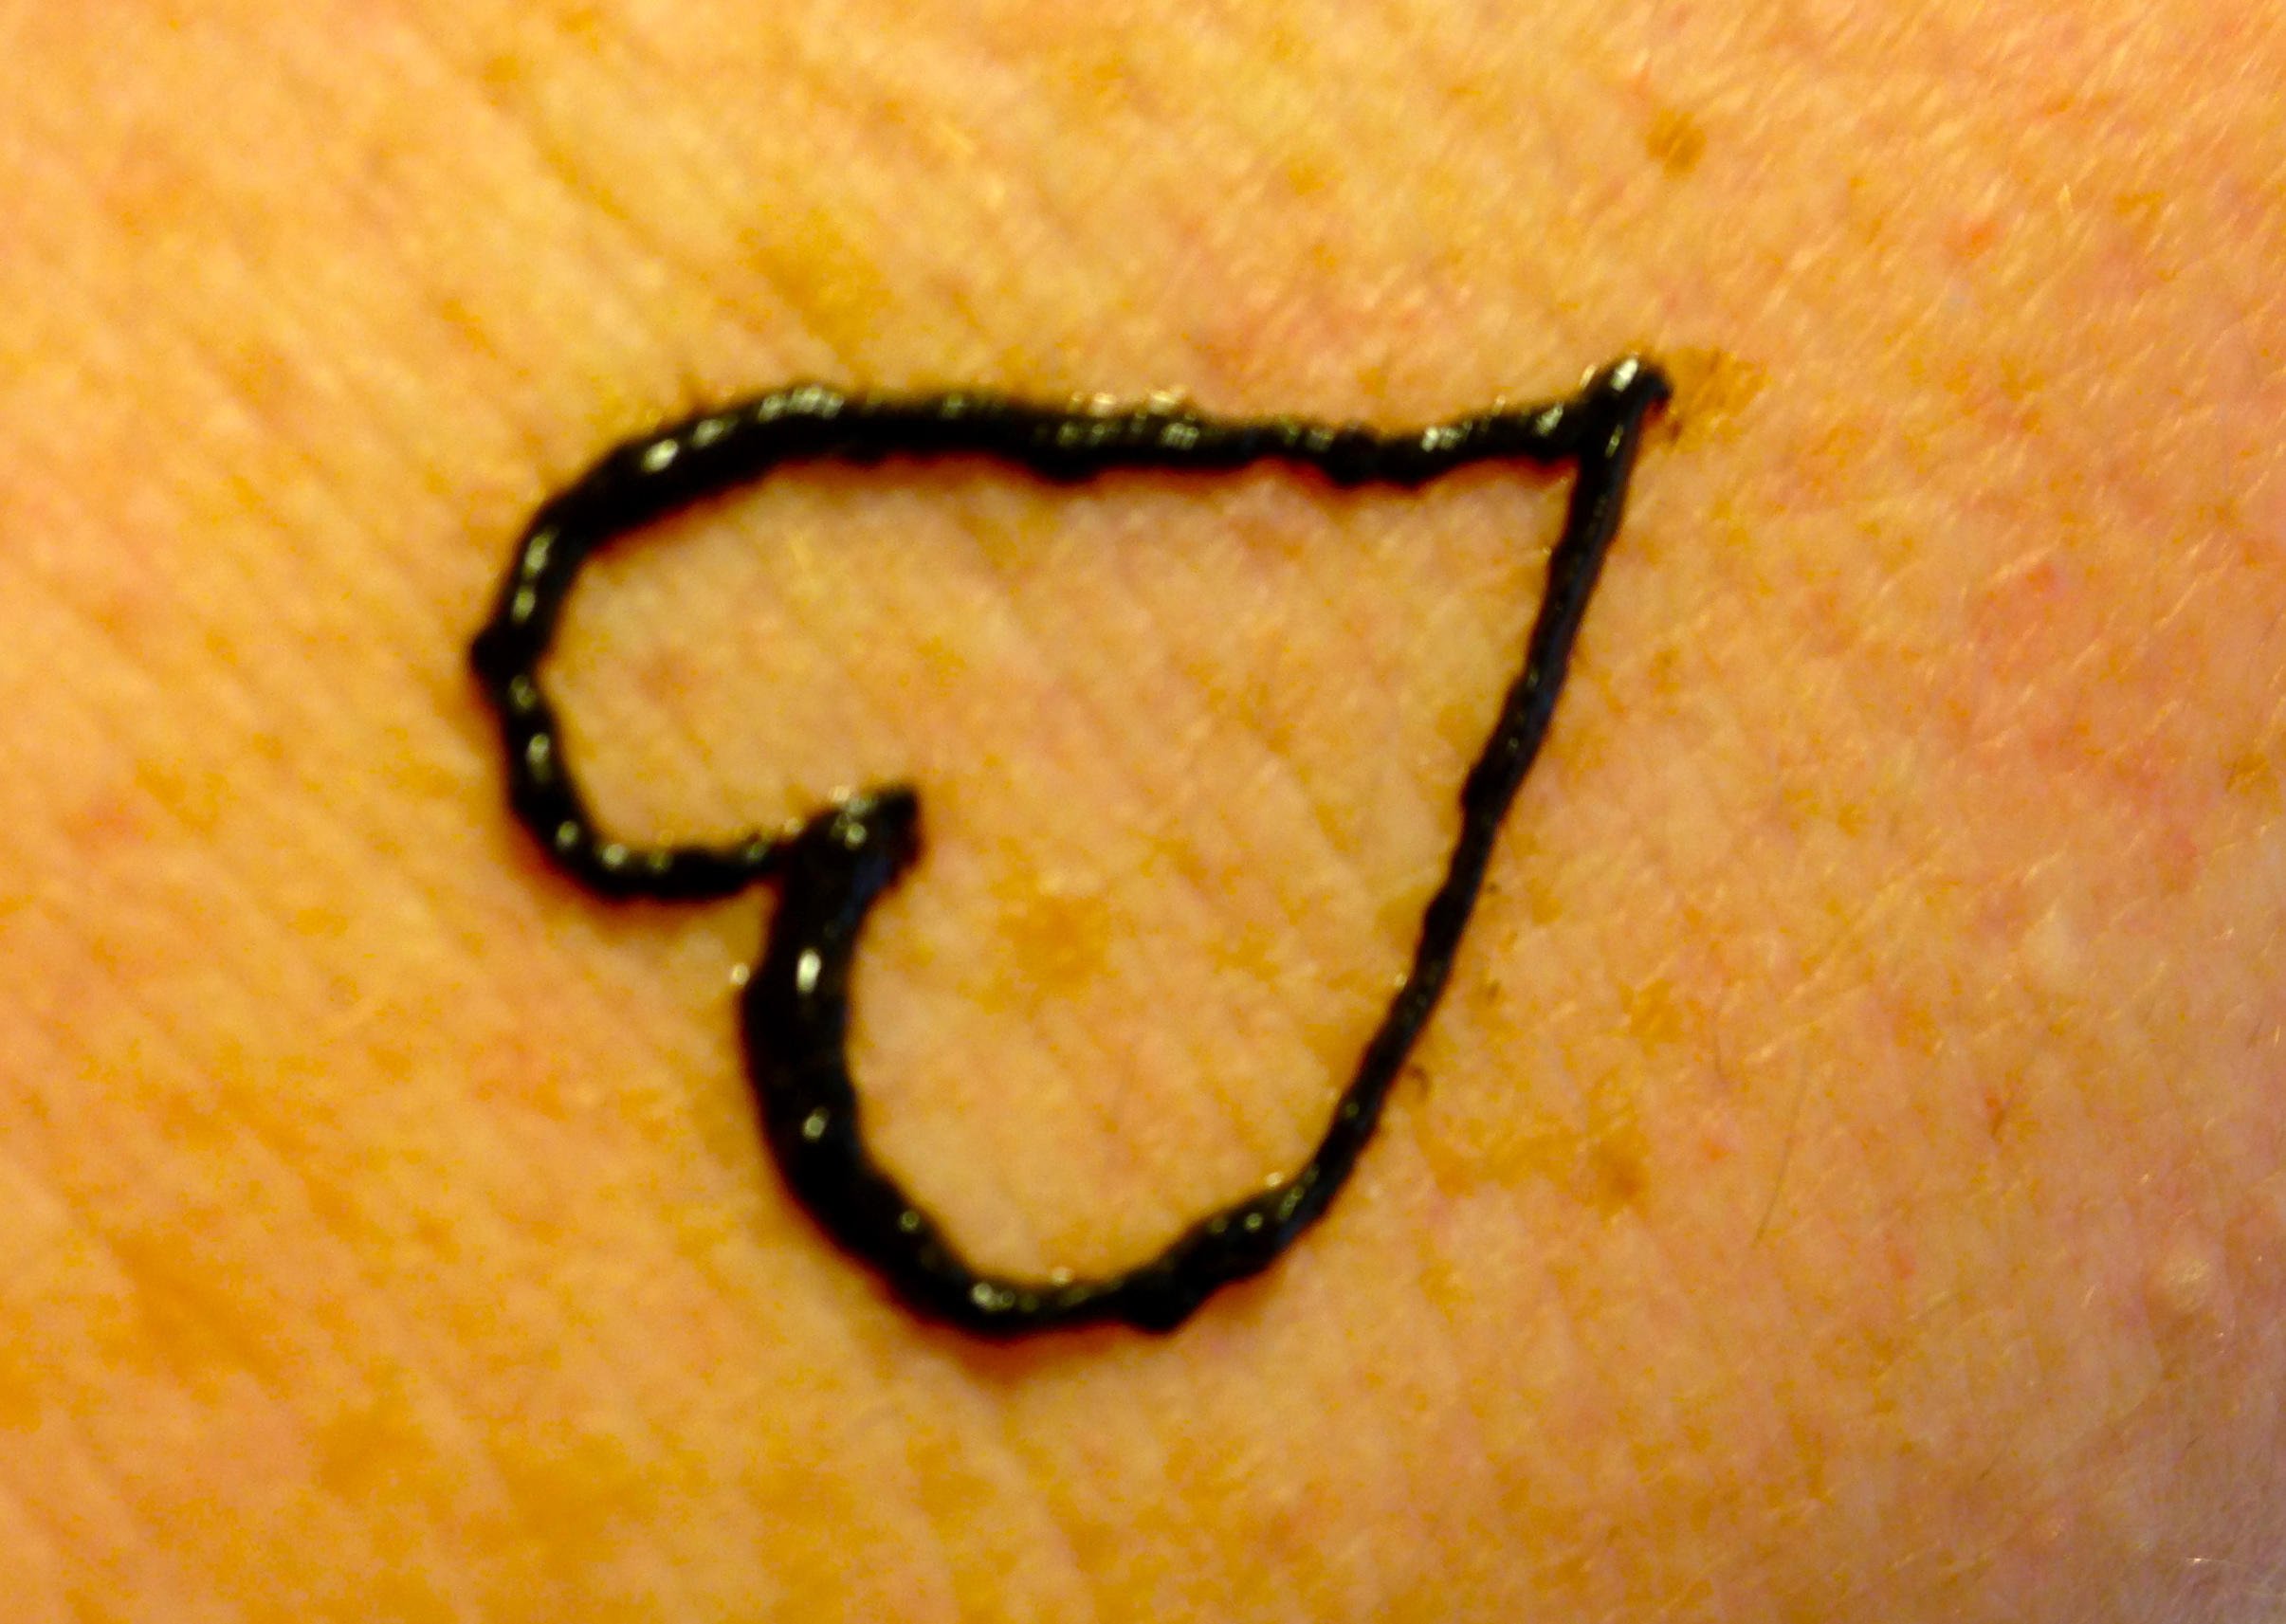
I started with a modest little heart.

IMG_7754
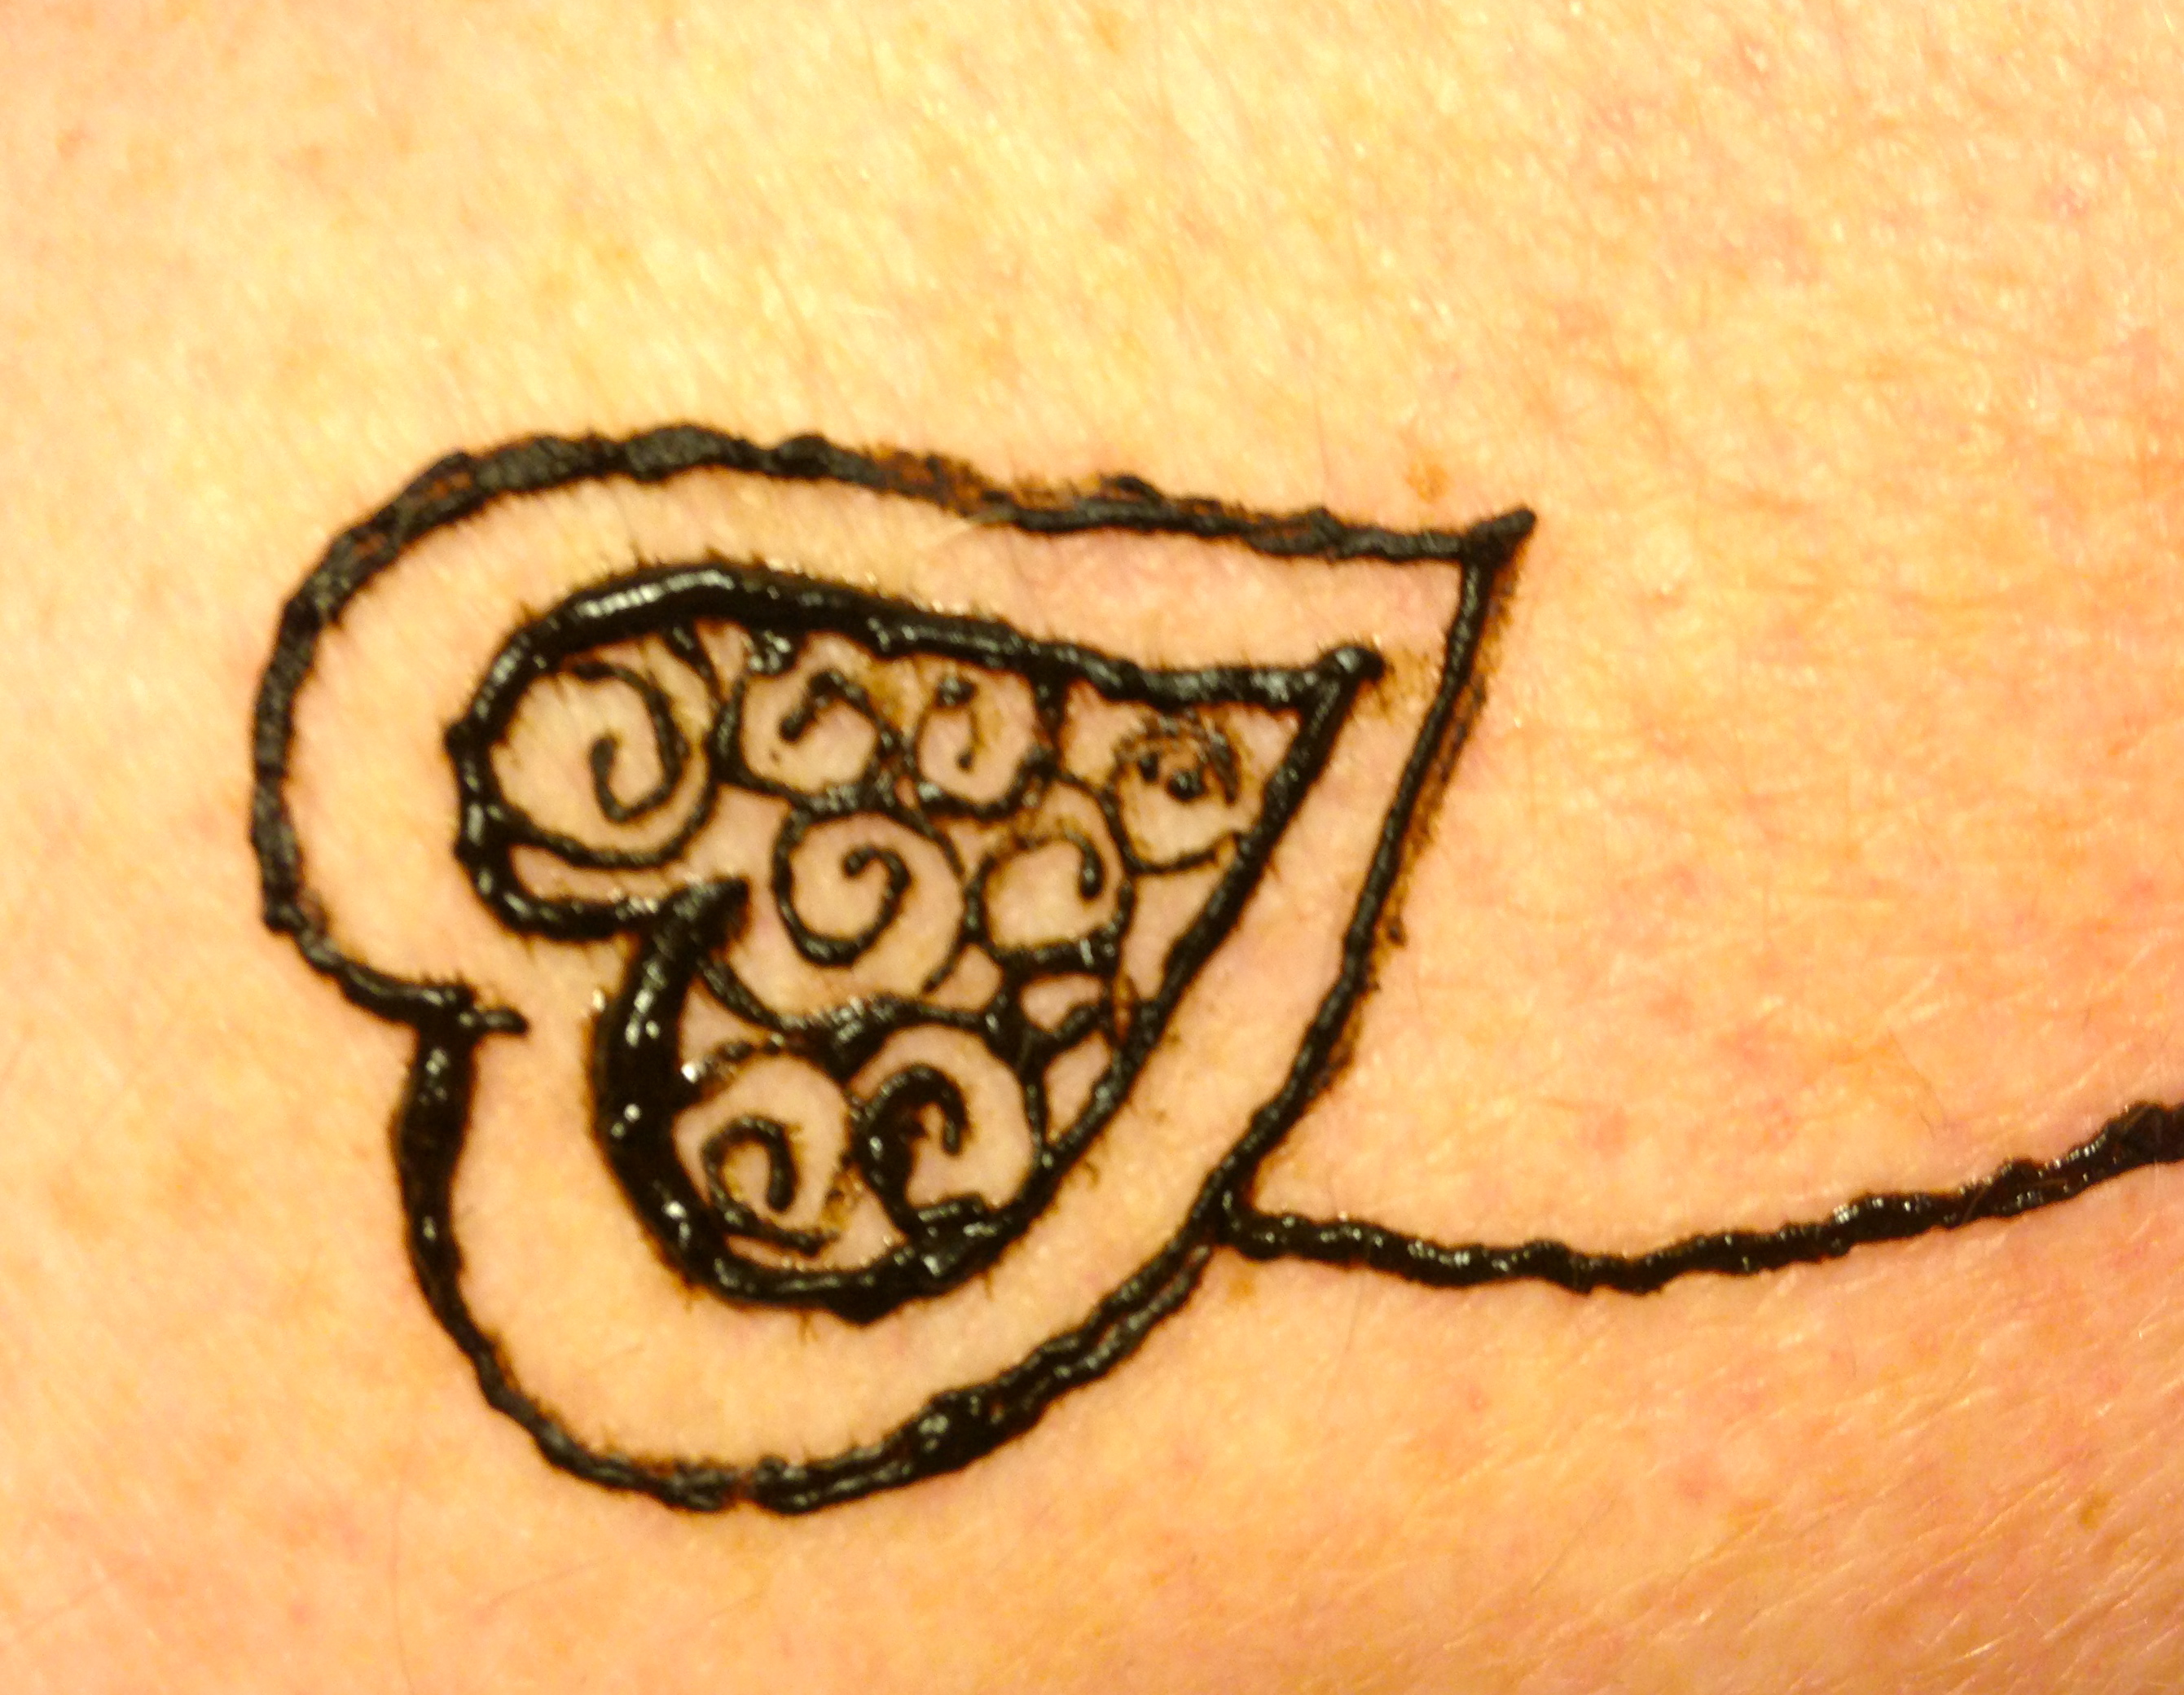
Then I added some curly-qs inside the heart.

IMG_7757And then a peacock!

henna-outside
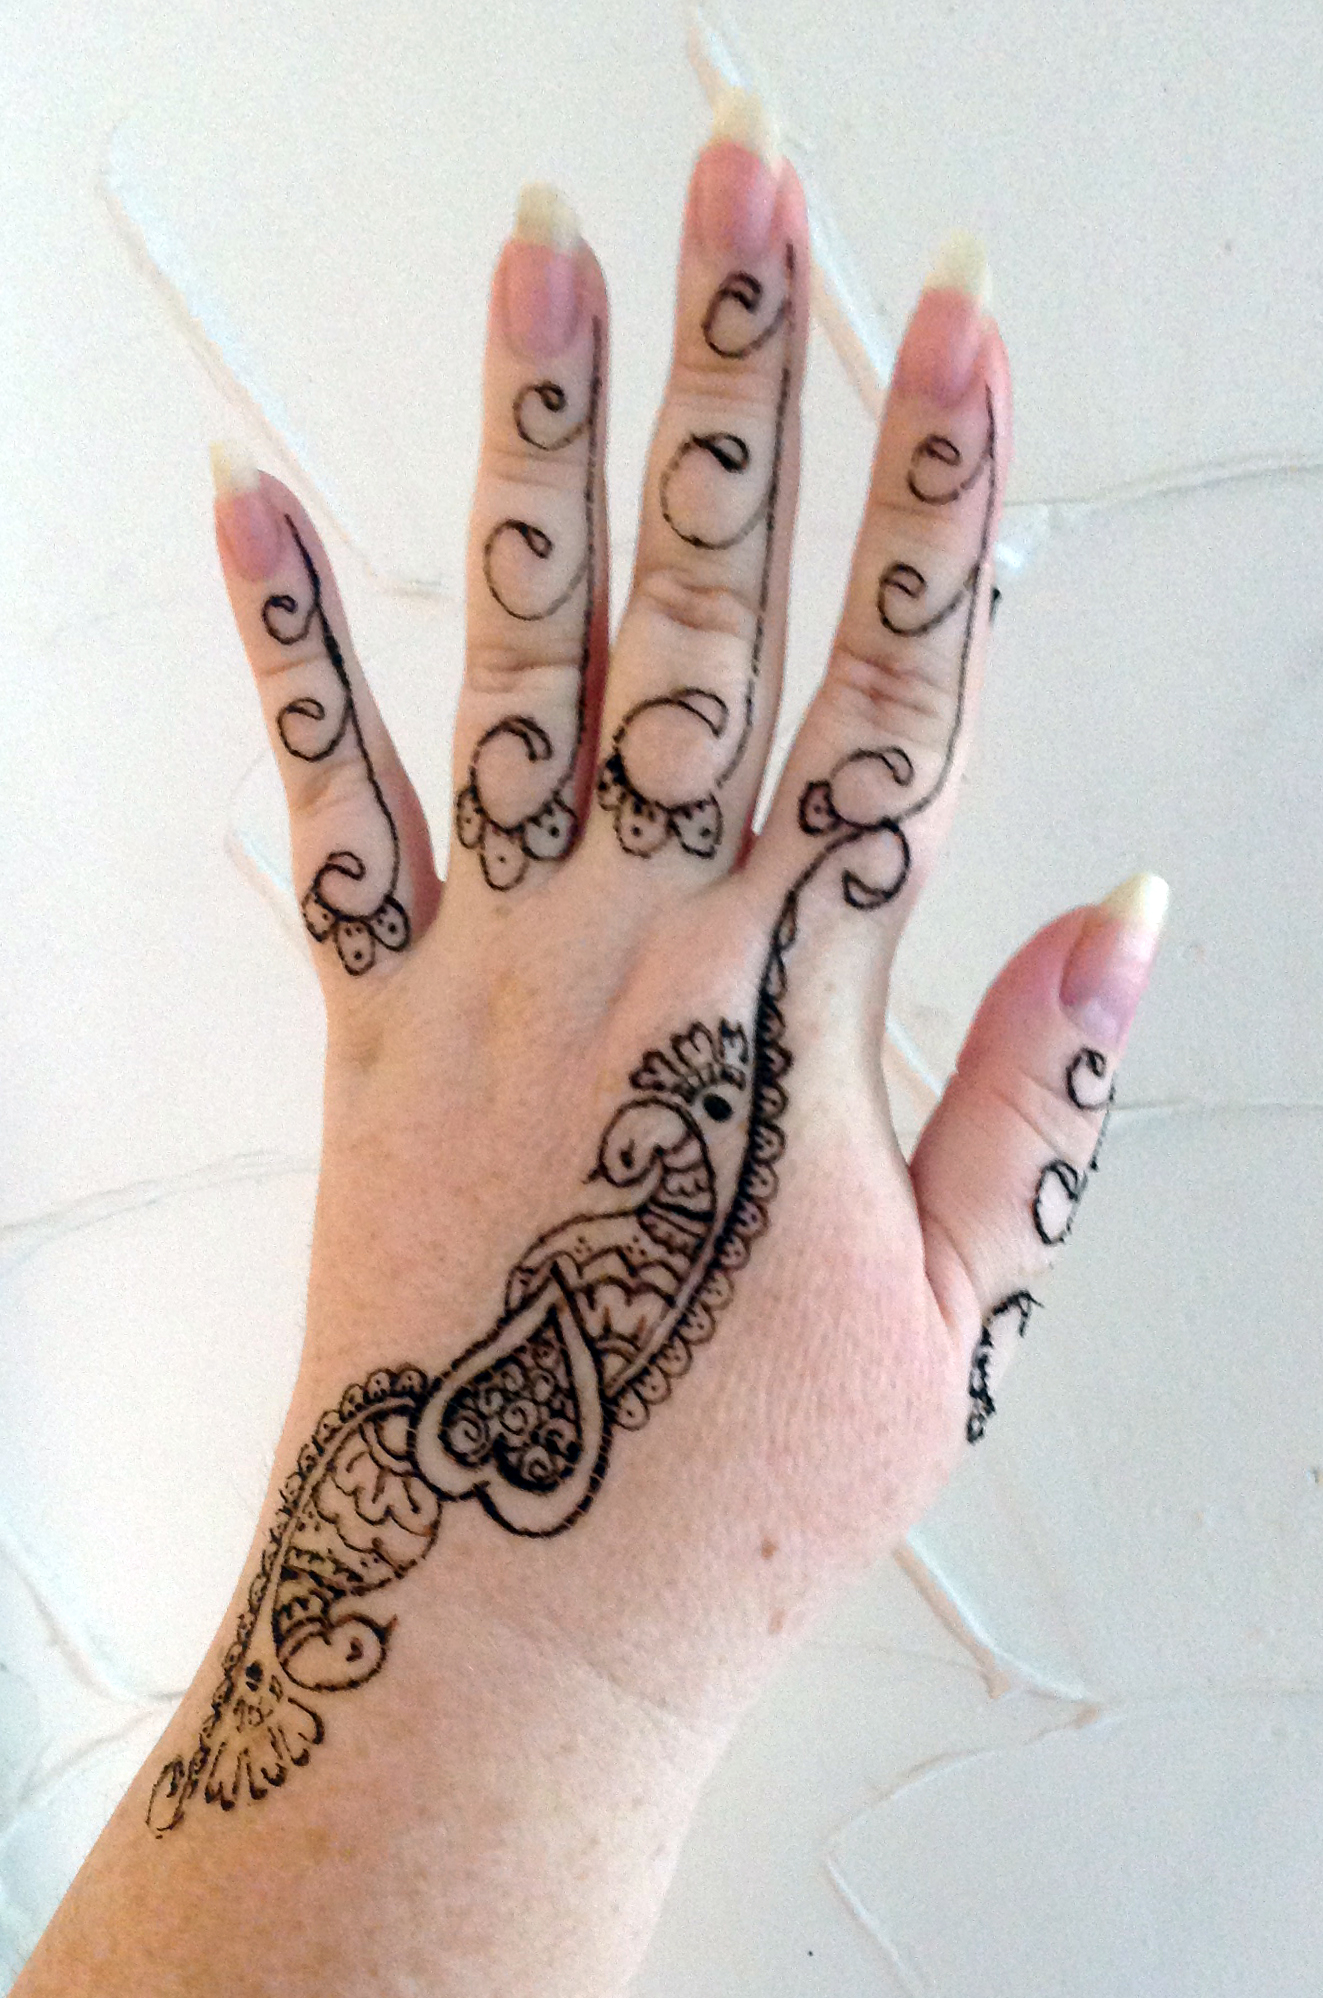
I had so much fun I kept going and ended up with this!

henna-inside
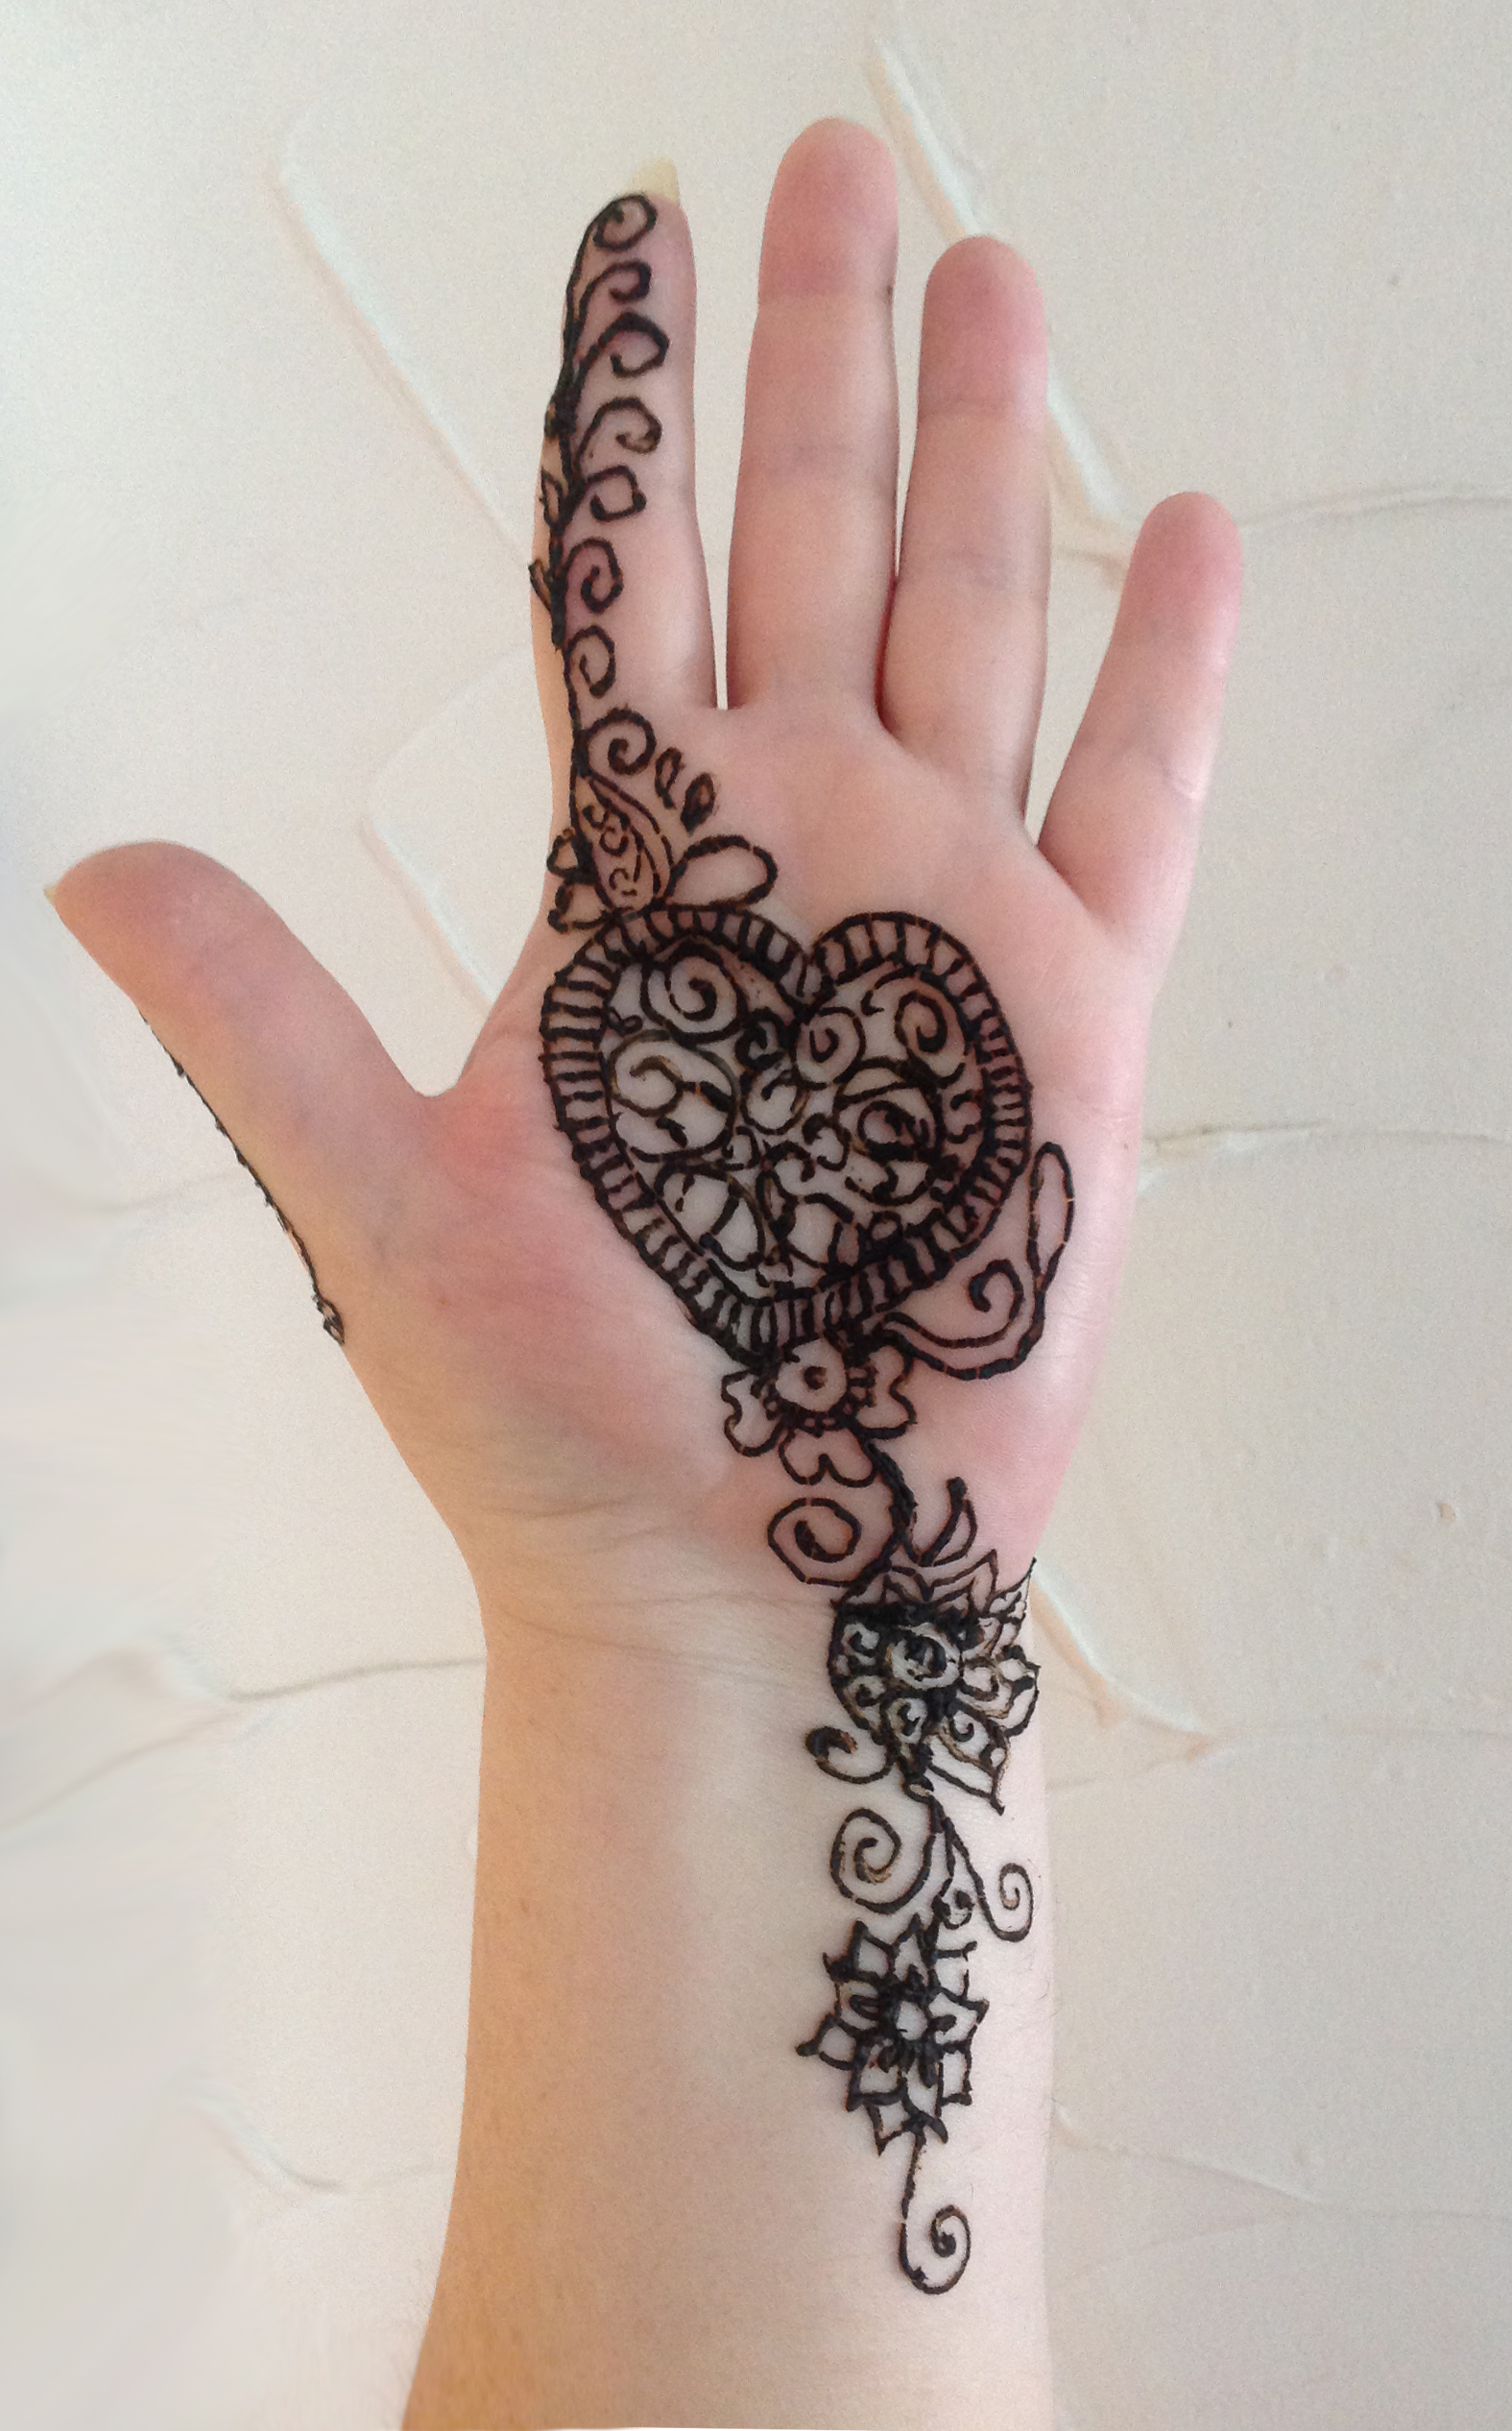
I still had henna left in the cone, so I went for broke and did the inside of my hand, too!


IMG_7167
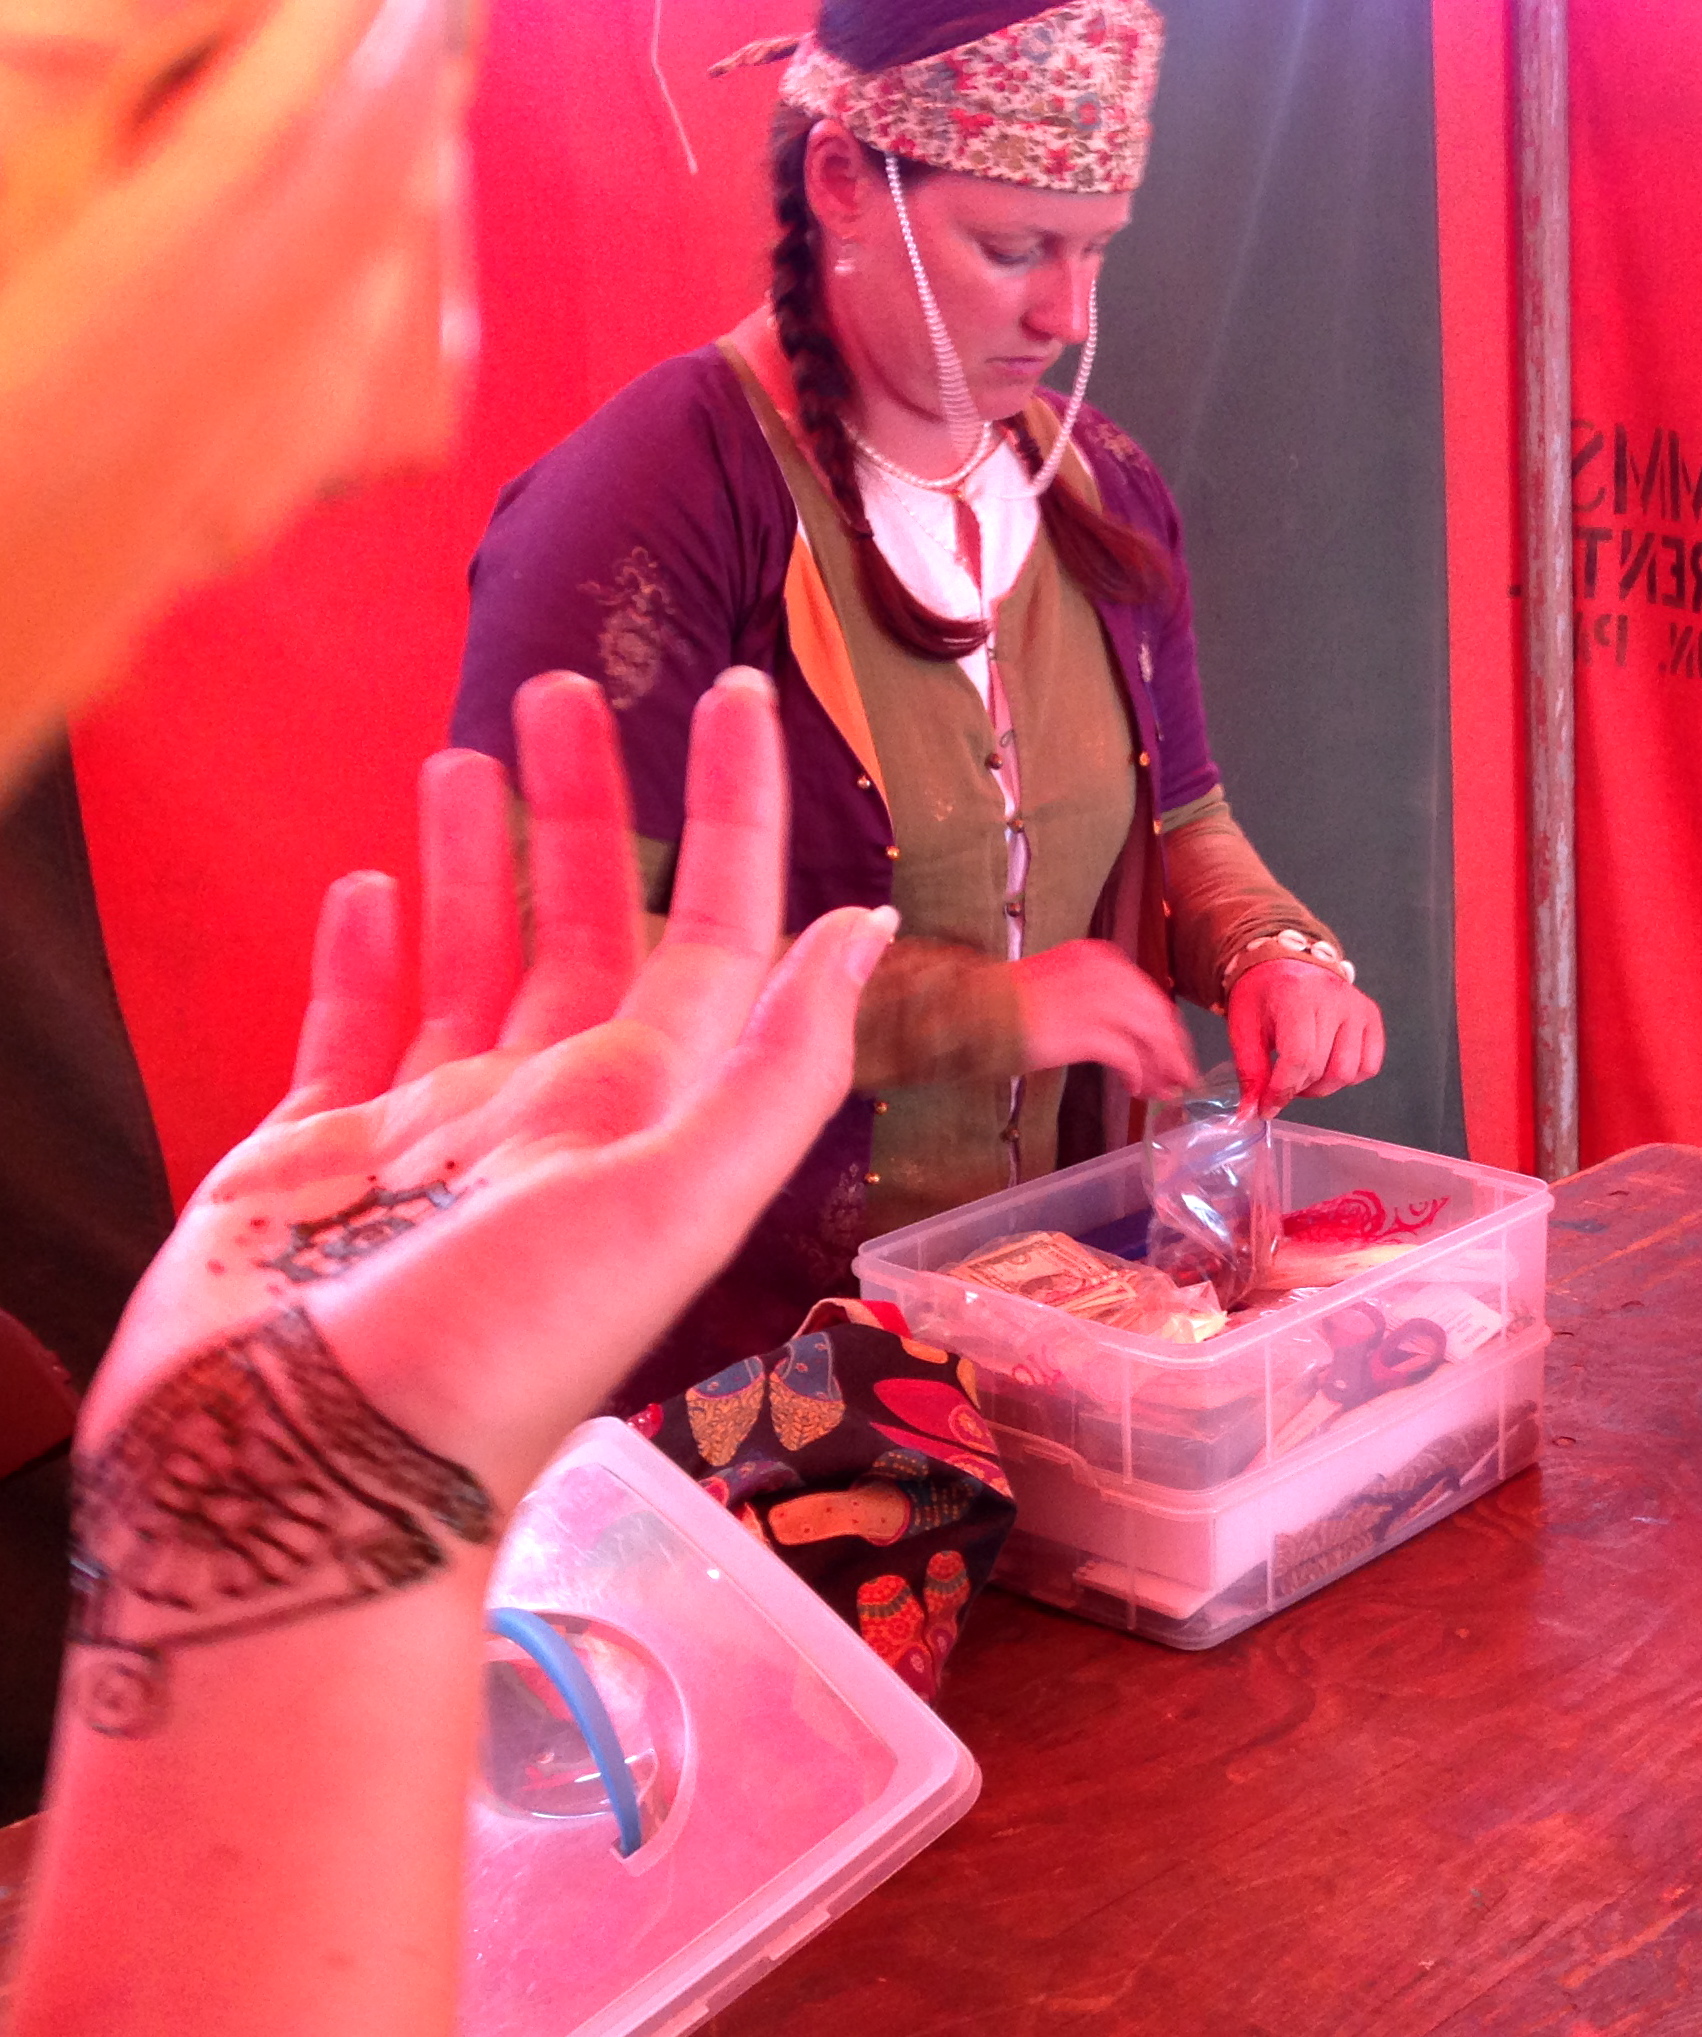
I wasn’t able to photograph myself applying it, but here is a student at Asalah’s class putting on her henna.

6. Once your henna has dried to the touch, but is not yet crackling and falling off, seal it with a lemon/sugar mixture. I mixed one tablespoon of sugar with one tablespoon of lemon juice, microwaved it for 30 seconds, then allowed it to cool. Then I lightly dabbed the henna with a cotton swab.

IMG_7758
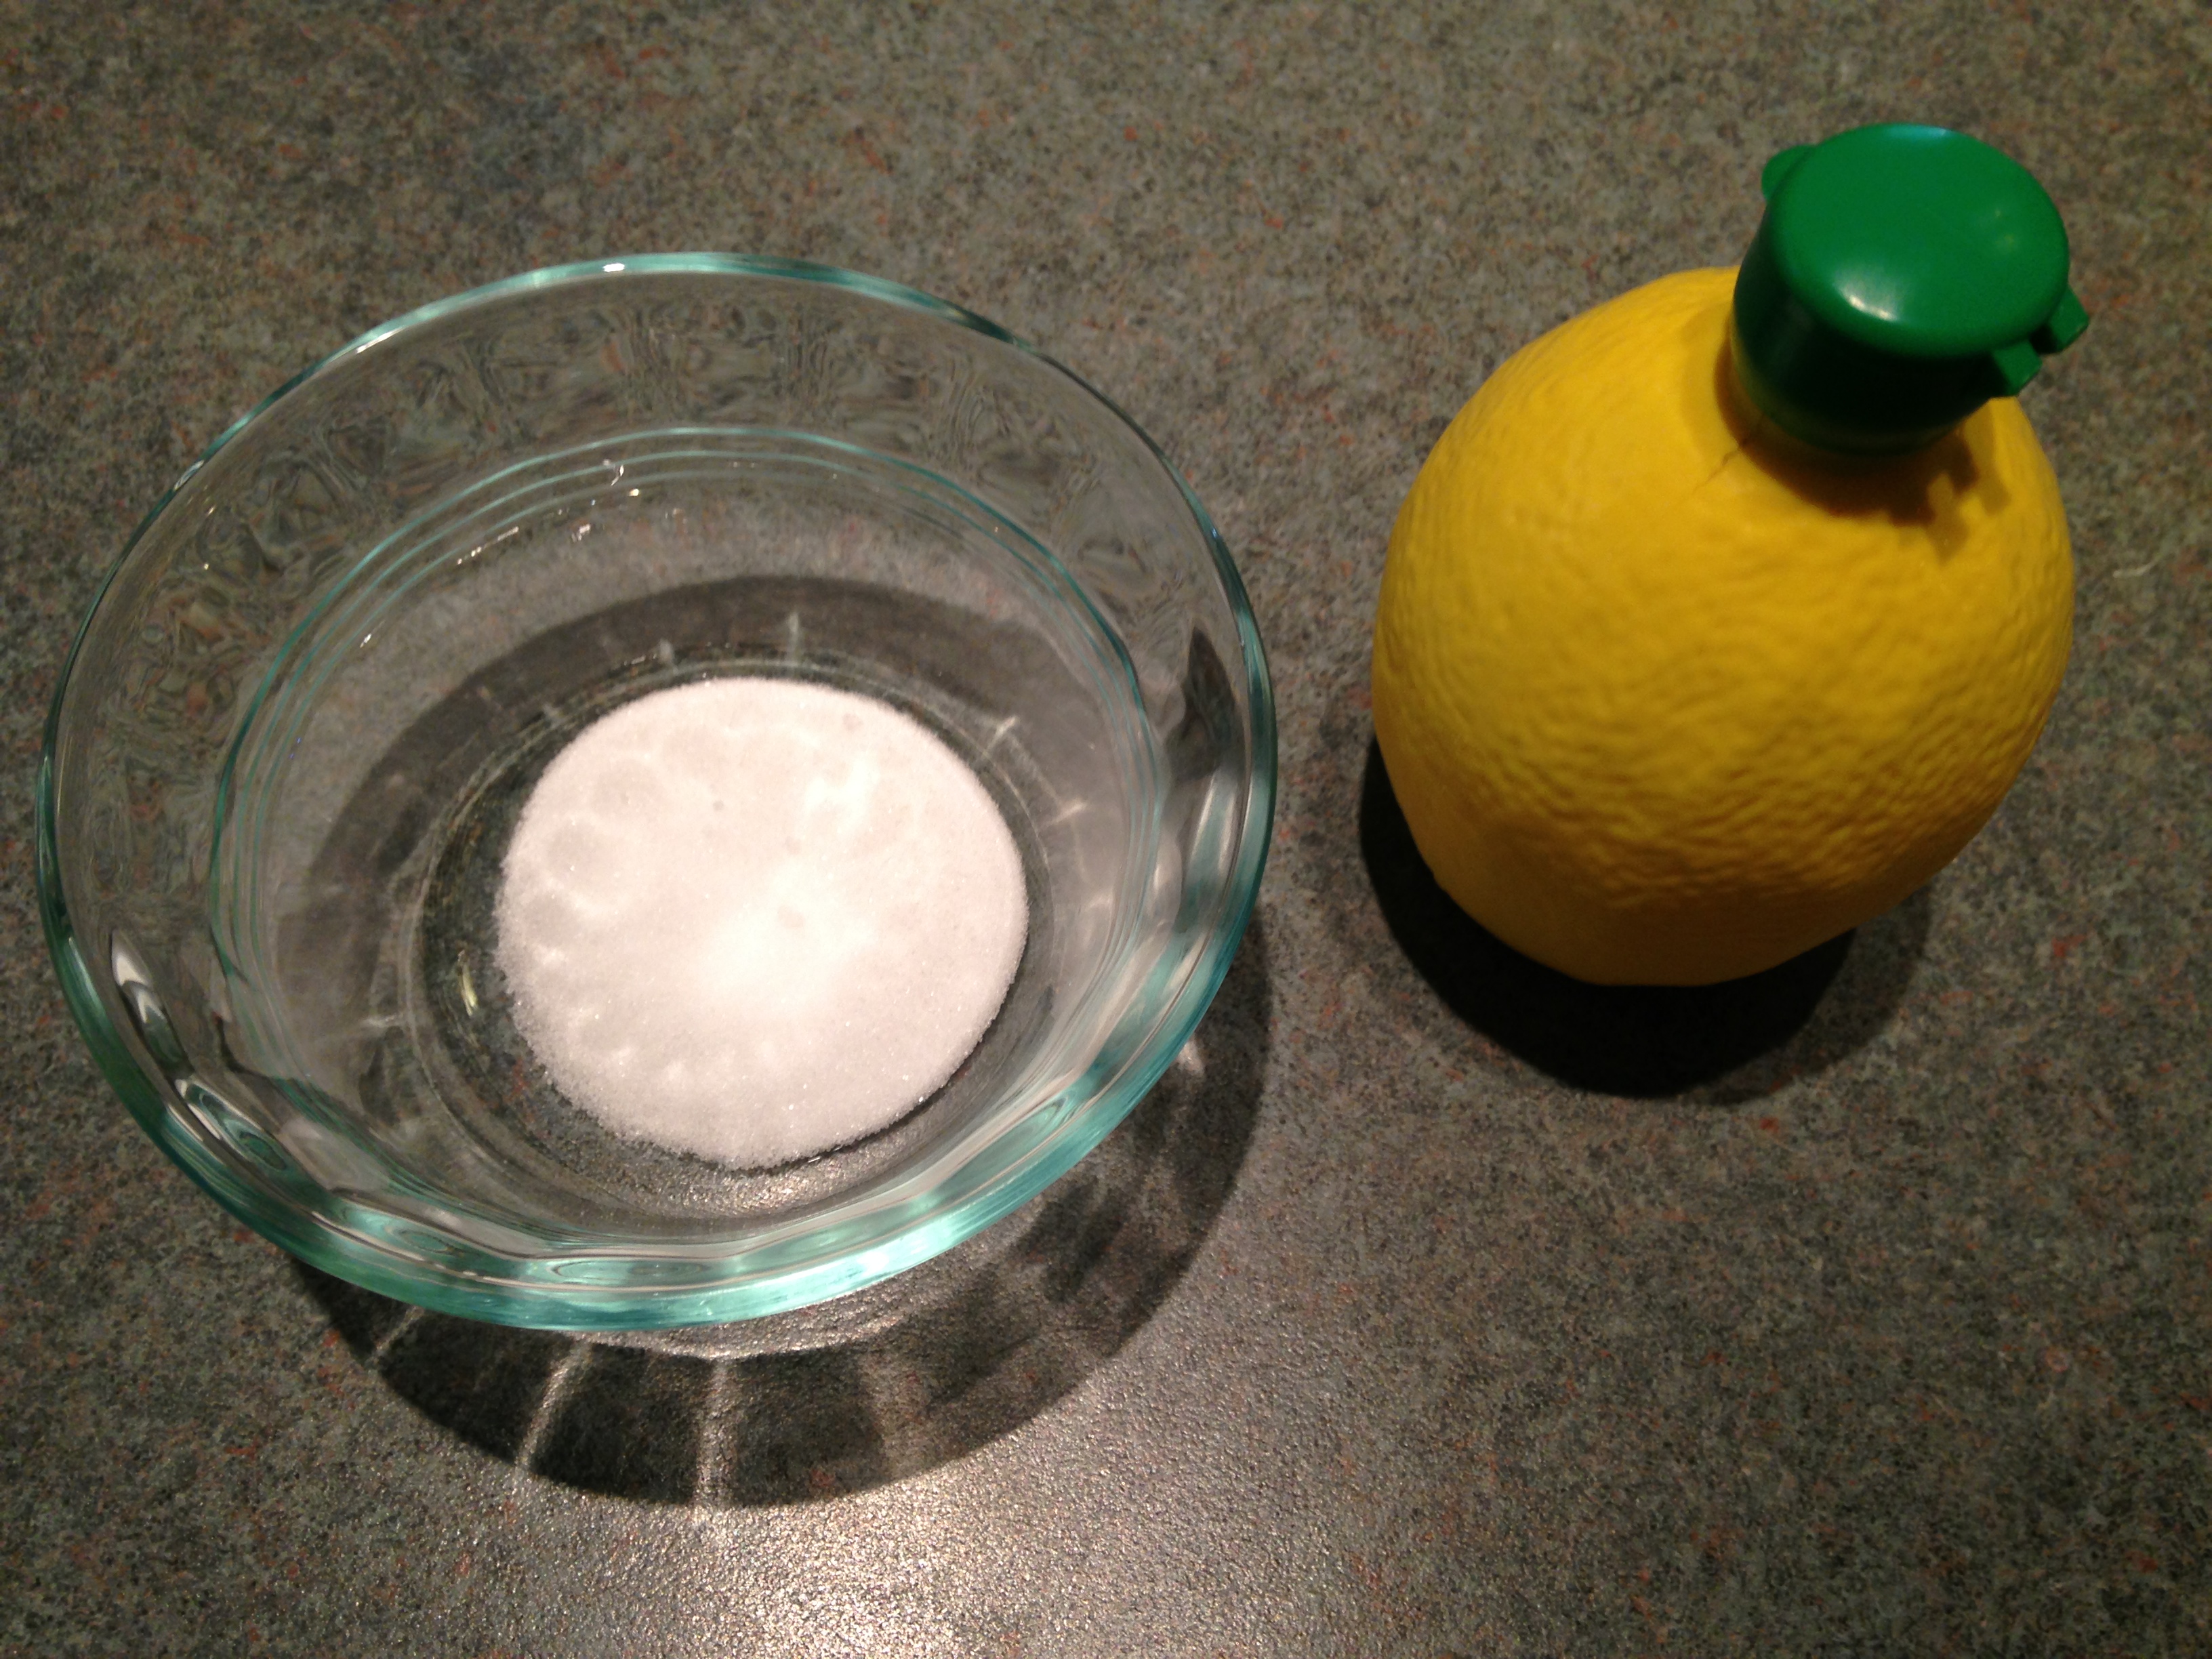
Mix equal parts sugar and lemon juice to make the sealer

IMG_4456My sealed design on my hand

7. Now let your henna paste stay on for as long as you can. (I am currently typing this article one-handed as my henna paste is still on). So far its been on for 2.5 hours, which is reallythe minimum. If you can, keep it on for 6 hours. You can leave it on overnight if you wrap it in some tissue.

8. When you’re ready, the paste can be scraped off. Do not wash it off and avoid contact with water for 12-24 hours, as getting the stain wet too soon may prevent it from darkening fully. It should darken into a reddish brown over the next 24-48 hours — to protect it, you can apply a thin layer of vegetable-based oil or beeswax-based balm before showering or bathing.

hand
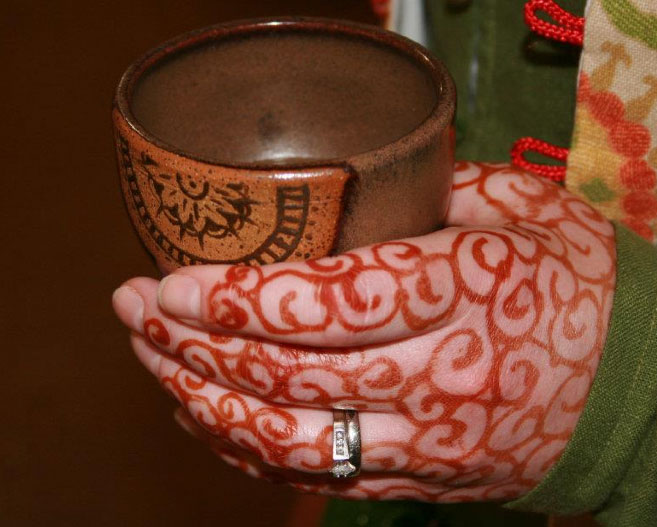
The reddish-brown stain of a henna application will last for 7-10 days if properly cared for

Tip: You can apply henna to wood, fibers, and hair, too!

henna-silk-fanAsalah’s silk fan with henna

Organizing SCA Recruitment Events: Preparations, Printables, and People!

24 September 2014

To My Fellow Chatelaines and My Most Esteemed Successor,

This is my third year as our baronial chatelaine and it’s getting about time for me to make way for another to serve our newcomers and our barony. In my three years, I’ve learned a great deal about being a chatelaine, and specifically about organizing recruitment events. Before I go, I thought it would be good to write up a little “procedures” on organizing recruitment events for new and aspiring chatelaines. I’ve tried to be specific for my successor(s) as well as general so that these procedures can be applied to recruitment events throughout the Kingdom and beyond. Please feel free to ask me any questions—I will always be a chatelaine, officeholder or not.

Genoveva
Chatelaine for the Mighty Barony of Cynnabar


recruitment-event-photo3

Organizing SCA Recruitment Events: Preparations, Printables, and People!

An SCA recruitment event, also known as a “demo,” is many things: a social gathering, a demonstration of what we love about our Society, and an event in its own right. As its organizer, you are a recruiter, planner, and autocrat, all tied up with a smile and a bow. The recruitment event serve to promote the SCA in your community as well as bring together potential newcomers with members of your group. It’s an opportunity for great things — and relationships — to begin.

In my barony, I organize four types of recruitment events:

  1. Community events and demonstrations (i.e., Saline Celtic Festival and Ann Arbor Public Library)
  2. Student-oriented recruitment festivals (i.e., Festifall, Northfest, and Winterfest)
  3. Stand-alone focused recruitment events (i.e., Cynnabar Mass Meeting)
  4. Casual meetings (i.e., Newcomer Workshops)

All four types of events have three things in common: preparations beforehand so it’s well organized, printed materials to promote and educate, and people to both demonstrate and to attend. You can use these “Three Ps” to organize every recruitment event. Let me walk you through how I do it using the Mass Meeting event we held last night as example:

Preparation for a Recruitment Event

The Cynnabar Mass Meeting is a stand-alone recruitment event held on the University of Michigan campus in Ann Arbor, and thus it is focused toward students at the University of Michigan, but it welcomes everyone in the community who may be interested in joining us.

9-12 months before – Find a place and date for your event! Rooms for a September event at U of M should ideally be booked nine months in advance (January/February) for best pick. If you’re looking for place, this is not dissimilar from finding an event site, and should be done far in advance. Check your local libraries and parks for free or low-cost event sites. Pay attention to the size and convenience of your venue. If you want to attract students, make sure it’s easily accessible; if you want to attract families, make sure there is plenty of parking.

Important: Be familiar with the SCA Demo Policy: In order to be covered by SCA insurance, demos must be approved by the sponsoring group’s Seneschal. In Cynnabar, this means we bring the demo up at a meeting to see if the group wants to support it, and if so, we approve it. Be sure you give yourself enough time to bring it before your group and have it approved.

4 months before: Request any necessary support from your group. That may be going through your approval process for the demo, or it may be requesting funds for brochures or other printed materials. Also, if you need a special insurance certificate from the SCA to provide to your site’s owner, now’s the time to request it to avoid any extra fees. (Here’s information on SCA insurance, and here’s an example of a letter I sent to request a certificate: CelticFestInsuranceCertReq2014.)

3-6 months before – Put your event out there! I add it to our baronial calendar, add it to our list of demos and events at our group’s web site, and create a Facebook event page for it. I also post a “Save the Date” notice to my group’s mailing list and Facebook page, and mention it at our meetings to maintain awareness of it. Why? I’ll talk about it a bit more later, but your PEOPLE are important, and your people need to know about it and plan to attend well in advance.

Note: If you’re thinking about having any sort of audio-video presentation at your demo, such as a video, now’s the time to start thinking and planning for it. Our group brought up the idea of a recruitment video in June, so we were able to get footage at Pennsic to make the video itself in August. I was able to make the video over a weekend, but my superpower is speed and that may not be yours — give yourself lots of time to work on it! Here’s our video: https://www.youtube.com/watch?v=046bs9DY7QY

At least 3 months before: Invite, invite, invite! You need people at your event and they won’t magically appear just because you scheduled a demo — you must invite them, repeatedly. Remember, it takes about seven impressions for someone to fully register what the SCA is and why they might want to get involved. Here’s how we invited people:

  1. Mentioned Mass Meeting in every communication with a new person, and encouraged them to attend
  2. Passed out colorful Mass Meeting flyers at our student recruitment fairs (Festifall and Northfest)
  3. Taped up Mass Meeting flyers on boards around campus and the community
  4. Asked members of my group to invite their friends and family
  5. Make notes and reminders to the Facebook event page to help remember
  6. Sent personal e-mails to every newcomer inviting them (two weeks before)
  7. Sent reminder e-mails to every newcomer (two days before)

Note: The invitation to attend the recruitment event can be “sweetened” by asking for RSVPs in exchange for a little gift. Last year I gave out canvas drawstring bags in Midrealm colors to anyone who RSVPed; this year we gave personalized, illuminated scrolls (more on that later). Having a reward for RSVPing helps them commit and attend!

mass-meeting-scroll-sample

1 month before: Determine what you can demonstrate. I may have a general idea in advance (like if we have room for a fighting demo), but I usually save the details until I get closer and have a better idea of who is attending. I should also note that I do not sweat the little details — I trust my group to bring awesome things to show and demonstrate. Mostly I look for an overview and try to cover the main things that our group excels at (combat, archery, A&S, heraldry, dance, and music). Because we had room for a dance demo in addition to fighting demos, I specifically enlisted the help of our dance mistress in organizing the dance and music folk. I also specifically enlist our group marshals to organize fighting demos (this year I live with our armored group marshal, so easy peasy). This year’s RSVP gift — the personalized scroll — required that I enlist the help of various scribes in advance, too. Finally, this is the time to confirm that your site’s facilities meet your needs, such as any tables and chairs you may need for your demonstrations.

One week before: Prepare your printed materials. Running out of toner the night before is zero fun. You may need to employ your local copy or office supply shop to make copies of brochures, so allow time for that as well. I list all the printed materials I use for demos a bit later. This is also a good time to make a schedule for your event, if applicable, as well as plan where you’ll put things in your room/site at this point — I like to make a diagram, like this:

recruitment-event-layout

1-2 days before: Remind EVERYONE. E-mail, post, chat, whatever it takes to make sure everyone you are hoping will attend remembers. Also get together all the things you’re bringing — here’s my checklist:IMG_7632


  • Banner
  • Signboard
  • Contact (sign-in) sheets
  • Cookies and napkins
  • Video on iPad and speakers
  • Photo display board
  • Printed materials (brochures, cards, sheets)
  • Nametag
  • Things to display (costumes, embroidery, leathercraft, woodcraft)
  • Extra paper, pens, pencils
  • Tablecloth(s)
  • Duct tape!


1-2 hours before: Arrive early. I cannot overemphasis how important this is to me personally. When I get somewhere early, I worry less and things go smoother. Whenever I am in charge of something, be it an event or a class, I always try to arrive early.

Here are some photos from the event last night:

IMG_7729

IMG_7722

IMG_7720

IMG_7726

IMG_7738

Printed Materials for Recruiting Events

I have made a lot of printed things over the past several years and now bring most, if not all, to recruitment events. I introduced a new one at last night’s Mass Meeting that I particularly like. Here’s a list of all my printed materials, as well as links to download and/or make your own:

  • Brochures: The Cynnabar brochure is a re-designed version of the official SCA tri-fold flyer found at http://www.sca.org/officers/chatelain/pdf/trifoldtemplate.pdf. Our version includes photos I took personally, as well as our most recent group photo. I prefer this personalized version over the generic version, but what’s important is that you have it. I have brochures on tables, as well as put brochures in the signboard placed 20-30 feet away (for those who want to read about us before they approach us).
  • Social Cards: This is a folded business card that we set out on tables. We also have folks keep these in their pockets to hand out as necessary. Here’s a generic, fillable version you can use for your group.
  • Demo Cards: These are cards you hand out to your group’s members to help them at the demo — one side has tips and reminders, the other side has a space where you can put important dates and information. I wrote up a blog post on the demo cards here.
  • Nametags: I make twill nametags so they go with our garb better—here’s the tutorial and PDFs for those.
  • Signage: Having signs around the room for various things helps everyone, newcomers and oldtimers. Here’s a PDF file with signs that you can print on card stock and fold in half to set on tables: event-signs
  • Newcomer Sheets: My latest printable is a set of individual sheets that I set around the room/site near the related activity/demonstration. They explain more about the activity and offer the locations/days/times of our related practices/workshops for that specific activity. When I greet newcomers, I give them the first page (“Welcome to the Society!”) and a folder, and tell them to pick up the other sheets places around to create their own newcomer’s handbook. I only have eight pages made so far — many more could be created! I took the text from the Newcomer’s Handbook at sca.org as well as the Newcomer’s Portal. The photos are all mine. Here’s a PDF of the pages so you can see what I’ve done—if you like this idea and what to do this, let me know and I’ll upload a fillable version for you to put your own information in.
  • Sign Up/Contact Sheets: Always have a bunch of copies of these so you can contact people later. Here’s a PDF of the one I use.
  • Flyers: Even though you probably already distributed/posted a bunch of these, I recommend you bring some to your event and pass them out near an entrance to your site/building to encourage more people to come! Here’s a PDF of a small, 1/4 page flyer we used last night.
  • Scrolls: I mentioned earlier that we had one of our scribes illuminate a scroll — I took this illuminated scroll, scanned it, and printed into onto a piece of parchment. Then we had two more scribes personalize each scroll with a newcomer’s name so they could take it home as a souvenir. I thought it was a big hit! Here’s a PDF of the scroll to use as inspiration for your own (note that it is two-sided).

IMG_7725

That’s a lot of stuff, I know, and you may not need all of it. But I find these things really help!


People for Recruiting Events

I’ve already touched on this a lot, but there is no recruiting event without people—your group’s people and the potential new people! The biggest tip I can provide here, beyond what I’ve mentioned, is personal invitations. When I personally ask someone from our Barony to attend and help out, they know they are needed and appreciated, and I find they are much more likely to try to make it to a demo. Not everyone likes demos, but most people like to know they matter, and this is an excellent time to remind them of their importance to your group.

Personal invitations to newcomers also really help. Even though we passed out a Mass Meeting flyer to nearly everyone who visited us at the student recruitment fairs, I still made a point to send a personal e-mail to each one to invite them to Mass Meeting. I really feel this makes a difference. It takes time, yes, but it’s worth it. Tip: I used Google Spreadsheets to enter each recruits e-mail address, name, and notes, then I used a mail merge to send out a personal e-mail with their name, location of where I met them, and relevant notes. This is how I sent out nearly 200 personal e-mails not once, but twice. Try it!

If your group doesn’t do a lot of demos, you may also want to schedule a workshop or meeting to talk about the demo. This is an opportunity to educate your group on what a demo is and what they can do to present a positive face to our newcomers. I don’t have to do this in Cynnabar, as our group is well-acquainted with demos.

IMG_7720

Finally, when your event is done, don’t forget to follow-up with your newcomers, thank your people for helping out, and plan another recruitment event, such as a newcomer’s workshop for all the new people to attend!

Speaking of which, a HUGE THANK YOU to Cynnabar for turning out so splendidly for our Mass Meeting last night. I’m continually amazed by your skills and talents, and your willingness to share those with new people. You are each an inspiration to me.

Let me know if you need more information or have questions!