Sewing

A Dressmaker’s Pell: Making My Own Dressform from Duct Tape!

3 July 2011

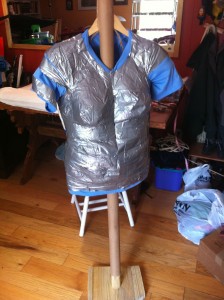
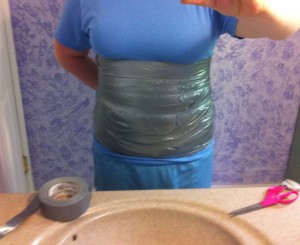
Last night’s pattern making went well, but this morning I decided I needed a way to see the muslin dresses better. I guess I wasn’t quite confident to cut out my linen without knowing that the dress really is constructed right. So this morning I got up and researched dressforms. I learned they are expensive to buy, but cheap to make if you have a bit of patience and a few easy-to-obtain supplies. So I went out and got a 60-yard roll of duct tape and some fiberfill (about $20 altogether). I put on an old t-shirt and began covering my torso carefully with duct tape.

Taping myself up

Notes: The t-shirt I chose was close-fitting, but not super tight. And it was important it be a bit long so I could continue the duct tape down over my hips. You want to tape yourself closely, but not so tight that it compresses or changes the shape of your body at all. This is NOT the time to suck in your tummy! The taping goes much faster and easier if you have a helper, but I did not … and I still managed to do it. The upper back was very difficult, and I couldn’t quite get it all. I just did the major parts (across the shoulders and over the shoulders) and that worked fine until later. For reinforcement, you’ll want to do on layer where the tape is mostly horizontal (wrapping around) and a second layer with the tape vertical — this will help your tape job keep its form after you later remove it.

Tip: If you try to do this yourself as I did, cut off strips of tape in advance and line them up on a safe surface. It makes the whole process go faster!

"Cross your heart"

You’ll want to pay particular attention to your curvy bits so you retain them properly in your dressform. I did the “cross your heart” method on my chest and it worked pretty well for me. You’ll want to use shorter bits of tape to stay true to your curves. I look like I’ve got some sort of weird duct tape armor harness on in this photo!

By the way, you’ll want to wear appropriate undergarments when you do this, or your dressform won’t drape your clothing in the way you want.

After I was all taped up, or at least as much as I could manage on my own, it was time to cut it off. If you have a helper, they could cut the tape and shirt up the back. As I did not, I cut it right down the front.

Note: Do not use your best scissors for this job. The duct tape will leave gummy residue on your scissors … blech!

Cutting off my taped shirt

Tip: Be really careful when cutting the shirt off that you don’t cut anything else you may be wearing. I thought I was doing well until I realized I’d cut a little snip out of one of my favorite skirts. I think I can mend it, but still … what a pain!

Once the duct taped shirt is off, you’ll want to tape the cut seam back up. Be sure this is well taped, because this seam will be under a lot of pressure later. Now you’ll want to stuff your dressform with fiberfill, or something similar. Before I stuffed mine, I mounted it on a pole (thick dowel from Lowe’s) which is screwed to a base made of leftover wood from my trestle table. I then attached a hanger to the top of the pole, making sure the “shoulders” of the hanger were at the same height as my own with my shoes on. It was important to me that the dressform be the same height as me so I could use it to hem my skirts!

My unstuffed dressform on a homemade stand


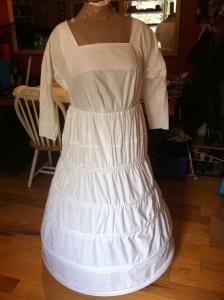
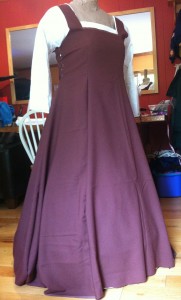
Once you’ve got your dressform the way you want it (you could also just put the hanger in it, close up the bottom, and not use a stand), it’s time to stuff it! I used cheap polyester fiberfill, but you could probably use whatever you had that wasn’t too heavy. Be sure to pack the stuff in well so you don’t have areas that are too soft or curves that are pushed in (or get pushed in later when you’re putting clothing on it). When I was done with the stuffing (it took me 2.5 bags), I made a neck out of a bit of leftover muslin and some duct tape. I then reinforced the top of the dressform with more duct tape, this time using a tan color (“cookie dough”) so it would look a bit more natural. I double-checked that the dressform was the same height as me, as well as double-checked its measurements against my own. It worked! I dressed it up in the smock I made last night and my farthingale… looks pretty good, I think! And when I tried the kirtle on it, remembering to pin up the straps a bit, I could see that the kirtle pattern I drafted does indeed look good, and I’m ready to make the real thing!

My completed dressform!


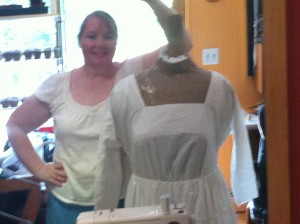
As I was making this dressform, I couldn’t help but think of Gregor’s pell and how he made it to his own measurements. Well, this is MY pell! I can use it to practice my art without fear of running myself through with a stick pin!

Me and my new dressform!


Drafting Patterns for Smocks and Kirtles

3 July 2011

I finally got the chance tonight to begin my Pennsic garb sewing. I decided to start with the simplest garment, the smock, and work my way out. I drafted a pattern based on my measurements and the instructions at http://www.elizabethancostume.net/smockpat/. I cut out some inexpensive muslin, sewed it, and it worked!! The smock was surprisingly easy to make and looked good. The only thing I’d change from my original pattern are the sleeves — I want them to be a bit wider and a bit longer — I think an inch at least.

So after my success with the smock, I moved on to the kirtle. I didn’t have any muslin for that, so I raided my stash of cheap fabrics procured from Scrap Box (recycled materials shop) which cost nearly nothing to me. I found some ugly brown twill that I think must be at least part polyester (but it wasn’t stretchy!) and used it to make a kirtle. Again, I drafted a custom pattern from my measurements and these directions: http://www.elizabethancostume.net/kirtlepat/gored.html. I decided to go with an A-Line Kirtle because I like the option of wearing my farthingale under it. The first try worked pretty well, though I think the shoulder straps need to be a bit shorter and the waist narrower. Those are both very easy to fix when I go to use the actual linen for the real kirtle. I tried my farthingale under it and it looked good.

Unfortunately, I didn’t measure the brown fabric before I cut it, so I’m not sure how much material I needed. If I were to guess, I’d say between 3 and 4 yards. The circumference of the skirt bottom is 132″, but I pieced it to make the most of the material. I think I’ll take apart the brown test kirtle apart and lay it out on my linen, using it as a pattern.

All in all, great progress for the evening! Once the patterns are down, I think I’ll be able to cut and sew these pretty easily.

More Thoughts on the Flemish Gown: Colors and Variations

29 June 2011

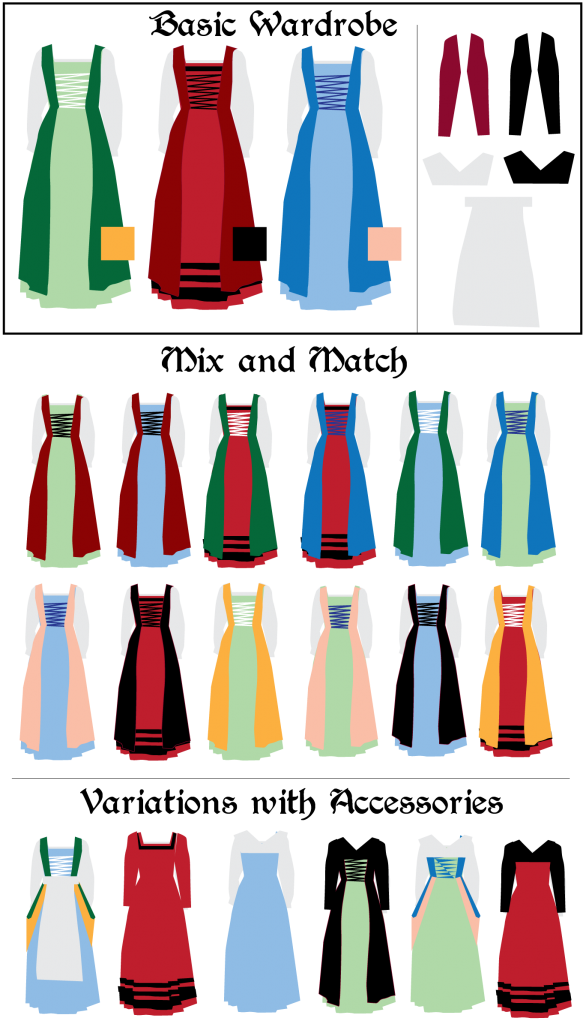
Thanks to the kind feedback at sca-garb, I am now feeling excited about making the linen Flemish Gown and excited about what I can do with it! If I make three complete reversible gowns and a few accessories, all in carefully chosen colors, I can actually get like 30 outfits out of it … maybe more, I didn’t keep going with all the permutations. Here’s what I have in mind right now — the color square next to each gown under the Basic Wardrobe is the reverse side of the overdress, and the accessories include two sets of tie-on sleeves, two partlets, and one apron.

I would like to put guarding on the bottom of the red kirtle, to give it a different look. I could also trim some of the other kirtles in various ways to dress them up a bit. I think this is really wonderful, and I can’t wait to get started! I think I will begin with the first outfit shown at the top, and have that ready for the Saline Celtic Festival demo in 10 days. I already have the linen I need in dark green, white, and gold — and I have extra white linen I can try to dye light green. Think I can do it?

The Flemish Gown

28 June 2011

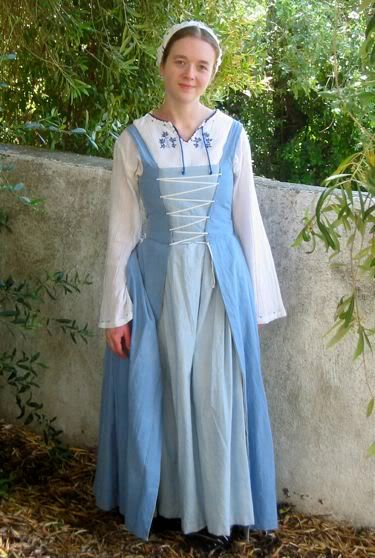
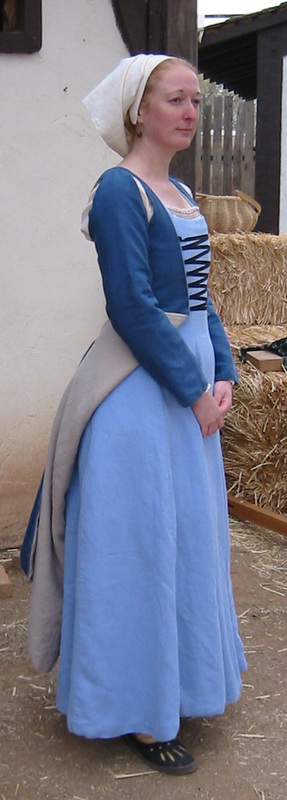
It’s time to set aside the woodworking and start making garb for Pennsic! I’ve been trying to find the right thing to sew for some time now — my requirements are that it be cool, comfortable, historically accurate, and aesthetically pleasing to ME. I’ve had a few frustrating days, but I think I’ve finally found a simple style that will work for my Pennsic garb: The Flemish Gown. The gown is based on dresses worn by Flemish woman in the 15th century, so I’m in the right timeframe for my persona, albeit a wee bit off geographically. But I was never planning to stick to one culture or time period for my garb — I plan to branch out as that exploration interests me anyway. But still, I really like the way the Flemish Gown looks — here are some photos:

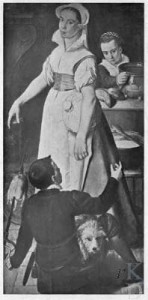
And here are some original sources that depict the dress:


The Four Elements (Joachim Beuckelaer)

Two Cooks and a Boy (Huybrecht Beuckeleer)


Besides the fact that this dress is very appealing to me, it is also very versatile. The underdress (kirtle) and overdress (gown) are separate, so if I chose my colors well, I could pair them together in different ways to achieve different outfits. If I managed to make three kirtles and three overdresses, that would give me nine different-looking outfits! That would suit me well, I think.

And as you can see by the photos above, the skirt can be worn tucked up (kirtled) or pinned back, further changing it. Of course, I’m not yet sure how hard it will be to make, but this is the best idea I’ve had yet, so I think I should try it. Here are the best directions I’ve found on how to make it: http://www.elizabethancostume.net/lowerclass/makeflem.html

So for my future reference, here are a whole bunch of links to other blogs from seamstresses who have made this gown:

Heather’s Pages (she made the kirtle reversible, which I think is a great idea!)

icklesevvy’s Flemish Front (she made everything fully reversible)

The Dreamstress

Philippa’s Wardrobe

Festive Attyre

I should probably first try to make the kirtle and underdress in an inexpensive muslin to avoid wasting any expensive linen. I shall report back as I work on this!

How to Sew a Flat-Felled Seam (Making a Shade Canopy)

22 June 2011

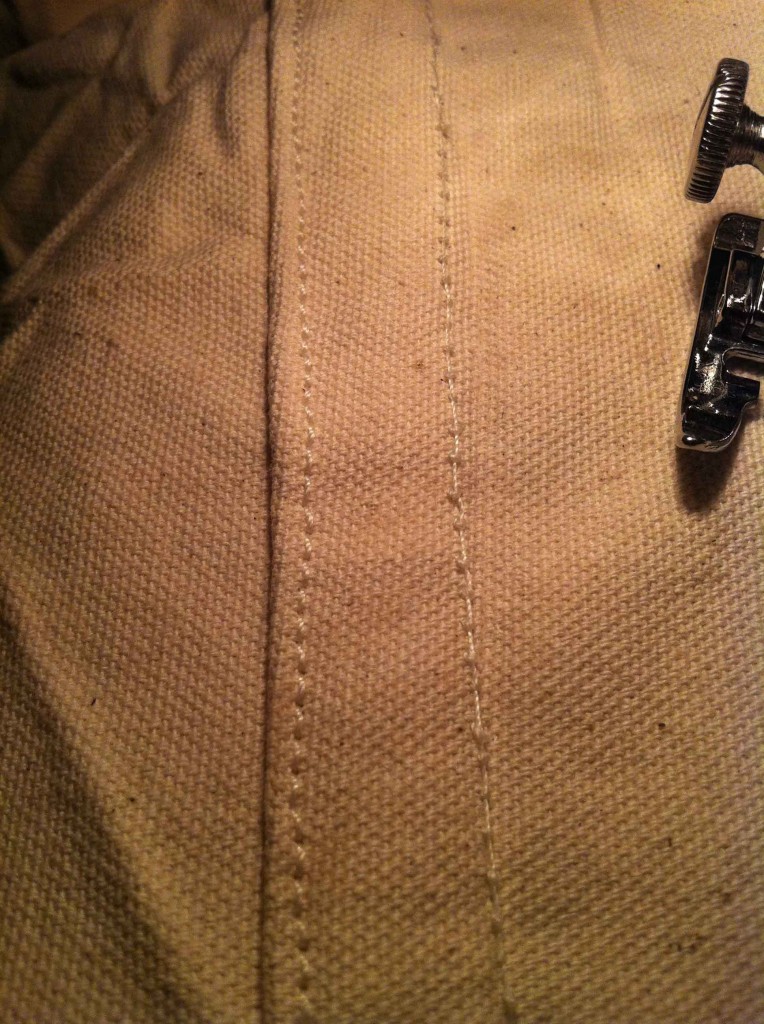
To make our shade canopy, I needed to join two large 9′ x 12′ pieces of heavy canvas together. My research indicated a “flat-felled” seam would be the strongest for this type of sewing. The idea behind it is that it makes the join stronger  because two lines of stitches get run through each piece of fabric (plus it hides the raw edges to prevent them from unraveling). It took a while to wrap my head around how to do this seam, so once I figured it out, I took photos of each step. Here’s how to do a flat-felled seam:

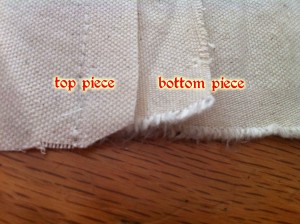
1. Place your two pieces of fabric (right sides together), but allow the bottom piece to stick out 1/2″ longer than the top piece. Stitch the two pieces together 1″ from the bottom piece (1/2″ from the top piece), as shown below:

Lay two pieces of fabric together, with the bottom extending out by 1/2" inch, and sew a line of stitching 1" in from the edge.


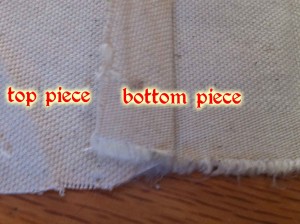
2. Flip the bottom piece out from under so the seam is lying flat, like this:

Flip the bottom piece out from under the top piece and lay flat


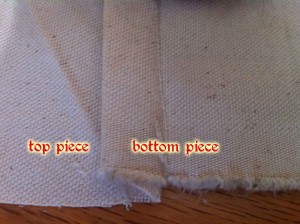
3. Lay the longer flap of the bottom piece over the shorter flap of the top piece, like this:

Lay the longer flap over the shorter flap


4. Now fold the longer flap over the shorter flap, and press flat, like this:


Fold the longer flap over the shorter flap


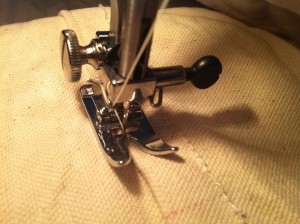
5. Sew a line to stitching to hold down the flap, like this:

Sewing the flap down


This is what the flat-felled seam looks like when finished:

A flat-felled seam

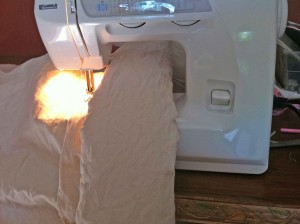
By the way, if you’re working with huge pieces of canvas as I am, you’ll find it difficult to maneuver all that material. So what I did was rolled up one edge of the canvas so it would fit into the sewing machine, and it worked very well. Here’s how I did it, in case it helps anyone else who is attempting to sew canvas with a regular, home sewing machine:

Roll or fold up one side of your material to sew the seam


By the way, I used a size 18 needle and extra-strength thread, and adjusted the tension on my sewing machine a bit, and it worked like a charm. No broken needles!

A Shade Fly for Pennsic: Ideas and Links

17 June 2011

Among my wish list for Pennsic is a shade fly to put out in front of the pavilion. What is a shade fly? Basically, a shade fly is a piece of canvas that is suspended with wood and ropes to provide a shaded area. I want one because I know I’ll prefer to spend my time outside (it’s supposed to be hot at Pennsic!) but I’m super sun-sensitive, so I need shade. A shade fly is my answer.

First, I checked to see how much a shade fly would cost from one of the pavilion suppliers. Panther Primitives wants $203 for a 14′ x 14′ fly made with 10 oz. Sunforger (cheapest option) — and that’s without poles/ropes, which are $174 extra. Plus shipping costs on top of that, so I’d be looking at $450 or even $500.

Second, I looked at how much it would cost to buy Sunforger canvas by the yard to construct it myself. I found 36″ wide 10 oz. Sunforger canvas for $6.25 yard. Since I wanted at least a 12′ x 15′ shade fly, that would be $125 + shipping for 20 yards of 10 oz. Sunforger. Still a little more than I want to pay right now. Perhaps in the future when I feel more secure in my fly/tent-making skills.

Third, I checked out alternate canvas sources. Joann’s has outdoor canvas for $20/yard — too expensive! Cotton duck canvas is $13/yard  — still too much. Even cotton twill is $5 yard, and I don’t know how well that would even work. Looking around online, I see people have had success with heavy-duty painter’s canvas drop cloths. Lowe’s has  9′ x 12′ 10 oz. cotton canvas drop cloths for $20. They aren’t “boat shrunk” like the Sunforger stuff, but I could pre-shrink them by washing them several times in hot water. And two put together — after sewing edges and reinforcing the center — would give me a shade fly of about 11′ x 16′.

So, after thinking about it quite a lot, I decided to get the drop cloths. They’re in the washing mashine now, shrinking, before I begin sewing. While I was at Lowe’s, I also got a 2″ x 4″ x 12′ ridge pole, some 2″ x 2″ x 8′ poles (8), lag screws (8), 10″ steel nails (10), and rope.

But now that I have it all, I realize I don’t see how I’m going to put this shade fly up by myself! I’m strong, but not that tall … and this is tall and big. I think I’m going to need to sew the fly (including grommets), attache the lag screws to the tops of the poles, and then wait for Gregor to come in July before we assemble and test it. He’s tall — he can help!

Here’s my inspiration for my shade fly, and about what I want it to look like:

A Simple Shade Fly

In the meantime, here are some useful links about shade fly construction:

Tent Information/Research (this is the main inspiration for my shade fly — post is about 1/2 way down by asbrand)

Shade Fly 101 by Maestra Giovanna

Shade Fly by Adventures of a Wanna-Be Seamstress

« Previous Page