A Shade Fly for Pennsic: Ideas and Links

17 June 2011

Among my wish list for Pennsic is a shade fly to put out in front of the pavilion. What is a shade fly? Basically, a shade fly is a piece of canvas that is suspended with wood and ropes to provide a shaded area. I want one because I know I’ll prefer to spend my time outside (it’s supposed to be hot at Pennsic!) but I’m super sun-sensitive, so I need shade. A shade fly is my answer.

First, I checked to see how much a shade fly would cost from one of the pavilion suppliers. Panther Primitives wants $203 for a 14′ x 14′ fly made with 10 oz. Sunforger (cheapest option) — and that’s without poles/ropes, which are $174 extra. Plus shipping costs on top of that, so I’d be looking at $450 or even $500.

Second, I looked at how much it would cost to buy Sunforger canvas by the yard to construct it myself. I found 36″ wide 10 oz. Sunforger canvas for $6.25 yard. Since I wanted at least a 12′ x 15′ shade fly, that would be $125 + shipping for 20 yards of 10 oz. Sunforger. Still a little more than I want to pay right now. Perhaps in the future when I feel more secure in my fly/tent-making skills.

Third, I checked out alternate canvas sources. Joann’s has outdoor canvas for $20/yard — too expensive! Cotton duck canvas is $13/yard  — still too much. Even cotton twill is $5 yard, and I don’t know how well that would even work. Looking around online, I see people have had success with heavy-duty painter’s canvas drop cloths. Lowe’s has  9′ x 12′ 10 oz. cotton canvas drop cloths for $20. They aren’t “boat shrunk” like the Sunforger stuff, but I could pre-shrink them by washing them several times in hot water. And two put together — after sewing edges and reinforcing the center — would give me a shade fly of about 11′ x 16′.

So, after thinking about it quite a lot, I decided to get the drop cloths. They’re in the washing mashine now, shrinking, before I begin sewing. While I was at Lowe’s, I also got a 2″ x 4″ x 12′ ridge pole, some 2″ x 2″ x 8′ poles (8), lag screws (8), 10″ steel nails (10), and rope.

But now that I have it all, I realize I don’t see how I’m going to put this shade fly up by myself! I’m strong, but not that tall … and this is tall and big. I think I’m going to need to sew the fly (including grommets), attache the lag screws to the tops of the poles, and then wait for Gregor to come in July before we assemble and test it. He’s tall — he can help!

Here’s my inspiration for my shade fly, and about what I want it to look like:

A Simple Shade Fly

In the meantime, here are some useful links about shade fly construction:

Tent Information/Research (this is the main inspiration for my shade fly — post is about 1/2 way down by asbrand)

Shade Fly 101 by Maestra Giovanna

Shade Fly by Adventures of a Wanna-Be Seamstress

Emerald Waves of the Crimson Guard Band: Tablet-Weaving Pattern

16 June 2011

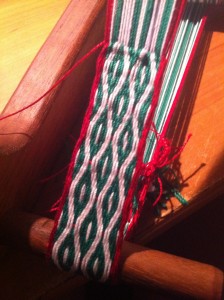
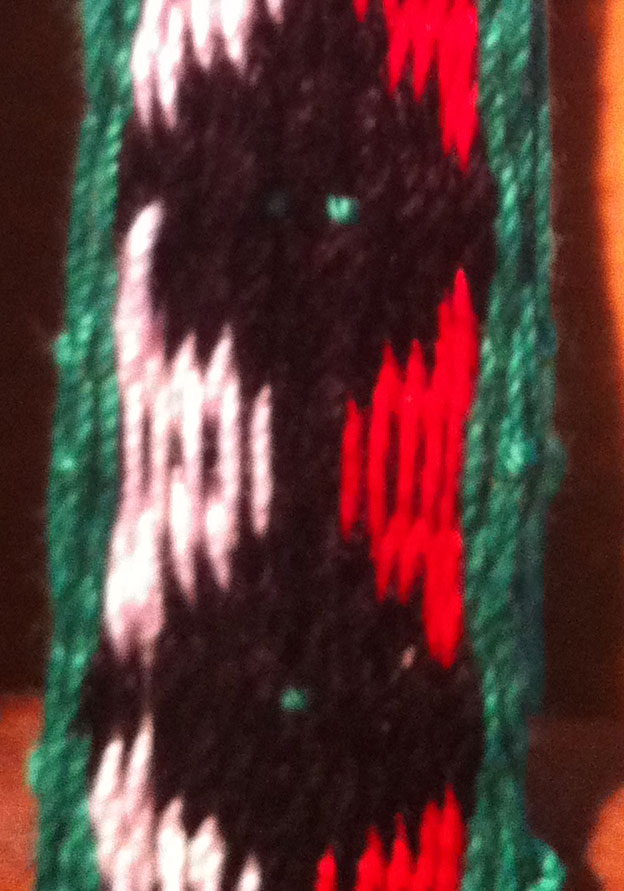
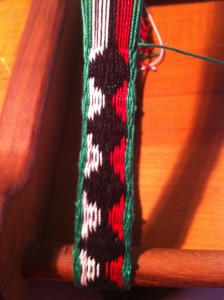
I’ve started on my fifth tablet-weaving band, which I am calling the “Emerald Waves of the Crimson Guard” band. Yes, that’s an awfully long and fancy name for a little tablet-weaving band, but it’s FUN! Here’s how it looks so far:

Emerald Waves of the Crimson Guard Band

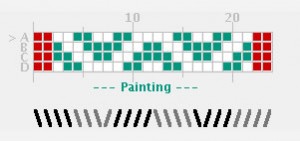
This is a pretty simple threaded-in pattern — the work is mostly in the threading of the cards, not the actual weaving. I got the pattern from a German site (Flinkhand.de). It takes 24 cards and three colors — here’s how the cards were threaded:

Emerald Waves Pattern

The card turning is very easy — four forward, four backward. It’s a great thing to do while Gregor and I are playing the D&D (Dungeons & Dragons) game he made for me (which is amazingly awesome, I must say). I’d love to say more about the D&D game, but well … I better ask him first!

This band is for my Irish dress, which I’m making for the Saline Celtic Festival which is being held July 8-9, 2011. I should start working on the dress itself, but I want to wait until at least July 1. Not only do I have a work deadline July 1 and really should focus on it, but I am in the midst of losing weight and want to wait a bit so the dress isn’t too loose on me. Couple weeks will do the trick!

A New, Larger Loom for Tablet and Inkle Weaving

12 June 2011

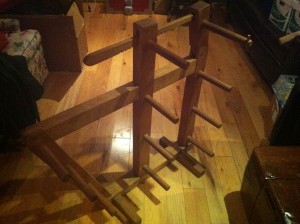
Today I stumbled across a new and much larger loom — it’s 40″ tall! It was being sold at a garage sale, and I discovered it when a fellow Cynnabar member posted about it on our mailing list. The frame is made of hardwood and the dowels are pine — it was built by a cabinetmaker for his wife. Oh, and the best part? It can do 8 yards! I can’t wait to try it out.

My New Loom

A Table for Pennsic: St. Jerome’s Trestle Table

9 June 2011

It’s time to make a camp table. I’ve been thinking about it a lot — and researching ideas online — and I would like to make a trestle table so it’s easy to take apart and put together. Specifically, I want to make one that looks like this:

St. Jerome in His Study

The above engraving is by a German artist (Albrecht Dürer) in 1514. It is a great, period table that would fit well with our personas. And it looks pretty easy to build. I’ve found several plans for it online:

The Peacock Table (made from common wood stock)

St. Jerome Trestle Table (made from plywood)

I’m torn between using plywood and non-plywood. I want to use the table on a regular basis as a sewing table, so I’m leaning toward non-plywood. But it’s expensive and I’m finding it hard to find 2″ thick wood that the first plans call for.

I am considering using a door slab (a door without paneling or a hole for a handle) for the tabletop. I used to have a table from IKEA that was essentially built like that and I never had a problem with it. And door slabs are only about $25. So I’d just need to find the wood for the legs and braces.

Tomorrow morning I am going to a place we have here called Reuse Center. They sell reclaimed lumber and old doors. Maybe I can find something interesting and affordable there that I can use in lieu of plywood.

Cynnabar Band: My First Tablet Weaving Pattern

8 June 2011

Now that I’ve woven three bands from others’ patterns, I want to make my own tablet-weaving pattern. I think a simple, threaded-in pattern would best for my first. But I still want something relevant, so I’ve decided to try to weave a band in the colors/style of the Barony of Cynnabar. The barony’s device is pictured to the right — black, white, red, and green:

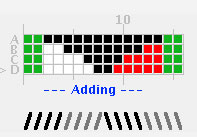
So after fiddling about using graph paper and an online weaving design tool (http://www.theloomybin.com/cw/index.html) I came up with a preliminary pattern using 16 cards and four thread colors, as follows:

First Pattern Attempt

So I threaded my loom with my pattern, noting the card-threading directions — a / means “S” threaded (from the front of the card to the back) and a \ means “Z” threaded (from the back of the card to the front). Then I tried it, with this turning sequence: four turns forward (entire pack), four turns back (entire pack). This was my result:


My First Pattern Result

Not bad — the color and shape is what I was looking for, but what’s with that green thread in the middle? Well by this point I was sleepy and went to bed, but all night in my dreams I was trying to work out how to get rid of this green thread. Finally this morning, I figured it out — I need to turn the two middle cards in my pack (#8 and #9) independently of the other cards, so that the turn happened BETWEEN the diamonds, but in the middle of them. So now I separated my cards into three packs — pack 1 (cards #1-7), pack 2 (cards #8-9), and pack 3 (cards #10-16) — and my turning sequence looks like this:


Picks Pack 1 Pack 2 Pack 3 Sequence
1 Up Up Up Turn all packs one quarter turn backward
2 Up Up Up Turn all packs one quarter turn backward
3 Up Down Up Turn packs 1 and 3 one quarter turn backward and turn pack 2 one quarter turn forward
4 Up Down Up Turn packs 1 and 3 one quarter turn backward and turn pack 2 one quarter turn forward
5 Down Down Down Turn all packs one quarter turn forward
6 Down Down Down Turn all packs one quarter turn forward
7 Down Up Down Turn packs 1 and 3 one quarter turn forward and turn pack 2 one quarter turn backward
8 Down Up Down Turn packs 1 and 3 one quarter turn forward and turn pack 2 one quarter turn backward

And here is the result of the modified pattern:

The Cynnabar Band

Hooray! This is what I was aiming for! Now I think I need to work on getting my threads tighter. I’m beating it down quite firmly, but I’m thinking I should put a little more muscle behind it. I’d like to see really tight threads in this band.

Gates of the Barony of Cynnabar

6 June 2011

I found this photo of the gates of the Barony of Cynnabar on the SCA site of my friend Tracy (Duchess AnneMarie de Garmeaulx). This is the first time I’ve ever seen it — I’m just so excited about Pennsic!

Gates of Barony of Cynnabar at Pennsic

I wonder what that wooden thing with all the heraldry off to the side might be. [Edit — I’ve been told it is a “china hutch,” but that it isn’t in use any more. I think it was used to display who was in camp at any given time. It’s a neat idea!]

Her Grace (did I say that right?) has many more photos of Pennsic 35 at http://www.degarmo.net/sca/pennsic35/index.html


Our Cooler Cooler: How We Turned a Boring, Mundane Cooler Into an Old Treasure Chest

6 June 2011

In preparing for Pennsic, I know we want to bring a cooler. Gregor will be fighting hard, it will be hot, and it would be good to have a cold drink or two. But a cooler? How mundane is that?! So I set out to look for ideas on bringing a cooler to Pennsic. Here’s what I found:

  • Hide the cooler in the tent
  • Throw a blanket or rug over the cooler
  • Make a wood box and put the cooler in it (i.e., Medieval Cooler Chests)
  • Buy a fancy, expensive, wooden cooler (i.e., Cowboy Country Coolers)
  • Change the outside of the cooler so it wouldn’t stand out

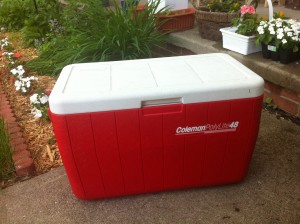
My Old Red Cooler

The last idea fascinated me, and I discovered this link on Making a Cooler Cooler by Ceallach mac Donal. I loved his idea of decoupaging his cooler, so I set out to try it with my old, bright red cooler. It was pretty simple but still quite functional, so it seemed like the perfect guinea pig for this idea.

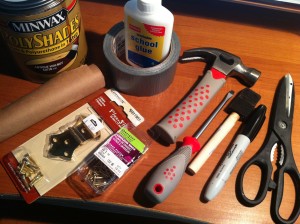
Next I needed to gather the supplies, and luckily I had several at home already. Here’s my list of what was needed for this project:

Things I used to transform my cooler

(more…)

Gregor Reinhardt: An Introduction

5 June 2011

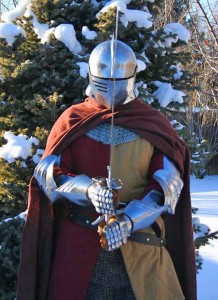
Gregory Reinhardt von Holstein

Gregor Reinhardt

A persona set in the 1400s – A toast to the medieval German fighting man. I have adopted this persona to attempt to get a glimpse into what is was and how it felt to live in the time of kings and castles. Over the next many months I shall be writing various articles relating to the medieval man-at-arms. This will include articles on medieval combat (S.C.A. as well as historic) armor working, matters of honor, and medieval life. This blog will grant me the opportunity to share my various projects with anyone interested – projects that will be focused on doing things as historic as possible without sacrificing the safety of myself and others… nor the common sense and practicality that modern materials provide.

Stay tuned…


We Have a New Rattan Stave!

5 June 2011

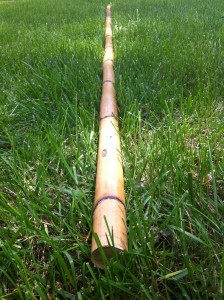
A 9-foot-long rattan stave

Look at that thing! It’s very long … I wonder how many swords Gregor can get out of this.

This appears to be a great piece of rattan — dense, straight, smooth, and uniform in diameter. (At least, that is what swordbrother.com defines as a good piece of rattan for an SCA weapon, and they know considerably more than I!) Here’s what the site says about choosing rattan:

You want a smooth stick of rattan because imperfections are weak spots. A piece of rattan that has a ridge along one of its segments should not be bought, in my opinion, because that ridge will cause some problems when it hits an opponent or a shield. It will channel more energy into your opponent in a focused edge, which is exactly what we’re trying to avoid by using rattan in the first place. Also, when you hit a shield, or other non-yielding object with that ridge, you will transmit all your energy back into that edge, which will lead to a much shorter lived stick.

Many thanks to Lord Jason Irenfest for purchasing this for us at the Midrealm Crown Tourney!


Camp Furniture for Pennsic War

5 June 2011

We’re going to our very first Pennsic War in just 58 days … and I am beyond excited. I’ve wanted to go to Pennsic since the mid ’90s when I first discovered the SCA. My friend Tracy (Duchess AnneMarie de Garmeaulx) raved about it to me, and it’s been on my “bucket list” ever since. And this year I’m going with my son and Gregor. Tracy is lending me her pavilion (thank you, Tracy!), but everything else I need to make or buy. It’s going to be a busy summer!

Beyond needing loads of garb, we need camp furniture. The metal-and-polyester camp chairs and air mattress we use for mundane camping are not going to cut it for us. If we’re doing Pennsic, we’re doing it right. So here’s my list of furniture I need to construct:

  • Table — for eating on, doing crafts on
  • Benches – for sitting on at the table, or wherever
  • Chairs (with backs) for sitting
  • Beds – for sleeping (of course!)
  • Wardrobe – for hanging clothes
  • Chest – for storing food

Yikes, that’s a lot of stuff to make! Two I can cross off the list already — I bought a simple metal-and-canvas wardrobe from Wal-Mart for $15. It will be inside the pavilion and no one will see it, so no worries there. And the benches I’ve already made — they are simple plywood benches that come apart for flat transport. Nothing fancy, but with a coat or two of stain, they’ll look pretty good, I think. Here is the bench pattern I adapted for my own use (many thanks to Charles Fleming), and here’s what the benches look like, unstained:

Simple Camp Benches

So I think the next furniture project I will tackle is a table. I need something that packs flat in the van, is easy to assemble and dissemble, is sturdy, and is large enough for three people to use comfortably — yet is simple to make and not too costly. A tall order, probably. I am searching for table plans — here are my ideas:

A Trestle Table with Tusk Tenon Joints

A Portable Trestle Table

Mock Trestle Table Project <– I really like this one!

My thinking is that I can use this table as a sewing table when it’s not in use at camp, as I really need a nice, big table for all my sewing project.

« Previous PageNext Page »