Portable Clothes Rack for Events, Camping, and Gold Key (Wood Garment Rack)

8 April 2013

An easy-to-make, wooden clothes rack!

When Queen AnneMarie mentioned She’d like to have a clothes rack in Her royalty rooms during Her reign, Gregor and I came up with an idea of a wooden break-down A-frame rack made of simple materials. We made it for less than $40 in less than an hour, and it works great!

In addition to holding royal garb, we use it at SCA events for holding gold key (loaner garb) for newcomers, we used it to hold clothes (and provide some privacy) in a crowded cabin at Gulf Wars, and we use it in our pavilion at Pennsic. You could also use it as a frame for some sort of privacy screen.

September 2014 Update: We’ve made several of these clothes racks now. The reign is long over, and we now use them at Pennsic in our pavilions as well as for holding Gold Key loaner garb at our local events. The key is making sure the holes into which you put the dowels are as snug as possible. The sturdiest one we made was of whitewood (poplar), while the pine versions seems to want to shift around a bit. None of them are intended for a lot of heavy stuff — this is just a simple, lightweight solution that was originally meant to hold just two garments (the King’s and the Queen’s). In practice, though, I load ours up at Pennsic with a LOT of clothing — it leans a bit to one side under the enormous weight of our garb (I’m a costumer), but otherwise stands and keeps our stuff up off the ground. Here’s a picture of it in use last year at Pennsic:

IMG_0127 IMG_0138

Anyone can make this with a few tools and a quick trip to your local home improvement store. Here’s what you need to make your own clothes rack:

Materials and Tools:

Materials and tools needed to make your own clothes rack

4 (four) – 1″ x 3″ x 6′ Poplar boards (avoid pine or softer woods) – $6.75 each

2 (two) – 3/4″ x 48″ Poplar dowels – $3 each

1 (one) – 1 1/8″ x 48″ Poplar dowel – $4 each

1 (one) – 4′ length of rope

Saw, drill with a 7/8″ bit and a  1 1/4″ bit, pencil, and ruler

(optional) stain, primer, paint, and/or varnish


Instructions:

1. With your pencil, mark a 15° angle at the end of each of your four 6′ boards and use your saw to cut them. (The angles are to allow the legs of the rack to rest level on the floor. You can change this angle a bit — a larger angle will mean a wider base, a smaller angle will mean a narrower base.)

Step 1: Cut angles at bottoms of all four boards

2. Make a mark about 4″ up from the bottom of each board, centered. Using your 7/8″ drill bit, drill holes at the spots you marked. (This is where your bottom dowels will enter.)

Step 2: Drill a 7/8″ hole four inches up from the bottom of each board.

3. Flip your boards over to the other end (the top) and make a mark about 2″ down from the top of each board, centered. Drill one hole in each board using the 1 1/4″ drill bit. (This is where your top dowel will enter.)

Step 3: Drill a 1 1/4 hole 2″ from the top of each board.

4. Now assemble your rack by placing cris-crossing the tops of two boards and putting the larger dowel through both holes, then repeat with the other two boards on the other end of the dowel. Now slide the smaller dowels into the holes at the bottom of the legs. (You may need to tap the dowels and/or boards to get them all to slide through the holes — you want it to be pretty snug for stability.)

Step 4: Assemble your rack!

5. Tie your rope between the two smaller dowels. (This keeps the rack from spreading apart.)

That’s it! You can use the rope to keep the boards bundled together when it’s broken down. You can stain or paint your clothes rack. I’ll admit I haven’t bothered to do it yet, but it still works and looks great.

The rack breaks down for easy transport

Pennsic Classes and Handouts

27 July 2015

Screen Shot 2015-07-27 at 11.12.48 AMWe’re just about to leave for Pennsic 44! Here are all the handouts we’ve prepared for our five classes this year at Pennsic — each one is in PDF format.

armor-stand

canvas-dayshade

painting-your-pavilion

clothes-rack

camp-sink

hand-cart gothic-chairs

trestle-table

camp-kitchen

Honeycomb-Pleatwork-Apron-2015

Drawnwork-Hemstitch-Hankie-Handout

Pleatwork-Book-Small

Screen Shot 2015-07-27 at 11.15.03 AMround-pavilion-sides-straight-template

round-pavilion-sides-sloped-template

round-pavilion-top-template

chain-mail


Our classes are as follows:

Thursday, July 30

Pleatwork Apron Make-and-Take (Genoveva) – 10:00 am in A&S 12 – 2 hours

A hands-on, instructional class on smocking, or honeycomb pleatwork, the gathering method commonly seen in German Renaissance clothing (but also popular for hundreds of years throughout Europe). You will make your own apron to wear around camp in style! We’ll also discuss pleating in general as we work, and students can read my 30-page research paper on historical pleating techniques. Materials available for 10 people ($10), or bring your own medium-weight, WHITE linen (1 yard). Free handouts for 25.

Period Pavilion Papercraft (Alexander) -1:00 pm in A&S 6 – 1 hour

Come learn how pavilions (tents) were made historically using basic construction techniques. Students will make a paper craft pavilion in the shape of their choice to take back to their own camp. Please bring scissors appropriate to your age (no sewing will be done). Free templates.

Enhance Your Camp (Gregor) – 4:00 pm in Camp Cynnabar (W02) – 1 hour

Join us at our camp to learn about how to make personal camp improvements that can enhance both its appearance as well as your own quality of life. Most projects are made from wood with basic tools and do not require special knowledge, skills, or equipment. Handouts will be available for each camp project ($1/handout), including our camp cart, kitchen worktable, sink with foot pump, trestle table, benches, chairs, clothes rack, armor stand, and more.


Tuesday, August 4

Mastering Pleatwork: Advanced 16th Century Techniques (Genoveva) – 10:00 am – A&S 12 (1 hour)

Experienced pleatworkers are invited to join me to discuss advanced methods of creating and securing pleats used in 16th-century Europe. Includes a review of my in-depth research on imagery and techniques, as well as a variety of reproduction pleatwork to touch and feel. After I present my research and experimentation, I will open the floor for discussion and practice. Participants will also have an opportunity to practice some of the more complicated stitches if they wish. 50-page handouts for 10 ($3 each), materials for 5.


Wednesday, August 5

Drawn Work Handkerchief Make-and-Take (Genoveva) – 2:00 pm in A&S 3 (1 hour)

A hands-on, instructional class on drawn work, specifically the hemstitch, seen in German, Italian, and English Renaissance clothing and accessories. Participants will create their own handkerchief with a drawn work hem, and learn how to make more elaborate drawn work designs on their own. Materials available for 10 people ($1 fee requested), or bring your own medium-weight, white linen (12″ x 12″). Free handouts available for 25.


Hope to see you at Pennsic!

The Good German Armor Stand: How to Make a Portable, Folding Wood Armor Stand in Less Than Three Hours

22 July 2015

ArmorStandTitleAt our first Pennsic four years ago, we attempted our first armor stand. It was a bunch of 2x4s screwed into the semblance of an armor stand on site. Sadly, it couldn’t hold the full plate armor Gregor had brought with him and it had a tendency to fall over.

The next year at Pennsic, Gregor noticed Baron Jasen Irenfest’s gorgeous (and functional) armor stand and asked how he made it. It turns out Jasen’s armor stand was based on a 1990 article that appeared in Tournament Illuminated, “A Barbarian Armor Stand,” by Sir Timoch of Nordhem. So, armed with the plans and materials, we set out to make a Barbarian Armor Stand. We found Sir Timoch’s general design to be good, but made our own improvements to key design details, as well as corrected the material list and modified some instructions. We updated the original plans to our liking and present them here with steps and photos. Many thanks to Sir Timoch, wherever he may be, for the original idea!

Notes: These plans will produce a custom armor stand that will fold down for easy transport. It can be setup inside or outside, and optional stakes can be inserted in the base when used outside for windy conditions. The stand will support most parts of your armor, and, so far, is quite sturdy and stable. We’ve used the armor stand at Pennsic for two years, as well as at various events around the Middle Kingdom. It’s continuing to work great!

IMG_7036

Armor Stand Materials:

  • Three 8-foot-long 2″x4″ lumber (currently $3.57 a piece from Lowes)
  • Eight 3-inch-long hinges (currently $2.17 per hinge from Lowes)
  • One bolt 3/8” x 31/2” long
  • One 3/8” wingnut (make sure it can screw onto the above bolt)
  • Two 3/8” x 11/2” washers (make sure hole is big enough to go over the neck of the bolt)
  • Eighteen 8d nails or 2 1/2″ wood screws
  • One small bottle of wood glue
  • One 18″ length of string
  • Optional: small cans of wood stain and polyurethane

Armor Stand Tools:

  • Hand saw or other cutting device like a mitre saw or jigsaw
  • Hammer
  • Drill
  • 1/2” bit
  • 11/2” spade bit
  • Screwdriver
  • Measuring device (tape measure or yard stick)
  • Pencil
  • Gummy bears (okay, those are optional, but yummy!)

Armor Stand Instructions:

Step 1. Take the measurements of the person whose armor will hang on the stand. You need three measurements:

  • Crown to crotch
  • Hip to hip
  • Shoulder to shoulder

Step 2. Cut your 2x4s down to the following dimensions:

  • Cut one (1) at 28″ long (A)
  • Cut one (1) at 22″ long (B)
  • Cut two (2) at 23/4” long (C)
  • Cut two (2) at 36″ long (D)
  • Cut one (1) of your crown to crotch measurement, or 36″, whichever is shorter (E)
  • Cut two (2) of your hip-to-hip measurement less 1″ and then divided by 2 (we cut 2 at 6″ long) (F)
  • Cut two (2) of your shoulder-to-shoulder measurement less 1″ and then divided by 2 (we cut 2 at 9″ long) (G)
  • Cut two (2) joint boards at 8″ long (H)

IMG_7038

Tip: If you intend to sand, stain, and/seal your armor stand, you may wish to do this now before you begin assembling it. It will be easier and the finished stand will look better if you complete sanding, staining, and/or sealing before assembly.

Good German Option: We recently bought a table saw with the ability to do angled cuts, so when Gregor made a second version of this armor stand recently he made fancy beveled edges. It looks sweet. If you want to do this, do it now, before assembly!

FullSizeBevelled

Step 3. Take board A, find the exact center of the board lengthwise, and drill a hole all the way through the board using the 1/2″ bit. On one side of this board, use the 11/2” spade bit to create a recess about 3/4” deep around the hole you just drilled. (This will accommodate your washer and wing nut.)

IMG_7041

Step 4. Take board B, find the exact center of the board lengthwise, and drill a hole all the way through the board using the 1/2″ bit. On one side of this board, use the 11/2” spade bit to create a shallow recess (deep enough to accommodate your bolt tip and the other washer) around the hole you just drilled.

IMG_7043

Step 5. Attach board A to board B using the bolt, washers, and wingnut. Note: You can choose to put the bolt downward or upward through the holes — what’s important is that hardware be recessed into the bottom of board B so that it can sit flat on the ground.

IMG_7045

Bolt recessed into the bottom of board B.

IMG_7046

Top of board A, with bolt and wingnut accessible.

Step 6. Apply wood glue to the underside of the two C boards and attach them to the ends of the A board, making sure that you can swivel and rotate the attached B board without hitting the C boards. Clamp and nail (or screw) C to A. These are now the feet of your armor stand.

IMG_7047

IMG_7049

Step 7: Attach a hinge between the end of board A and the end of one of your D boards. You’ll want to position the plates so that the hinge itself sits just beyond the edge of the boards — this allows you to fold it more compactly.

IMG_7057

Step 8: Remove the pin from another hinge (insert a nail into the bottom hole of the hinge and hammer it down a bit to release the pin). Put the pin back into the hinge loosely, then repeat step 7 by attaching the hinge between the other end of board A and the second board D.

IMG_7054

Removing the hinge pin

IMG_7056

Hinge with pin removed

Step 9: Remove the pin again from the same hinge as in step 7 and tie a piece of string around the pin, then attach the string to board A. This ensures you never loose that pin. Re-insert the pin for now and set this assembly aside.

Step 10: Now that you have the base and two legs assembled, lay them flat on the ground and place board E (the torso board) in between at the top, flanked on either side by the H boards (joint boards). Lay them in a position relative to the legs as though it were all set up. Do not mount or attach hinges to boards E or H yet, but check their placement to insure no other screws will block the pre-drilled holes in the hinge plates. Now mark on the H joint boards the appropriate angle where the legs meet the H boards. A typical angle is 24°, but yours may vary if you significantly changed the measurements of your boards or with the placement of your hinges.

IMG_7059 IMG_7060 IMG_7061

Step 11: Cut the joint boards (H) at the angle you determined in step 10 and attach them to the bottom of board (E).

IMG_7067

Step 12: Attach the hinges to the joint boards (H). Make sure that when everything comes together that it fits snugly — if it is too loose, your armor stand will have a tendency to sway. Do not yet attach the other side of those hinges to your leg boards — it’ll be easier if you do that at the end.

IMG_7068

Step 13: Attach the hinges between the hip boards (F) and the torso board (E), making sure to test fit them first. Leave about a 1/4″ between the F hip board and the H joint board, allowing the F board to fold down without being obstructed.

IMG_7073

Step 14: Attach the hinges between the shoulder boards (G) and the torso board (E).

IMG_7078

Step 15: Now finally attach the hinges at the joint boards (H) to the leg boards (E).

IMG_7086

Step 16: Fold down your armor stand to make sure it folds neatly. If the bolt gets in the way of folding, as shown in the photo below, you may wish to drill a small recess in one of the leg boards so it folds flatter.

IMG_7089  IMG_7091

IMG_7092

Voila! You have an armor stand.

IMG_7088

Gregor’s armor stand made in 2012

armorstandbevelled

The armor stand Gregor made for Baron Ermenrich in 2015

Optional: Consider putting holes in the baseboards so you can stake it to the ground in windy weather. You may also want to add holes in the hip boards or shoulder boards if you have things you need to need to hang from your stand.

If you have questions, please let us know! The armor stand will be on display, along with handouts on how to make it, at Gregor’s “Enhance Your Camp” class on Thursday, July 30 at 4:00-5:00 pm, located in Camp Cynnabar (W02). Here’s the actual class description:

“Join us at our camp to learn about how to make personal camp improvements that can enhance both its appearance as well as your own quality of life. Most projects are made from wood with basic tools and do not require special knowledge, skills, or equipment. Handouts will be available for each camp project ($1/handout), including our camp cart, kitchen worktable, sink with foot pump, trestle table, benches, chairs, clothes rack, armor stand, canvas organizer, and more.”

A Trestle Table for Under $35: How I Built a 15th-Century-Style Table for Pennsic From an Old Door and Pine Boards

19 June 2011

My Trestle Table

If you’re prone to dancing on tables, read no further. But if you want an authentic-looking, wooden trestle table that you can take to events, or even use as a craft table in your home, do I have some woodworking plans for you! You won’t be able to dance on this table, sure, but its lightweight tabletop is perfect for lugging about without breaking your back … or your wallet!


How did these plans come about? In 2011 I joined the SCA and I needed a table for camping at Pennsic, but I didn’t want to spend a fortune on it. I could buy a couple sheets of plywood, but I want to use this table year-round for crafts, so I preferred something that would look nicer. Alas, oak and even select pine is really pricey — $100 and up for the project. My solution? I combined an old recycled door (for the table top) with inexpensive pine (for the legs and spacers) for a 15th-century, St. Jerome-style trestle table that comes in at under $35.

An Old Door for $5

What You Need:

  • 10 feet of 2″ x 4″ pine – $3
  • 10 feet of 2″ x 12″ pine – $10
  • 8 feet of 2″ x 10″ pine – $7
  • 1 36″ x 80″ hollow door slab – $5 at my local recycling center (or about $30 if you buy one new at Lowe’s)
  • Dowels- $1
  • 4 (four) 1″x 2″ x 8″ firring strips – $3.20
  • 1 12″ x 24″ x 1/2″ oak board – $3
  • Wood glue – $2

Total for the Table: $34.20

Optional Extras to Make Your Table Fancier:

  • Stain (Minwax Polyshades Antique Walnut Gloss) – $12
  • Moulding to put around the table edges – $20
  • Wood burning tool to make designs – $12

Equipment Used:

Jigsaw, circular saw, drill with boring bit, sander, chisel, mallet, pipe clamp, spring clamps, sawhorse, ruler, knife, permanent marker, safety goggles

Experience Required:

I’d say beginner-intermediate. I’ve only made a few things from wood (some benches, a two-step stair, some trellises), and I was able to create this table to my satisfaction.

So you may be wondering what in the Known World possessed me to use an old recycled door as a tabletop. I thought a door would be both inexpensive and light enough for me to carry on my own. I can’t very well use this table at Pennsic if I can’t even carry the tabletop to my camp site, now can I? A hollow door slab is really quite lightweight, but still strong enough to function as a great table. It’s true, no table dancing, but how often does that really happen anyway (oh, right, I’m going to Pennsic … )

A door is the perfect size for a trestle table

As for finding an old door, my local recycling center had about 50 of ’em, all for $5-$10. I was able to find one that hadn’t ever had a door handle installed, too. And it was already stained a good color. Just needed a little dusting! You might have one hanging around the house from a remodel (or know someone who does). And I’m convinced that doing something like this is period — our ancestors recycled wood, including old doors, whenever it made sense. Wood was never wasted.

As to whether you can actually use a hollow door slab as a tabletop, yes, you can! This is a common practice among folks who need furniture on a budget, model train enthusiasts who need a place for their layouts, drafters who need a desk, and crafters who want a large workspace.

The Table Plans

So here’s how to make the trestle table — these plans are adapted from those posted by Charles Oakley and bits and pieces picked up from other online sources.

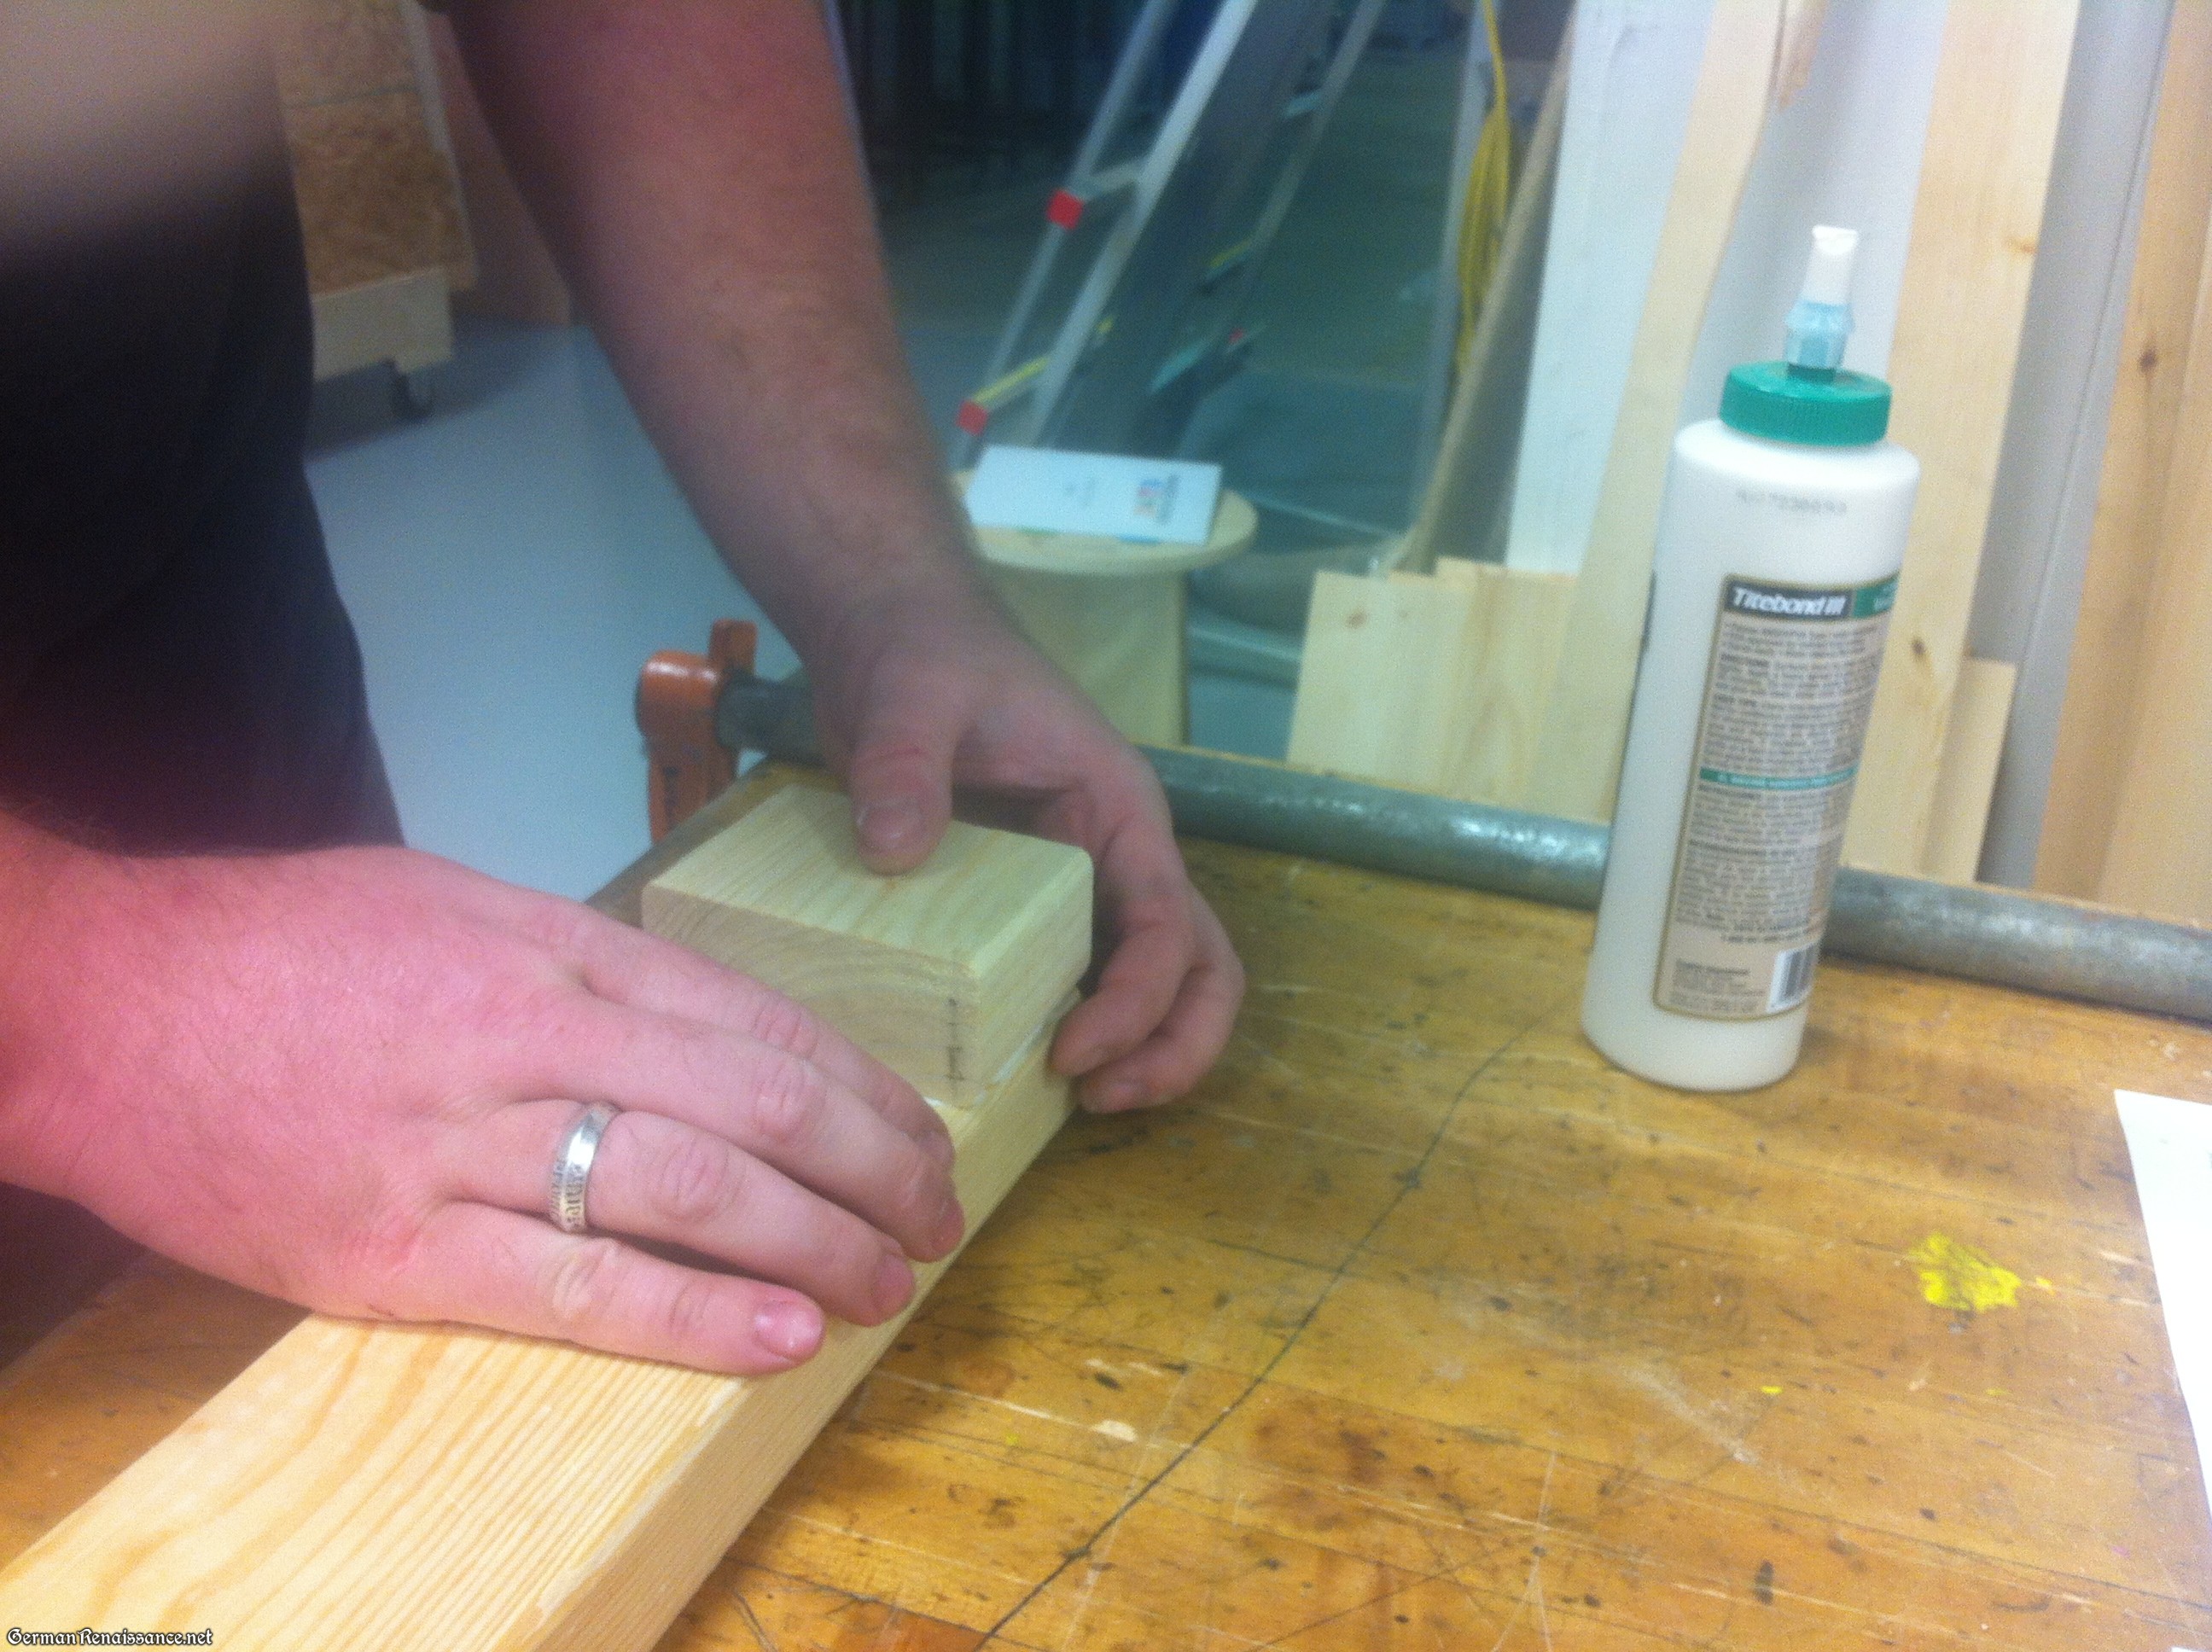
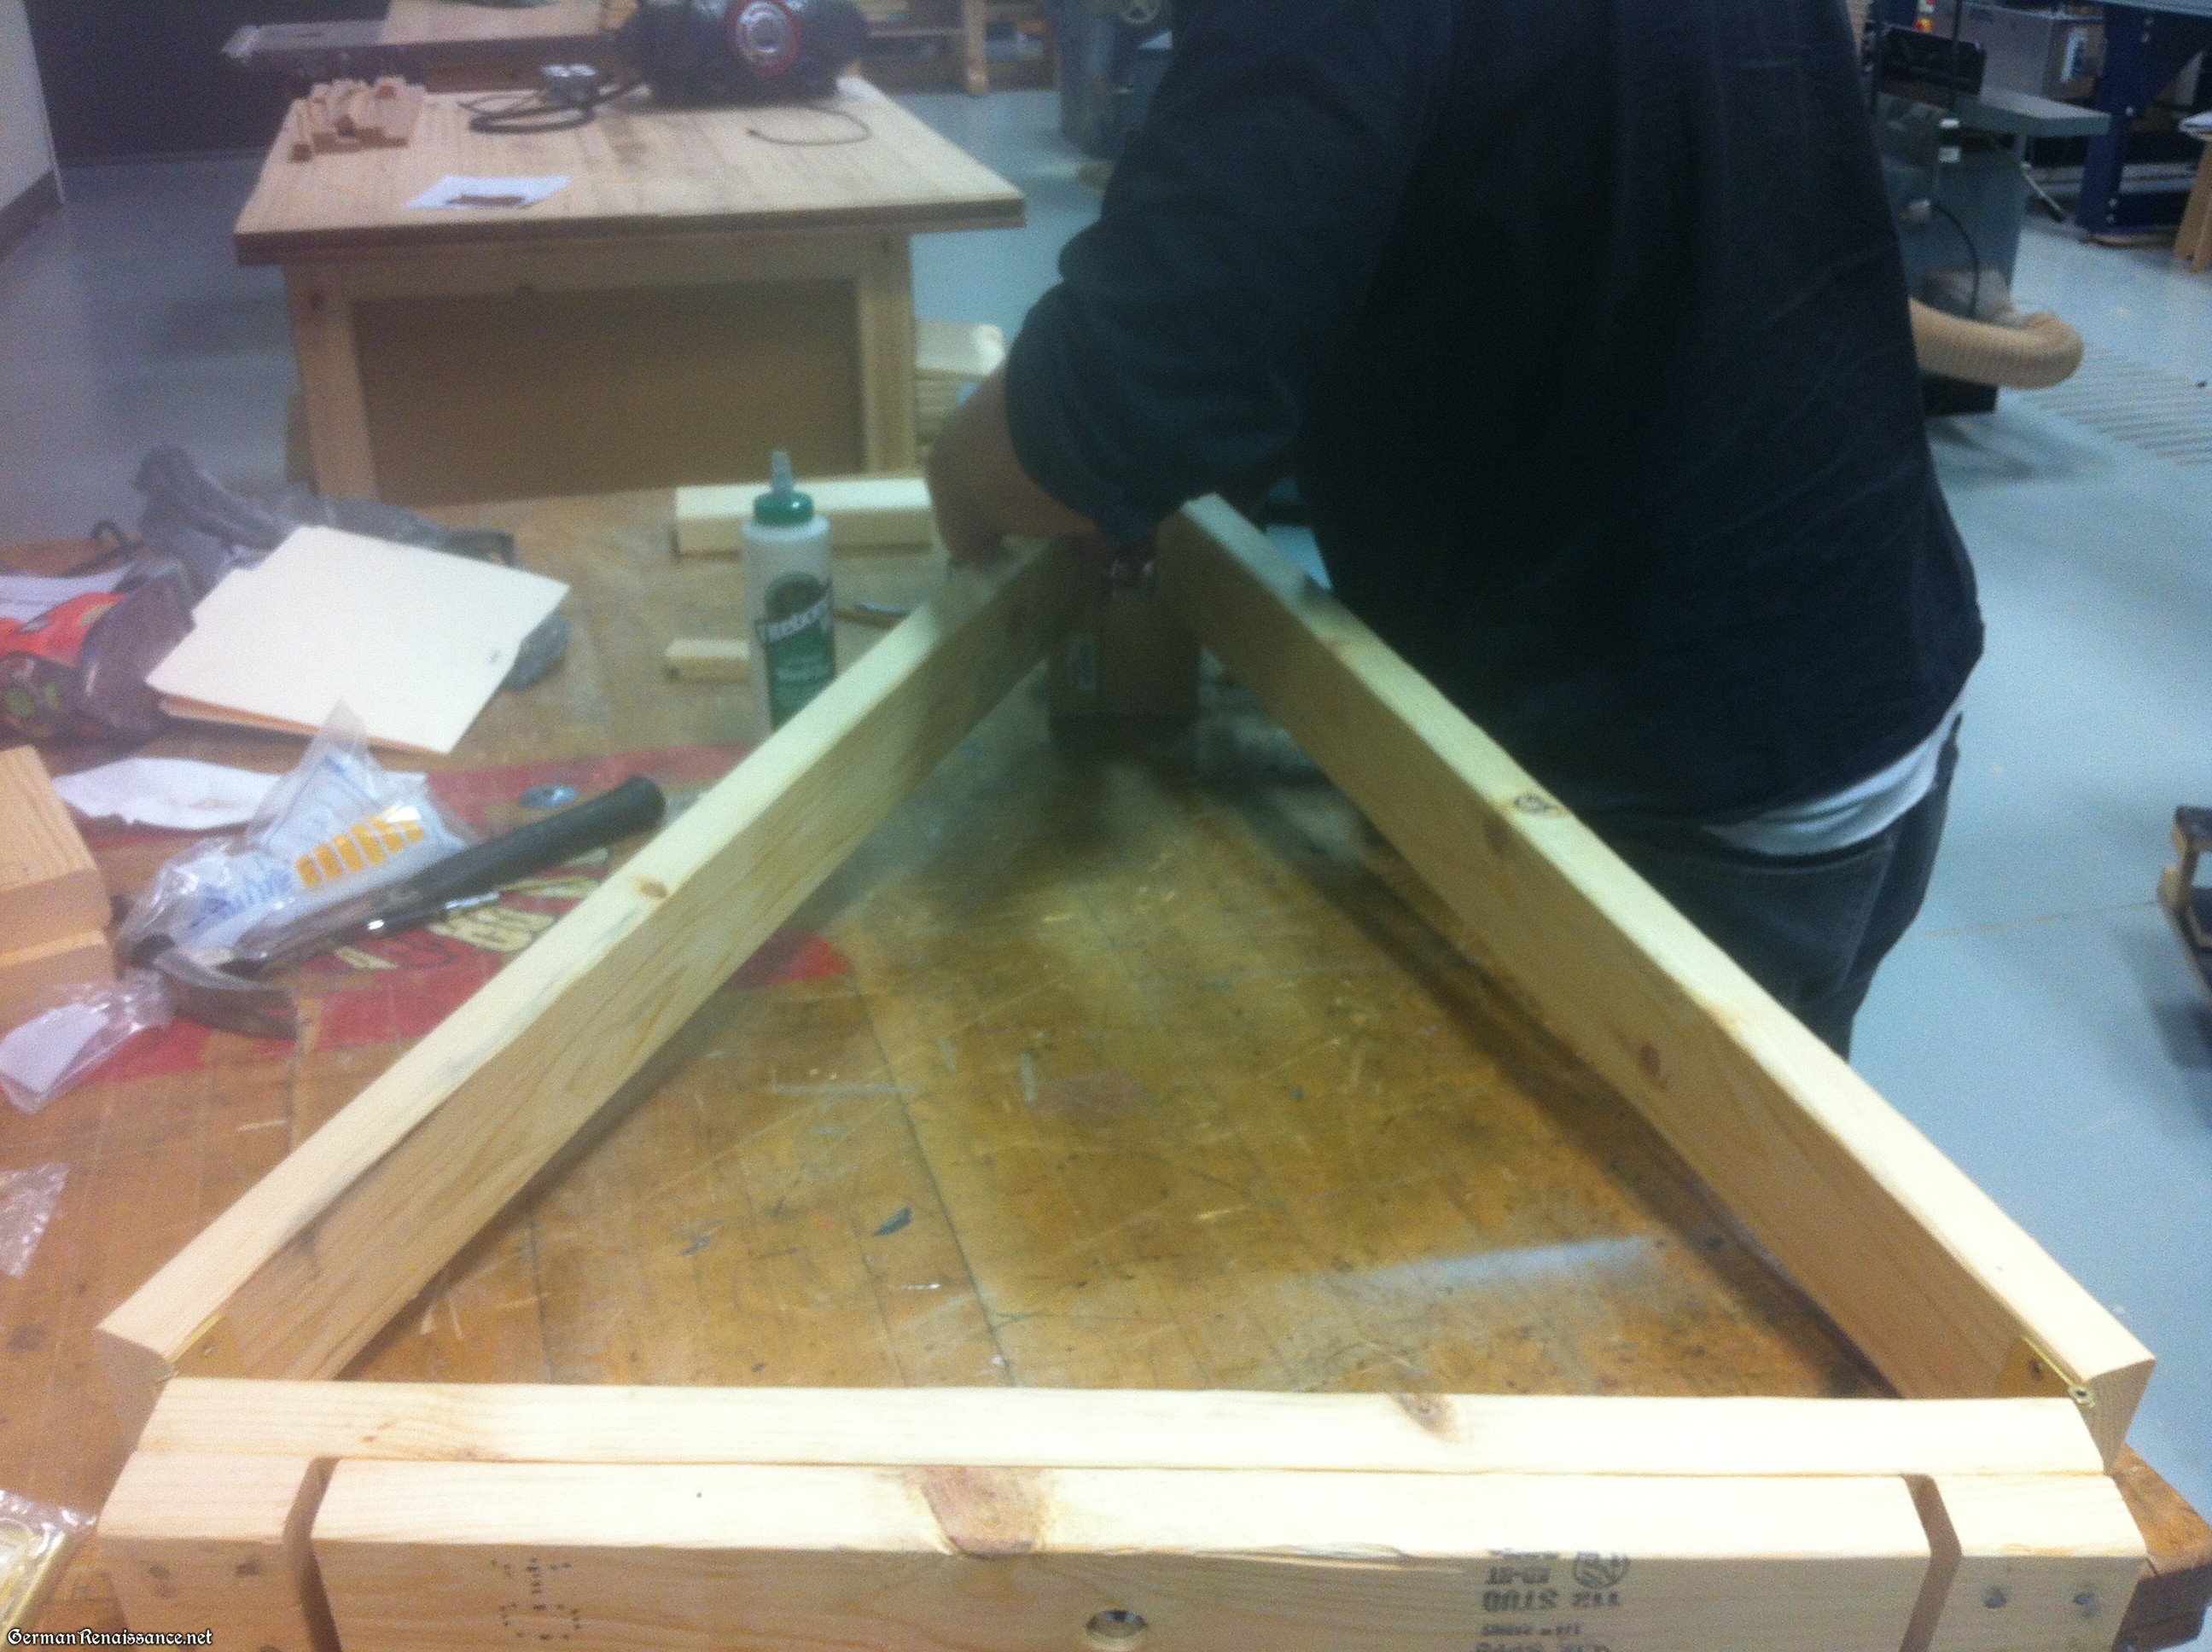
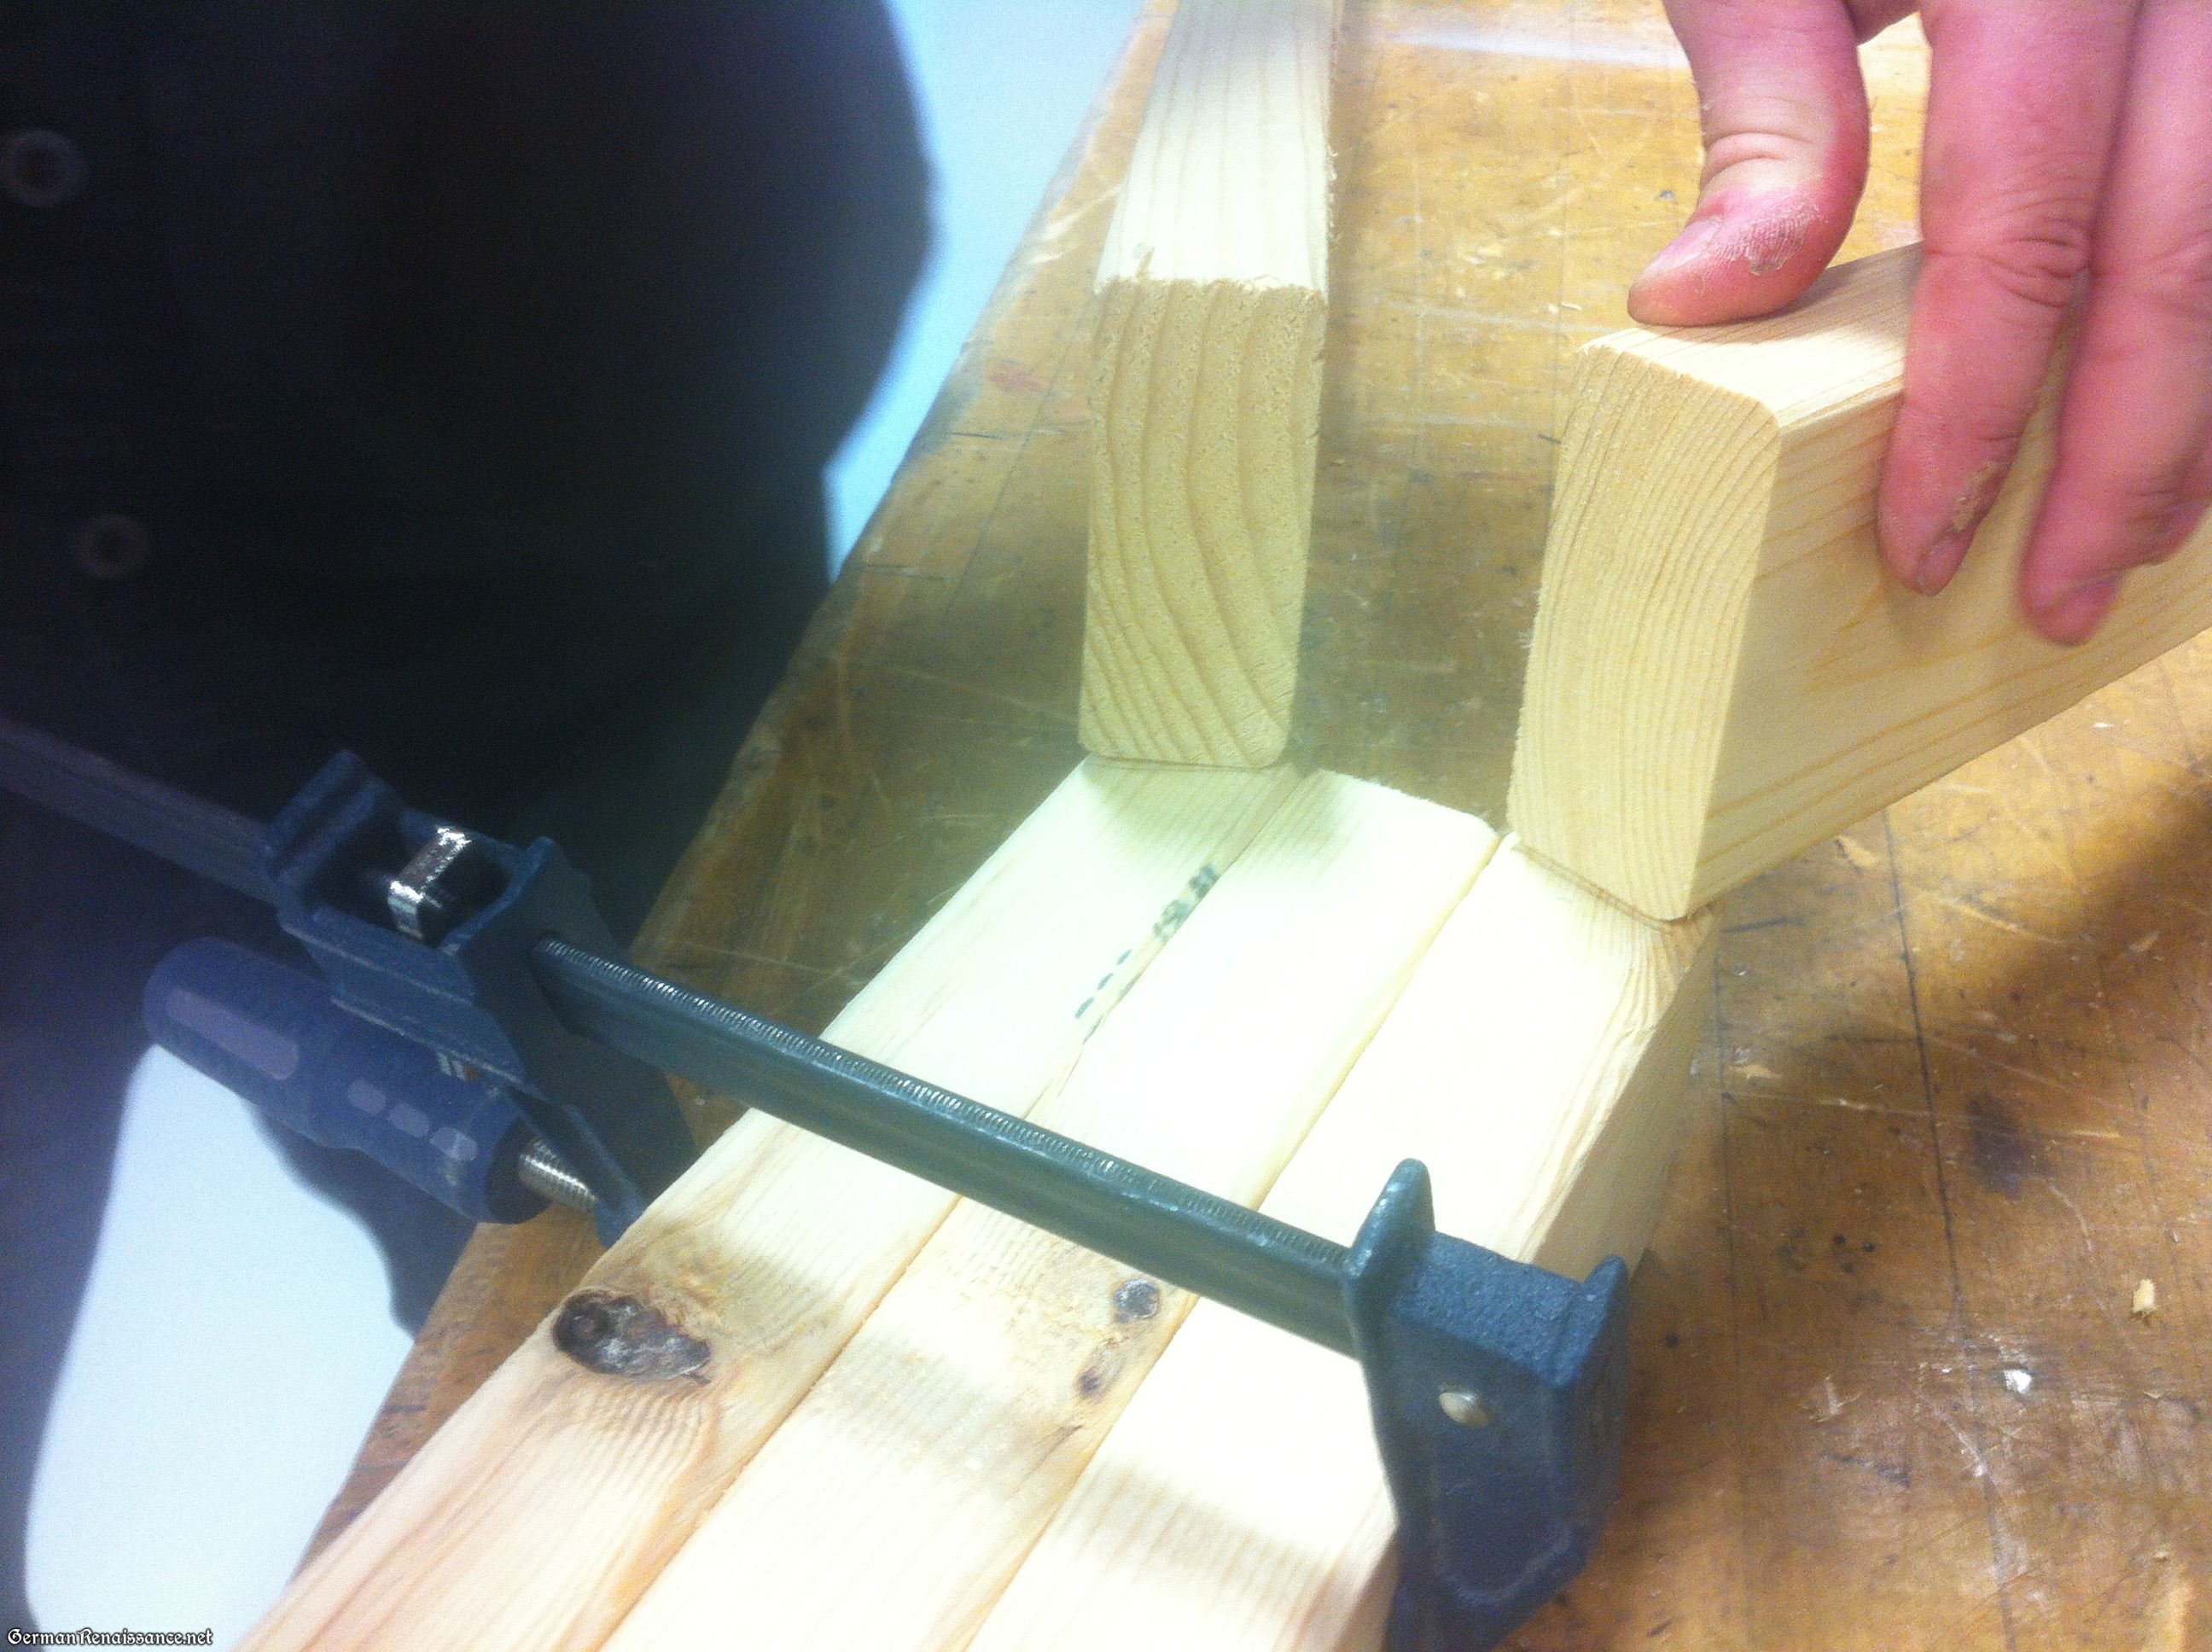
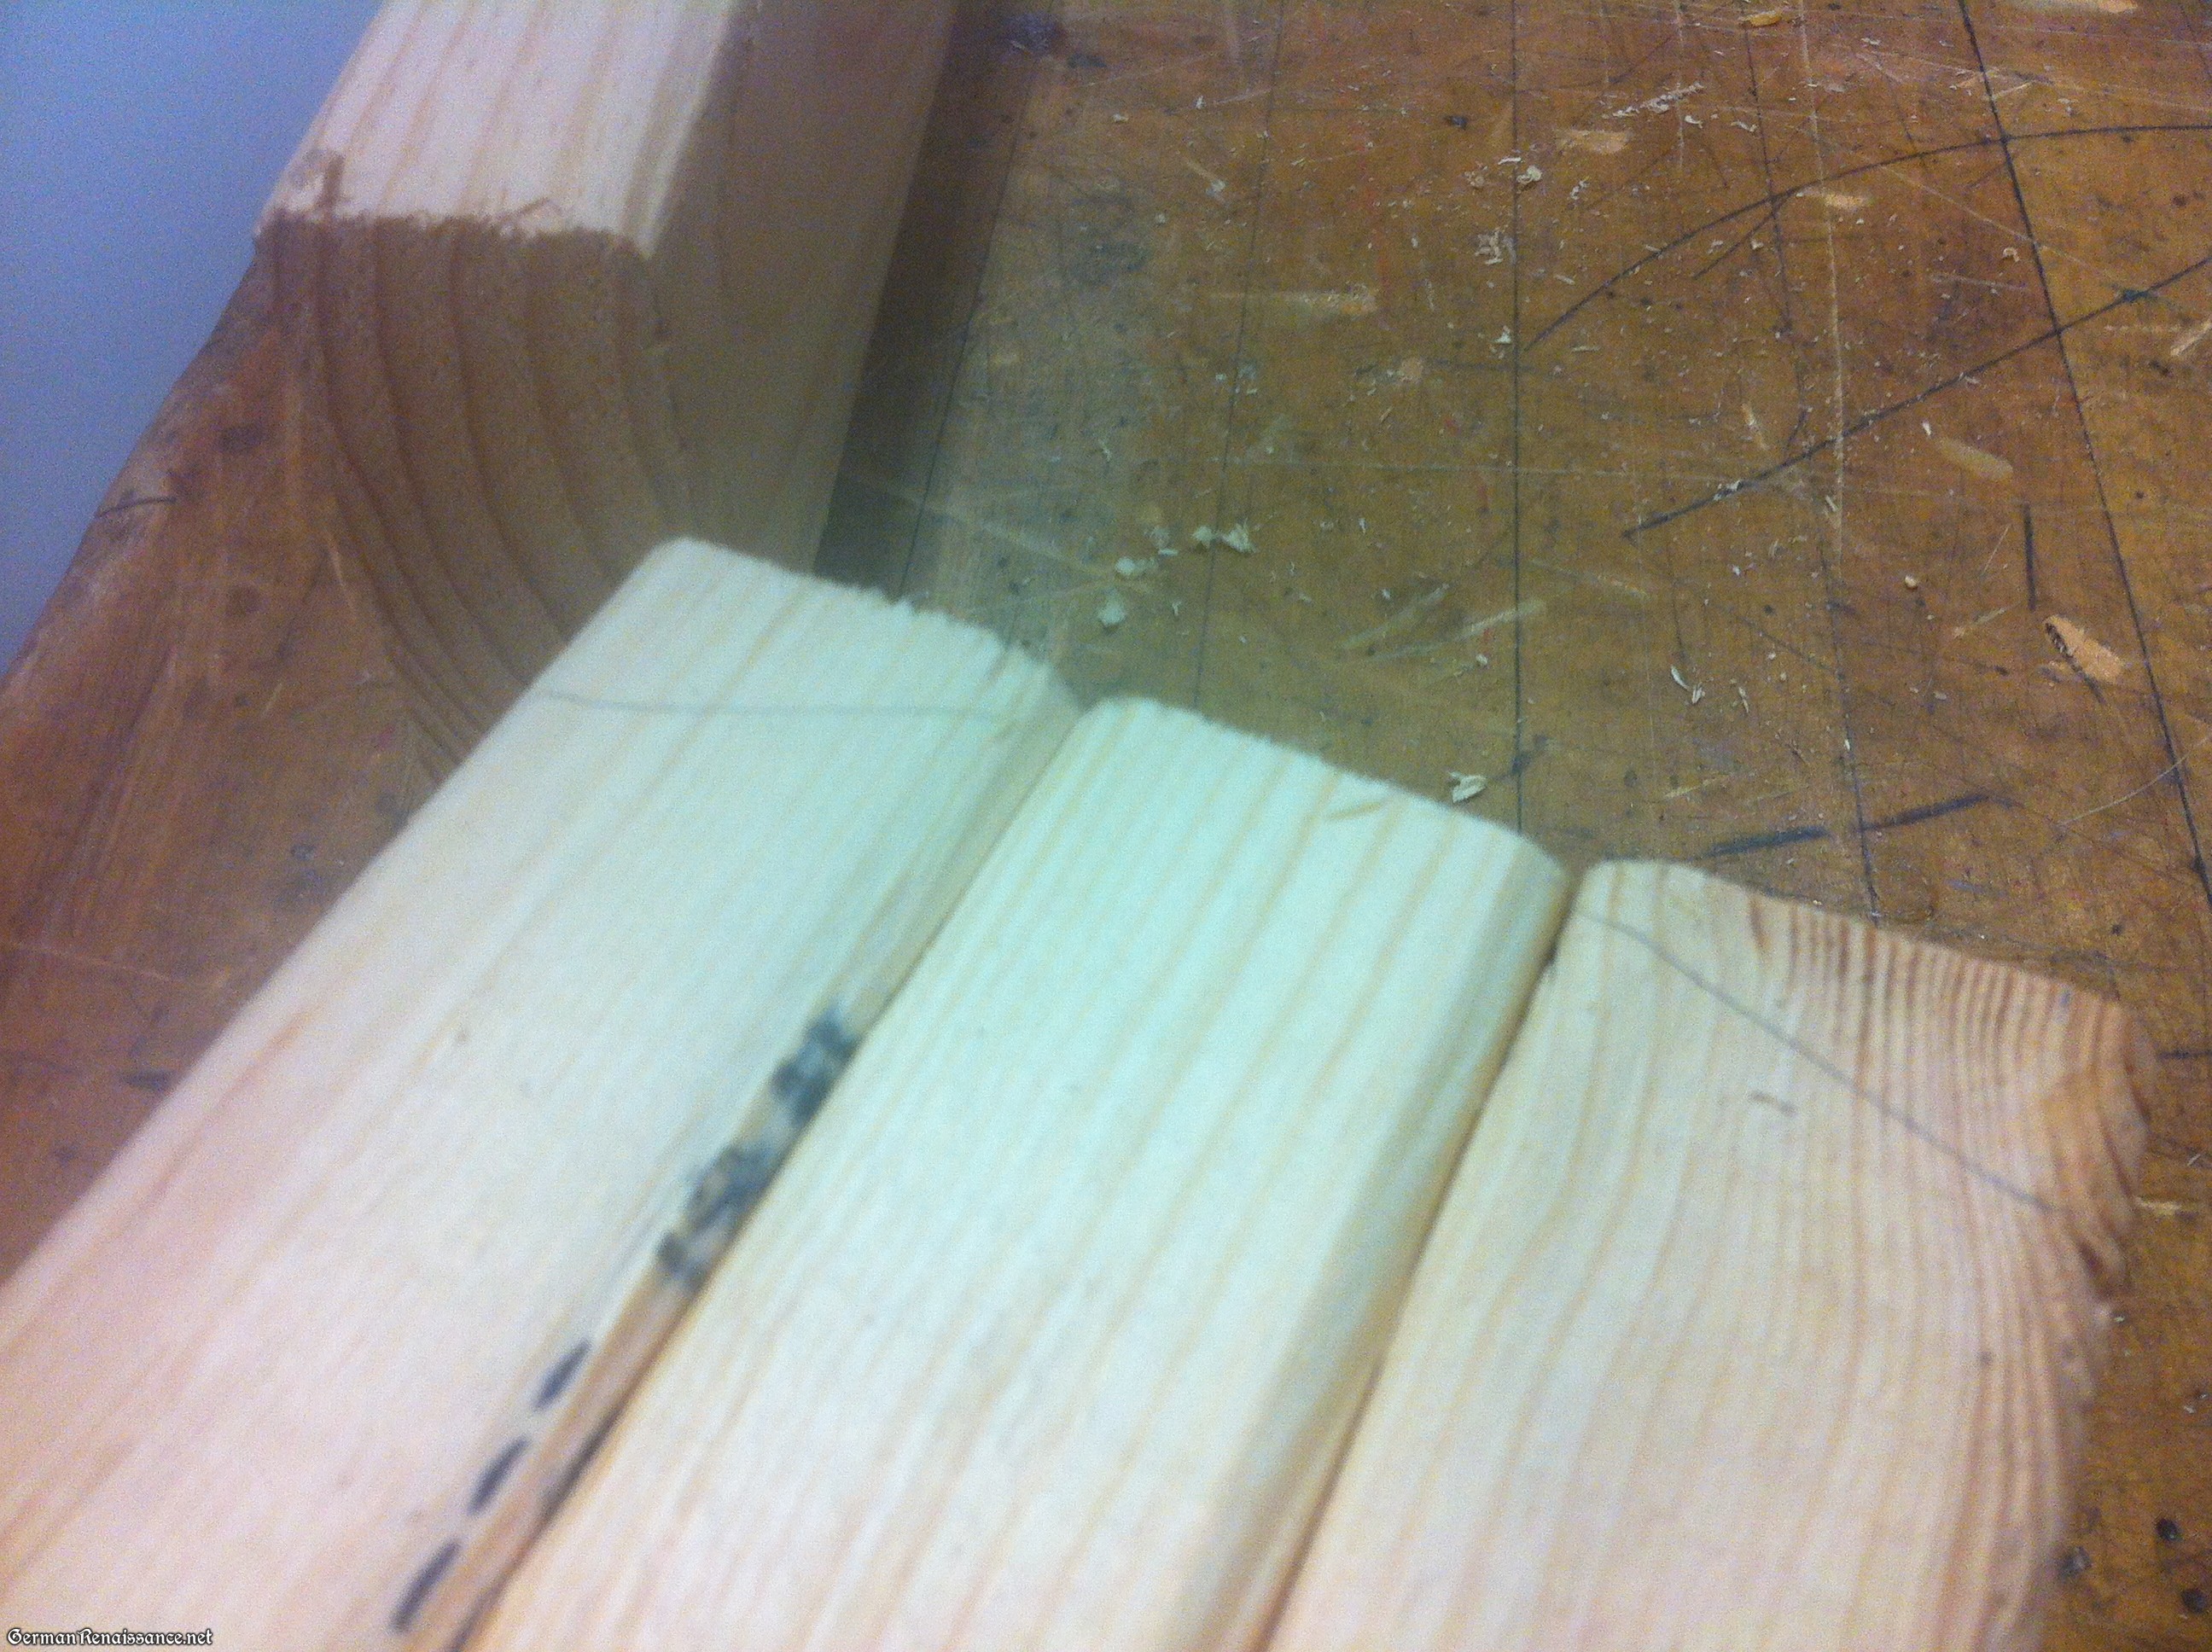
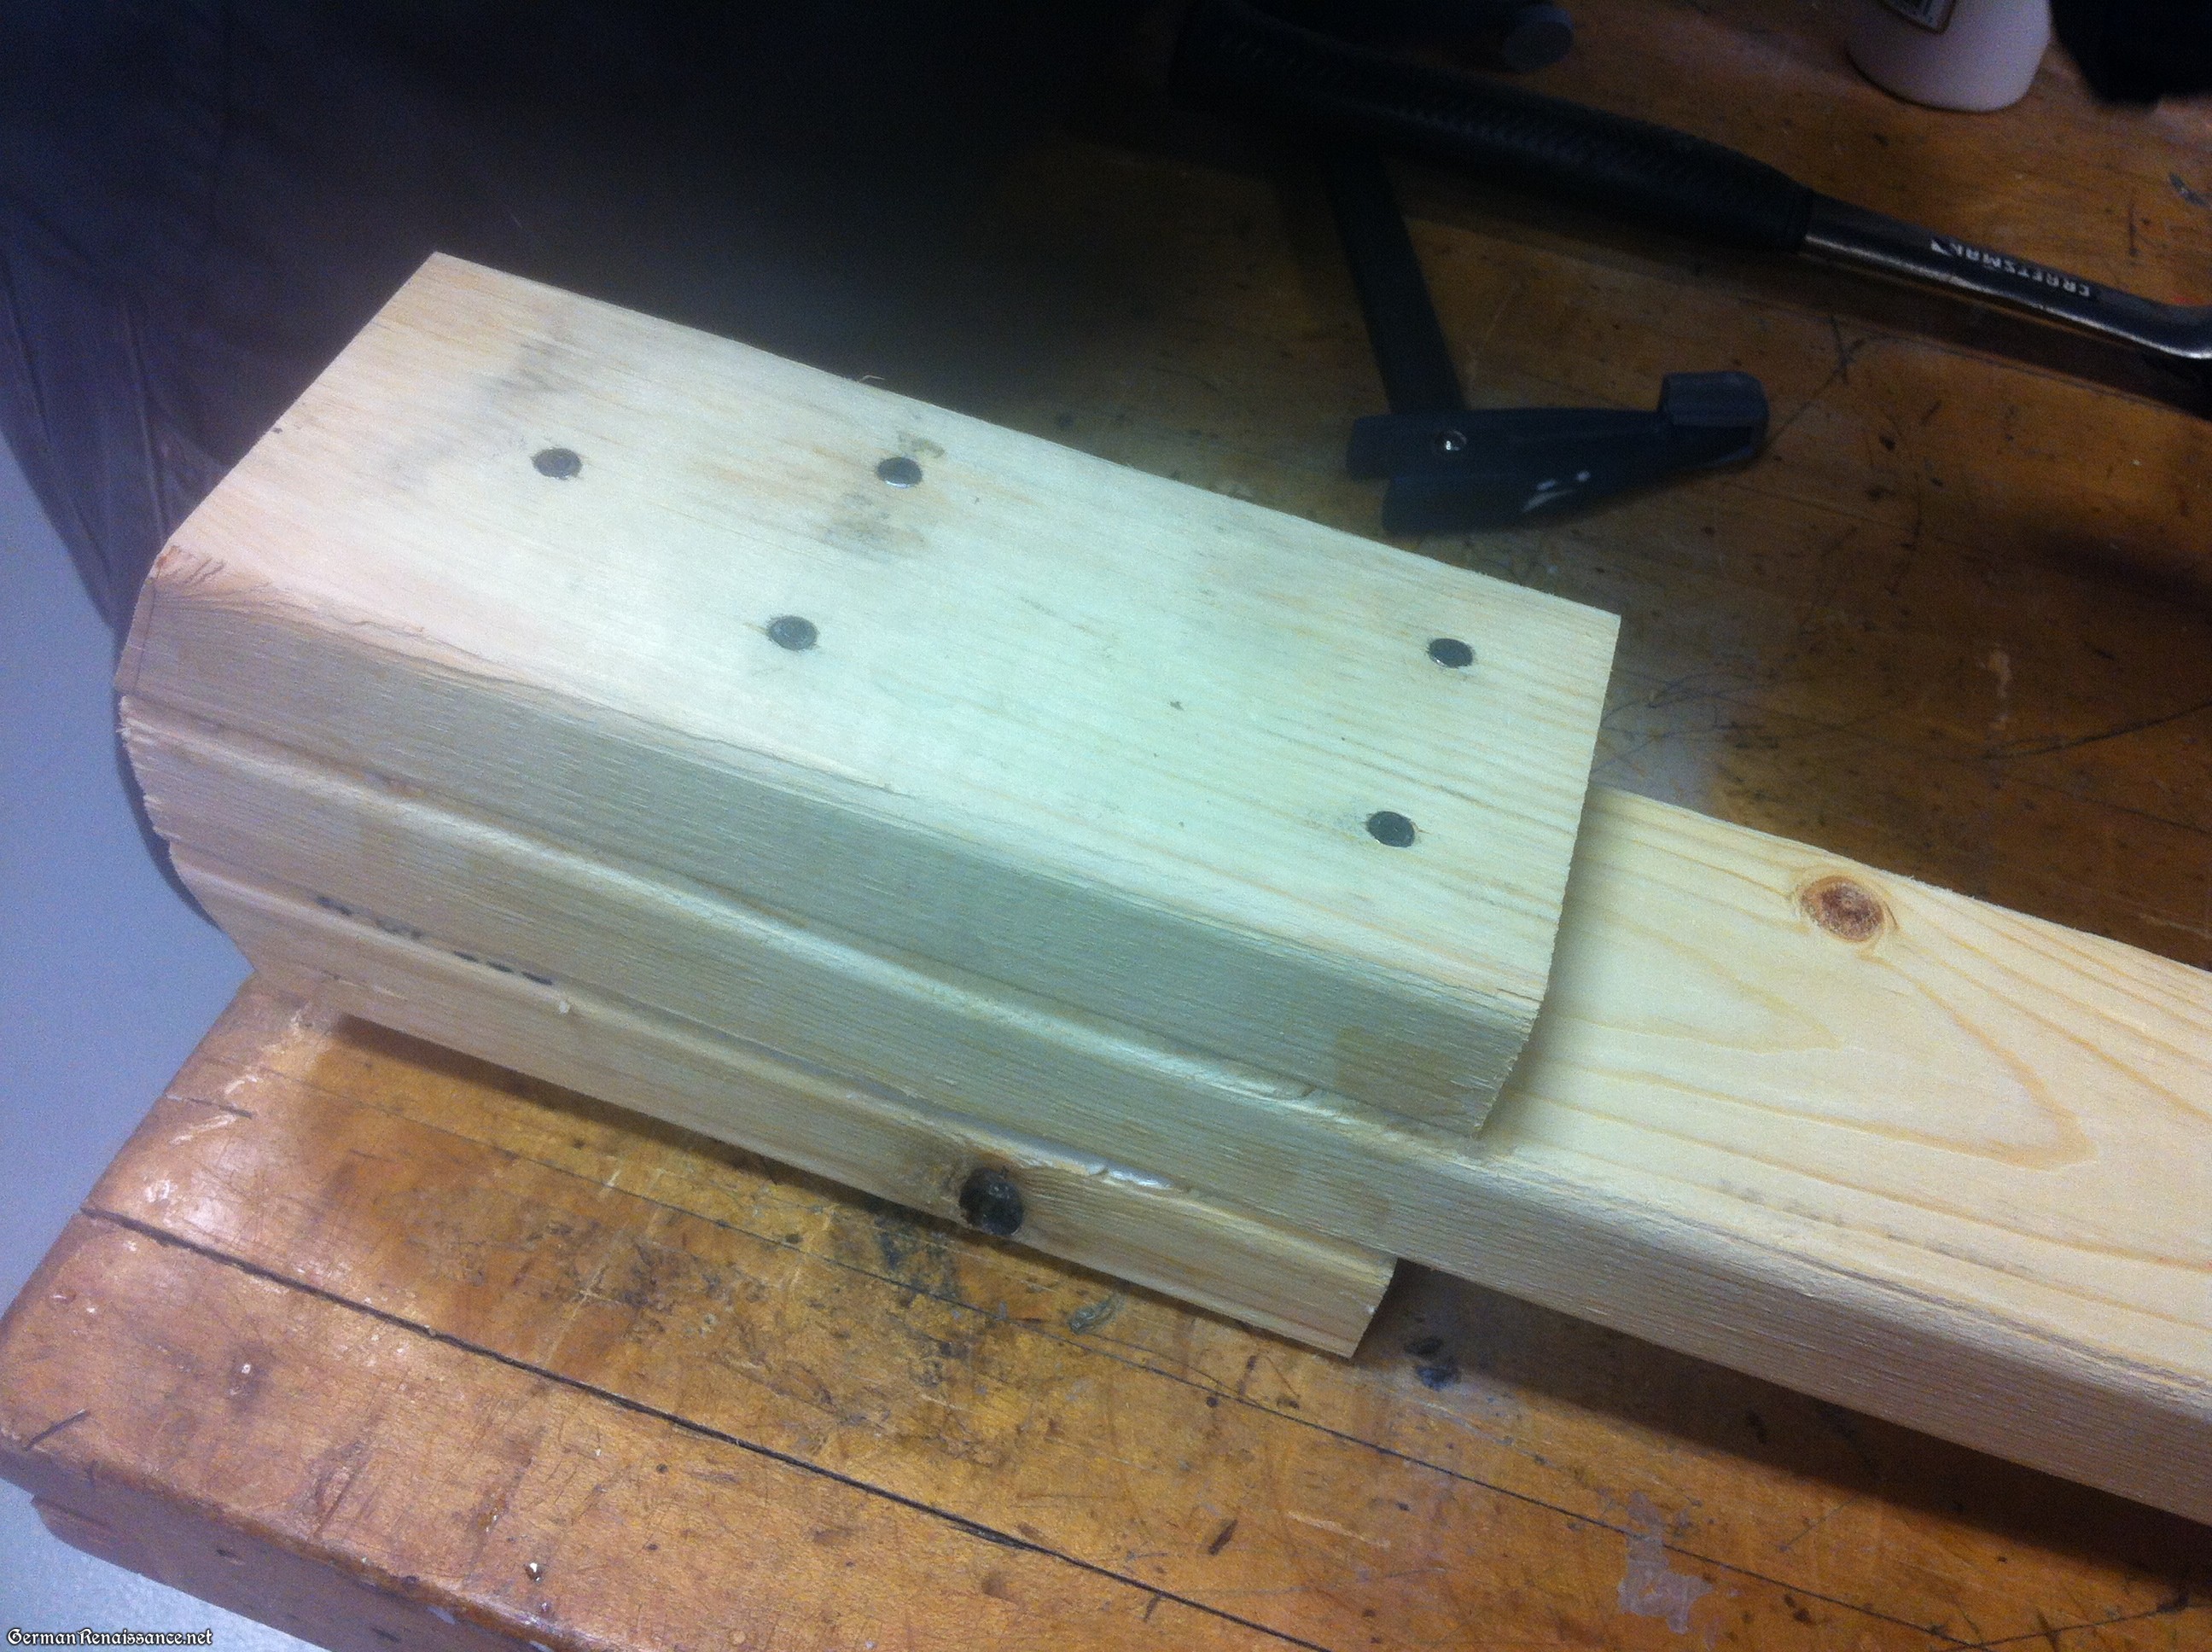
1. Join the Leg Pieces: Cut the 2″ x 12″ board into four 30″ long pieces. Cut the 2″ x 10″ board into two 30″ long pieces. Place one of the 2″ x 10″ boards on the floor or some other flat place, and flank it with two of the 2″ x 12″ boards, creating 34″ x 30″ of wood. Repeat with the other three boards. Drill holes in the edges of the boards where they meet, then insert dowels into them and glue them in place with wood clue. Clamp and allow to dry for 24 hours.

Join the wood tightly and securely

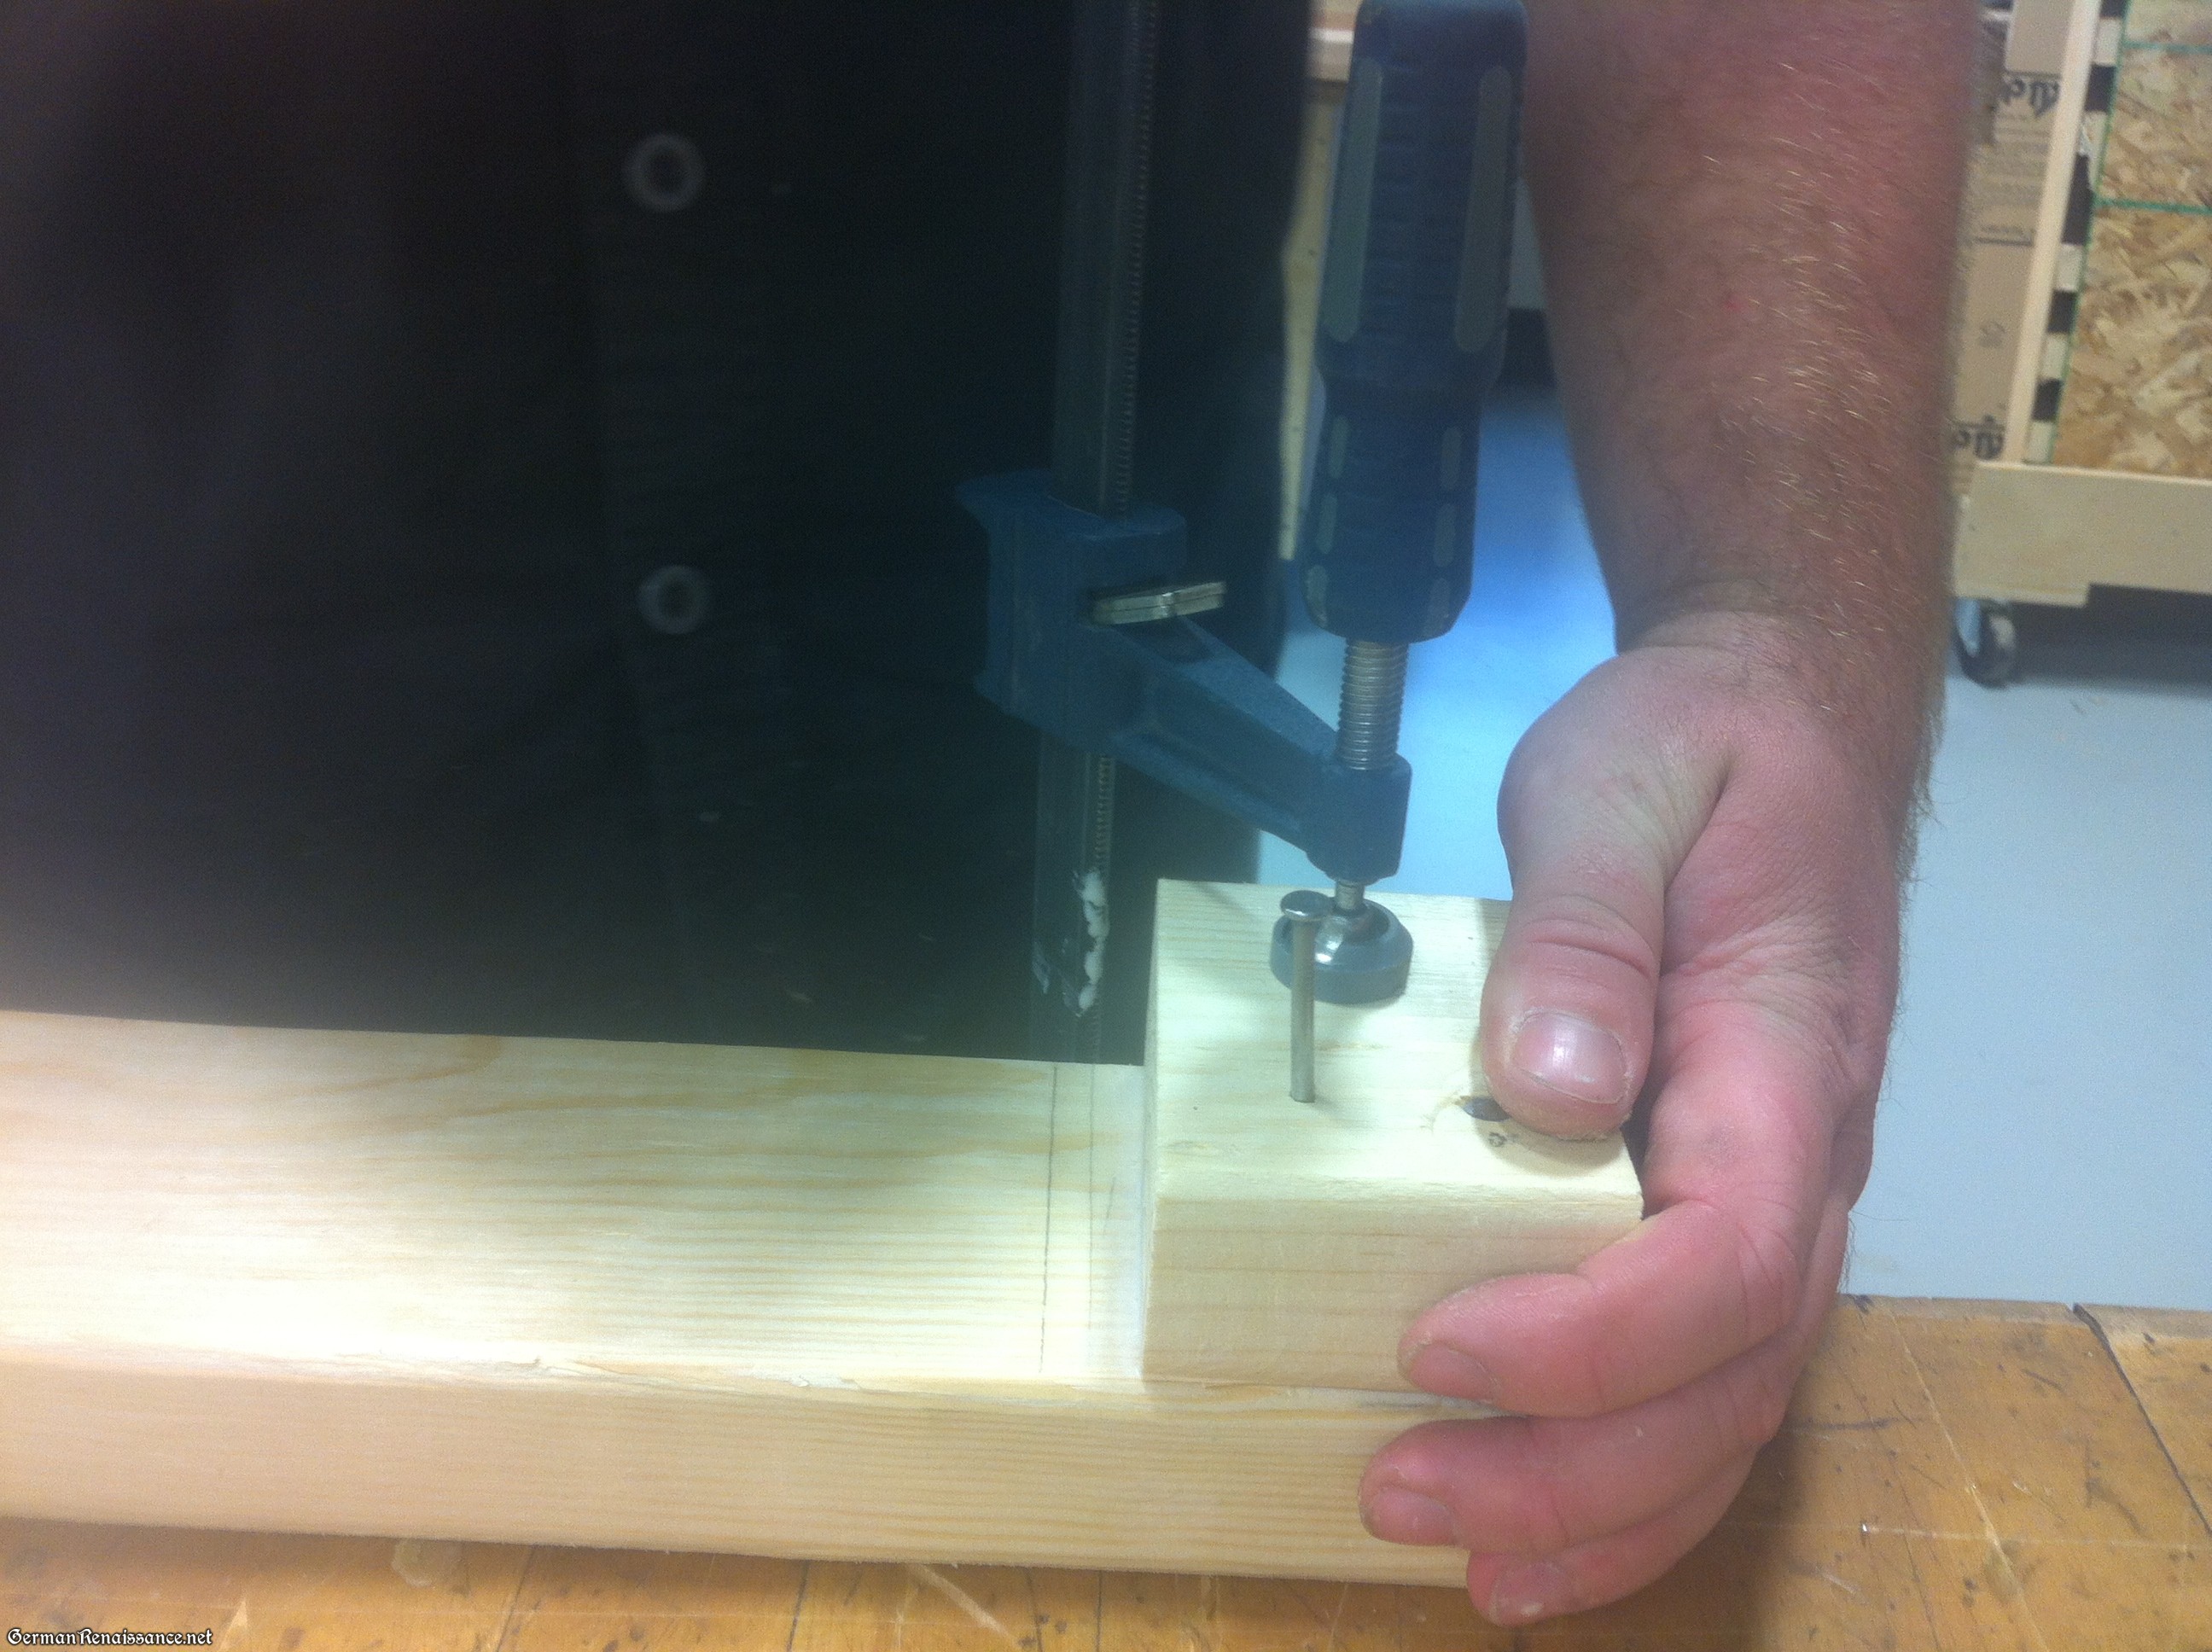
2. Size the Tabletop (Optional): If you want to use the full length of your door slab, just skip this step. I wanted my table to fit into a free space in my studio so I could use it as a craft table, however, so I’m shortening my door slab. Here’s how to do it: Measure 58″ inches on your door slab and score it with a knife (this prevents splintering when we cut it). Cut the door so it is 58″ long (I used a circulate saw). [Note: You can vary the length of your table, but be sure to change the length of your stretchers in step 3 accordingly.] Make room in the newly open end by pulling out/pushing in the reinforcements you’ll find there. Cut your firring strips to about 34″ long and place them just inside the open end of the door for support on the end, using wood glue to keep the strips in place. Clamp and allow to dry.

Plug the open end of your hollow door with strips of wood and glue

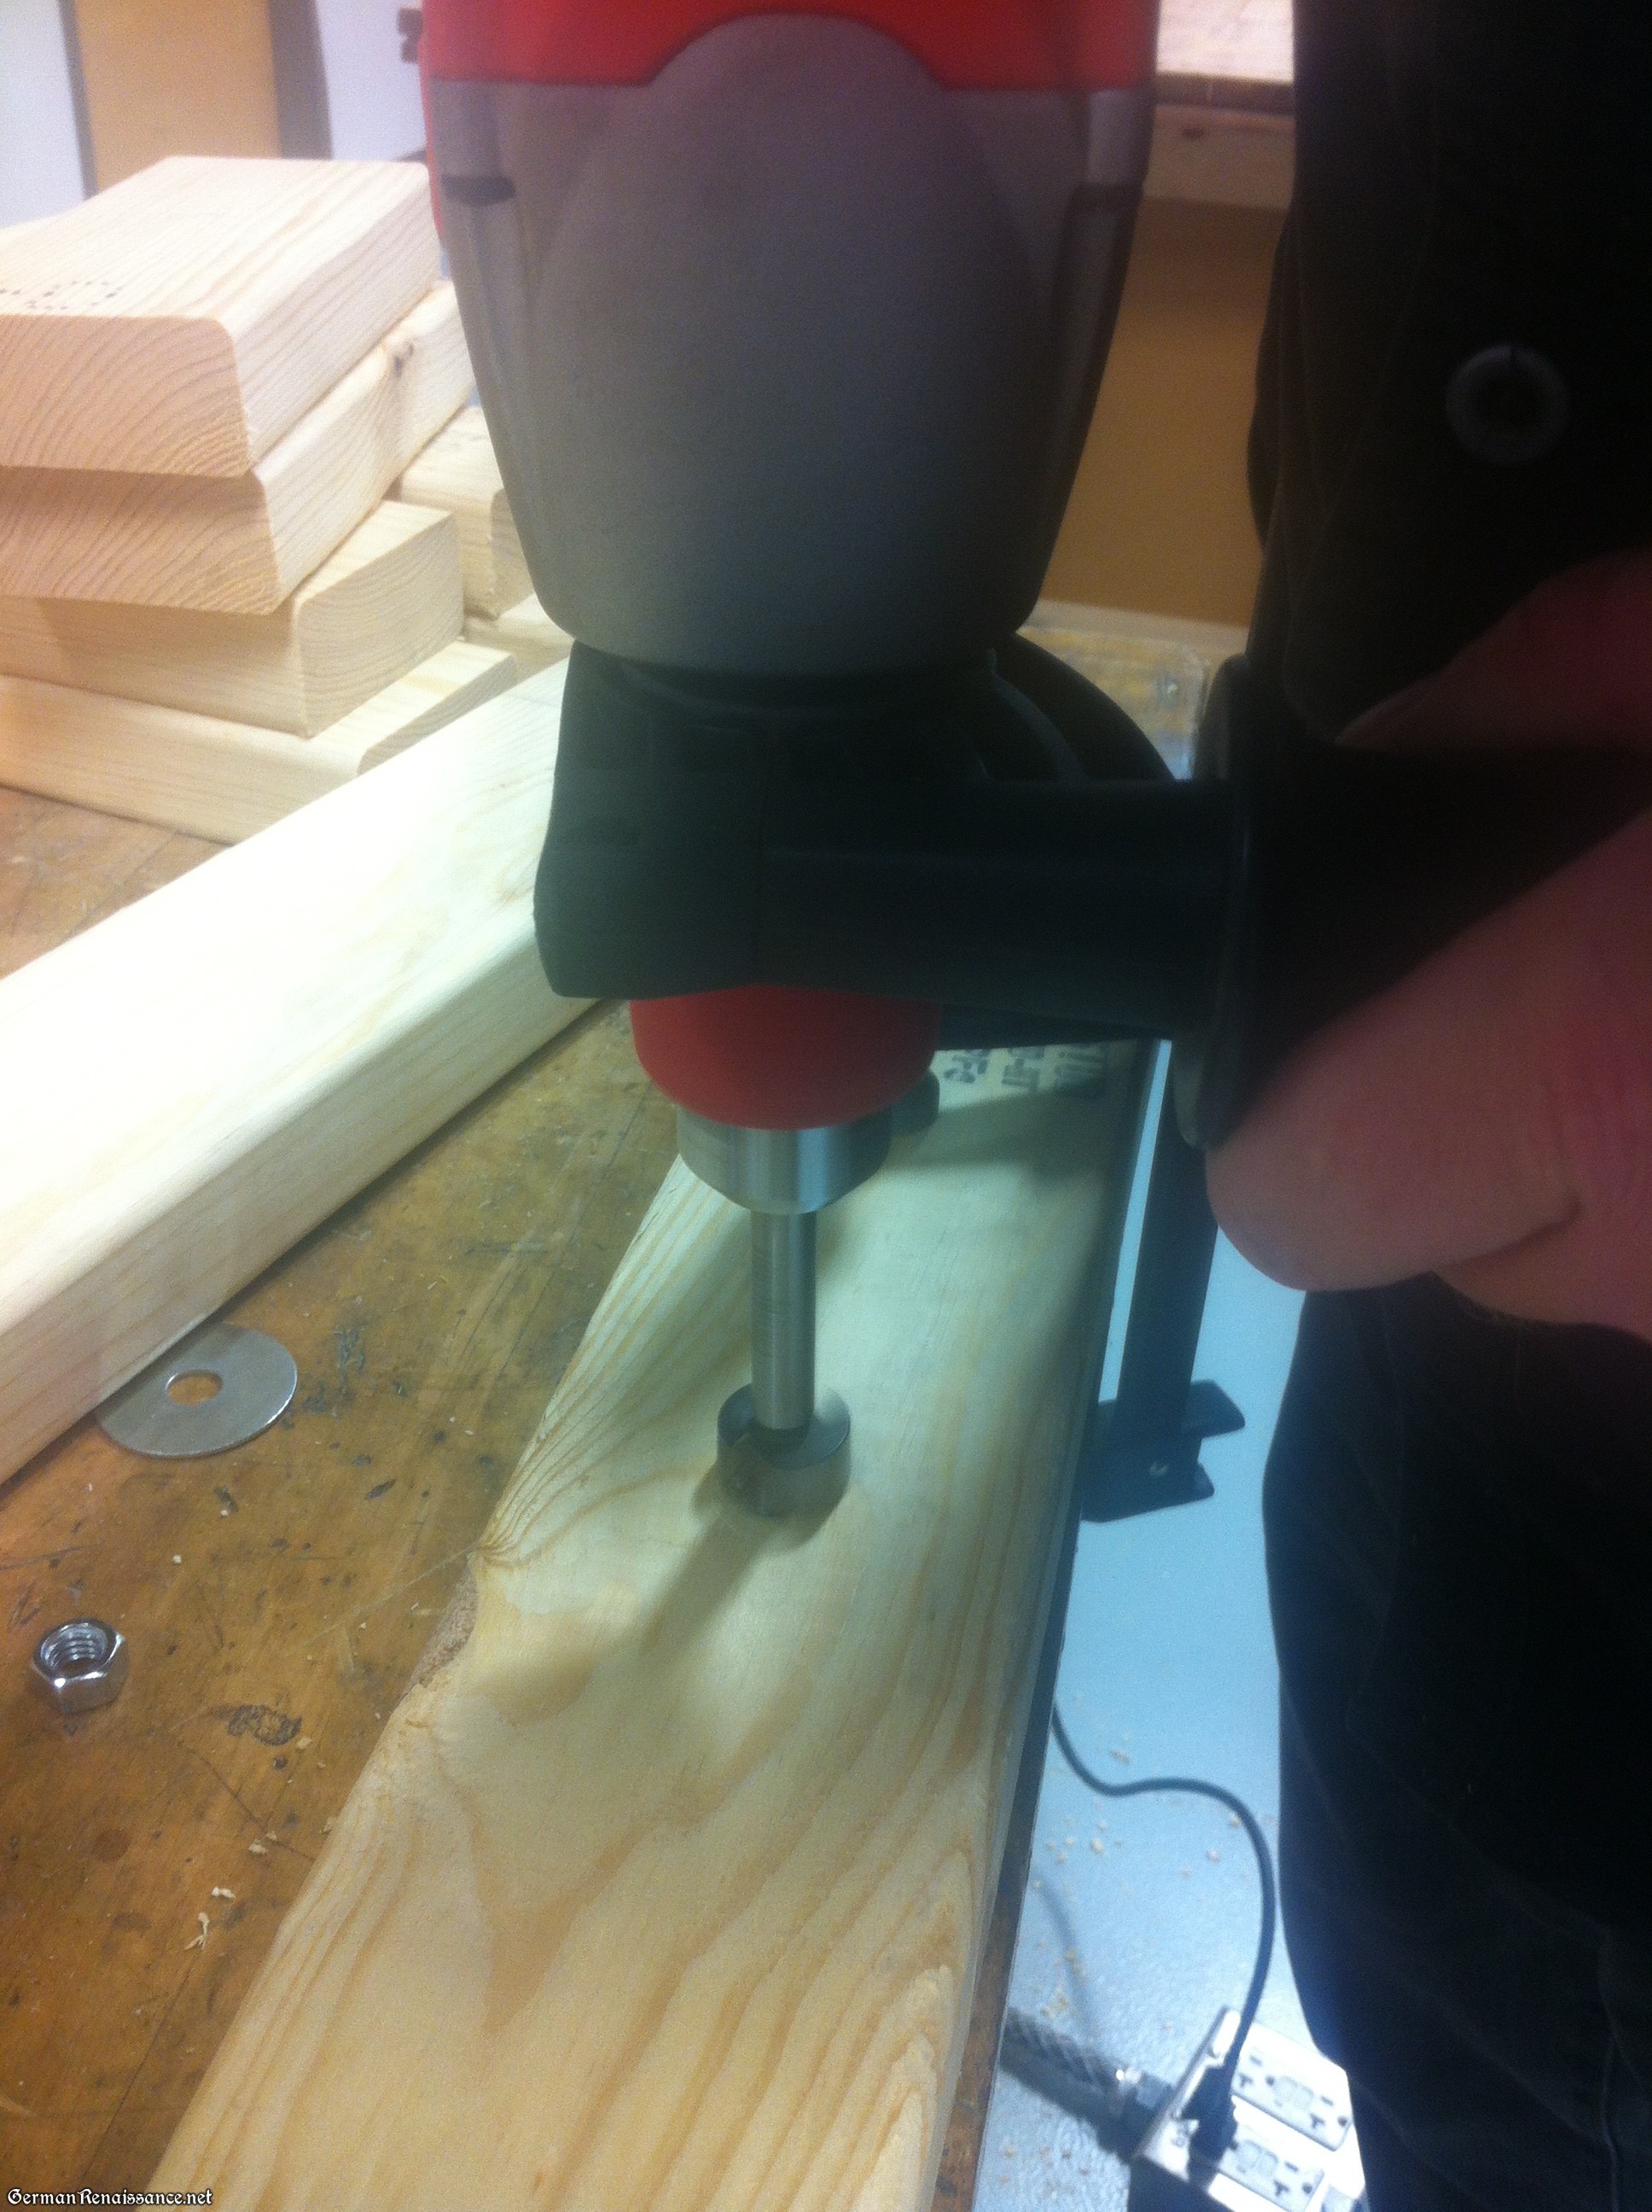
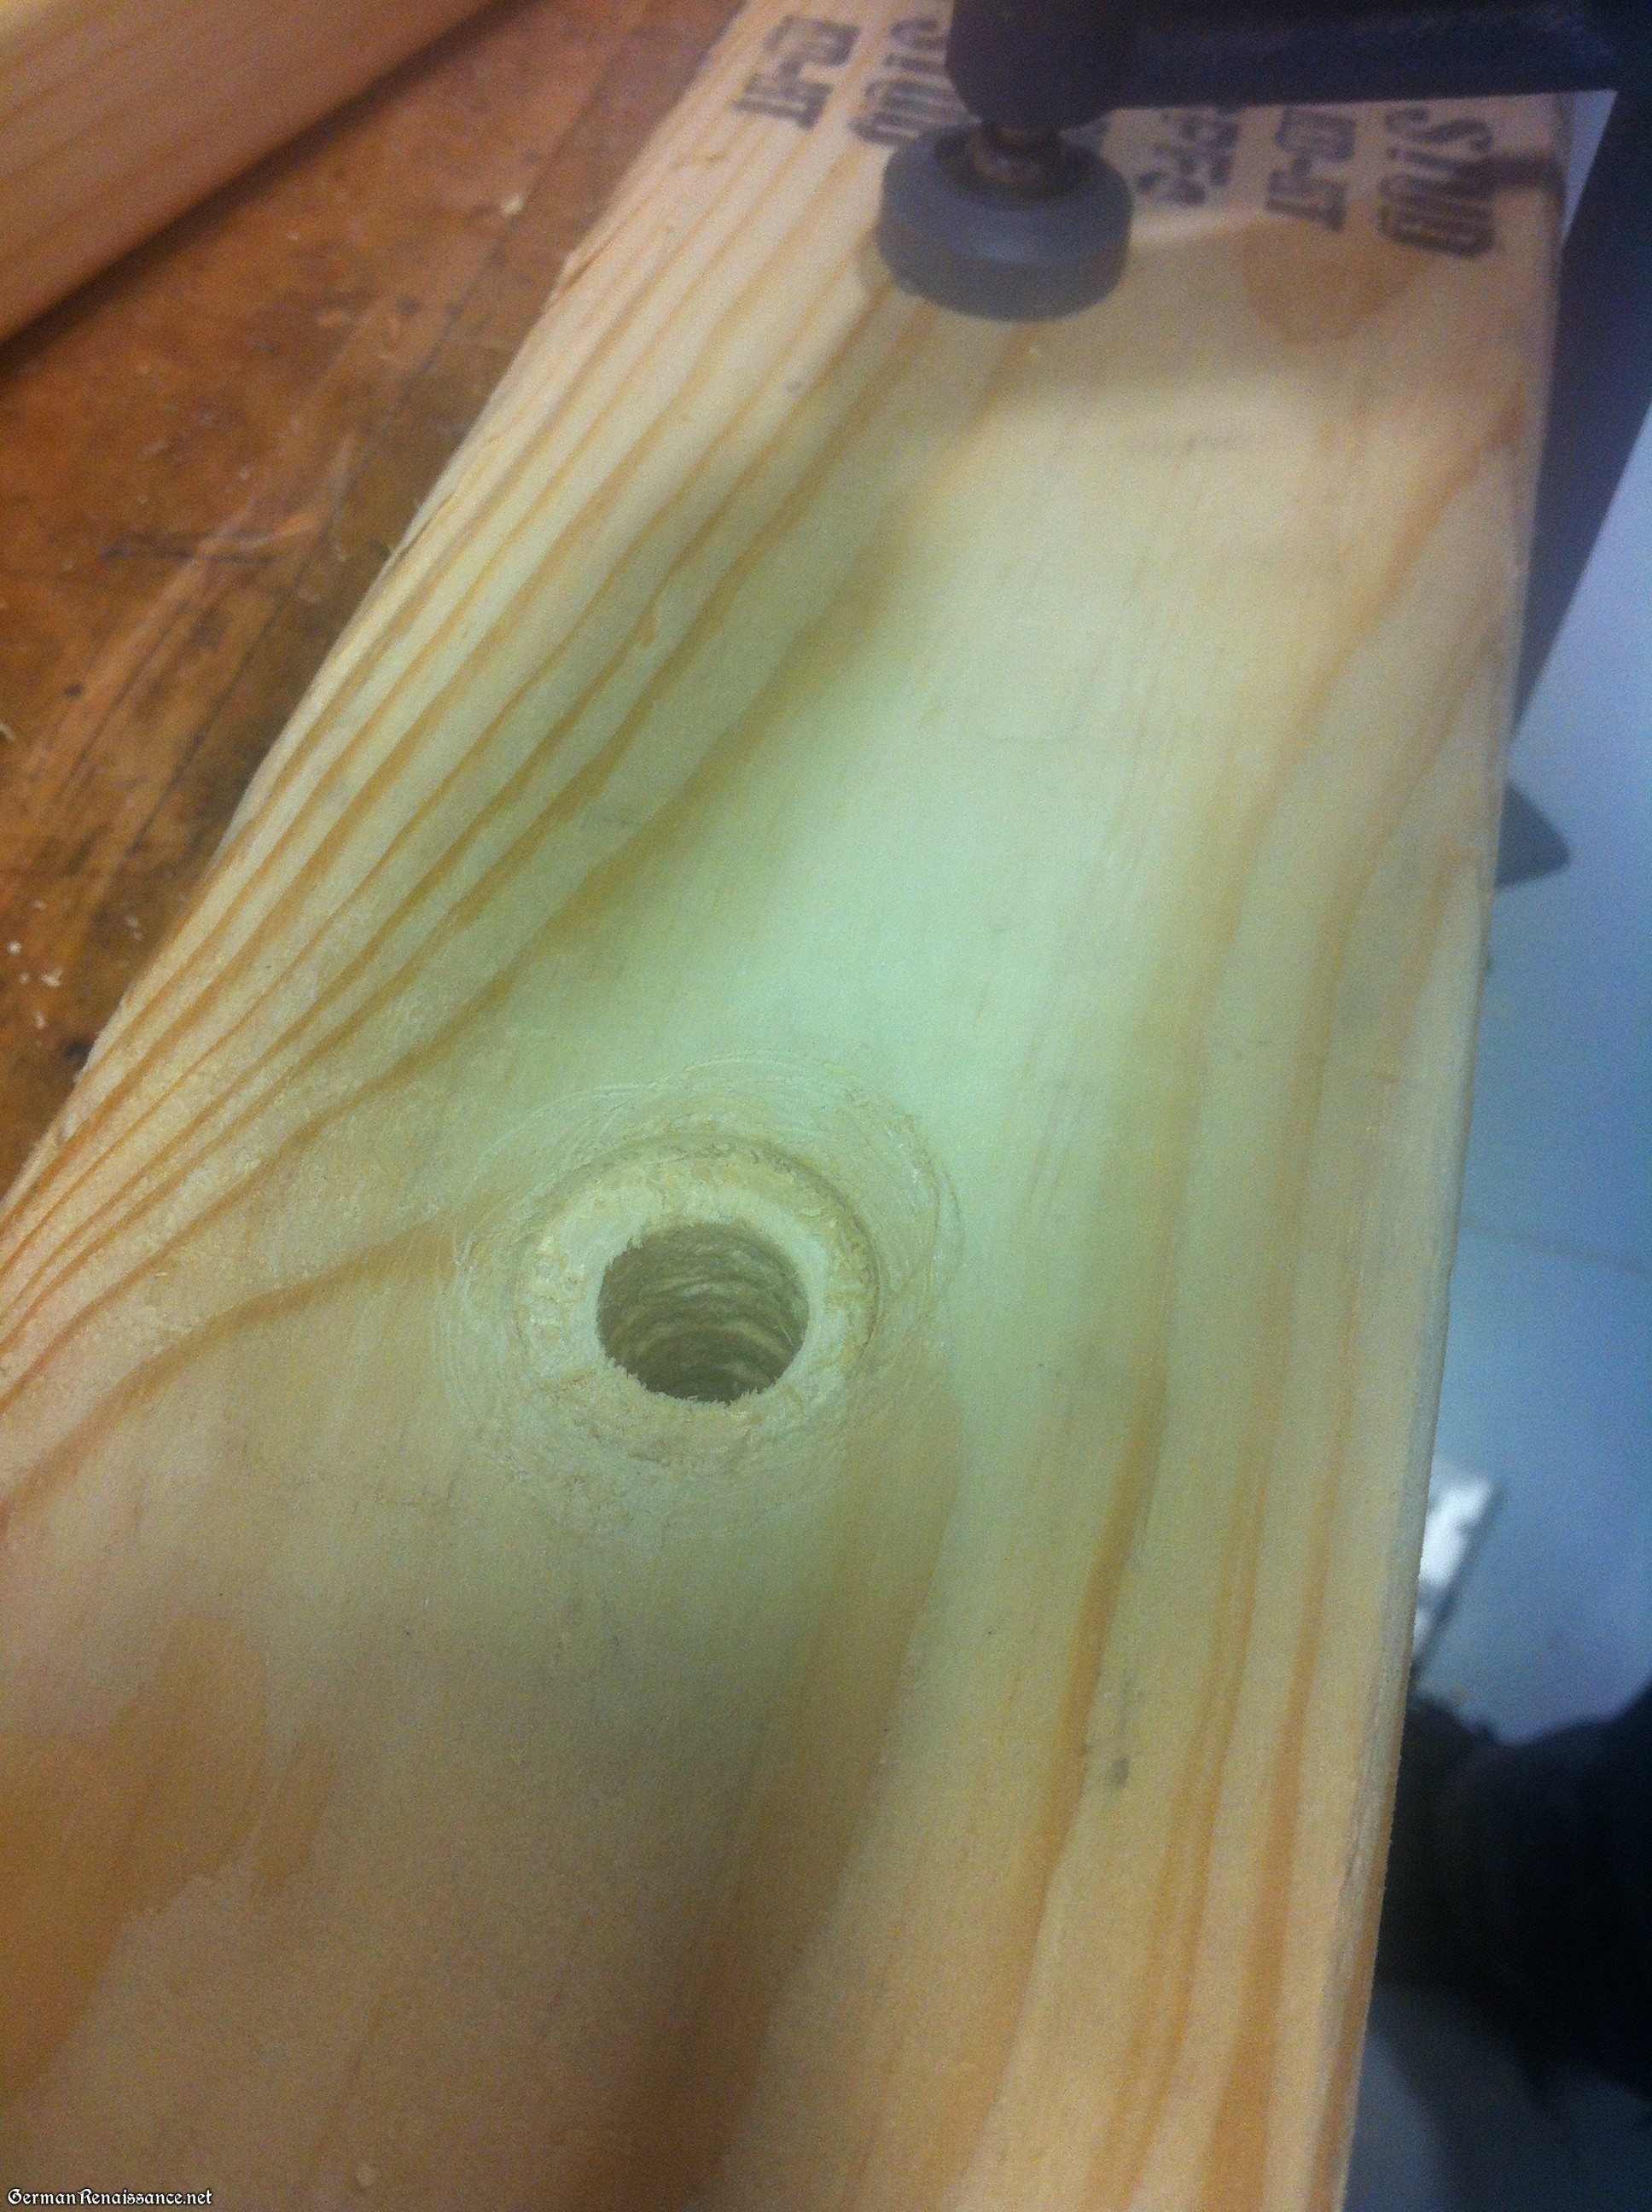
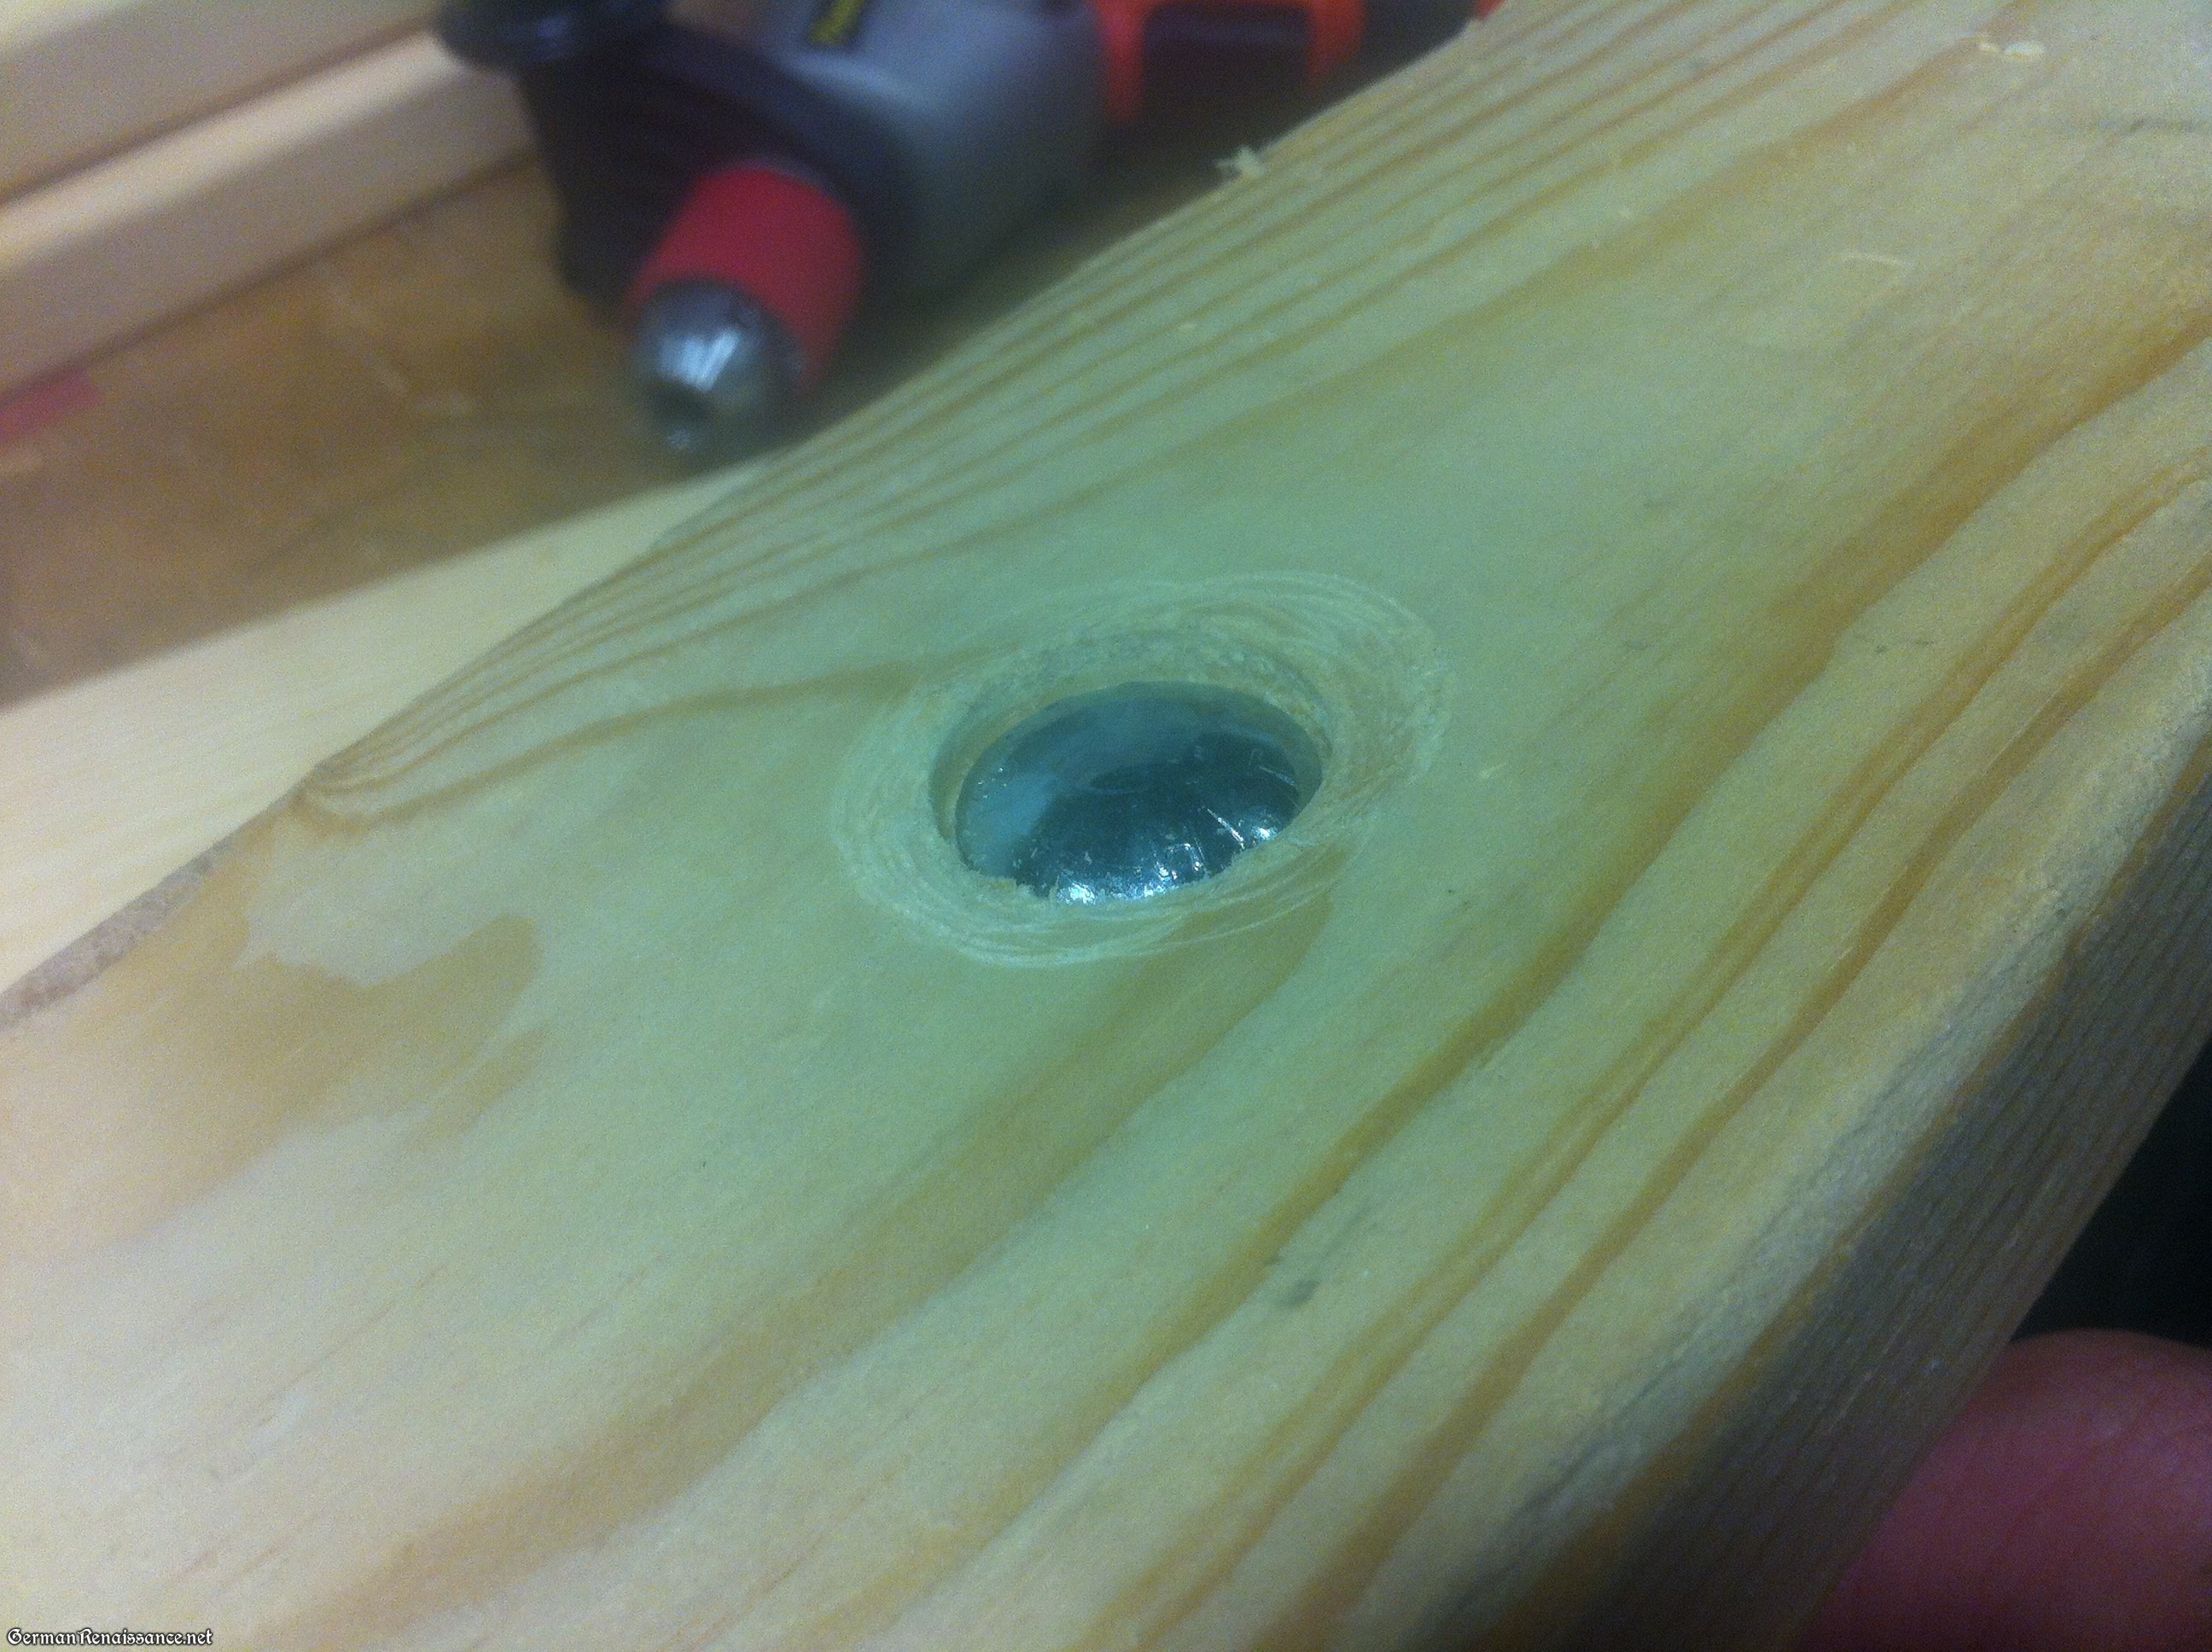
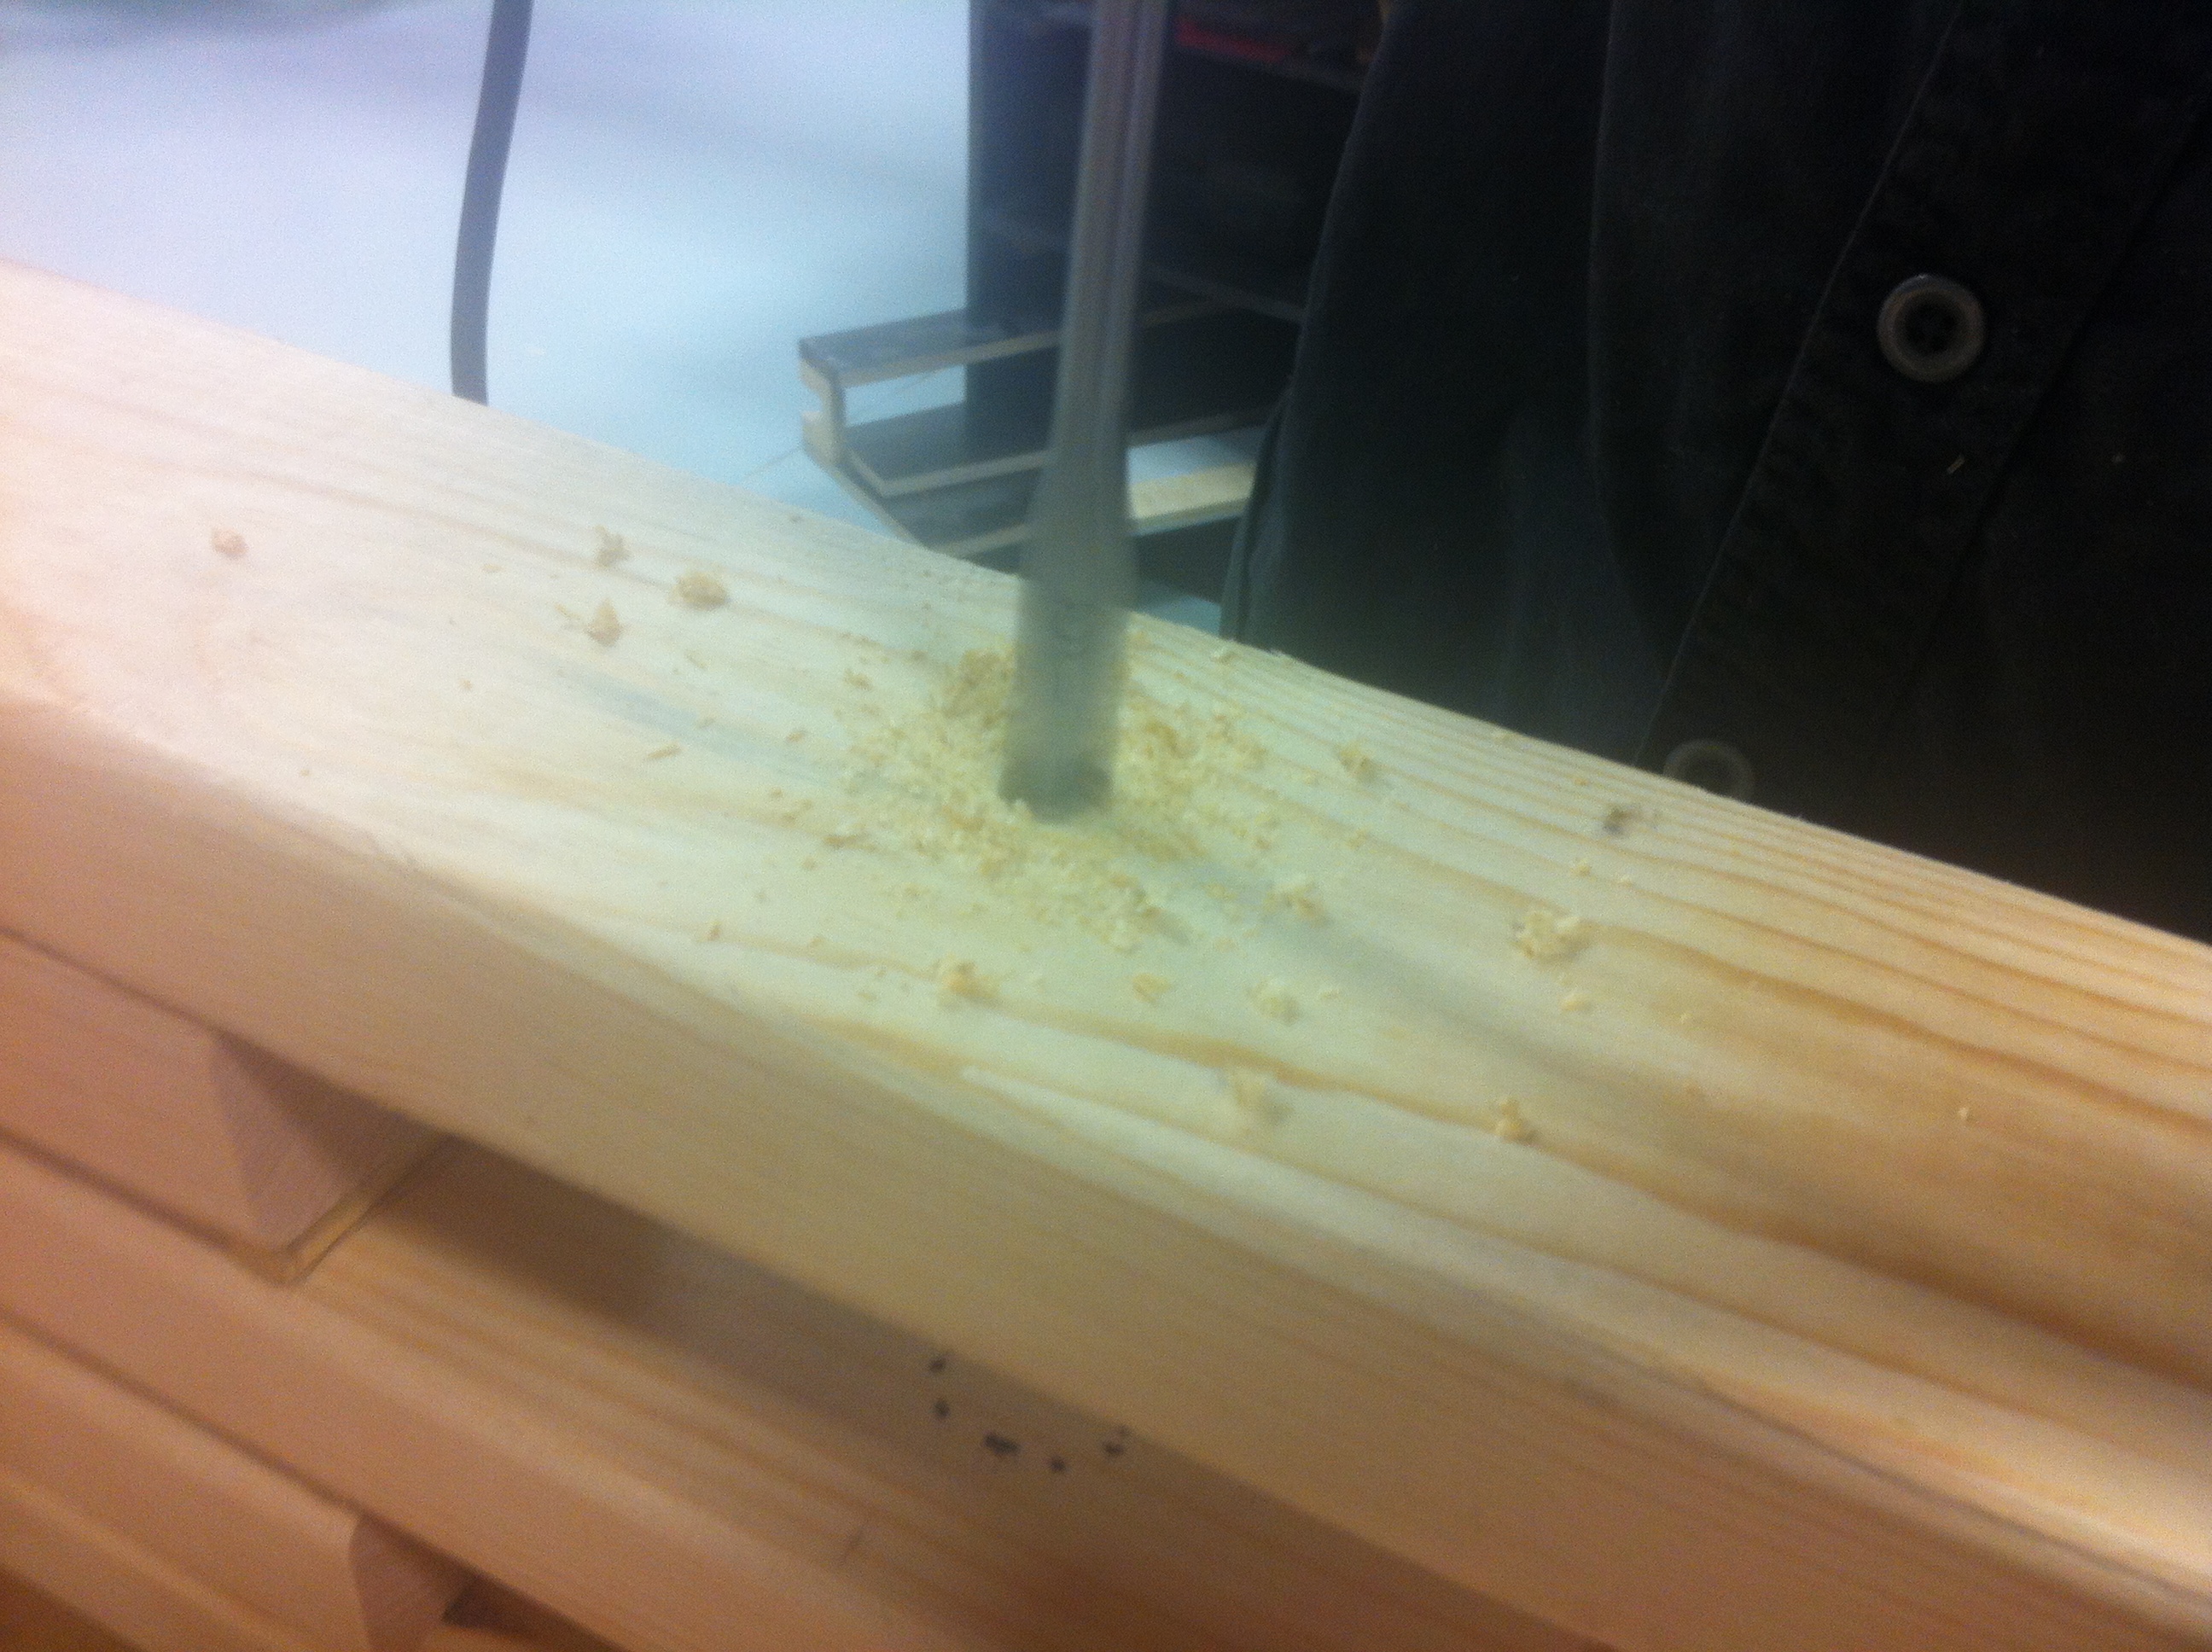
3. Create the Stretchers: Take the 2″ x 4″ and cut into two 51″ lengths (shorten or lengthen this if you have a shorter or longer table than me). Trim the end of each spacer according to the diagram below. To create the mortise (the hole in the end of the stretcher), use a boring bit on your drill to drill in two places (either end of the bit of wood you want to remove), then use a jigsaw and/or chisel to remove the extra wood and smooth it down.

Cutting the ends of the stretchers

Mortise in the end of a stretcher


4. Create the tenon keys. The tenon key is the tapered bit of wood that will fit into the mortise and hold the legs and stretchers in place). You need four of them. Use the oak board (or just leftover pine) and cut the board into two 4″ x 7″ x 1/2″ pieces, then cut each of those boards diagonally in half and round the ends. Each key should be 1″ at the bottom and about 3″ at the top. You can this diagram (PDF file) to cut your tenon keys: trestle-table-tenon-key.pdf

One of the tenon keys

5. Cut away the extra wood in your table legs once the wood glue has dried (wait at least 24 hours). Here is the diagram I used for my table legs. I drew the pattern in Adobe Illustrator, printed it out tiled, taped the pages together, cut it out, and drew the pattern onto my wood. Just flip the pattern over to do the other side of the wood. Here’s the pattern I used in a PDF: trestle-table-leg-design.pdf

Marking my pattern on the wood

Cutting out the design on the legs

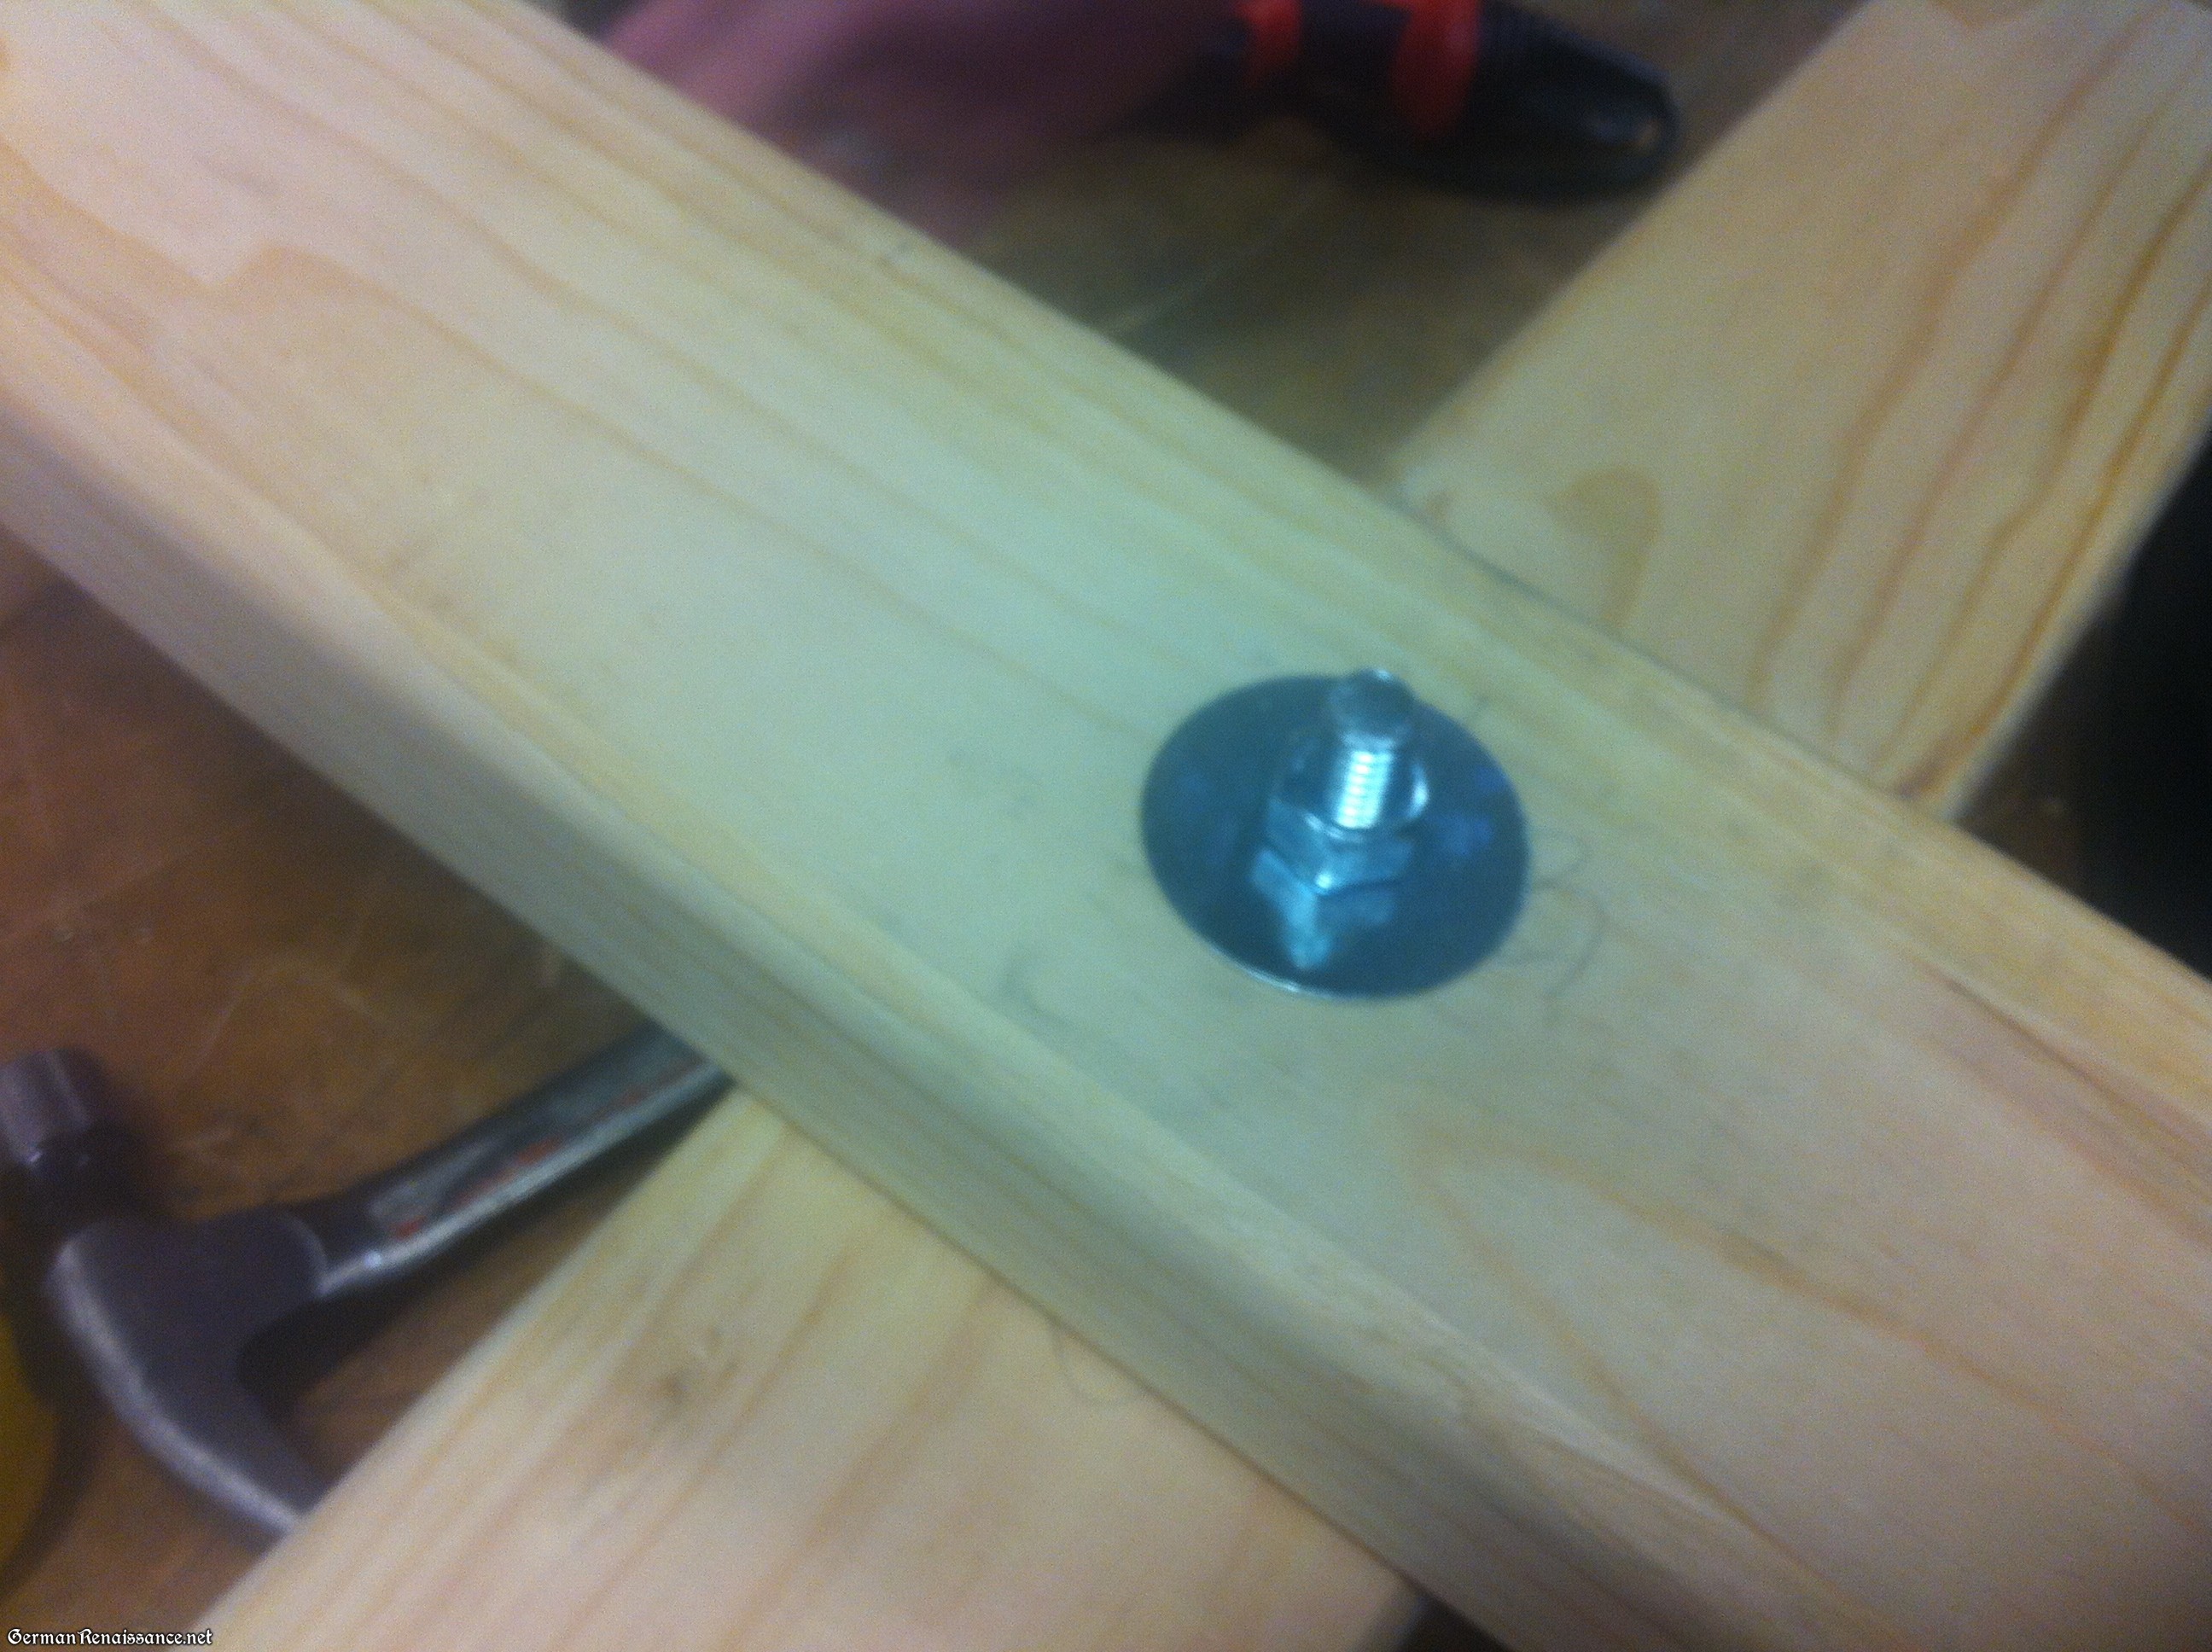
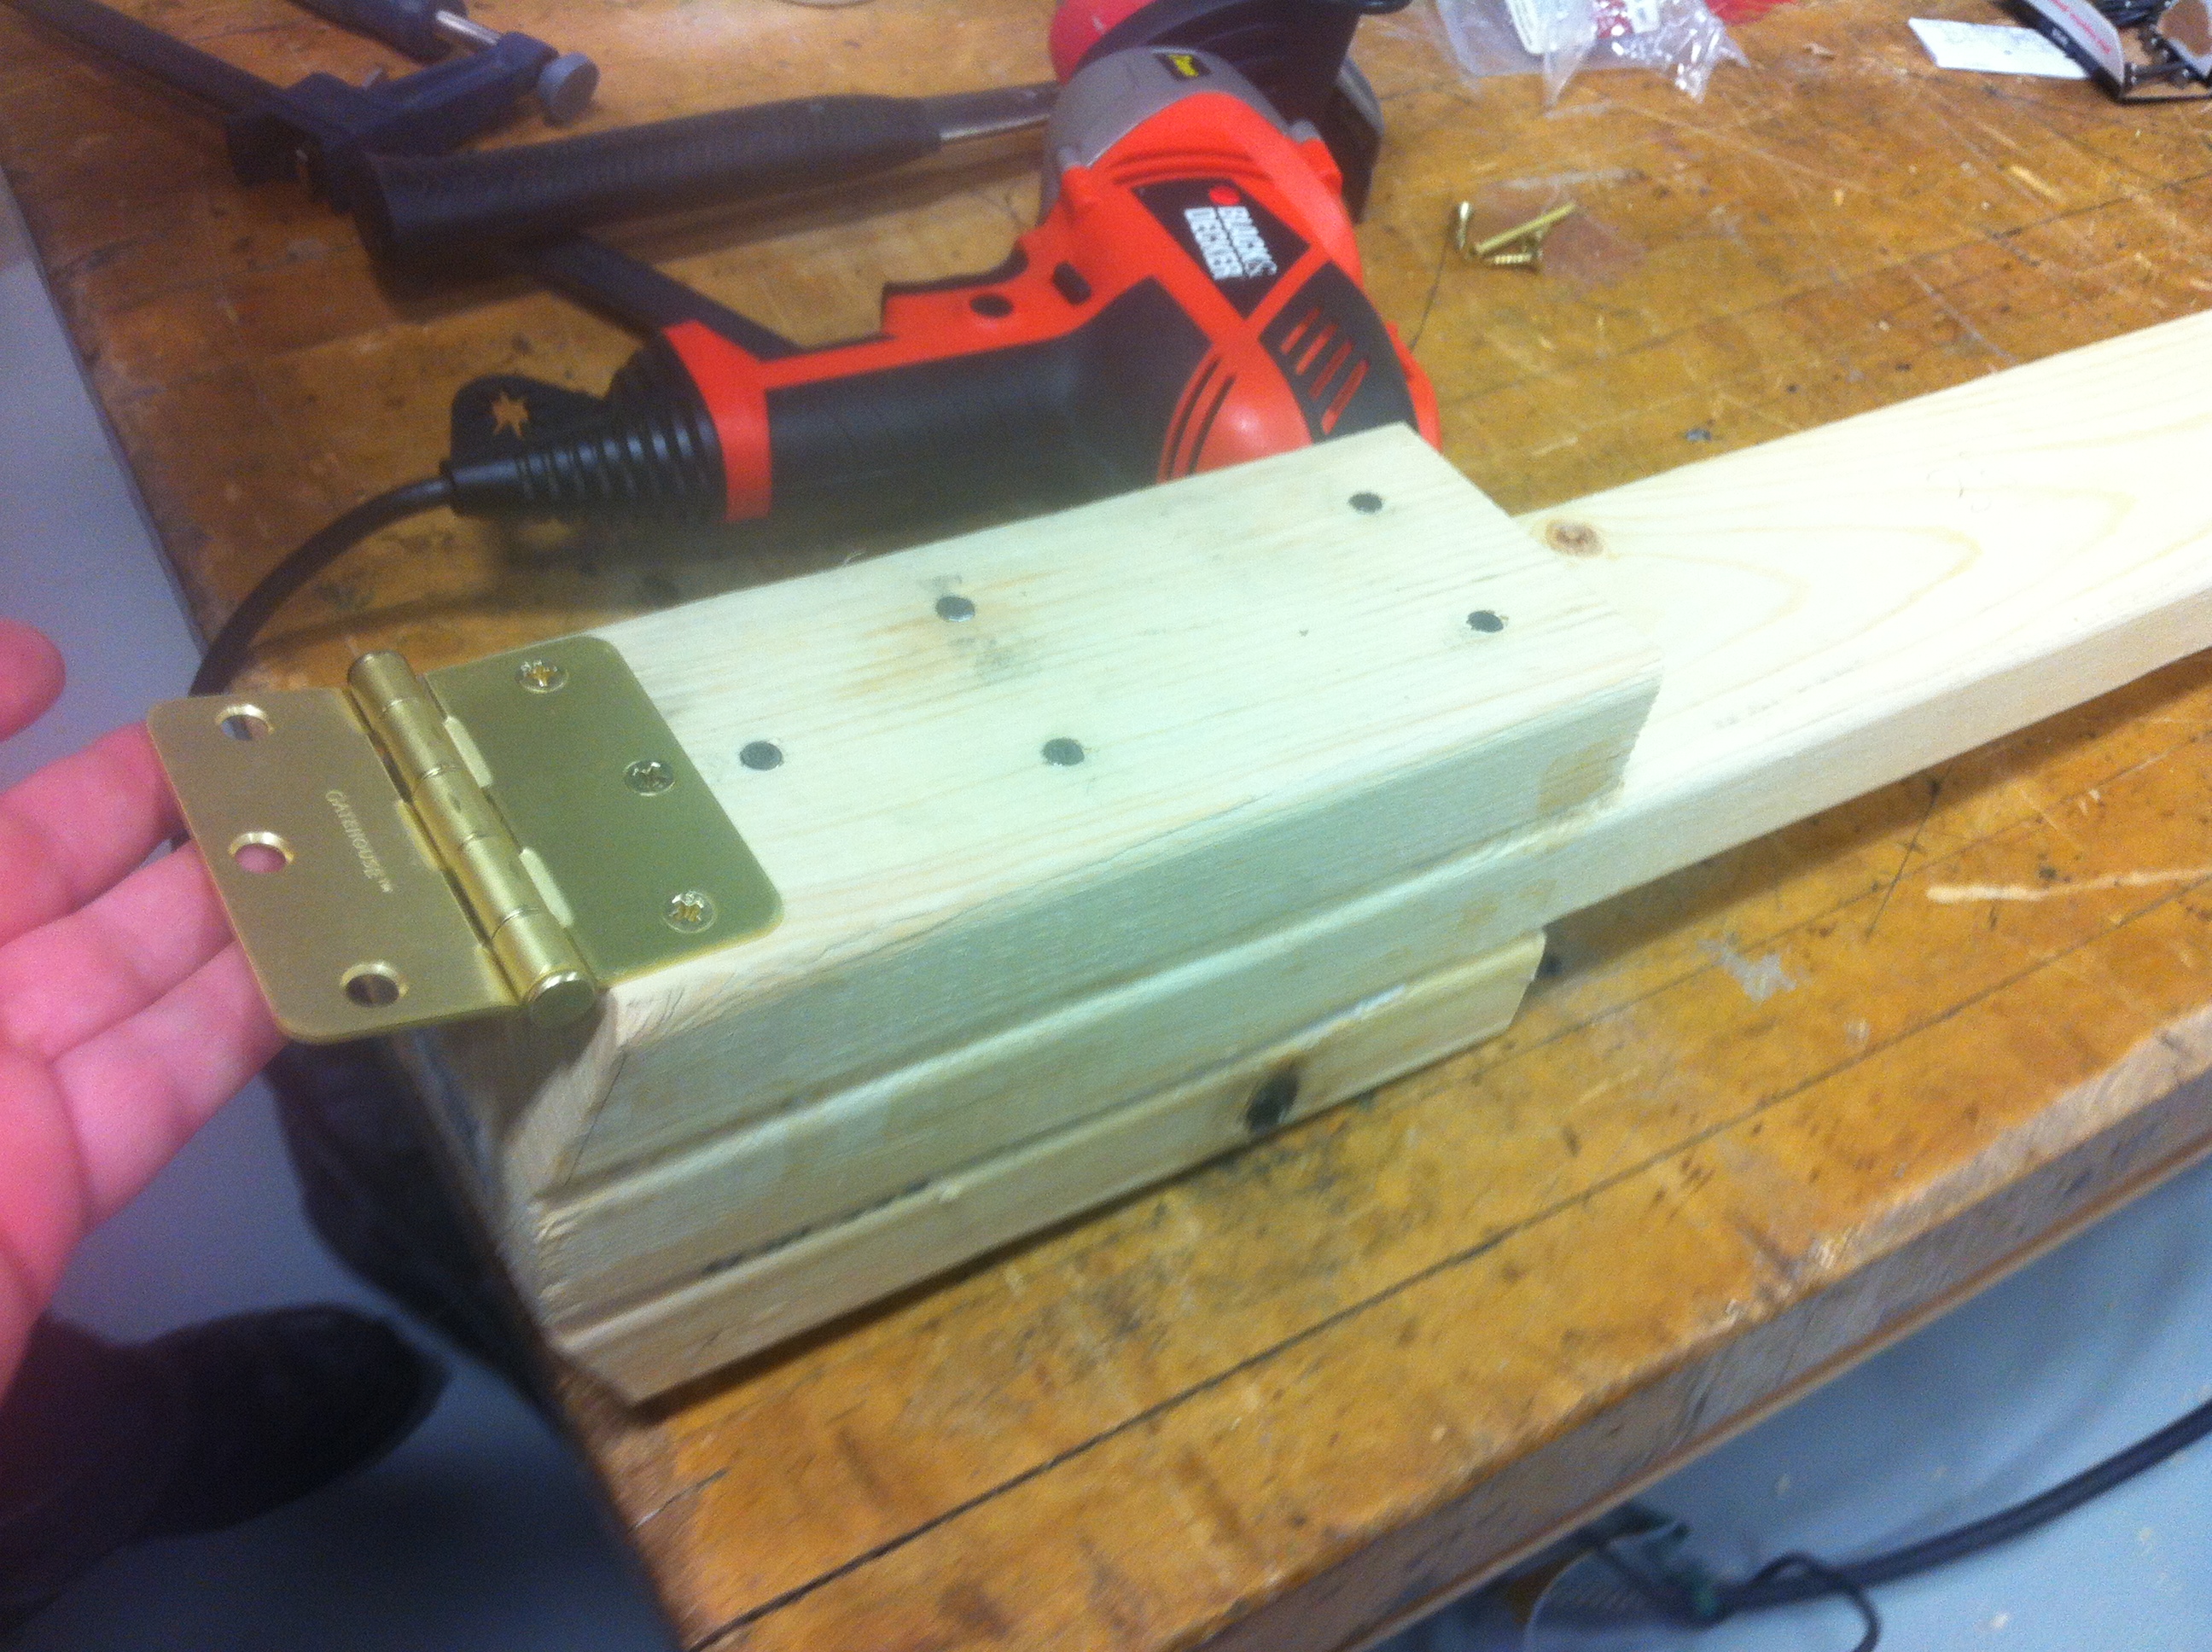
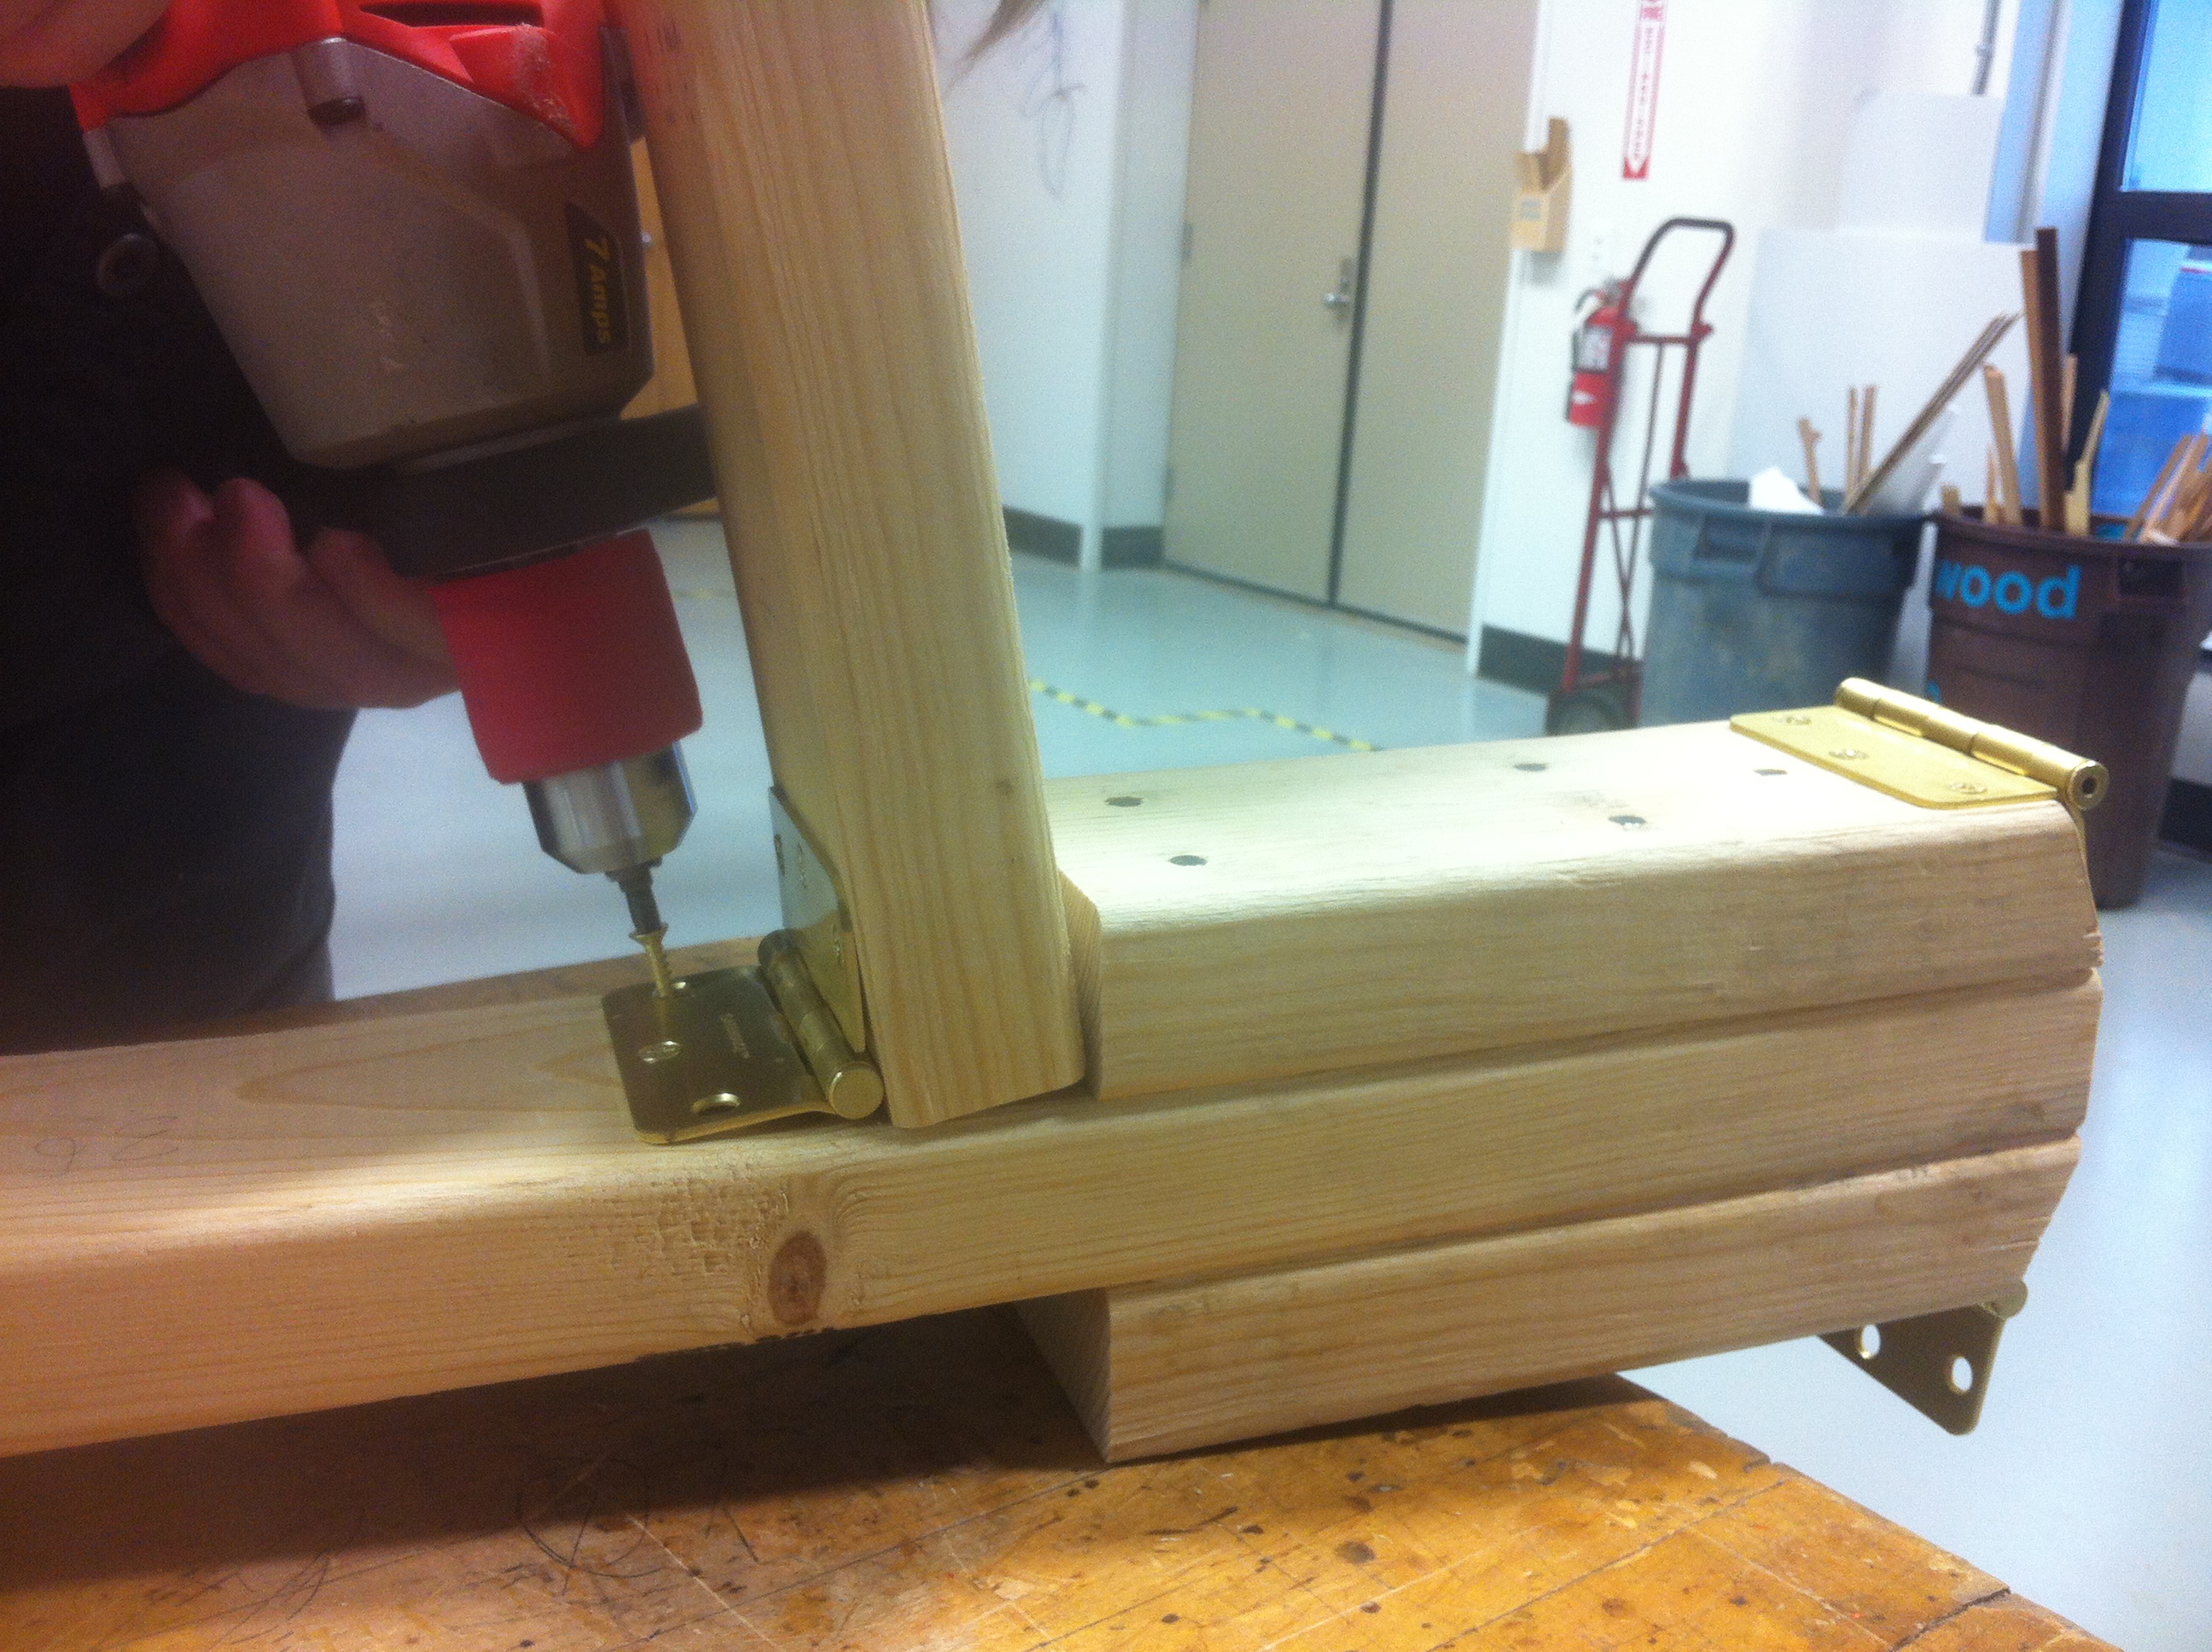
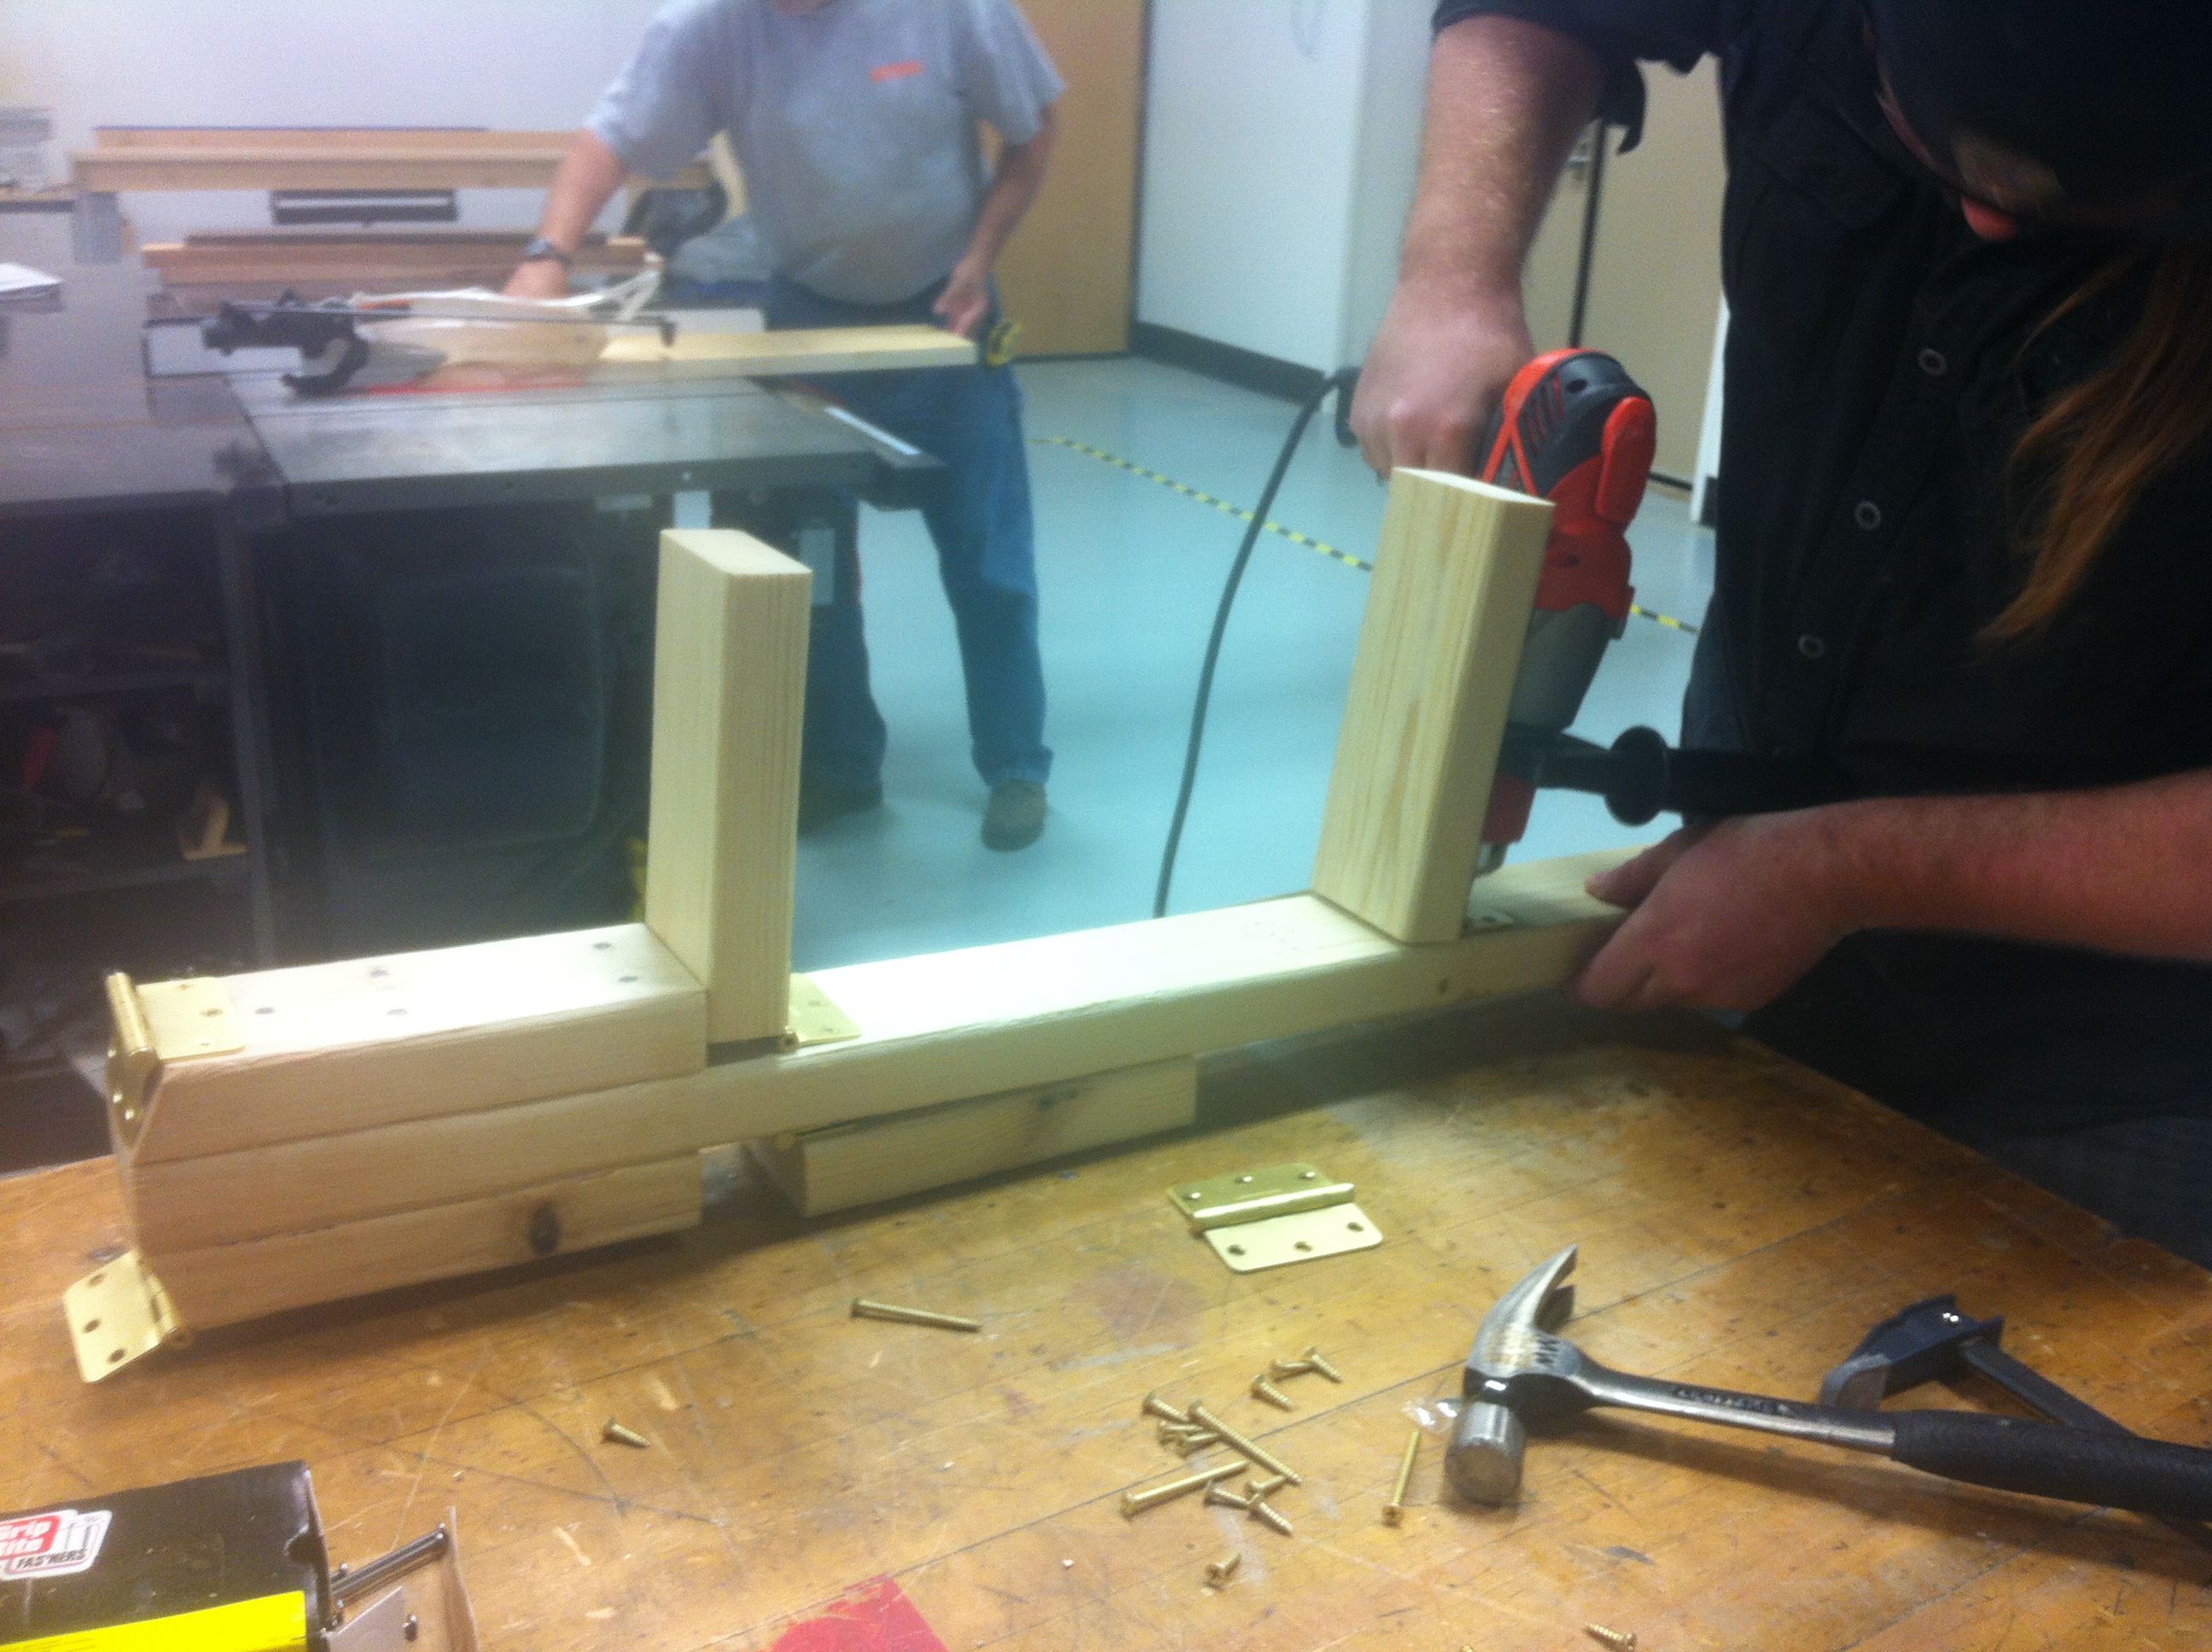
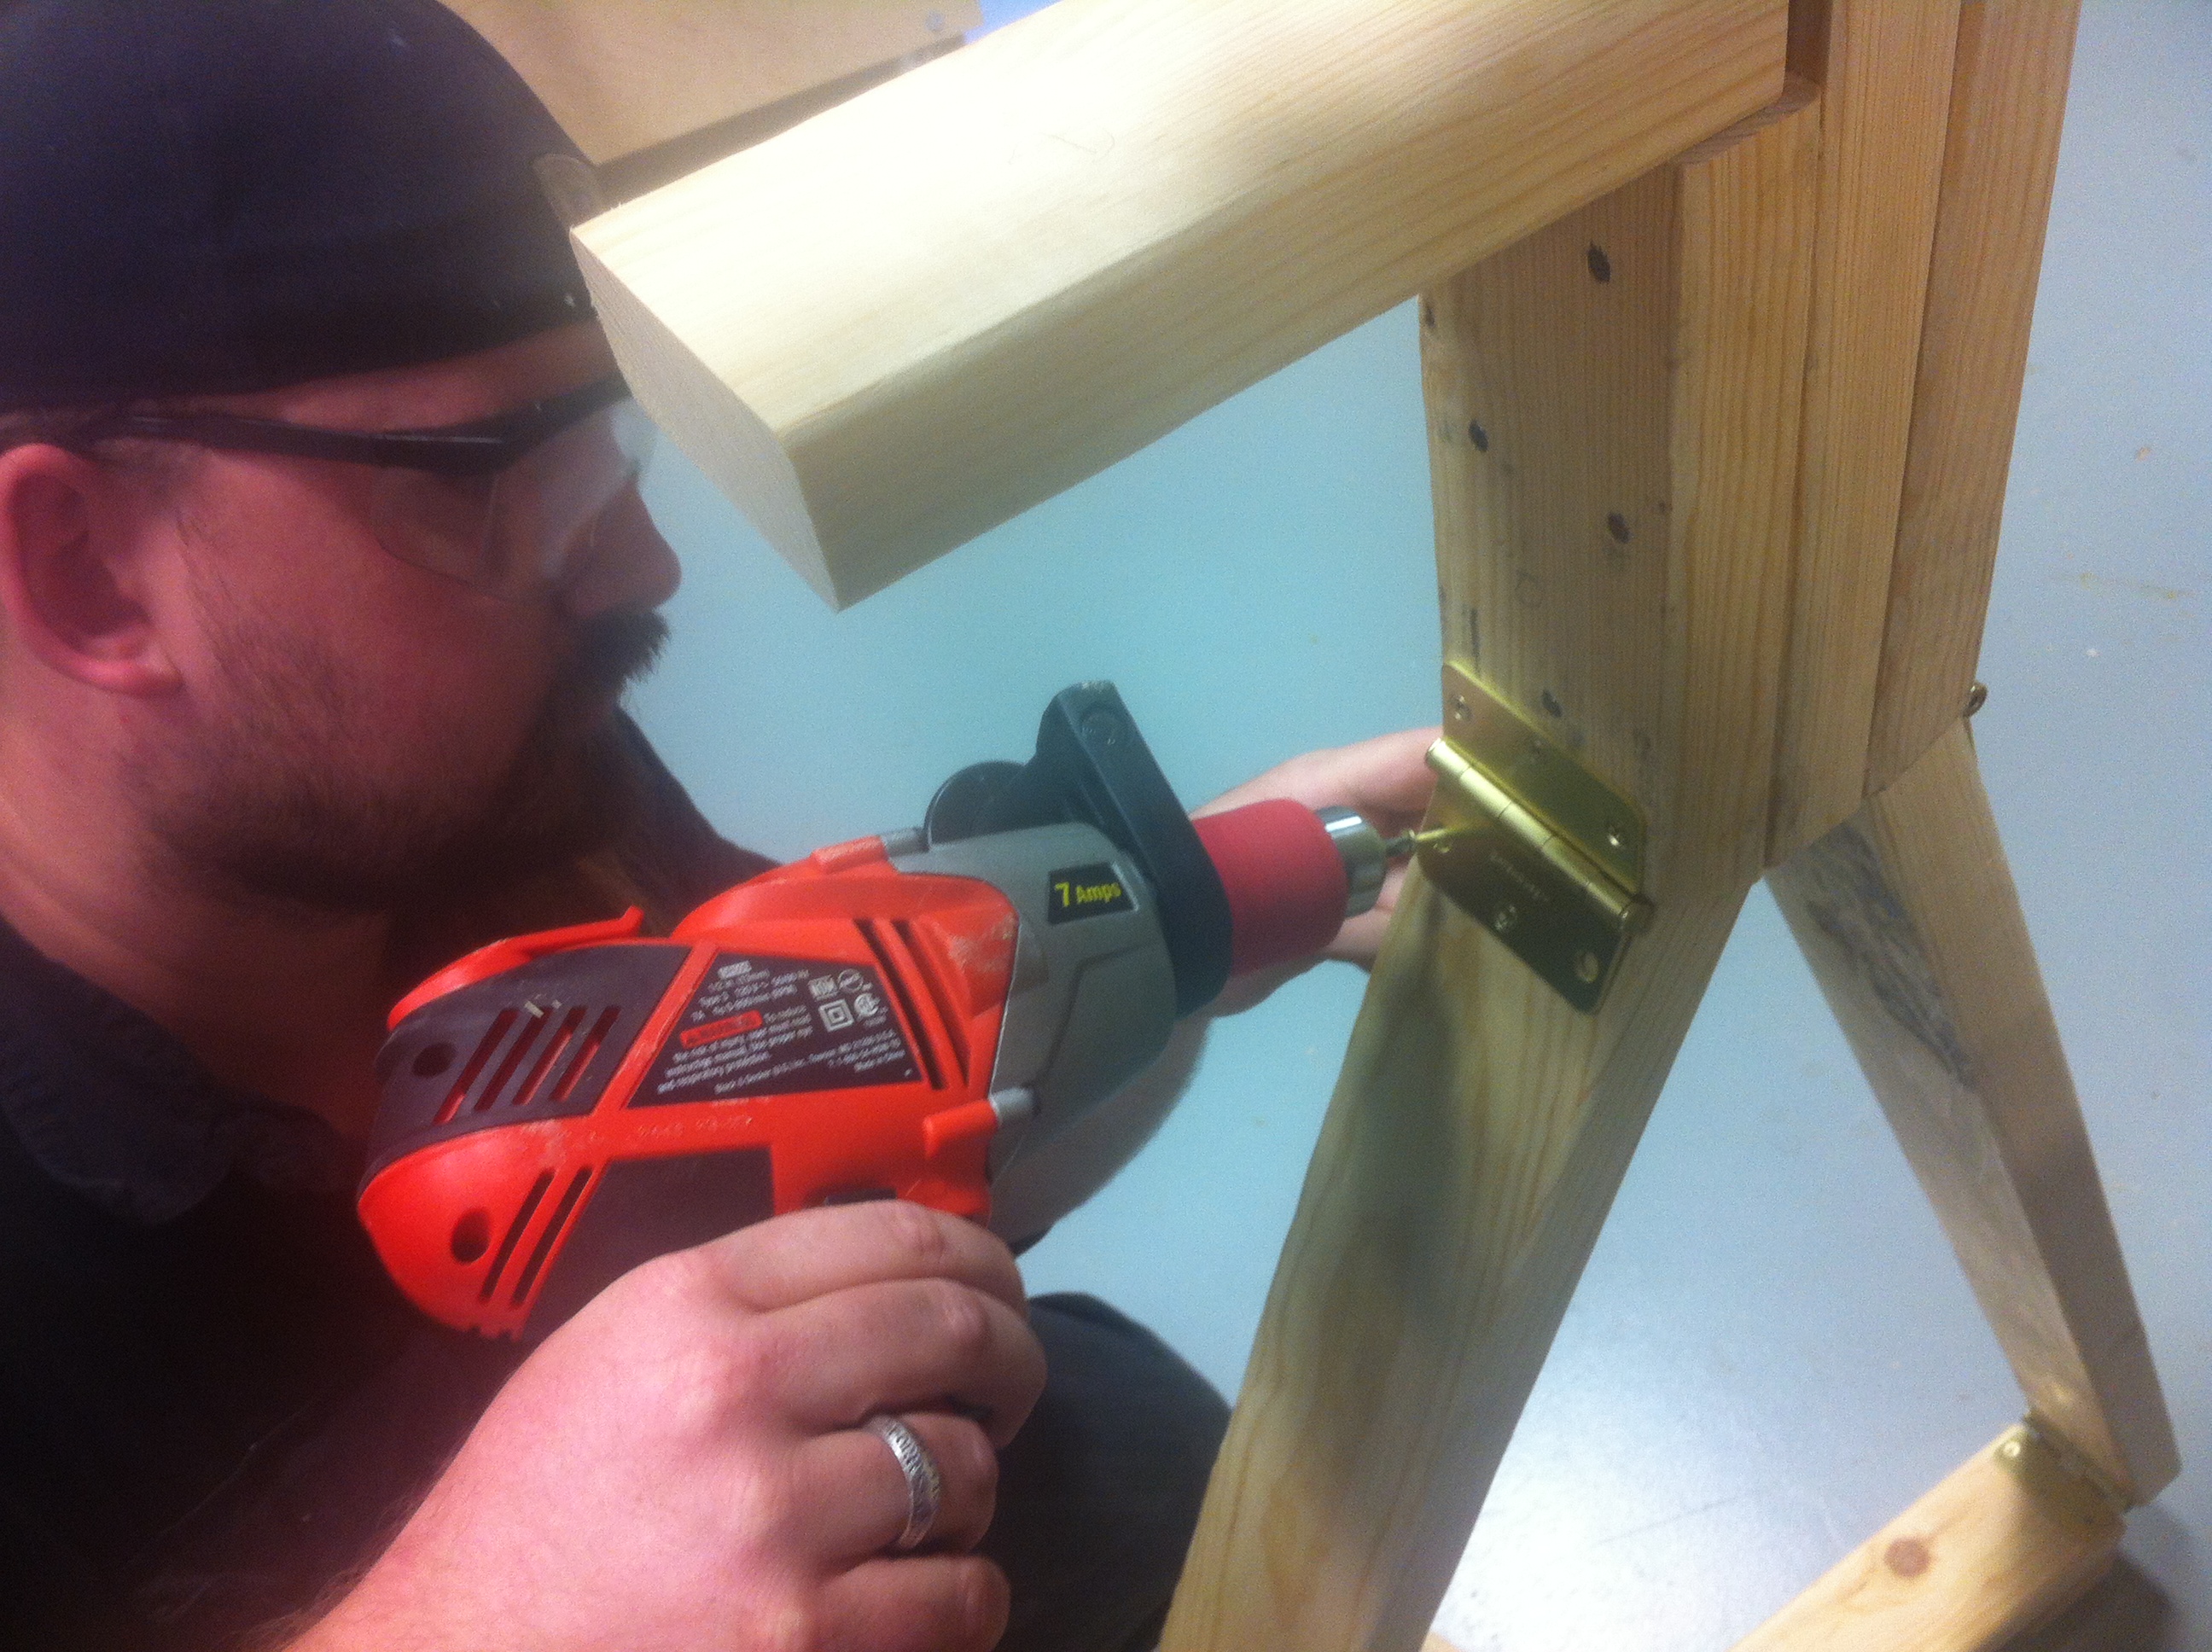
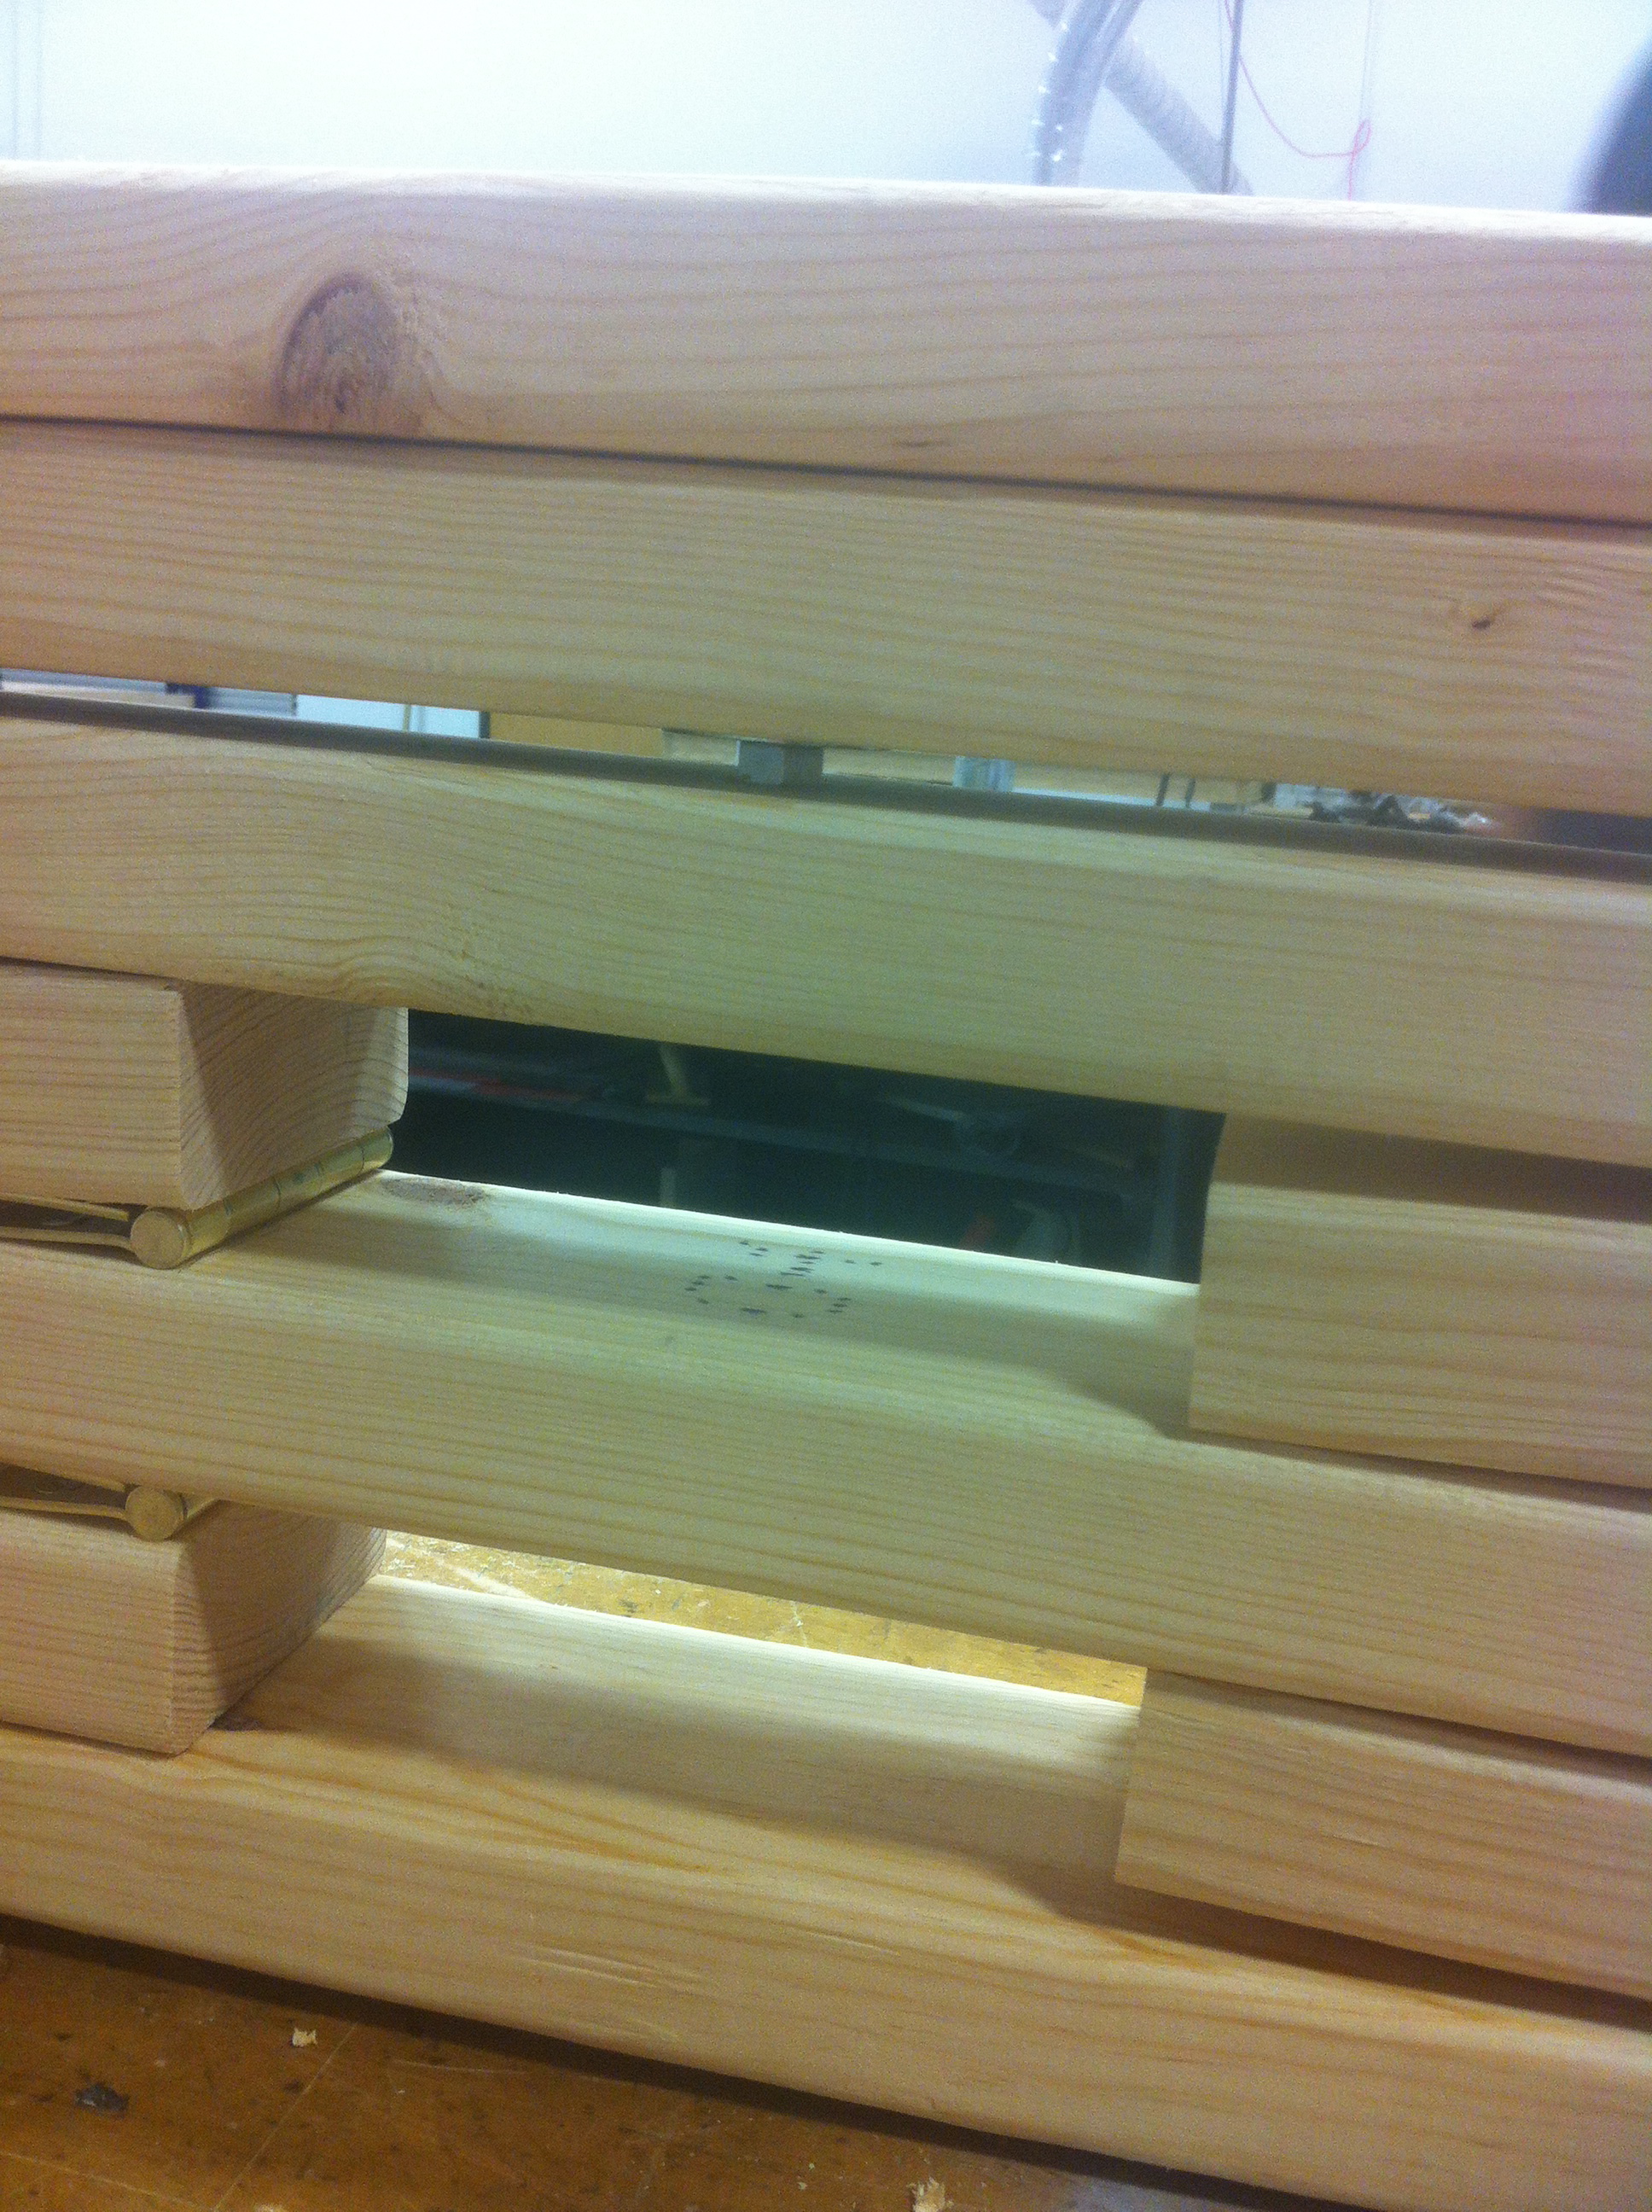
6. Assemble your table legs, stretchers, and tenons. Now that everything is cut out, put your table legs and stretchers together. You may find that some tenons don’t quite fit in some mortises, and now is the time to narrow/widen as necessary. Once it’s all put together just the way you like, take a permanent marker and write indicators on each board so you now how to assemble it quickly and easily next time.

Assembled legs with tenons firmly wedged in mortices

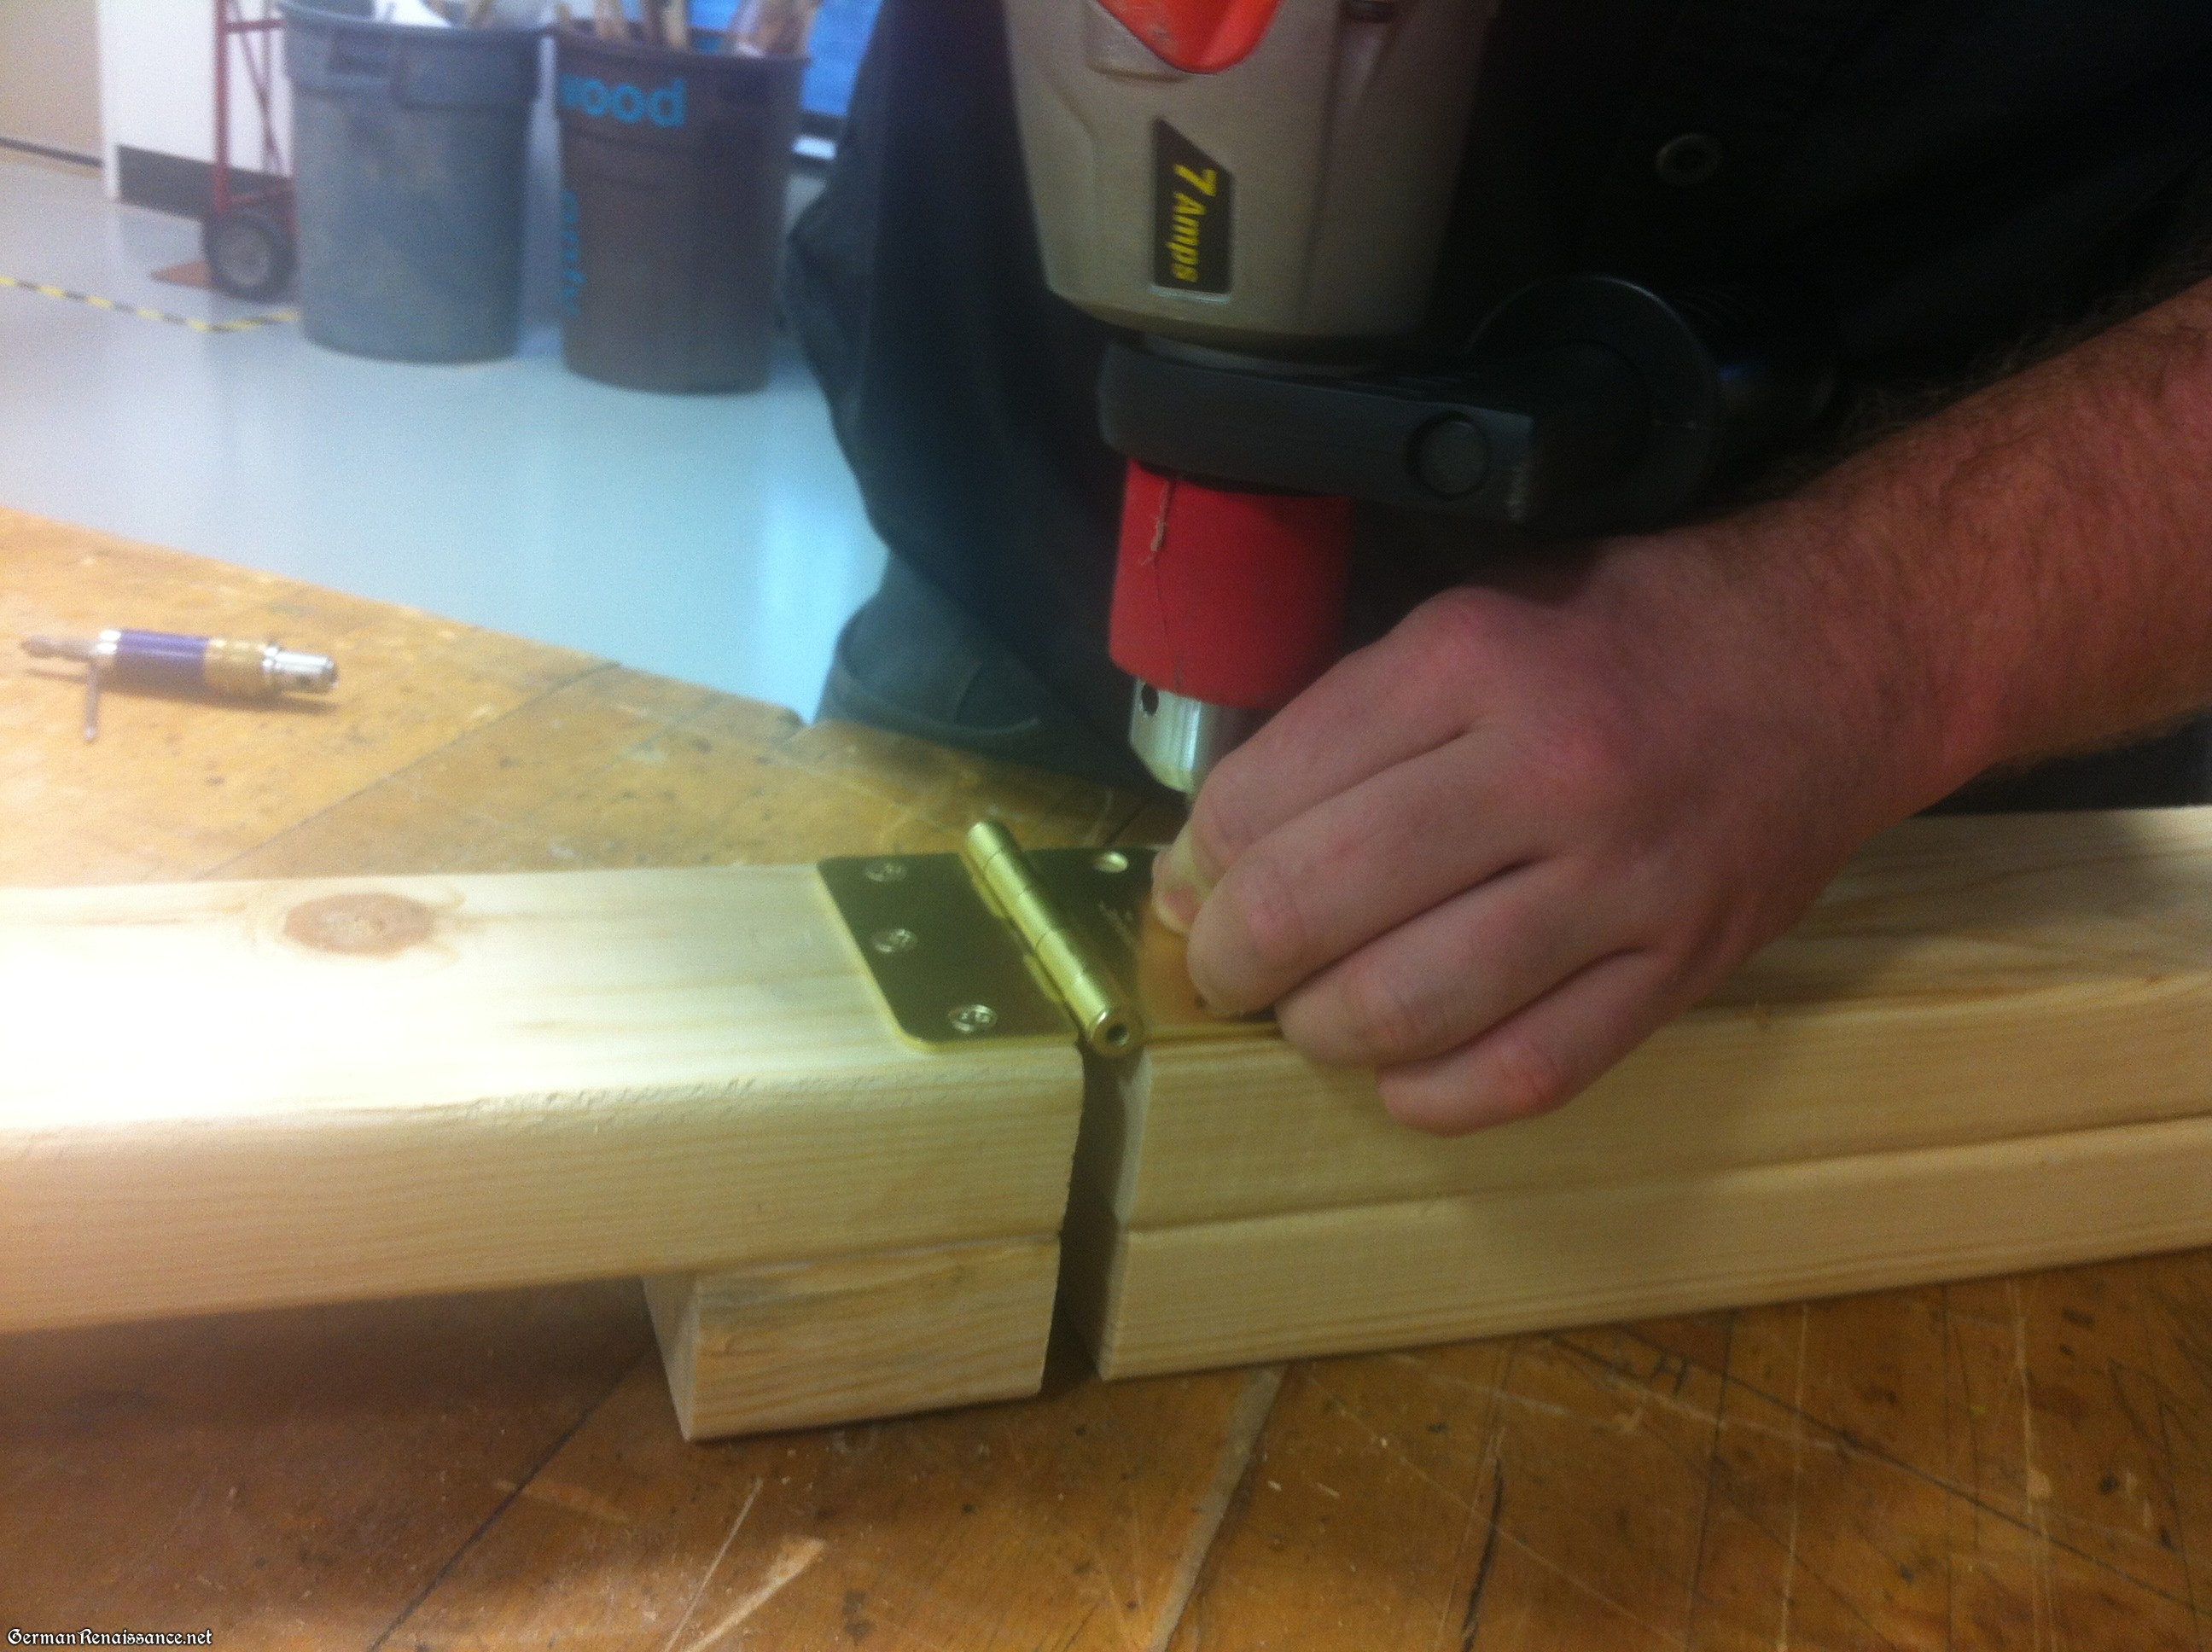
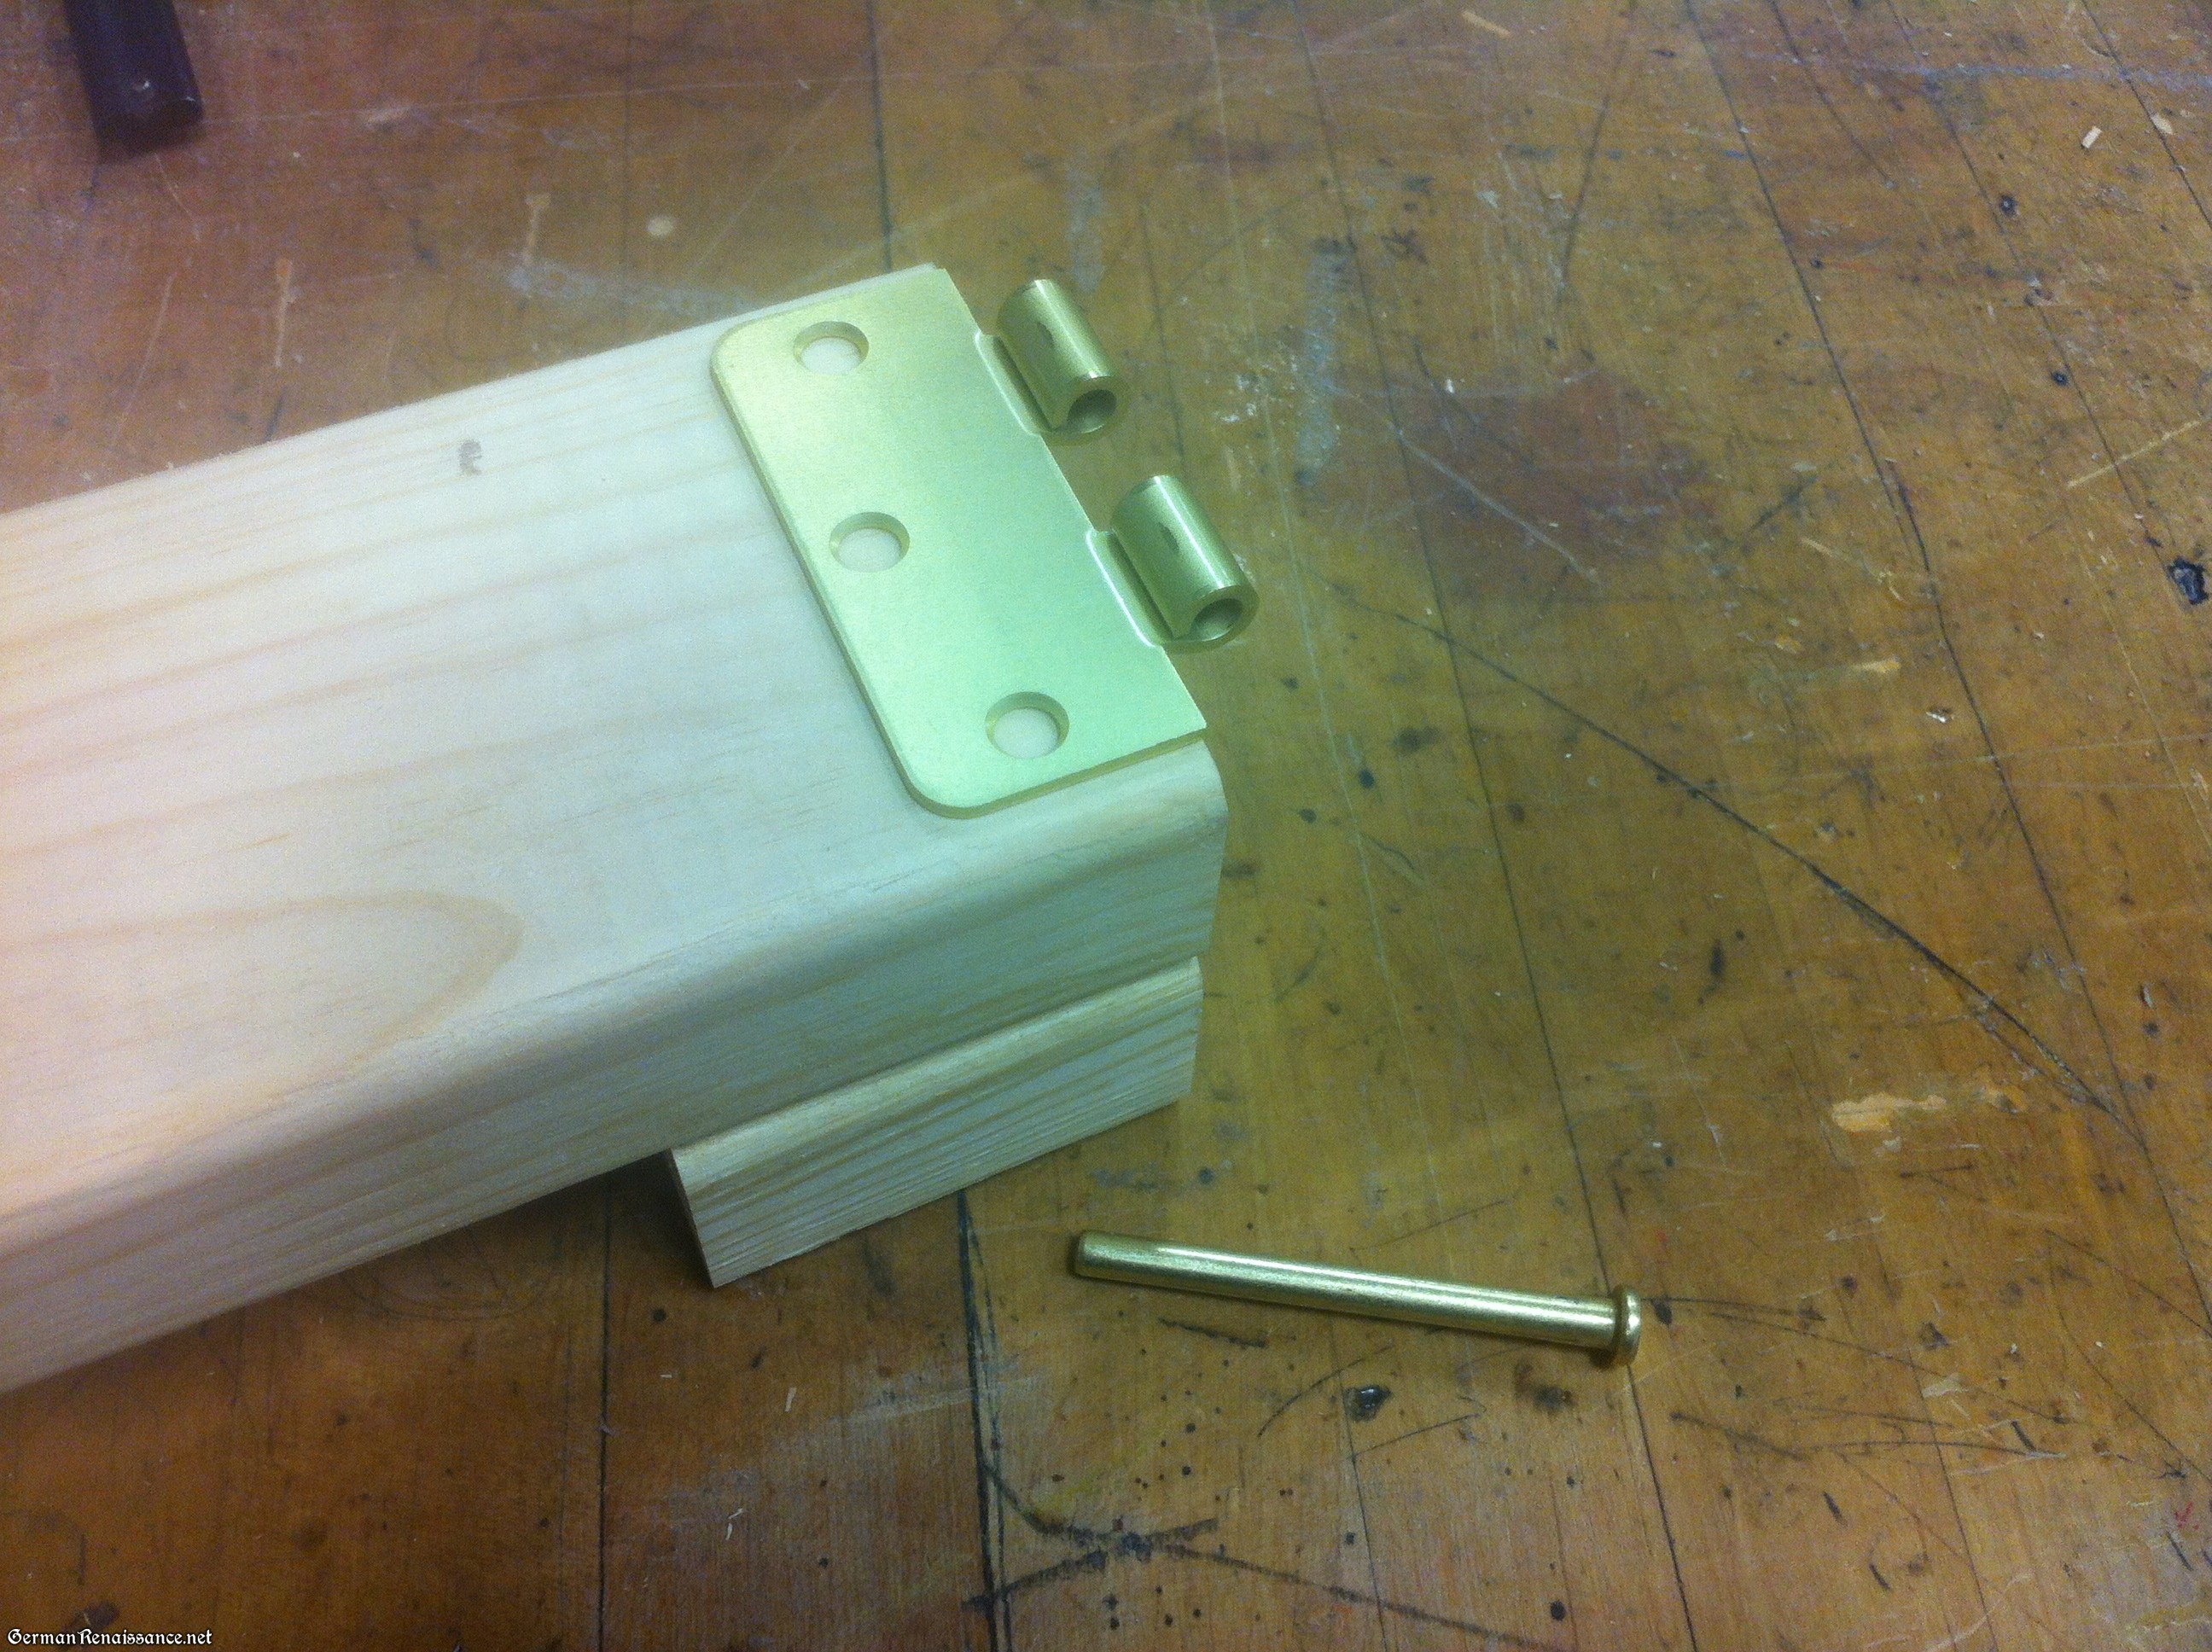
7. Attach tabletop anchors. As the tabletop is so light, I want to avoid actually attaching the tabletop to the legs, just in case the legs were a bit too heavy for it when it was picked up or otherwise moved. So I attached simple 1″ x 2″ boards to the underside of the table, on either side of where the legs meet the table, to hold the table in place and prevent it from moving about when used. I attached the boards to the very sides of the door, where it is solid, for the most secure hold — and this has the added advantage of strengthening the underside of the door a bit. Now the tabletop just rests on top of the legs, but doesn’t slide or move thanks to the anchor boards. (Note: If I find the tabletop moves or tilts during use, I’ll simple drill holes through the anchor boards and into the top of the legs, then slip a dowel through for stability.)

Anchor boards attached to the underside of the door/tabletop

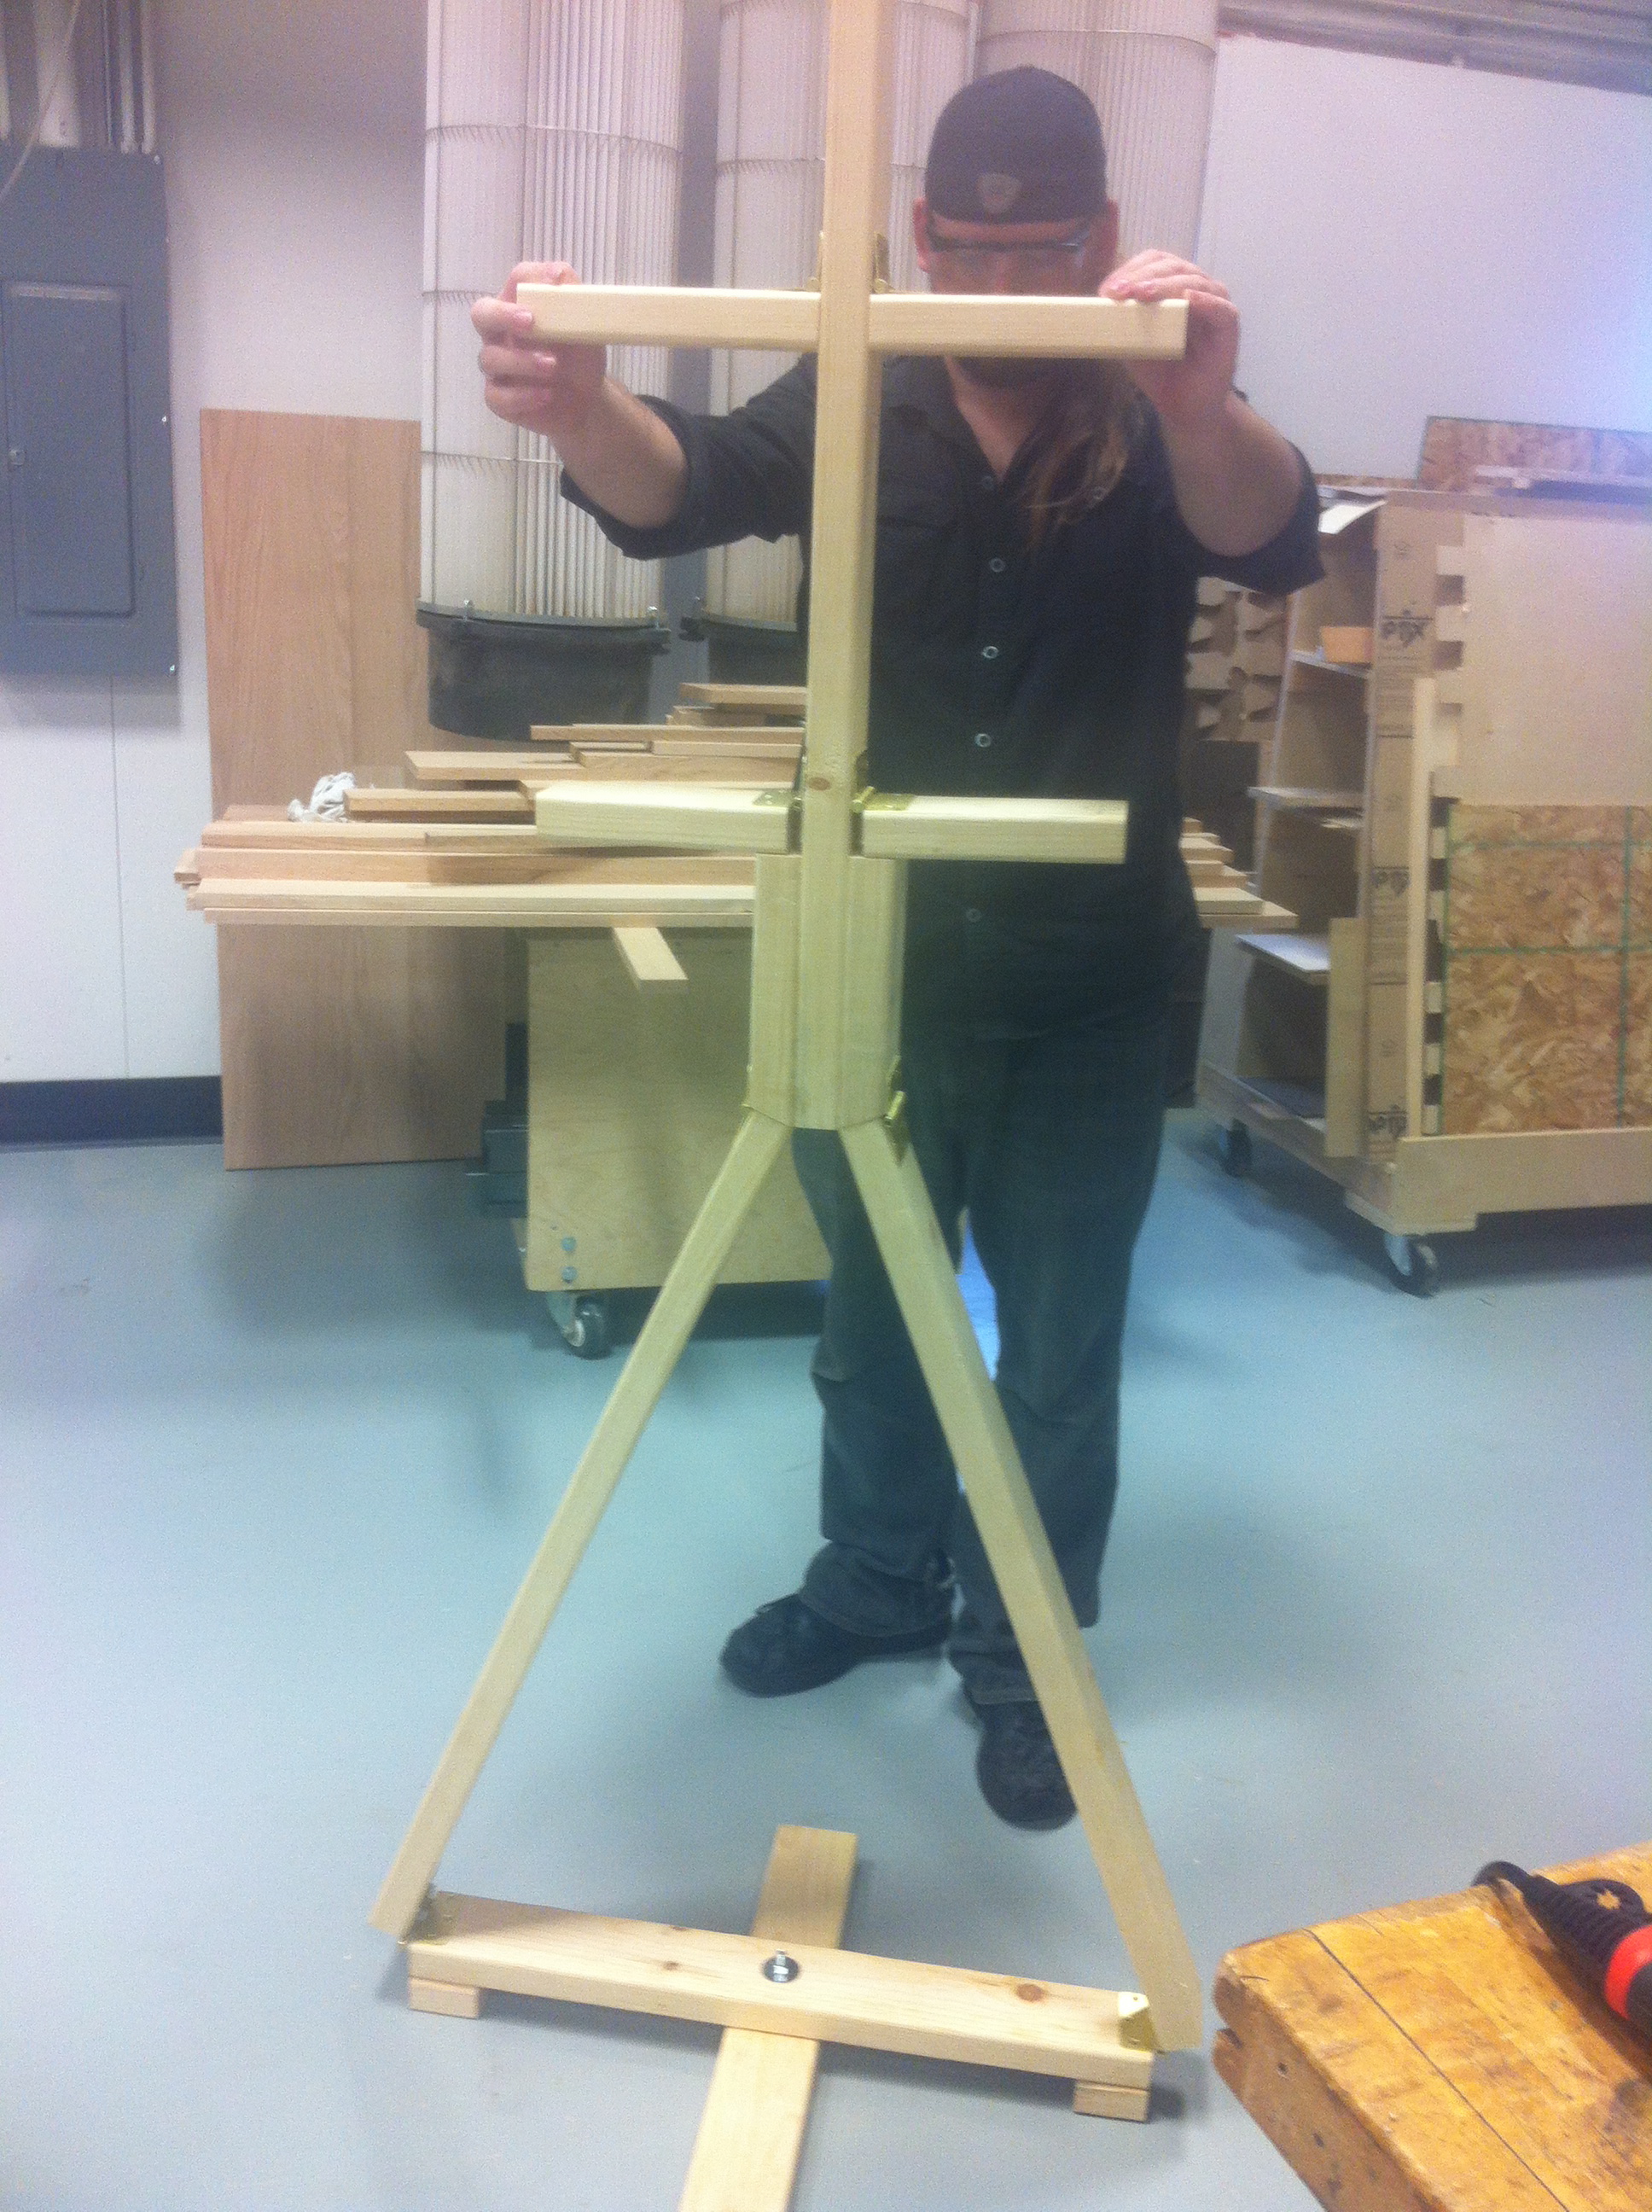
And that’s it … the table is done!


A functional trestle table for under $35!

Now you can fancy it up, if you like. Since I’d saved so much in the construction of the table, I decided to put moulding around the edges and stain the moulding, legs, stretchers, and tenons. That cost an extra $32, although I’d already bought the stain for another purpose (my cooler cooler and my benches). Here is my completed table:


My inexpensive but lovely trestle table

Tips I Learned the Hard Way:

  • Buy dry wood. Wet wood is super heavy and hard to cut! And it won’t take any stain until it dries anyway.
  • If possible, smooth or otherwise plane the sides of the wood boards before you dowel and glue them together in step 1. This will really help the boards stay strong and stable.
  • When you apply any wood glue, put glue on all surfaces to be glued in a thin, even coat. And clean up any wood glue that beads or globs during the drying process — it’s really hard to get this glue off once it has dried.
  • When staining with tinted polyurethane like I did, keep a cloth handy to wipe drips — it gets tacky VERY FAST and is hard to wipe up later. Also, do not go back over previously stained areas (anything older than, say, 3 minutes) until it is absolutely dry because it will glob and gunk and look yucky. This happened with mine, and I got better at the staining thing as I went along (told you I wasn’t that experienced!)

All comments, questions, and suggestions for improvements most welcome!

Also, it’s probably not clear who wrote and made this table, but it was me (Genoveva), working on my own. Gregor was in another state at the time! He’s since helped with many other projects, but not this particular one.

Update 2/2014: This table continues to serve us very well and has survived six weeks at Pennsic so far. I am glad I used a hollow core door, especially now that we have quite a bit of stuff to bring to Pennsic and weight is an issue. The table gets near daily use at home, too, as my sewing table. Here are photos of the table in action:


Our table at Pennsic 40

Table at Pennsic 41

Table at Pennsic 42

Our table gets a lot of use!

My table functions as a sewing table at home most of the time

And we’re planning to bring it to Pennsic 43! And if you’re interested in camp furniture, check out these other things we made:

Pennsic Prep: Project Tutorials

19 July 2018

Every year since my very first Pennsic I’ve taught classes. This will be the first year I do not, as I will be Deputy Mayor for Cultural Affairs (woohoo!) and I felt I should keep my schedule as free as possible. But I still want to help and I love to teach. So this year I’m sharing ALL the PDF handouts for every class I or my family (Lord Gregor and Lady Alexa) have ever taught at Pennsic, which includes a lot of Pennsic project things you might like to do now before you arrive. Enjoy!

Pennsic Project Tutorials

Screen Shot 2015-07-27 at 11.12.48 AM

Portable, Folding Armor Stand (see the blog post for more detail)

Make a Canvas Dayshade (see the blog post for more detail)

Painting Your Pavilion

Portable Clothes Rack (see the blog post for more detail)

A Working Camp Sink (see the blog post for more detail)

Breakdown Hand Cart

Breakdown Gothic Chairs  (see the blog post for more detail)

15th c. Trestle Table ( (see the blog post for more detail)

Breakdown Camp Kitchen

Honeycomb Pleatwork Apron

Drawnwork Hemstitch Hankie Handout

Pleatwork BookScreen Shot 2015-07-27 at 11.15.03 AM

Blackwork Embroidery Book (see the blog post for more detail)

Round Pavilion Papercraft (sides-straight-template)

Round Pavilion Papercraft (sides-sloped-template)

Round Pavilion Papercraft (top-template)

Chain Mail (Youth Activity)

How to Make Butter

Heddeby Leather Pouch


Despite our lack of classes this year, we’re still making things! We have a brand new four-poster bed, new finials for our new shade fly, a new pup tent for Alexa, a new coronet box, and tons of new garb!

Four poster bed at Pennsic Coronet Box by Gregor

Enjoy!

Genoveva, Gregor, and Alexa