The Good German Armor Stand: How to Make a Portable, Folding Wood Armor Stand in Less Than Three Hours

22 July 2015

ArmorStandTitleAt our first Pennsic four years ago, we attempted our first armor stand. It was a bunch of 2x4s screwed into the semblance of an armor stand on site. Sadly, it couldn’t hold the full plate armor Gregor had brought with him and it had a tendency to fall over.

The next year at Pennsic, Gregor noticed Baron Jasen Irenfest’s gorgeous (and functional) armor stand and asked how he made it. It turns out Jasen’s armor stand was based on a 1990 article that appeared in Tournament Illuminated, “A Barbarian Armor Stand,” by Sir Timoch of Nordhem. So, armed with the plans and materials, we set out to make a Barbarian Armor Stand. We found Sir Timoch’s general design to be good, but made our own improvements to key design details, as well as corrected the material list and modified some instructions. We updated the original plans to our liking and present them here with steps and photos. Many thanks to Sir Timoch, wherever he may be, for the original idea!

Notes: These plans will produce a custom armor stand that will fold down for easy transport. It can be setup inside or outside, and optional stakes can be inserted in the base when used outside for windy conditions. The stand will support most parts of your armor, and, so far, is quite sturdy and stable. We’ve used the armor stand at Pennsic for two years, as well as at various events around the Middle Kingdom. It’s continuing to work great!

IMG_7036

Armor Stand Materials:

  • Three 8-foot-long 2″x4″ lumber (currently $3.57 a piece from Lowes)
  • Eight 3-inch-long hinges (currently $2.17 per hinge from Lowes)
  • One bolt 3/8” x 31/2” long
  • One 3/8” wingnut (make sure it can screw onto the above bolt)
  • Two 3/8” x 11/2” washers (make sure hole is big enough to go over the neck of the bolt)
  • Eighteen 8d nails or 2 1/2″ wood screws
  • One small bottle of wood glue
  • One 18″ length of string
  • Optional: small cans of wood stain and polyurethane

Armor Stand Tools:

  • Hand saw or other cutting device like a mitre saw or jigsaw
  • Hammer
  • Drill
  • 1/2” bit
  • 11/2” spade bit
  • Screwdriver
  • Measuring device (tape measure or yard stick)
  • Pencil
  • Gummy bears (okay, those are optional, but yummy!)

Armor Stand Instructions:

Step 1. Take the measurements of the person whose armor will hang on the stand. You need three measurements:

  • Crown to crotch
  • Hip to hip
  • Shoulder to shoulder

Step 2. Cut your 2x4s down to the following dimensions:

  • Cut one (1) at 28″ long (A)
  • Cut one (1) at 22″ long (B)
  • Cut two (2) at 23/4” long (C)
  • Cut two (2) at 36″ long (D)
  • Cut one (1) of your crown to crotch measurement, or 36″, whichever is shorter (E)
  • Cut two (2) of your hip-to-hip measurement less 1″ and then divided by 2 (we cut 2 at 6″ long) (F)
  • Cut two (2) of your shoulder-to-shoulder measurement less 1″ and then divided by 2 (we cut 2 at 9″ long) (G)
  • Cut two (2) joint boards at 8″ long (H)

IMG_7038

Tip: If you intend to sand, stain, and/seal your armor stand, you may wish to do this now before you begin assembling it. It will be easier and the finished stand will look better if you complete sanding, staining, and/or sealing before assembly.

Good German Option: We recently bought a table saw with the ability to do angled cuts, so when Gregor made a second version of this armor stand recently he made fancy beveled edges. It looks sweet. If you want to do this, do it now, before assembly!

FullSizeBevelled

Step 3. Take board A, find the exact center of the board lengthwise, and drill a hole all the way through the board using the 1/2″ bit. On one side of this board, use the 11/2” spade bit to create a recess about 3/4” deep around the hole you just drilled. (This will accommodate your washer and wing nut.)

IMG_7041

Step 4. Take board B, find the exact center of the board lengthwise, and drill a hole all the way through the board using the 1/2″ bit. On one side of this board, use the 11/2” spade bit to create a shallow recess (deep enough to accommodate your bolt tip and the other washer) around the hole you just drilled.

IMG_7043

Step 5. Attach board A to board B using the bolt, washers, and wingnut. Note: You can choose to put the bolt downward or upward through the holes — what’s important is that hardware be recessed into the bottom of board B so that it can sit flat on the ground.

IMG_7045

Bolt recessed into the bottom of board B.

IMG_7046

Top of board A, with bolt and wingnut accessible.

Step 6. Apply wood glue to the underside of the two C boards and attach them to the ends of the A board, making sure that you can swivel and rotate the attached B board without hitting the C boards. Clamp and nail (or screw) C to A. These are now the feet of your armor stand.

IMG_7047

IMG_7049

Step 7: Attach a hinge between the end of board A and the end of one of your D boards. You’ll want to position the plates so that the hinge itself sits just beyond the edge of the boards — this allows you to fold it more compactly.

IMG_7057

Step 8: Remove the pin from another hinge (insert a nail into the bottom hole of the hinge and hammer it down a bit to release the pin). Put the pin back into the hinge loosely, then repeat step 7 by attaching the hinge between the other end of board A and the second board D.

IMG_7054

Removing the hinge pin

IMG_7056

Hinge with pin removed

Step 9: Remove the pin again from the same hinge as in step 7 and tie a piece of string around the pin, then attach the string to board A. This ensures you never loose that pin. Re-insert the pin for now and set this assembly aside.

Step 10: Now that you have the base and two legs assembled, lay them flat on the ground and place board E (the torso board) in between at the top, flanked on either side by the H boards (joint boards). Lay them in a position relative to the legs as though it were all set up. Do not mount or attach hinges to boards E or H yet, but check their placement to insure no other screws will block the pre-drilled holes in the hinge plates. Now mark on the H joint boards the appropriate angle where the legs meet the H boards. A typical angle is 24°, but yours may vary if you significantly changed the measurements of your boards or with the placement of your hinges.

IMG_7059 IMG_7060 IMG_7061

Step 11: Cut the joint boards (H) at the angle you determined in step 10 and attach them to the bottom of board (E).

IMG_7067

Step 12: Attach the hinges to the joint boards (H). Make sure that when everything comes together that it fits snugly — if it is too loose, your armor stand will have a tendency to sway. Do not yet attach the other side of those hinges to your leg boards — it’ll be easier if you do that at the end.

IMG_7068

Step 13: Attach the hinges between the hip boards (F) and the torso board (E), making sure to test fit them first. Leave about a 1/4″ between the F hip board and the H joint board, allowing the F board to fold down without being obstructed.

IMG_7073

Step 14: Attach the hinges between the shoulder boards (G) and the torso board (E).

IMG_7078

Step 15: Now finally attach the hinges at the joint boards (H) to the leg boards (E).

IMG_7086

Step 16: Fold down your armor stand to make sure it folds neatly. If the bolt gets in the way of folding, as shown in the photo below, you may wish to drill a small recess in one of the leg boards so it folds flatter.

IMG_7089  IMG_7091

IMG_7092

Voila! You have an armor stand.

IMG_7088

Gregor’s armor stand made in 2012

armorstandbevelled

The armor stand Gregor made for Baron Ermenrich in 2015

Optional: Consider putting holes in the baseboards so you can stake it to the ground in windy weather. You may also want to add holes in the hip boards or shoulder boards if you have things you need to need to hang from your stand.

If you have questions, please let us know! The armor stand will be on display, along with handouts on how to make it, at Gregor’s “Enhance Your Camp” class on Thursday, July 30 at 4:00-5:00 pm, located in Camp Cynnabar (W02). Here’s the actual class description:

“Join us at our camp to learn about how to make personal camp improvements that can enhance both its appearance as well as your own quality of life. Most projects are made from wood with basic tools and do not require special knowledge, skills, or equipment. Handouts will be available for each camp project ($1/handout), including our camp cart, kitchen worktable, sink with foot pump, trestle table, benches, chairs, clothes rack, armor stand, canvas organizer, and more.”

Pennsic Classes and Handouts

27 July 2015

Screen Shot 2015-07-27 at 11.12.48 AMWe’re just about to leave for Pennsic 44! Here are all the handouts we’ve prepared for our five classes this year at Pennsic — each one is in PDF format.

armor-stand

canvas-dayshade

painting-your-pavilion

clothes-rack

camp-sink

hand-cart gothic-chairs

trestle-table

camp-kitchen

Honeycomb-Pleatwork-Apron-2015

Drawnwork-Hemstitch-Hankie-Handout

Pleatwork-Book-Small

Screen Shot 2015-07-27 at 11.15.03 AMround-pavilion-sides-straight-template

round-pavilion-sides-sloped-template

round-pavilion-top-template

chain-mail


Our classes are as follows:

Thursday, July 30

Pleatwork Apron Make-and-Take (Genoveva) – 10:00 am in A&S 12 – 2 hours

A hands-on, instructional class on smocking, or honeycomb pleatwork, the gathering method commonly seen in German Renaissance clothing (but also popular for hundreds of years throughout Europe). You will make your own apron to wear around camp in style! We’ll also discuss pleating in general as we work, and students can read my 30-page research paper on historical pleating techniques. Materials available for 10 people ($10), or bring your own medium-weight, WHITE linen (1 yard). Free handouts for 25.

Period Pavilion Papercraft (Alexander) -1:00 pm in A&S 6 – 1 hour

Come learn how pavilions (tents) were made historically using basic construction techniques. Students will make a paper craft pavilion in the shape of their choice to take back to their own camp. Please bring scissors appropriate to your age (no sewing will be done). Free templates.

Enhance Your Camp (Gregor) – 4:00 pm in Camp Cynnabar (W02) – 1 hour

Join us at our camp to learn about how to make personal camp improvements that can enhance both its appearance as well as your own quality of life. Most projects are made from wood with basic tools and do not require special knowledge, skills, or equipment. Handouts will be available for each camp project ($1/handout), including our camp cart, kitchen worktable, sink with foot pump, trestle table, benches, chairs, clothes rack, armor stand, and more.


Tuesday, August 4

Mastering Pleatwork: Advanced 16th Century Techniques (Genoveva) – 10:00 am – A&S 12 (1 hour)

Experienced pleatworkers are invited to join me to discuss advanced methods of creating and securing pleats used in 16th-century Europe. Includes a review of my in-depth research on imagery and techniques, as well as a variety of reproduction pleatwork to touch and feel. After I present my research and experimentation, I will open the floor for discussion and practice. Participants will also have an opportunity to practice some of the more complicated stitches if they wish. 50-page handouts for 10 ($3 each), materials for 5.


Wednesday, August 5

Drawn Work Handkerchief Make-and-Take (Genoveva) – 2:00 pm in A&S 3 (1 hour)

A hands-on, instructional class on drawn work, specifically the hemstitch, seen in German, Italian, and English Renaissance clothing and accessories. Participants will create their own handkerchief with a drawn work hem, and learn how to make more elaborate drawn work designs on their own. Materials available for 10 people ($1 fee requested), or bring your own medium-weight, white linen (12″ x 12″). Free handouts available for 25.


Hope to see you at Pennsic!

Pennsic: We Will Never Forget — A Recounting by a First-Time Visitor, Carolyn J. Tody

25 April 2013

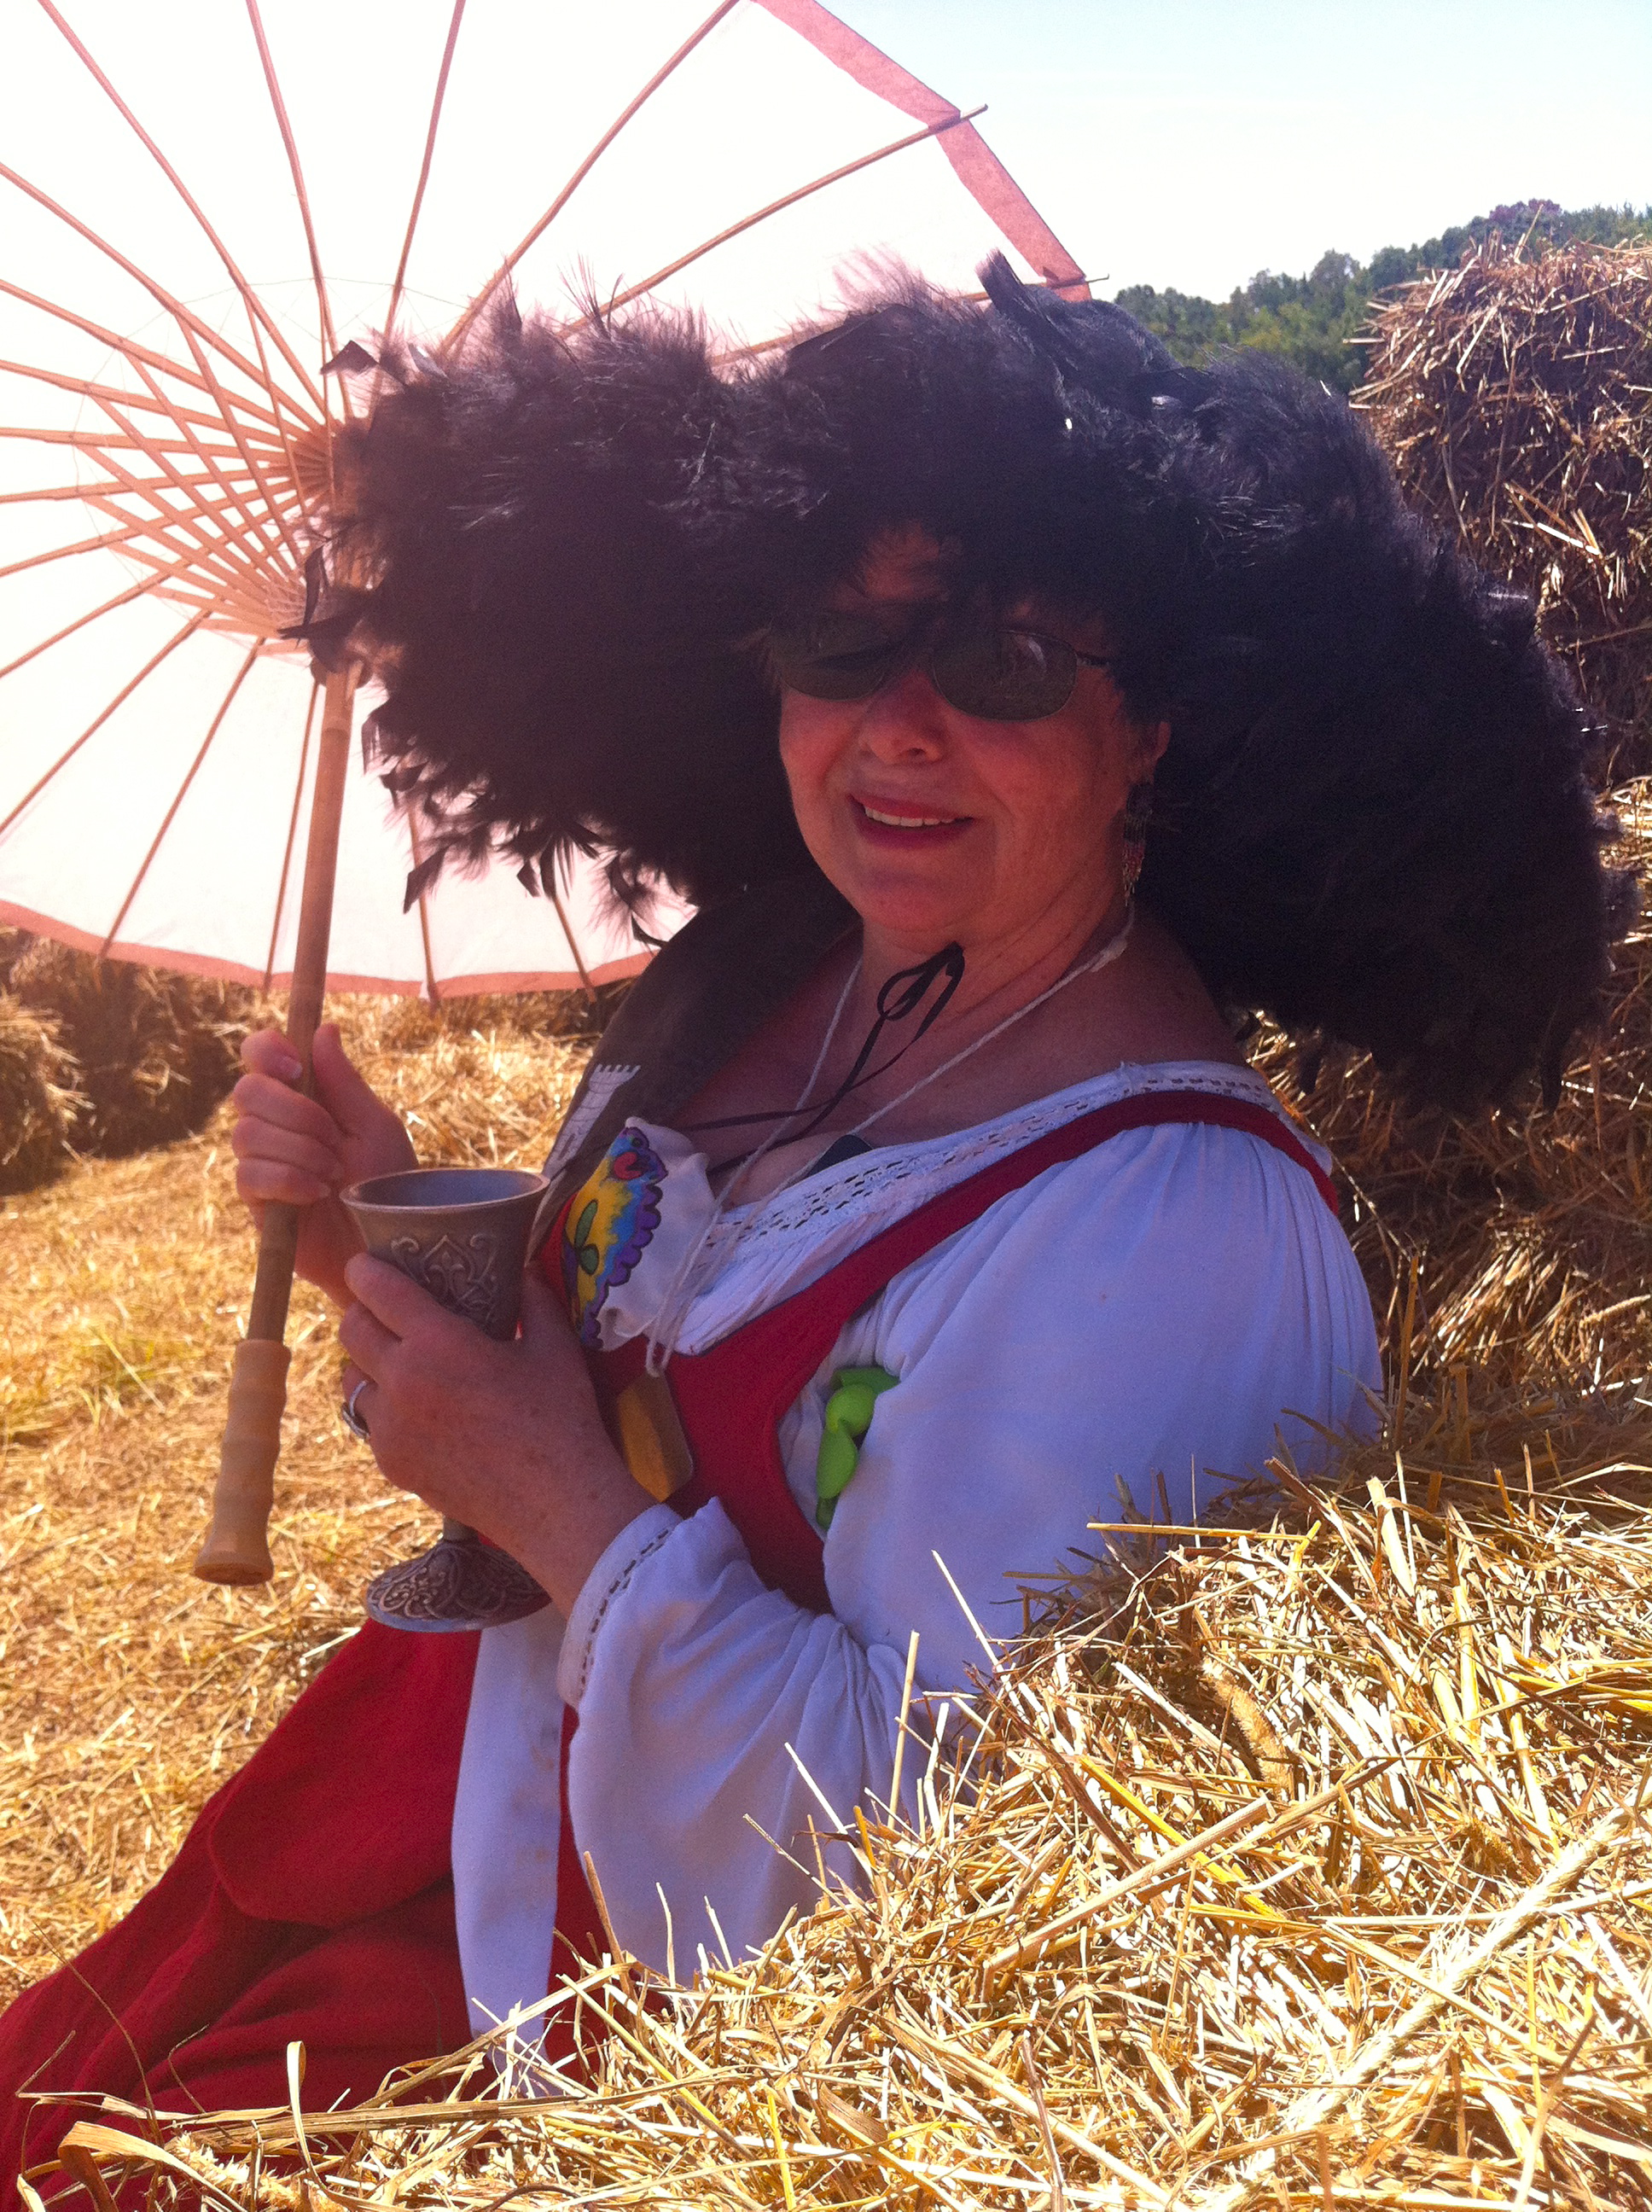
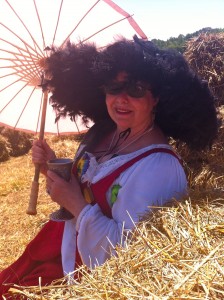
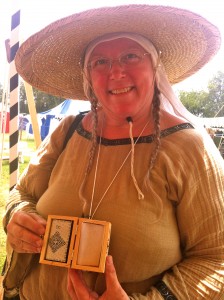
The author keeping cool at Pennsic

by Carolyn J. Tody

(Carolyn is Genoveva’s mother. Pennsic 41 was her first SCA event. This is a recounting of her experiences and adventures at Pennsic.)

Fifteen thousand participants from around the world began to filter into the mile-long encampment in western Pennsylvania. Ahead of them opened a portal to a magical time capsule. Inside lay a ticket to travel back to the Middle Ages.

Sighing with satisfaction, Lady Genoveva von Lübeck looked back at her encampment. It was an enchanted place. The enormous rainfly gave her a private outdoor living space spanning two round canvas pavilions and the portable wooden furniture she created over the past year. Even so, she wanted to do more. In the meantime, she walked through the turreted castle arch that served as an entry to the Barony of Cynnabar’s camp at Pennsic.

Genoveva stared in amazement as she walked through the Pennsic War historical village. Although this was only her second year at Pennsic, it was the forty-first anniversary for historical reenactment.

For thousands each year, this became a secret world, a retreat from the pace of modern life to another time and place. More experienced reenactors had as many as forty years of attendance. Each day brought new participants from around the globe. Their clothing and campsites largely reflected the period of medieval life occurring worldwide between 600 and 1600 A.D.

Yesterday, the earth was bare as far as the eye could see. Over here was a permanent camp store and an office; over there was an open barn. Today, a medieval community was rising. A global village was forming. This paradoxical new world was growing daily. Homespun wearing apparel and makeshift armor was juxtaposed against the occasional hidden cell phone linking its owner to the twenty first century technological age.

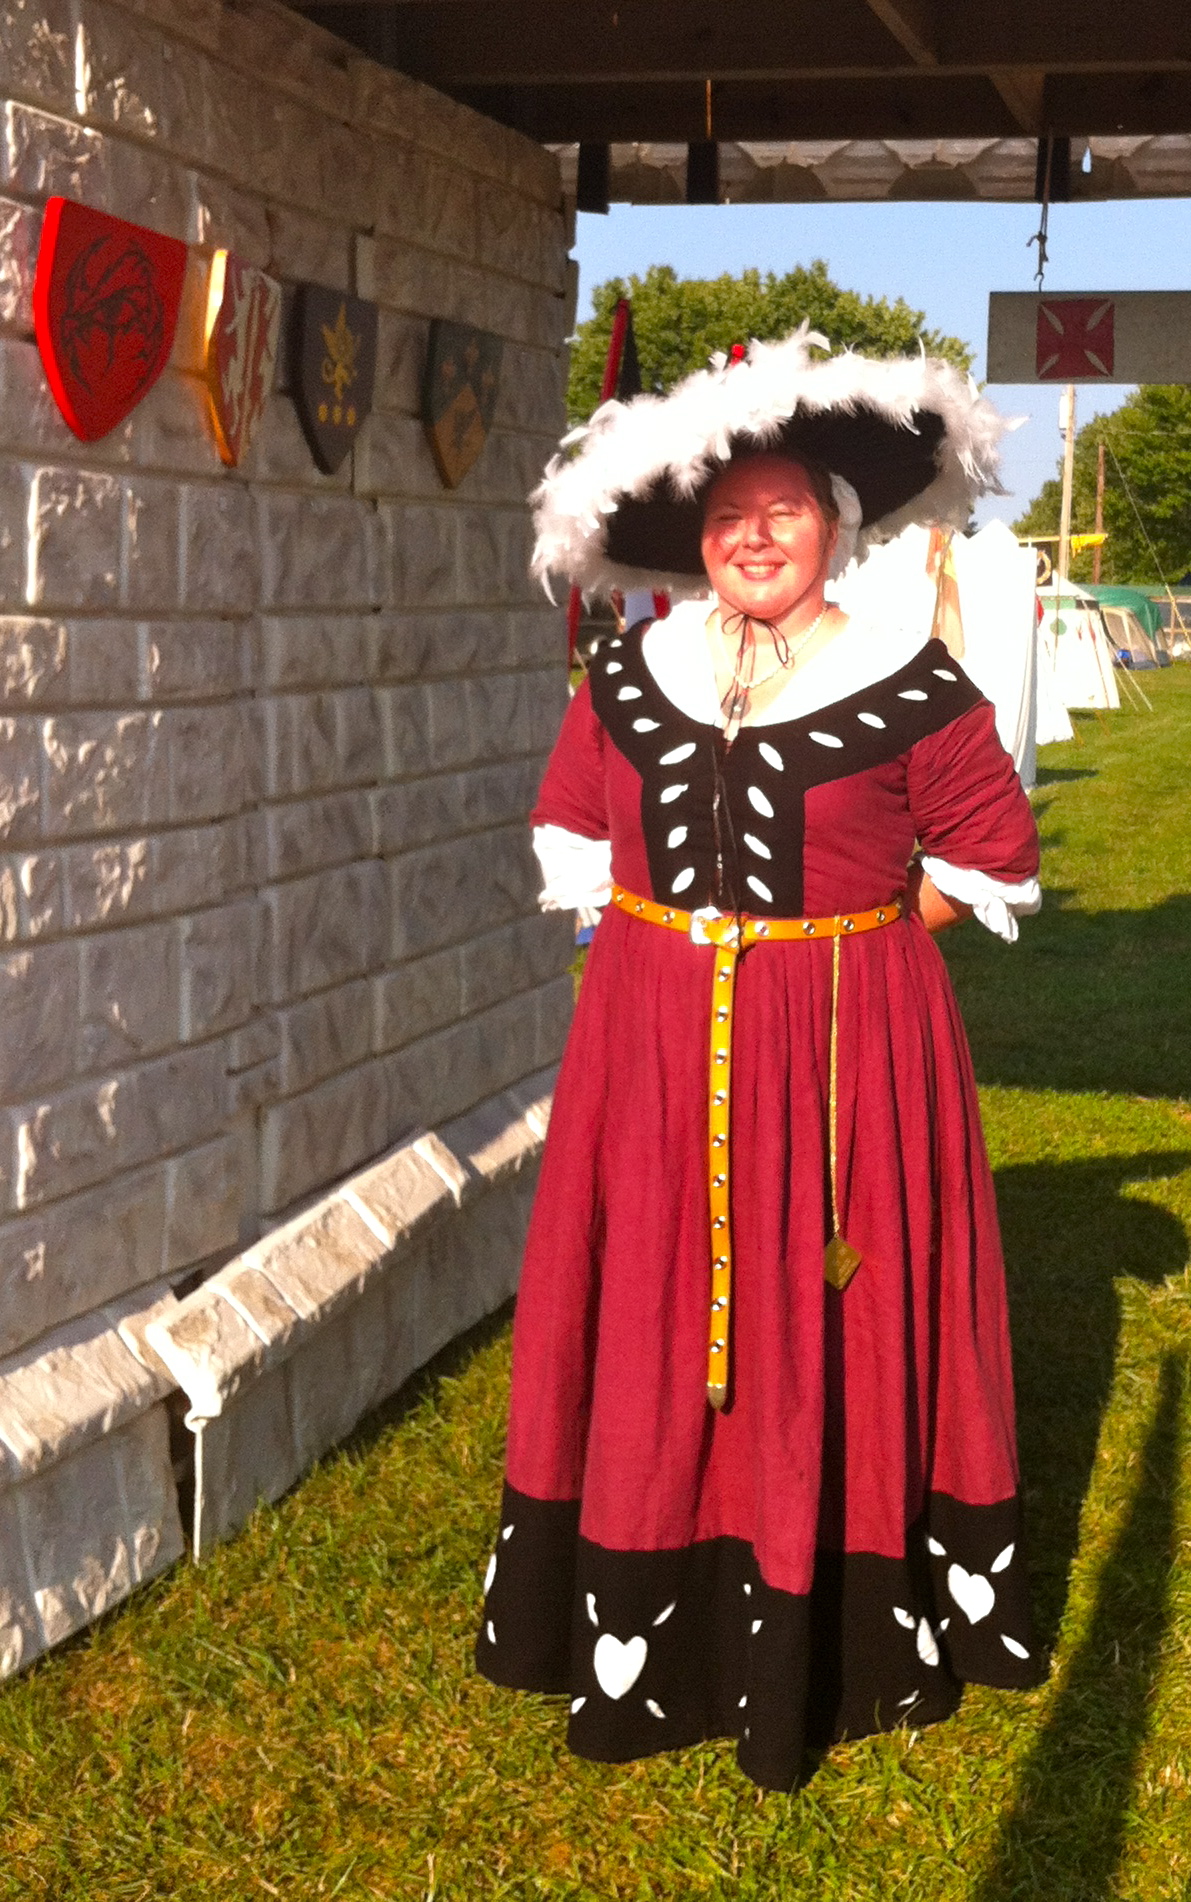
Genoveva in her new gown

It still seemed a bit surreal for Genoveva in her second year. She wandered through, looking at each section of the campground. Marketplaces and eateries sprang into existence. Long-established kingdoms breathed life into their compounds. Castle gates and reviewing stands sprang from their components. An even more complex marketplace rose. Vendors set up awnings with historical displays of pottery, clothing and other accessories from every corner of the globe.

Pennsic University and its related colleges staked their massive tents near the heart of the marketplace. An entire book was published to list every class offered over the two week event.

Emergency services brought in ambulances and created a sprinkler system to cool the overheated, listing daily temperatures and heat indices along with warnings on a large sign at the site. Gatekeepers set up booths to validate in and out traffic. Handicapper services did likewise, issuing ECV passes and limited vicinity parking as an alternative to the massive, yet distant hillside.

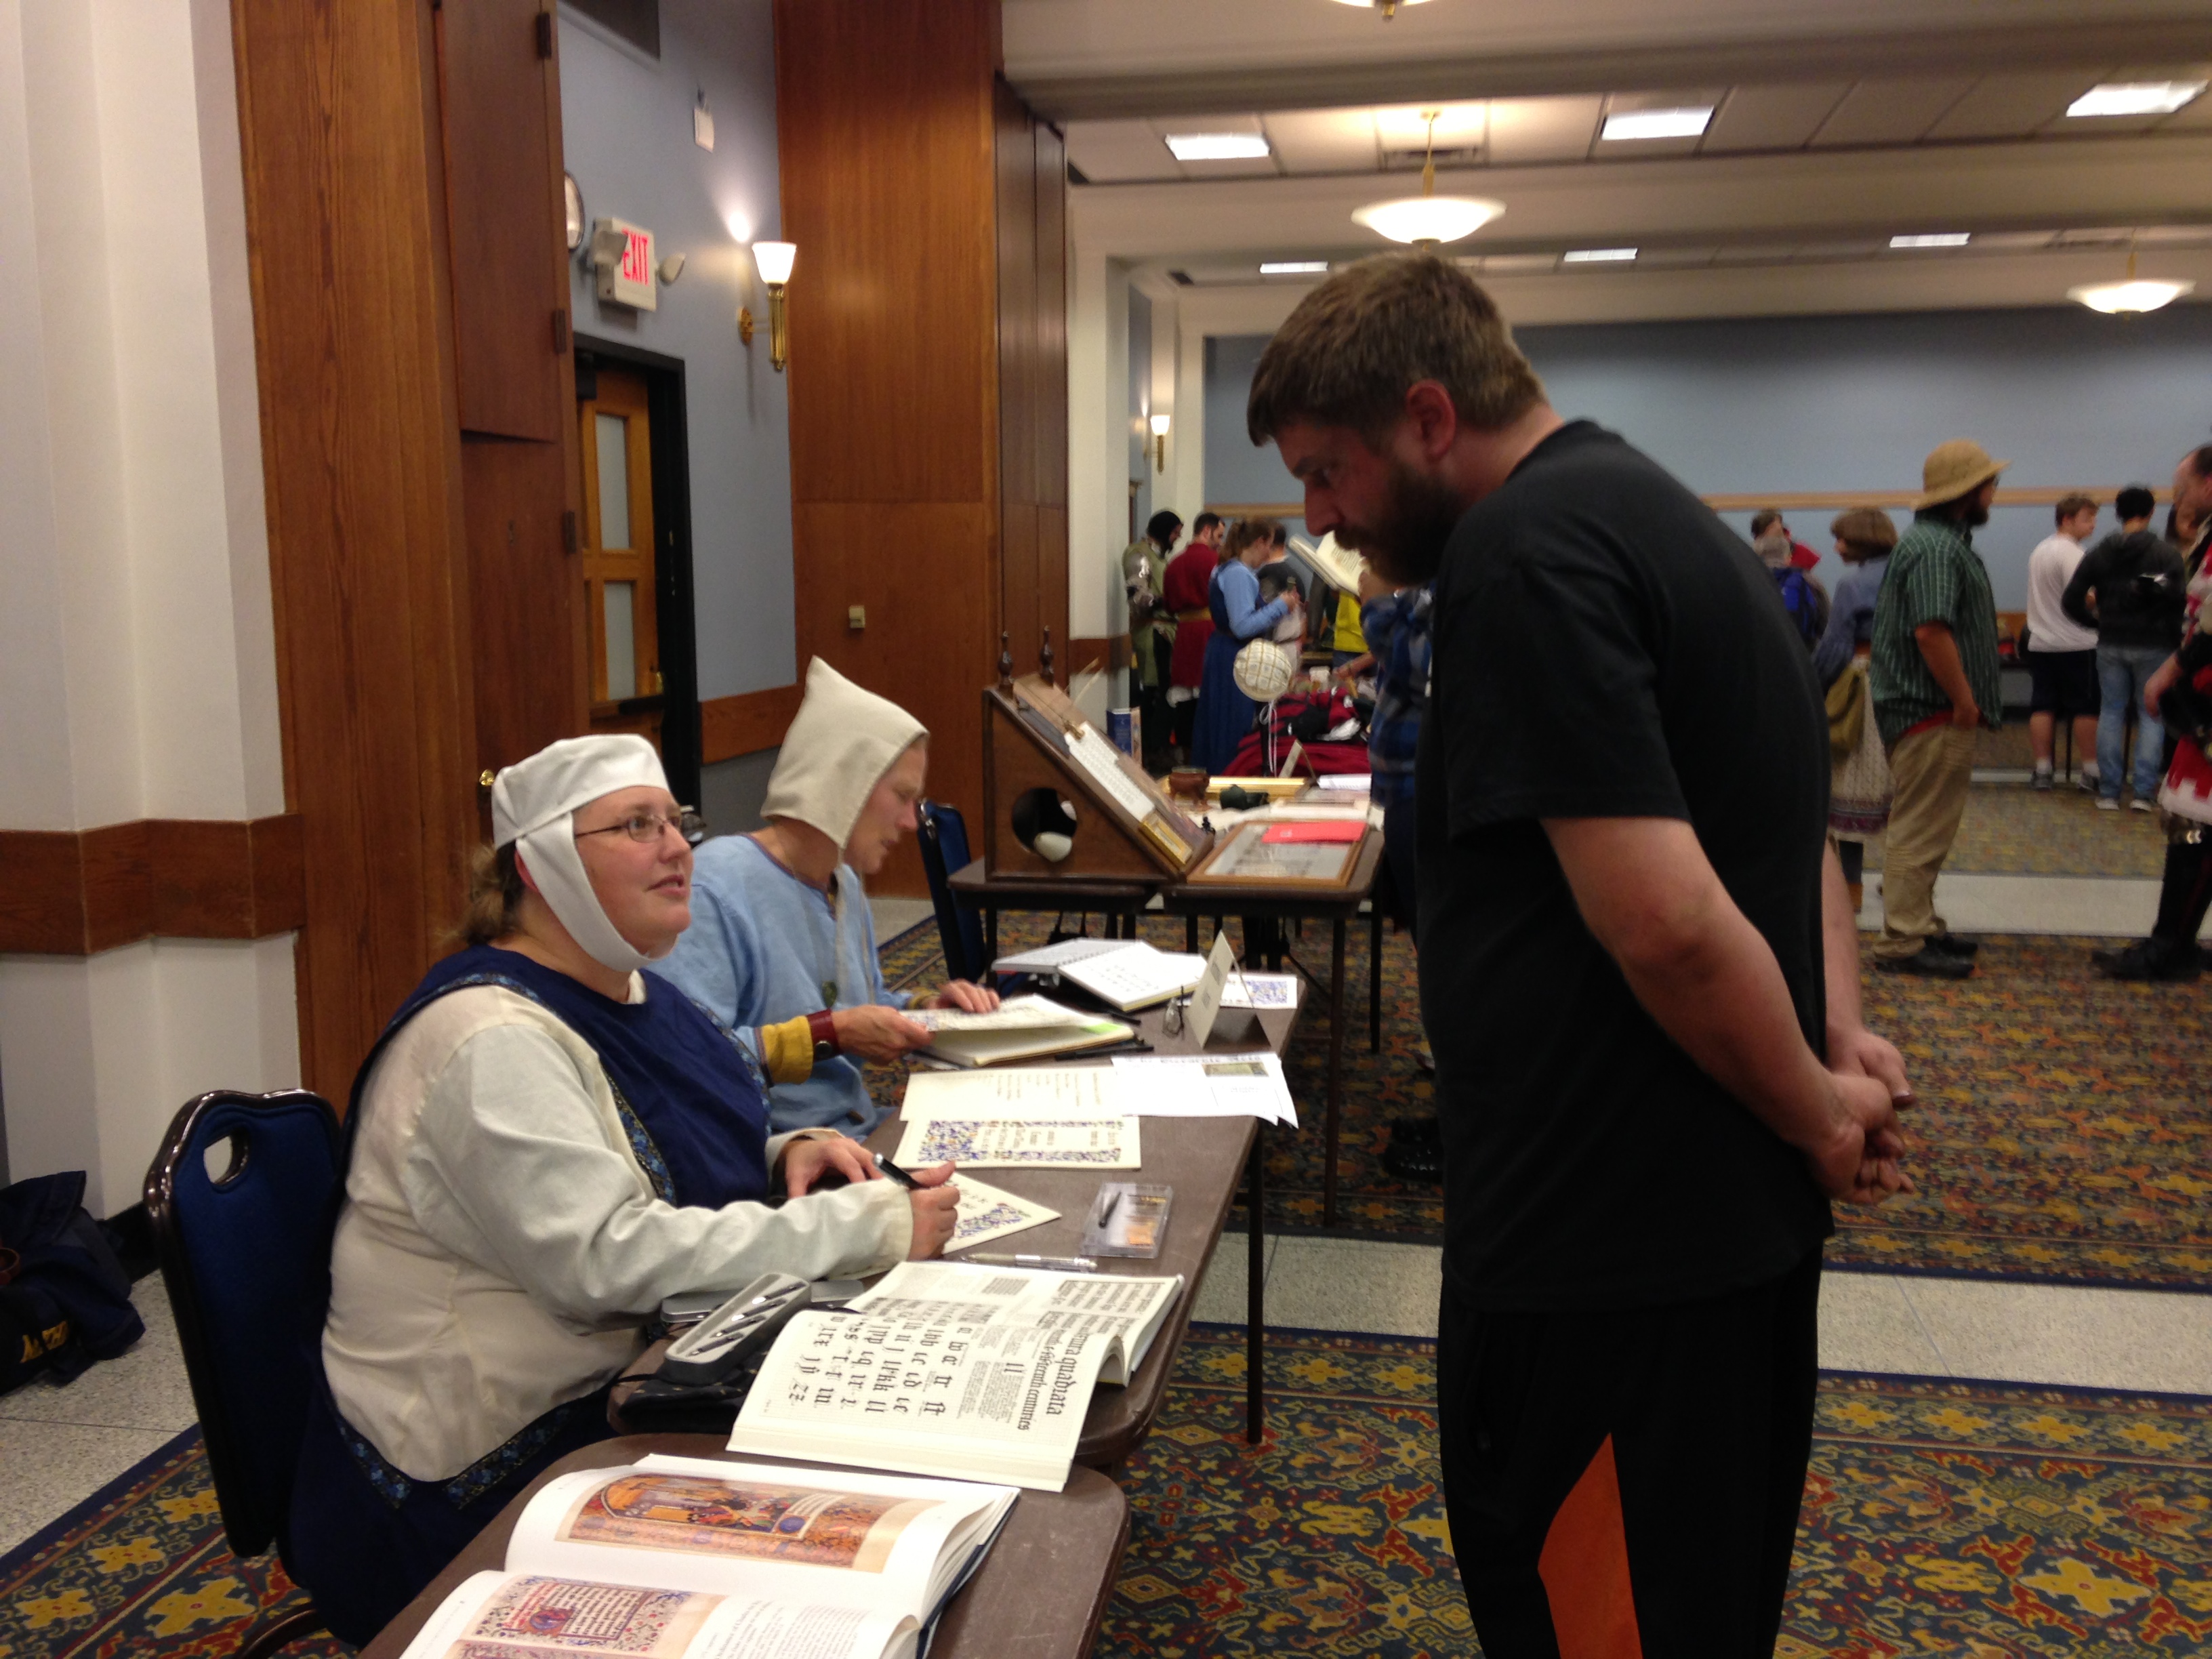
Administrators took their places. Volunteers at a location they called “Troll,” the registration pavilion, entered data on specially outfitted iPads and distributed two huge, printed directory guides to each newcomer. A medieval world began to emerge.

For Genoveva, this modern ‘old world’ bore some similarity to the Disney resorts to which she was accustomed. It was complex and otherworldly, yet vastly different and historical in every sense. The olde world became  tangible. It was awesome.

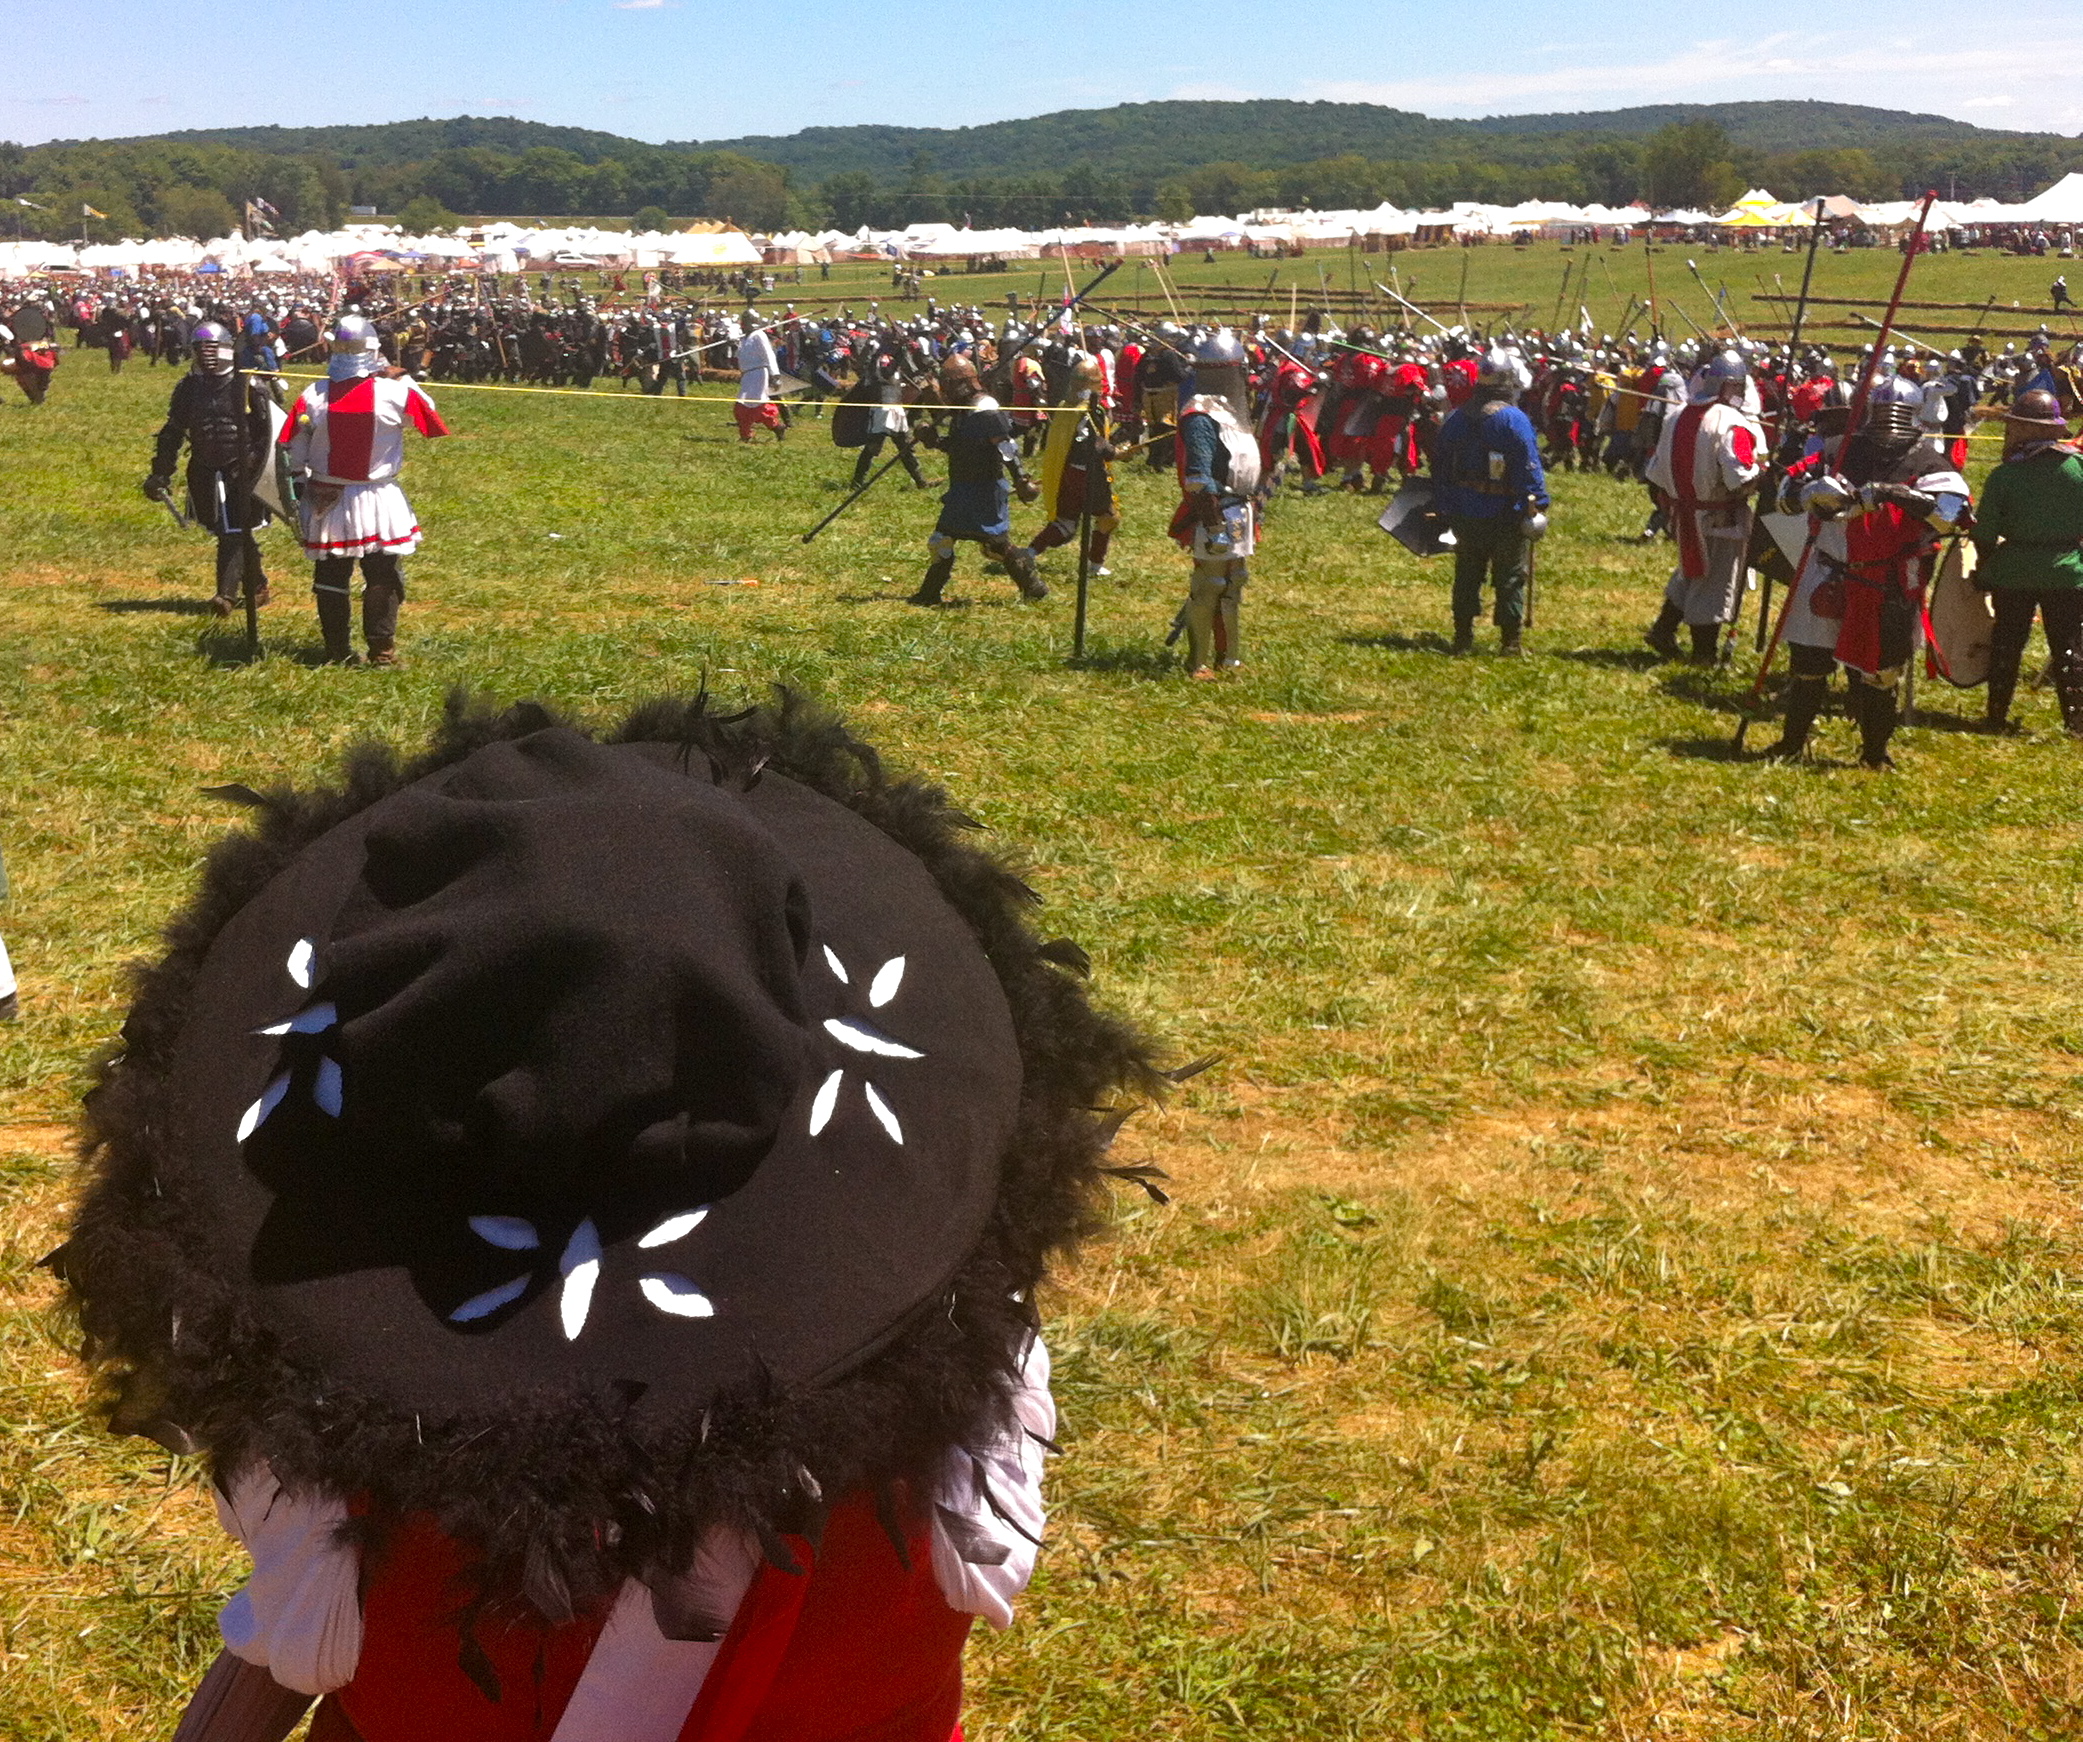
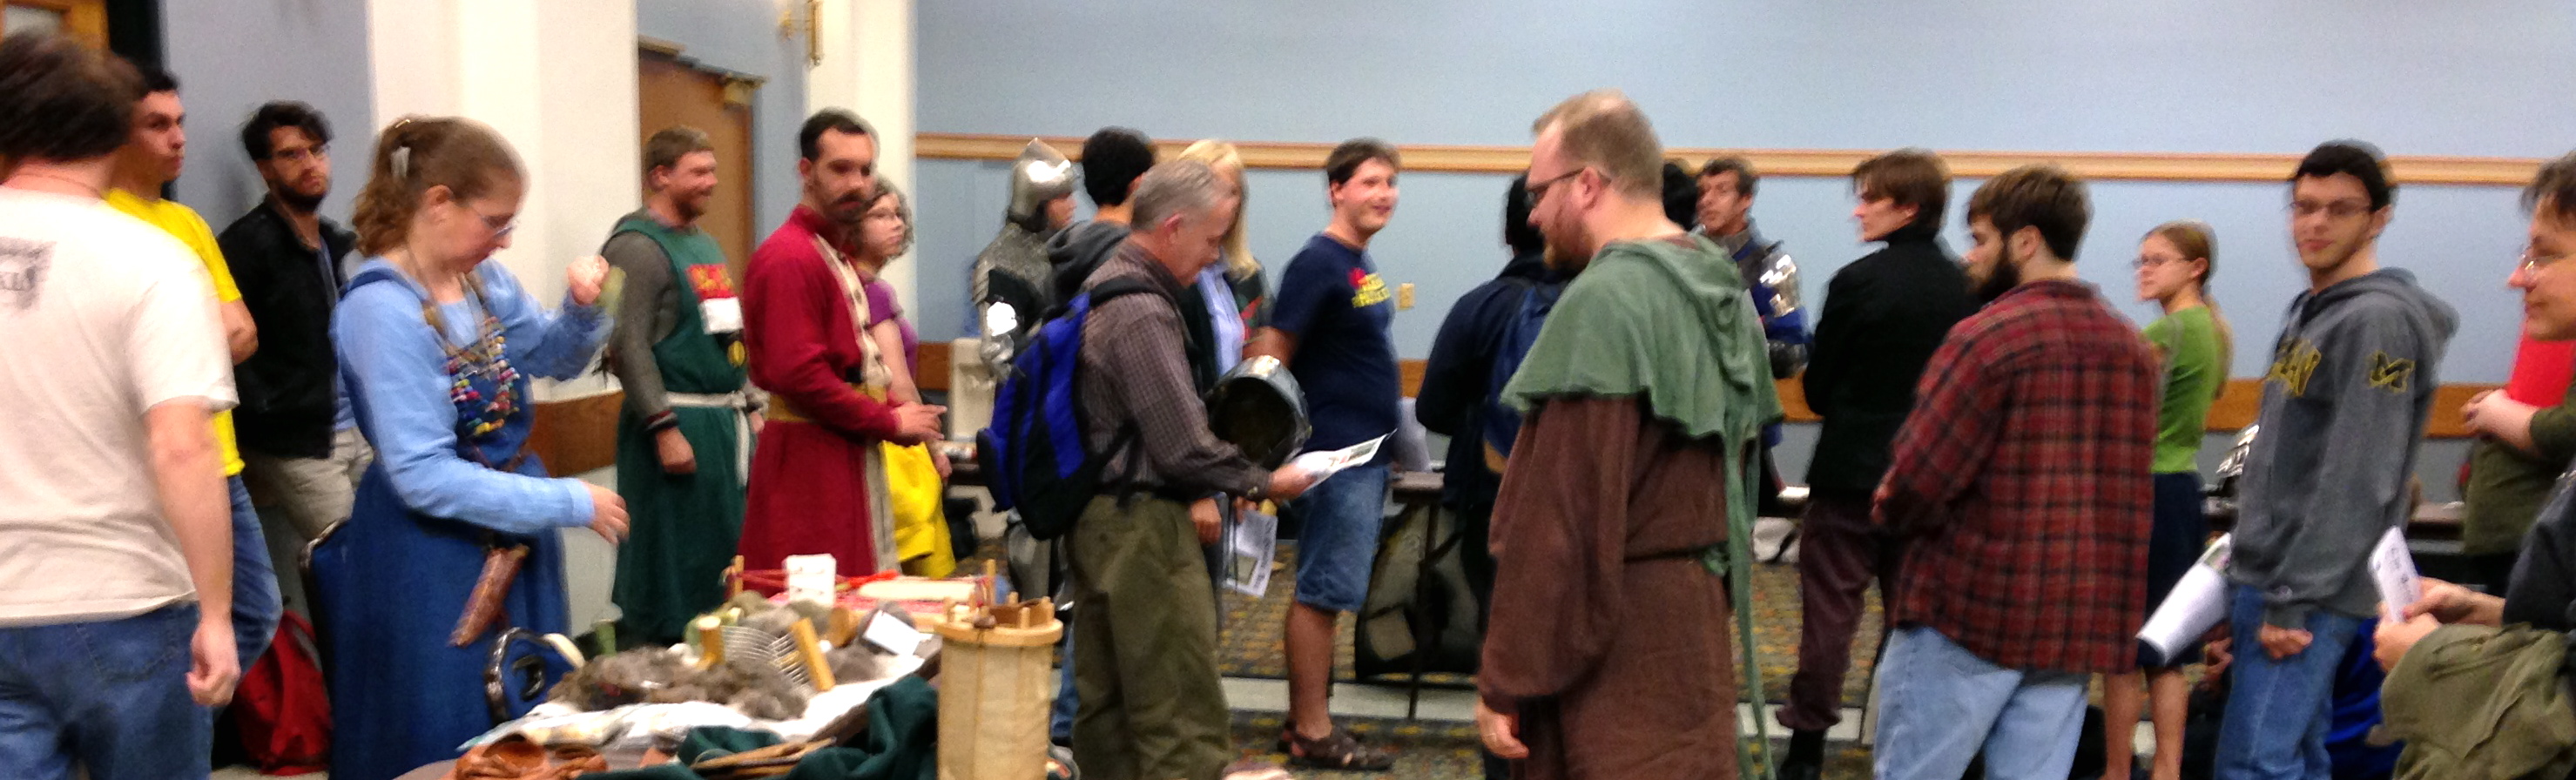
Watching Pennsic battle

And so it was into this magical environment that I entered as Genoveva’s invited guest. The evening was dark even though it still quite early, and I had driven far to find this campground outside of Slippery Rock, Pennsylvania. As I motored along the entry road, an unexpectedly new and surrealistic lifestyle emerged. I realized that I would learn more here than the eagerly anticipated Pennsic University classes on fiber arts, earthen kilns, silk painting, and the ancient art of Japanese calligraphy. My class list expanded. So did my camping survival skills.

Although the vast Pennsic historical village seemed new to me at first, my vast background helped me relate, as it always does. A few years before, I had lived on property at another global village, known fondly as the Disney World complex. At the time, this entertainment giant offered widespread historical elements. With an educational leave from my professional career in my pocket and a ‘for sale’ sign in front of the house, I accepted an invitation from Disney University to intern in theme park management. Even though I was a decade or two older than some of the participants, I chose the immersion experience to live with roommates from Norway, United Kingdom, France, and Washington State rather than live offsite. In part, this meant sharing a room with a night owl and navigating my own daily commute to classes, on stage presences, and professional casting, sometimes riding a shuttle bus along with characters half in and out of costume. So, after being dropped by a shuttle at the airlock entrance to the tunnels under the Magic Kingdom, I navigated my way on foot, dodging pargo forklift trucks until I reached Costuming, where I donned my new street length outfit and wove in and out of pargos again until I located the particular stairway ascending into my ‘onstage’ role.

Disney University designed the classes, even though I reported directly to MSU. Besides studying business and joining Disney Management trainees in special DM development opportunities, I toured developing attractions in steel toe shoes and a hard hat, attended “evenings with” the directors of Imagineering, Animation, Audioanimatronics and others. At one point, my own interdisciplinary team designed a new restaurant for Space Mountain and presented it in costume to the theme park Vice Presidents. Other opportunities came through VoluntEars, Give Kids the World, ToastMousters and assisting in the development of the Spectromagic parade.

During each of my dinner breaks in the Magic Kingdom Tunnel’s own Cinderella Cafeteria, entrenched employees would seek my attention as a role model for change and ask how to live their own dreams. I hadn’t realized this would happen, but happily encouraged and coached them in the necessary action steps until they moved with great momentum into their dream careers.  I, on the other hand, barely rested during long months of enjoying my survival in this 24/7 world that never slept.

During that experience, Olde World Antiques in Liberty Square commanded a large part of my Disney presence. Sharing the Silversmith building and located directly across the moat from Cinderella Castle, the antique shop broadened my horizons with visitors from around the world. From here, I often joined in spectacular media events after regular park hours and watched presidents and media moguls venture next door to eat at the Liberty Tree Tavern. European antiques filled this shop. Silver items hallmarked during the Middle Ages featured maker marks that the buyer taught me to read. Vintage jewelry filled display cabinets. Capistrano porcelain chandeliers hung from the ceiling. Artists demonstrated their unique specialties. I mixed many different perfumes from essential oils using an ancient book of recipes, bottling them in replica containers bearing the stamp of antiquity.

Least of all, I liked the silence of the Annex. More than once, as I stood here in costume behind the Annex podium, guests jumped in shock after mistaking me for one of the antique dolls lining the shelves behind my stand. But I did not have to worry; decorated masks, dolls, and vintage bears kept me under their constant vigil as I began to write on 2″ x 3″ break slips ~ at first, poetry about moonbeams dancing along the bridge to Cinderella Castle; then, about my frustration at being confined behind lacy curtains and not outside playing in the sun with guests; and finally, a story about the adventures of antique dolls escaping into the tunnels at night which thus began my current series.

My favorite visitor in the otherwise boring Annex setting was a Brazilian doctor, who closed his clinic for the first time to attend his daughter’s wedding; our fascinating conversation lasted over an hour. Another visitor was a British woman who invited me to visit her estate in England, because “we women must stick together.” During my daily commute through this vast, complex property, my internship experience became a less and less surreal immersion into a new world.

Now, here I was at Pennsic, entering a new “Olde” world. As I soon discovered, the international Pennsic War event annually draws participants from across the globe. Hosted by SCA, the Society for Creative Anachronism is an international ‘living history’ group aiming to study and recreate medieval culture prior to the 17th century, primarily European. SCA provides participants with a way to learn beyond the textbook. The organization reenacts the richly detailed past from its current world headquarters at Coopers Lake in Butler County, Pennsylvania, a state richly steeped in history. “Pennsic” is a combination of ‘Pennsylvania’ and ‘Punic War.’

Since modern times spring from the past, knowing from whence we came can be of great help when attempting to understand the present and plan for the future. Pennsic kingdoms attempt to replicate the medieval period without a measure of the treachery, disease and otherwise harmful elements occurring during the Middle Ages. In this way, Pennsic reflects strong values in art and science, chivalry, heraldry, and valor found in various Period societies.

Chivalrous action unfolds in the heart of the Kingdom of Aethelmarc, which is one of nineteen SCA kingdoms throughout the world. My home state of Michigan is in the Middle Kingdom, and stretches from Kentucky to a portion of Ontario, Canada. Other Kingdoms include Atlantia, Meridies, Gleann Abhann, Ealdormere, Ansteorra, Calontir, Drachemwald, An Tir, West, Caid, Lochac, Artemisia, East, AEthelmearc, Trimaris, Northshield, Outlands, and Atenveldt.

During the Pennsic gathering, participants dressed in period apparel gather to socialize and shop, as well as craft, learn new arts, and indulge in the sport of honorable combat. No real conflict exists between the kingdoms. For the sake of calling it a “war,” though, the participants do pick competitive sides but only in a spirit of fun and friendship. In fact, friendly people provide the main attraction for participants whether they are returning for the first or for the twentieth time.

In most kingdoms, new kings and queens are chosen every six months after holding an arms tournament to select the winner. In turn, kings and queens recognize people for their service, arts, and marshal prowess.

Titles are taken seriously. You may be a Lady or a Lord, a Baron or a Baroness, a Duke or a Knight, a King or Queen, but there are no peasants; everyone is respected as nobility. Participation is growing. Currently 9,000 to 15,000 global participants attend annually, regularly averaging between 10,000 and 11,000. Foreign guests quite often attend from such countries as Sweden, France, Italy, Germany, and Greece in Europe, Japan, Australia, and occasionally the Middle East, among others.

During the second week of encampment, four major battles occur. Contenders compete early on in the Town Battle for “last man standing.” In addition, the Bridge Battle and Champions Battle yield their “best” from each battle. Melee provides an opportunity for team combat.

High safety standards are imposed throughout. Combat is a chivalrous sport. Good armor and excellent sportsmanship make the use of single and two-handed “weapons” less dangerous than the game of football. Moreover, this remains true even during the excitement of hand-to-hand combat involving hundreds. There are many different types of siege weapons, including broadswords, maces, and nine foot long spears. Some combatants also enjoy using archery equipment or other smaller specialty equipment. Well before the battle sports begin, all weapons and armor are rigorously inspected, weaknesses are corrected to specification, and passed for use.

At the beginning of the War, teams choose their allies with an attempt to keep each side as even as possible. A battle plan is formed. Combatants in this sport are fighting for their Kingdom or household. Combatants practice, often warming up in pairs or units. Teams and units are varied. The lesser skilled Baronial Levy Units perform in large blocks, consisting of newer members or those who attend once a year. Elite units perform more complex maneuvers.

Marshals are present to ensure safety, but not necessarily to referee. Pennsic uses an honor system to determine its winners. Players are on their honor to say, “I was inflicted with a “kill action,” a hard enough blow to a certain area of the body to kill a person if this were a real battle.” The action may knock them to their knees, where they fight from that stance. They are also “killed” if they are hit in an appendage hard enough to lose an arm or leg.

There is a great deal at Pennsic to interest a newcomer. Clothing alone is enough to set in place a sense of the medieval world. Many outfits are highly elaborate; a great deal of talent attends this event, and many make their own apparel. If desired, there are also commercial outlets offering the components.

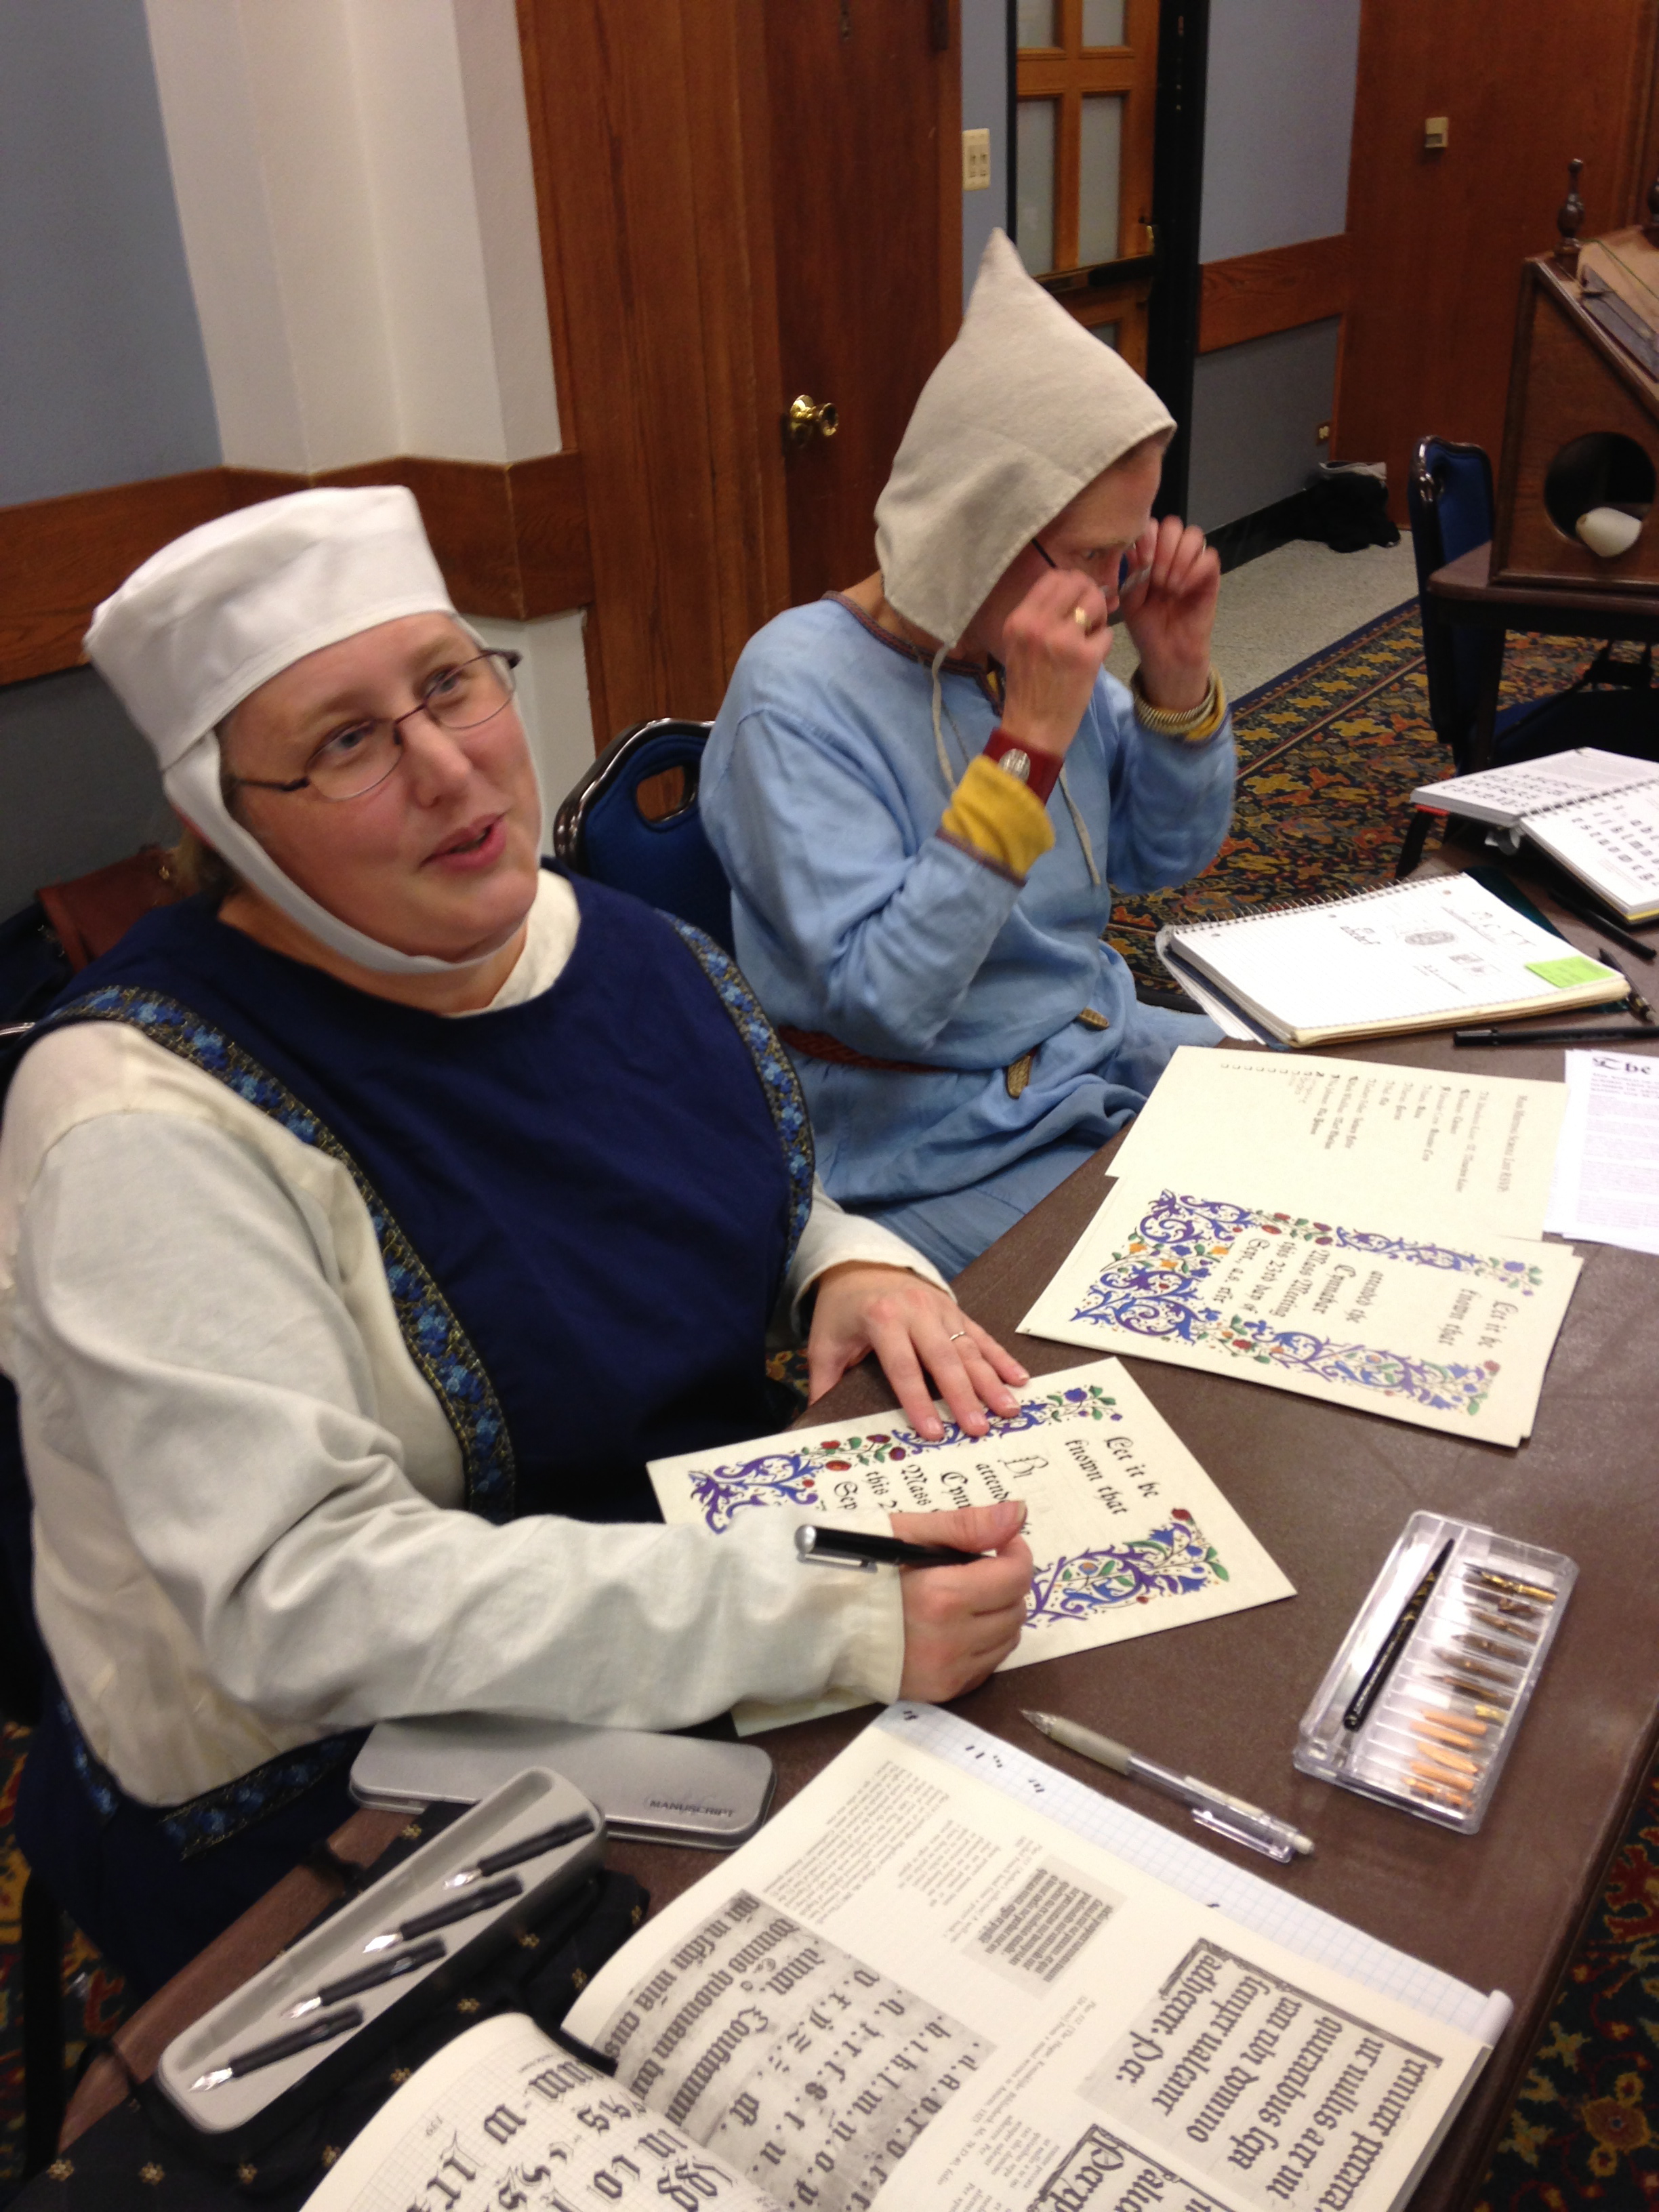
Numerous items are used to denote achievement. White belts, worn by Knights, are considered to be ‘black belts’ of the sport, an achievement usually accomplished only after seven to ten long years of training. Various crowns convey a bevy of different meanings. Kingdoms and Baronies award special medallions. Artistically illuminated certificates are completed by hand, then personalized in ancient calligraphy to acknowledge a new level of achievement.

Participants are motivated to attend in ways too numerous to comprehensively list. Some people enjoy the combat. Others like to be part of a group learning fascinating historical insights. Another prime draw is found in experiencing new techniques in arts, crafts, and science. Camping is also a sport many enjoy. But overall, people come to meet new friends or reunite with those they already know.

Newcomers can watch a tremendous amount of developing activity as it unfolds. On any given battle day, a tremendous amount of pageantry occurs when uniformed units form into lines and march onto the battlefield carrying banners. Spectators will hear the clash of weapons and shields. Most agree, however, that the most exciting time for an outsider is at the end of the event when the Friday Field battle ensues. At this time, large units collide, moving in mass to make or break the day.

In addition to happenings already mentioned, there are occasional stage performances. The Known World Players is one group that encompasses actors from all of the Kingdom chapters within the SCA, including parts of the world that were known to exist during the Medieval period. Players are auditioned and cast a year before coming together to direct a play, which at Pennsic XLI was “Anne of a Thousand Days.”

There are also art and craft demos, primarily Blacksmith. Goods produced are not sold but smiths may entertain a barter or exchange of goods.

Lady Genoveva felt that her campsite bore improvement over her first year of attendance, when she crowded herself into a borrowed pavilion. Now she owns two. For the next few days of the event, I shared one of those pavilions with my seven-year old grandson and several dividing curtains. My space contained a closet rod, chair, and nice camping cot, which I made extra comfortable with an air mattress and a memory foam mattress folded in half. His portion of the pavilion contained a small canvas ‘Kidcot’ bed covered in a blue tent that enclosed the sleeping child. The remaining space in the pavilion was given over to an entryway with shelves and hanging organizers for storage.

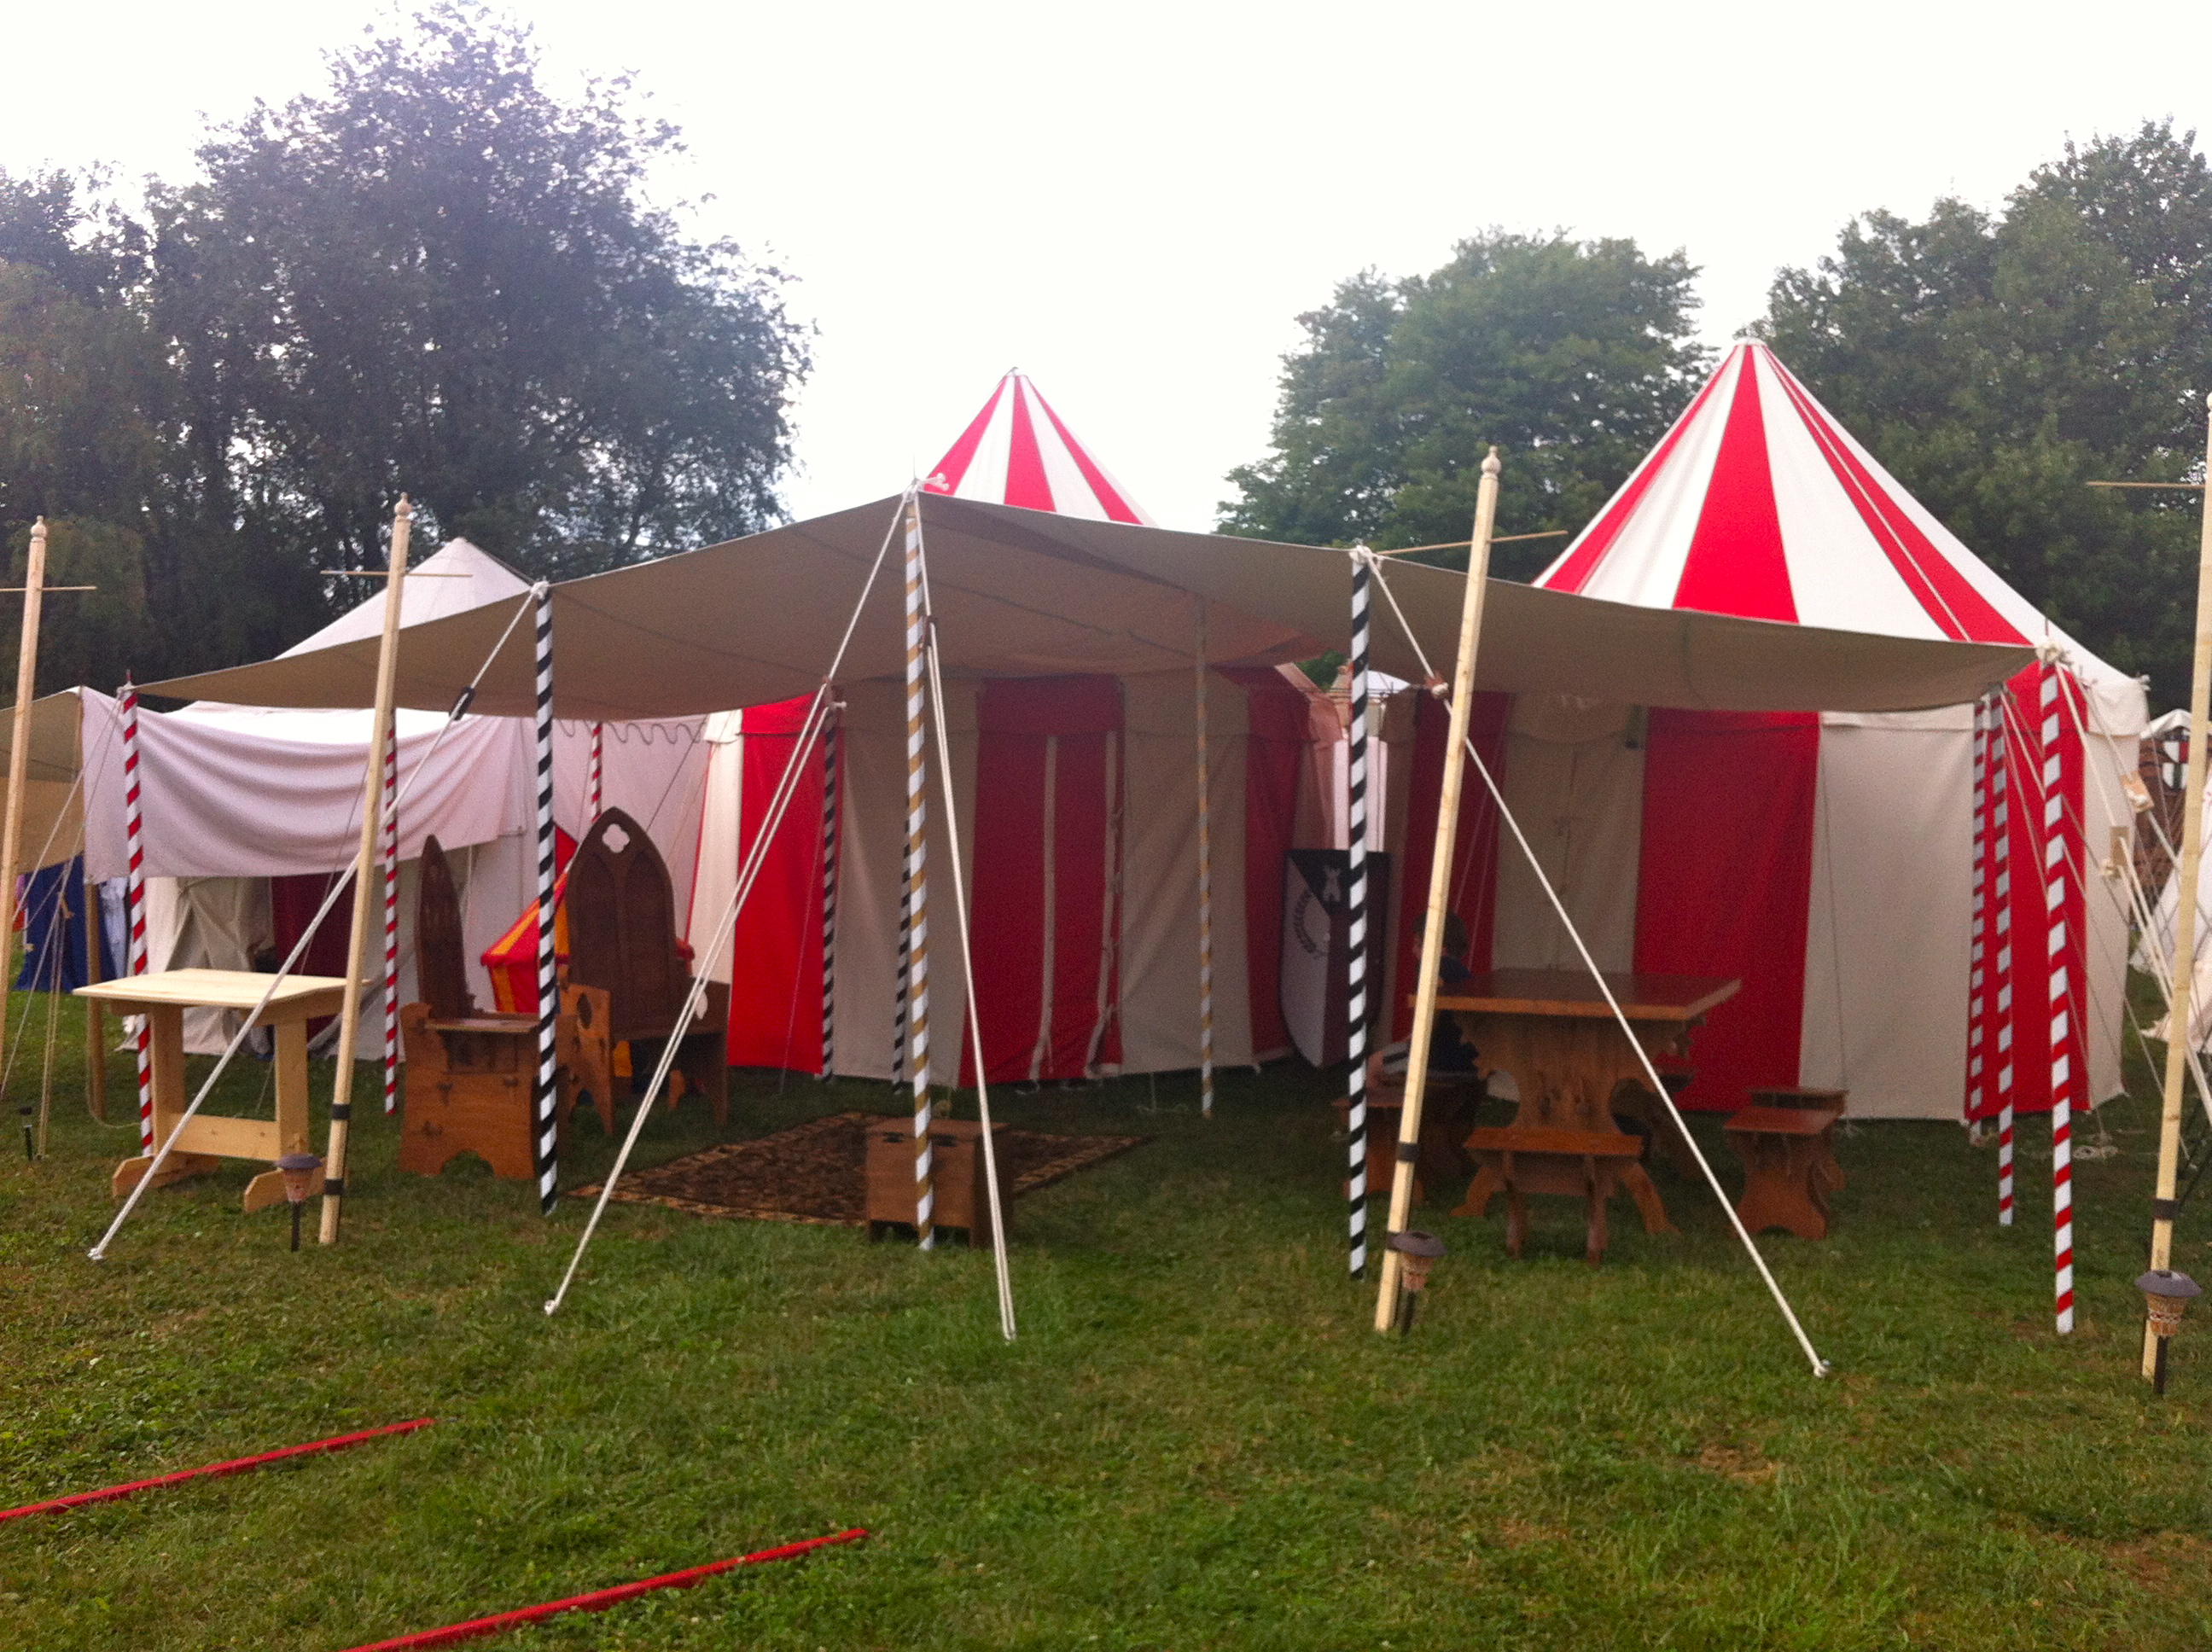
Our two pavilions and shade fly with furniture

The morning after my arrival, I ventured out to view other campsites in our Barony. As I later came to understand, each Kingdom is a regional club within the greater SCA organization. Many of them had well-established territorial encampments around the vast campground.

Our site was located at the front of the Barony near a castle entry arch. I was surprised to discover that after assembling our pavilions, my grandson and Genoveva’s friend Gregor had dug the Barony firepit in front of our site. Actually, our campsite was in front of the firepit. Either way, I appreciated conversations shared around social centers in the encampment.

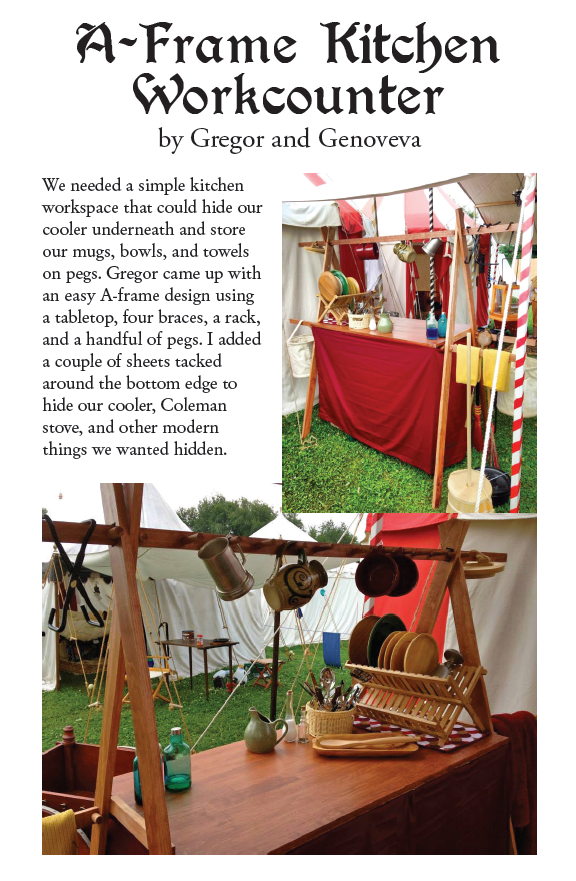
Our camp master assembled several helpful features in advance. Most prominent among them was a vast community awning and nearby hot and cold running water for a sink in the kitchen tent, water that was filtered three times for drinking. But what surprised me the most was an enclosed, open air shower tent with adjoining dressing room. Later that evening, I realized I could take a shower under the stars. The only drawback to the entire camp arrangement was a shared bank of portable bathrooms that sat just outside the entry to our Barony. Entering those on a hot summer day was akin to roasting in a sauna at my gym.

Several of the Cynnabar tents rose to a twenty foot high peak similar to “Genoveva Pavilion,” although others were square or domed. One was artistically handmade. Another was the ‘EZ up’ variety of awning with customized canvas sides.

Genoveva and Gregor had created the massive canvas rainfly supported by striped poles that spanned the front of  their pavilions and created a fine outdoor living space. The intense sun was no match for our shelter. Although it only rained on one of the days I visited, we were well protected during this horrific, battering assault. Under the rainfly, she assembled a dishwashing station and furniture she had built to fit together without the benefit of glue or nails, which included a six-foot table and four benches. Two high back chairs completed the group, one painted with her crest and the other featuring my grandson’s crest. Between them on the ground lay a large, Persian-style rug.

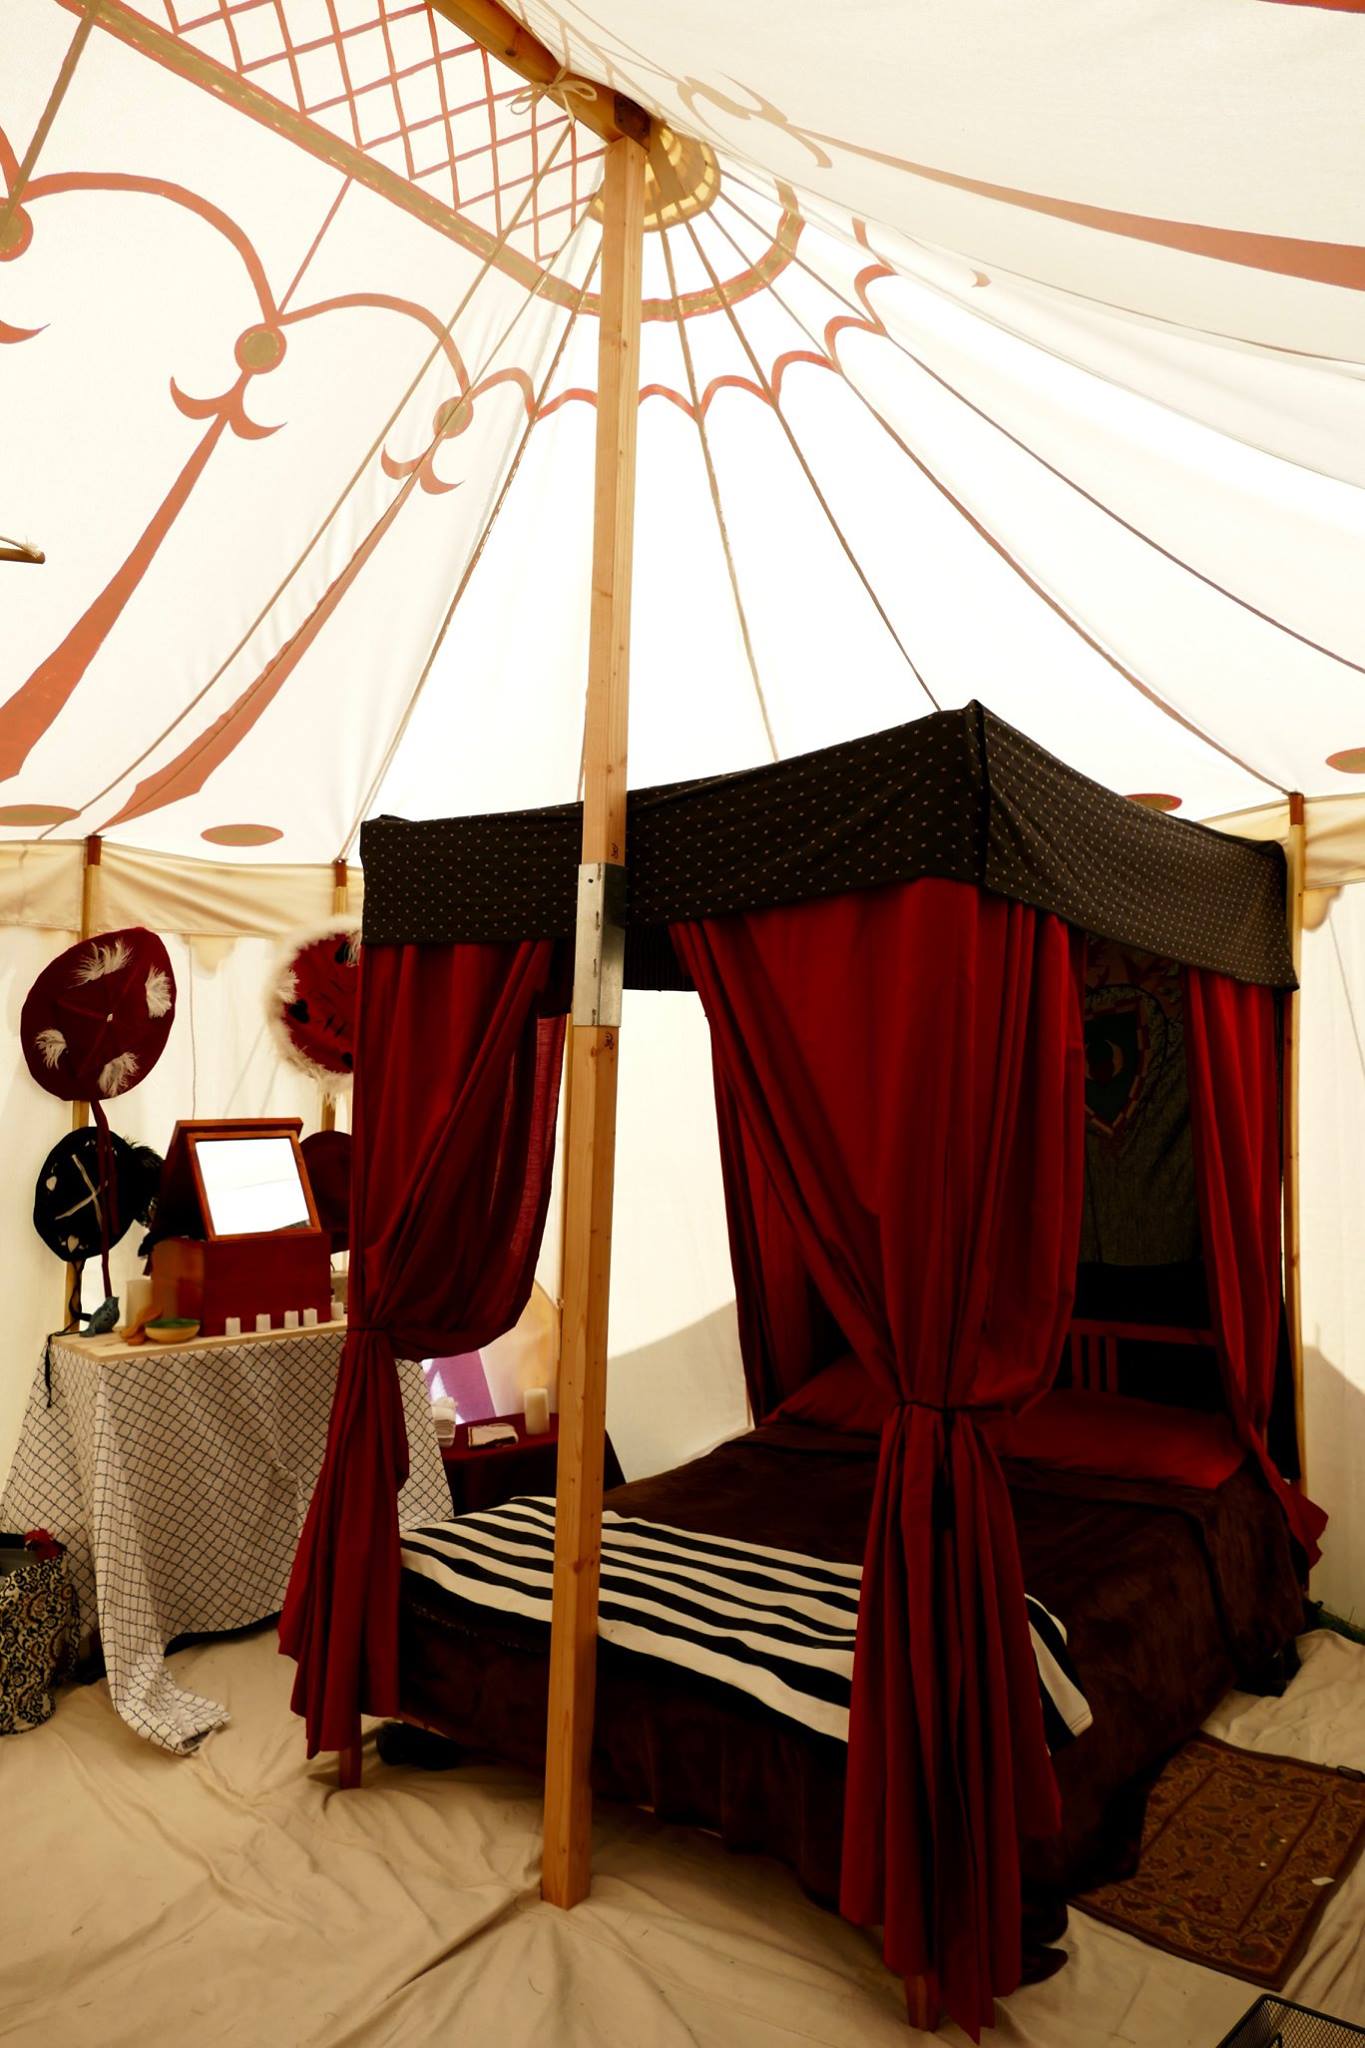
Her cozy interior contained a modular queen bed. Hats hung on hooks slung from the supports, as did canvas slings to hold shelves. Other features included a makeshift vanity table and desk. I was impressed to see her open a freestanding canvas closet and take out five costumes to lend me from many new ones she had sewn over the past year. There was also room for period clothing she made for Alexander and for Gregor, who was about to join us with his SCA-approved armor, ‘weapons,’ and a measure of chivalrous heraldry.

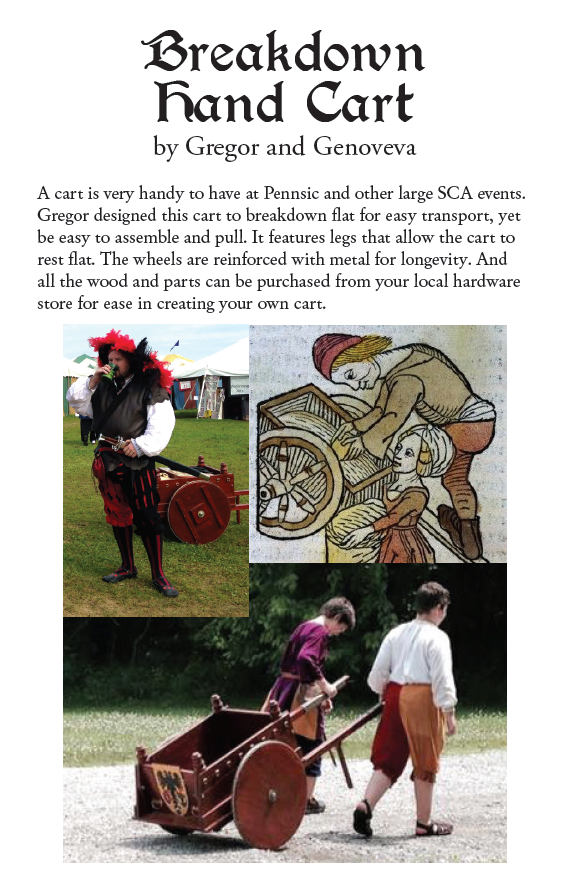
Even under this rainfly, summer temperatures mounted. Ice replacement became a daily chore using a collapsible borrowed wagon. Alexander chose to help out in this category with very little assistance, and this year he will be surprised to see that I purchased one for permanent use in the camp.
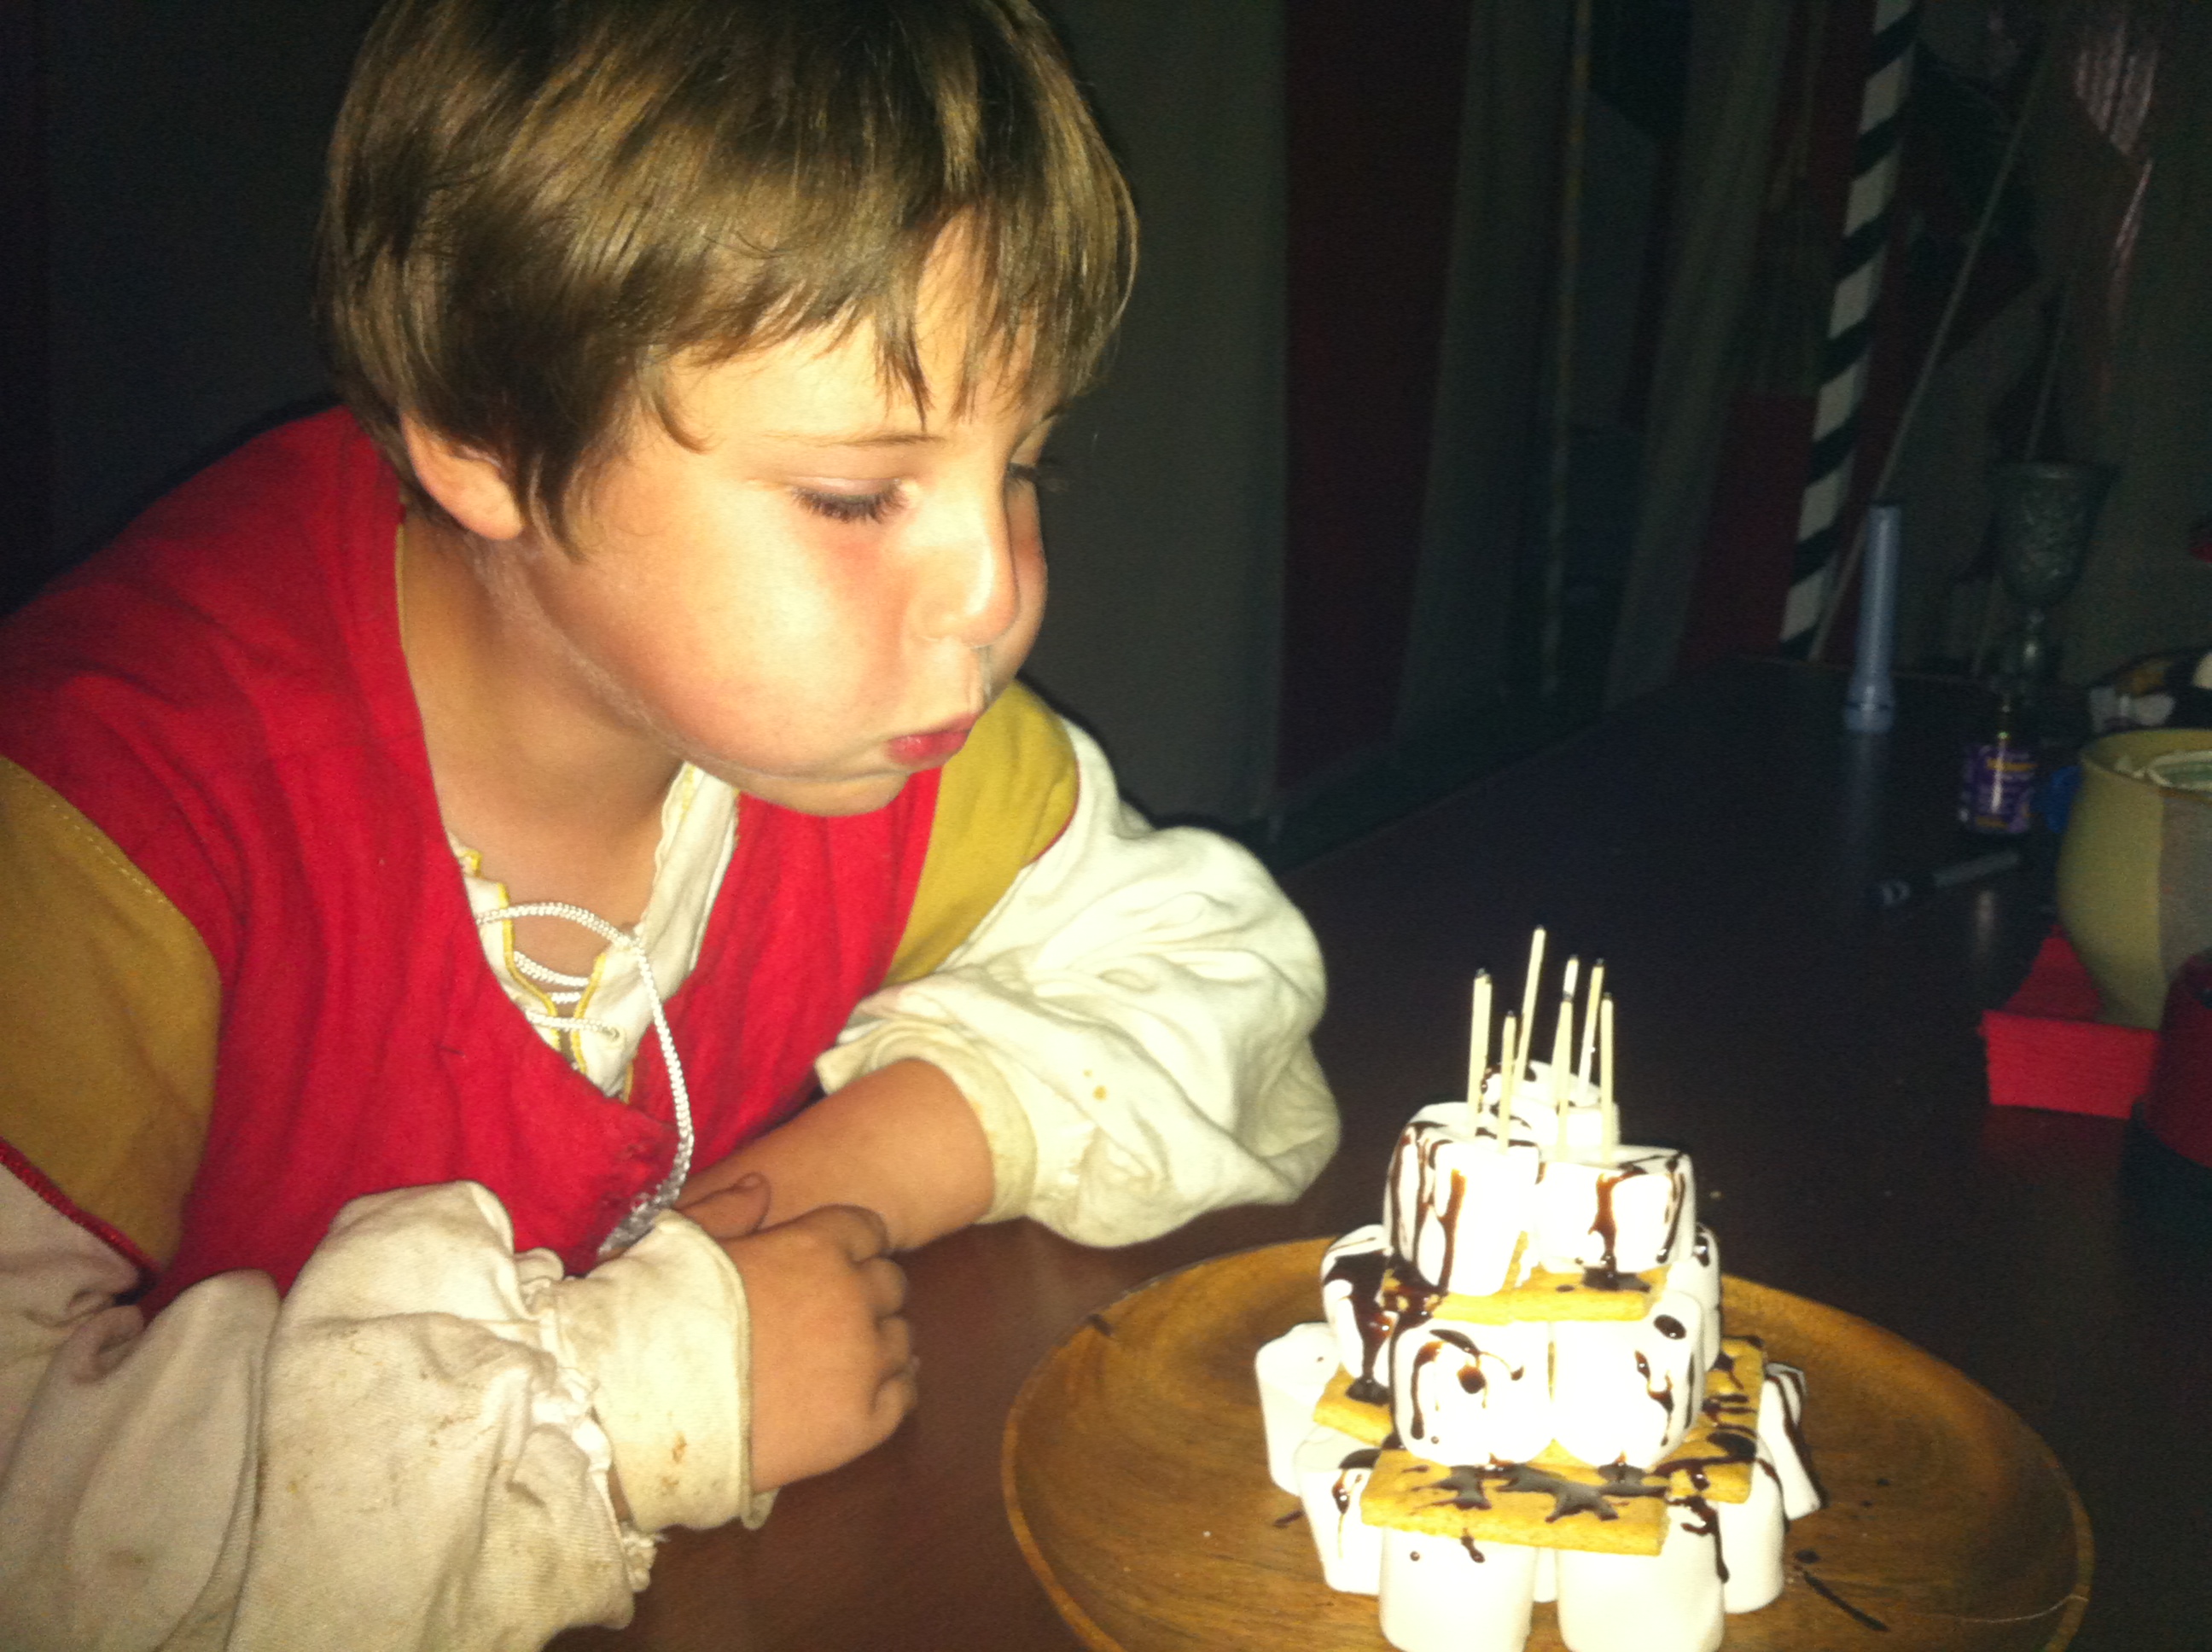
The S'more Cake

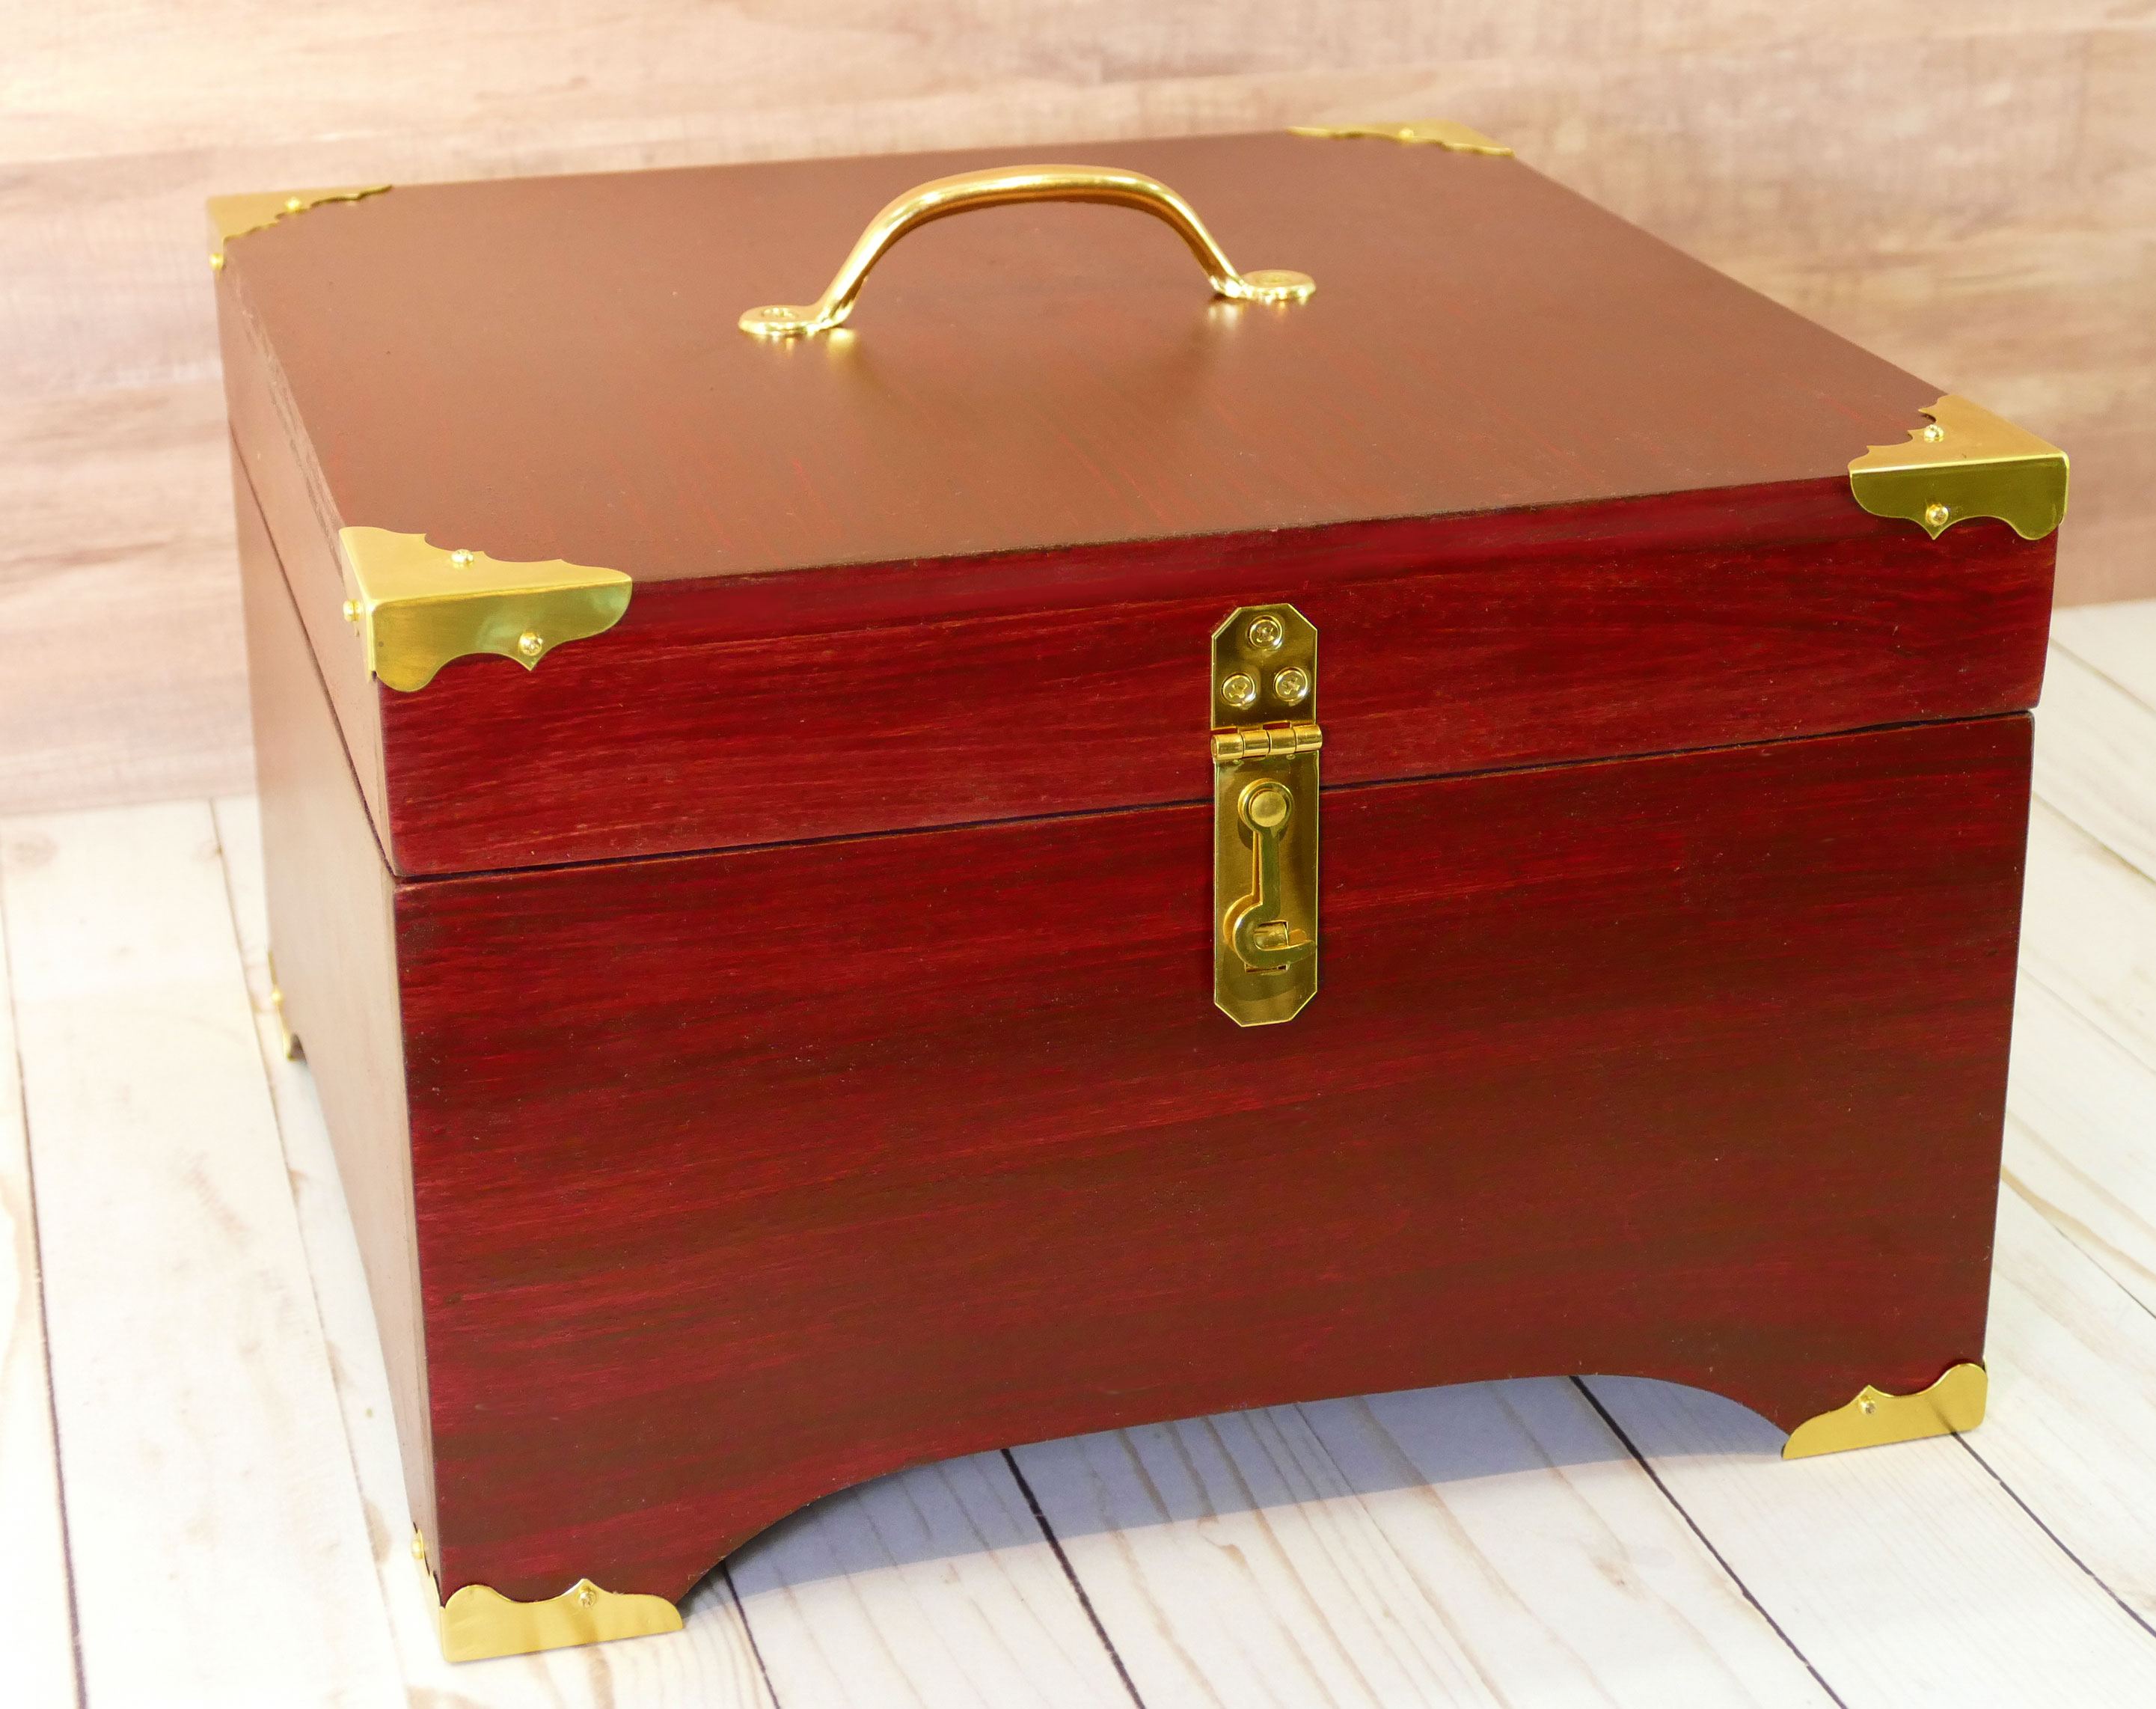
I stayed long enough for Alexander to celebrate his eighth birthday. Baking a cake in camp was challenging, so without prodding he designed a S’more cake constructed from marshmallows. On top of this we drizzled melted chocolate over graham crackers. We lost our birthday candles and instead lit toothpicks. The Baroness made a surprise visit to present him with his first scout knife which he stored in his treasure chest. Overall this was a very special celebration.

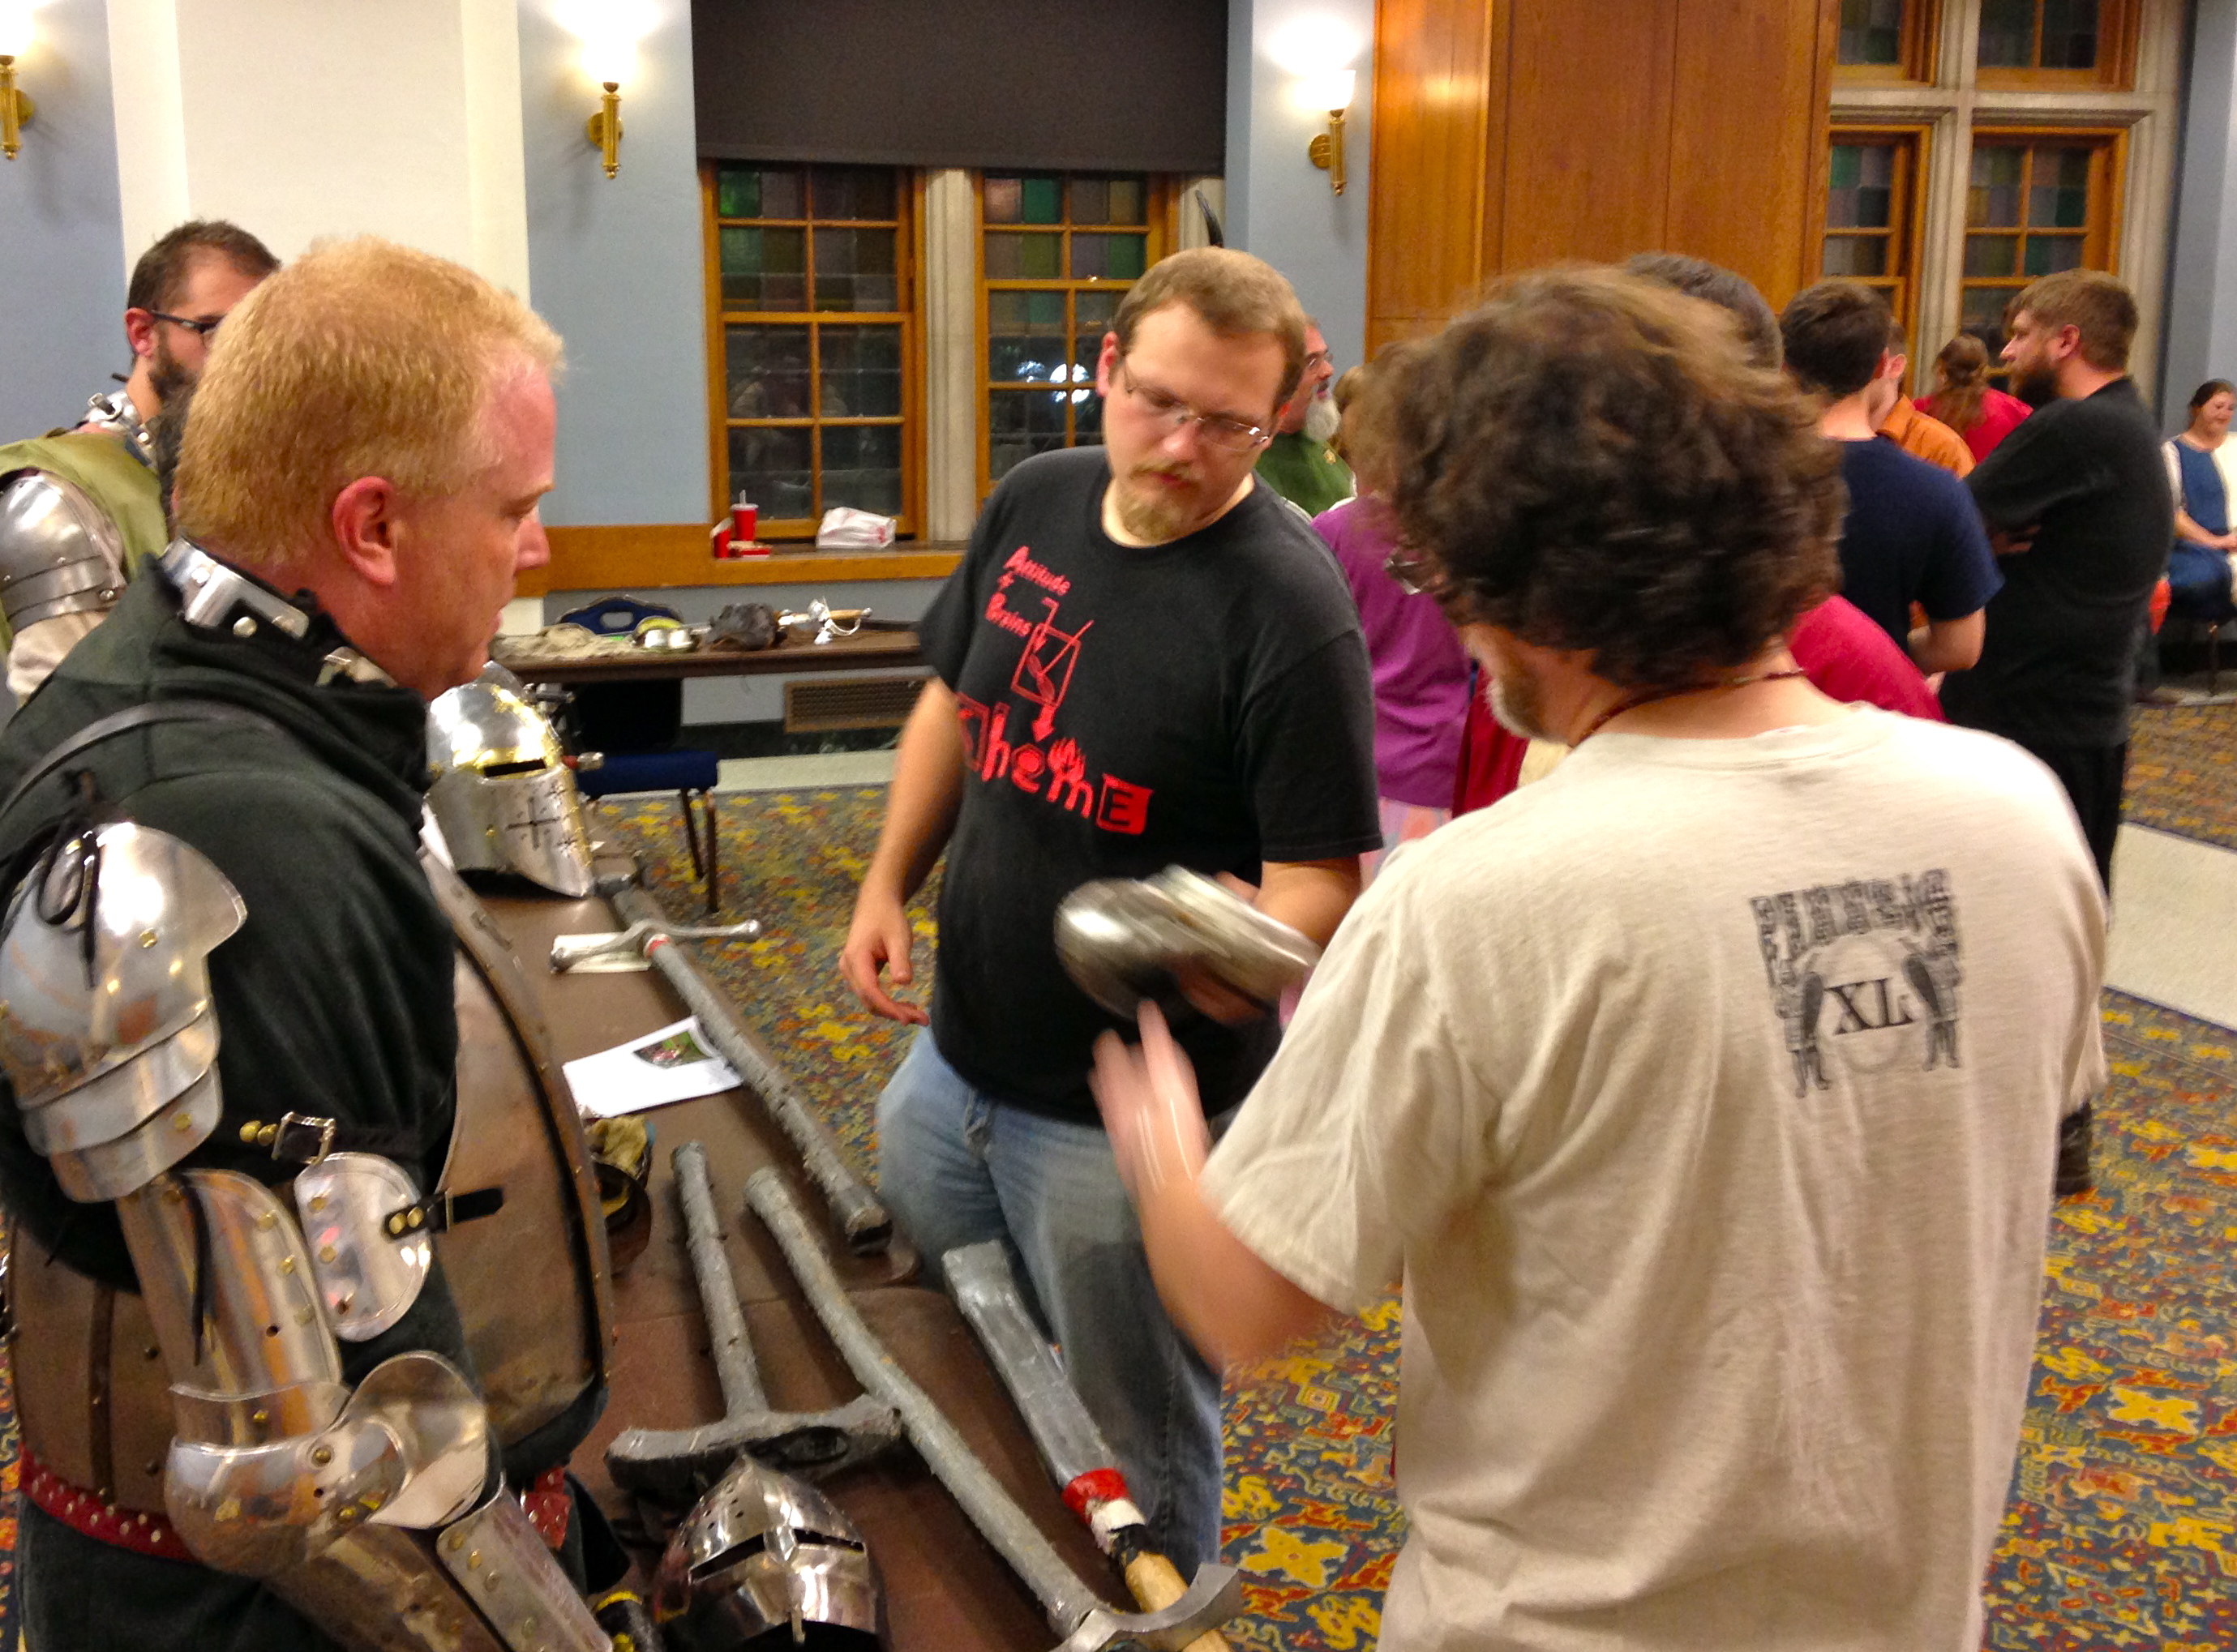
Soon, knights began to shine their armor and seek inspections for their weaponry. Some purchased new protective gear or replaced weaker armor for a safer experience. A vast array of ethnic flair appeared, including many outfits featuring chainmail. Feathered hats and shining helmets looked distinctively diverse, yet somehow provided symmetry to the field of color that flooded battlefield viewing stations.

A reenactment was underway. At home in the mundane world, however, a workweek was ending. New participants arrived to erect their campsites. Soon the Barony was so full that I could barely wind my way between tents to reach the open air shower in the evening.

My days were full. At a minimum, I joined classes and ate dinner with my family in the marketplace, shopping a little along the way. Fresh produce and other healthy foods were available for purchase among the abundance of period merchandise and crafted objects. I had plenty of opportunity to linger and talk too long with new acquaintances, but very little truly quiet time to write or practice any of a various array of my usual arts. We should all be so lucky.

At night, I occasionally watched Alexander as respectful social parties began to blossom all around the encampment honoring their Kings and Queens. Our campfire attracted an amazing number of fascinating storytellers from across our entire Barony.

When I left several days later, I took home fond memories shared with others, and incredible insights into the world that existed before my time. Spending time with family was my main motive for attending before I time traveled into the past. I found much more, however, after my daughter introduced me to Pennsic and the SCA, where I met interesting friends, other published authors, and artists who were expert in their specialties.

My insider peek at Genoveva’s glorious creations was satisfying. Among those especially highlighted were her classes, Art and Sciences exhibition booth, and pavilion. There were also many other classes I journeyed through as well as my first battle reenactment intermingling thousands of combatants wearing finely crafted armor.

One of Genoveva's blackwork students showing her work!

Genoveva is now a blackwork enthusiast. She is a period seamstress and maker of fine millinery. As Pennsic University opened its doors, she taught a well-received blackwork class. For the rest of that week, students sought our camp to show us finished work and earn the ultimate prize: a set of tools to fill the class project in the wooden box she bestowed upon them. A week later, she joined the many fascinating presenters who represented each historical period at the arts and sciences show, with her booth featuring a blackwork head covering and period garments. It was here at her booth that the local channel 10 television crew covering Pennsic XVI filmed an interview with Genoveva. Naturally, I filmed the crew filming her. But overall, it was fascinating to learn about arts and methods practiced during various historical periods.

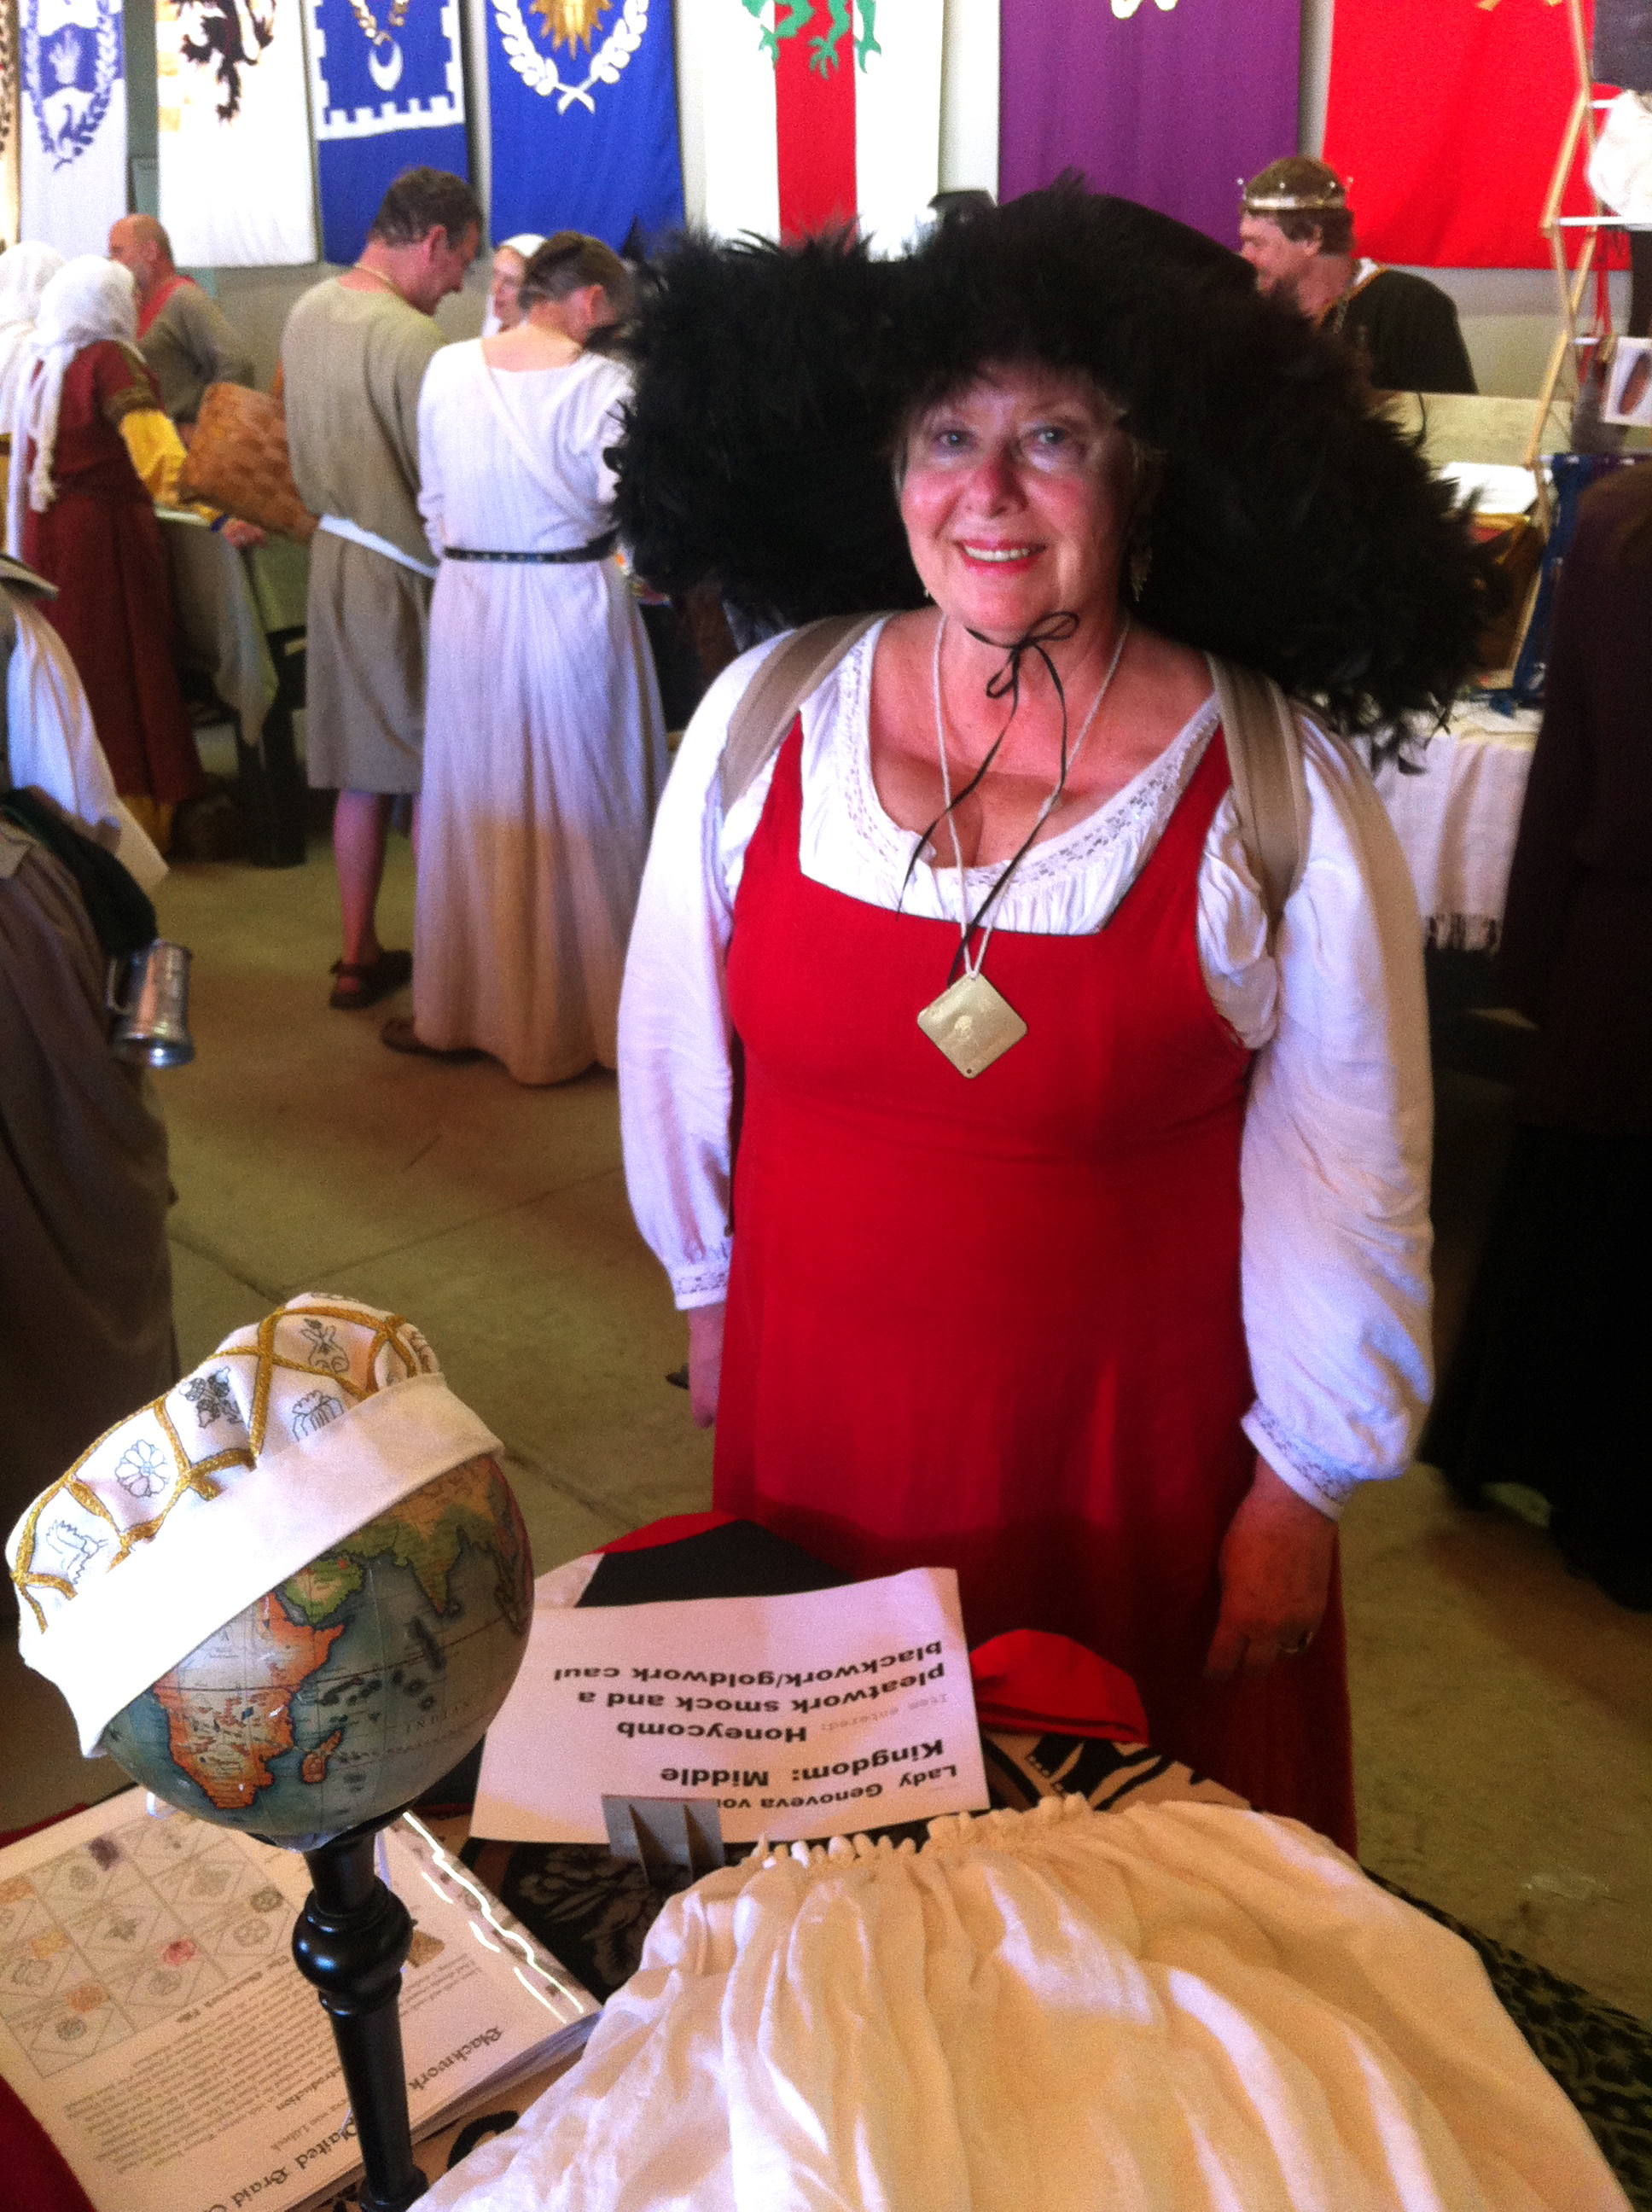
I received other gifts during my stay. My daughter customized for me a large “platter” hat as protection from the sun. She fashioned this avant-garde, flat-brimmed hat from black wool, trimming it with feathers and dragonfly cutwork as a practical aspect of German period fashion in the sixteenth century. Her own red platter hat received nodding approvals whenever she wore it to marketplace. Returning from an errand one day, three artists asked her to sit while they sketched her.  I too benefited from her artistry because, as we walked along together laughing, a gentleman smiled and tipped his hat to me in the style of a bygone era.

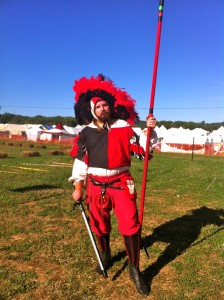
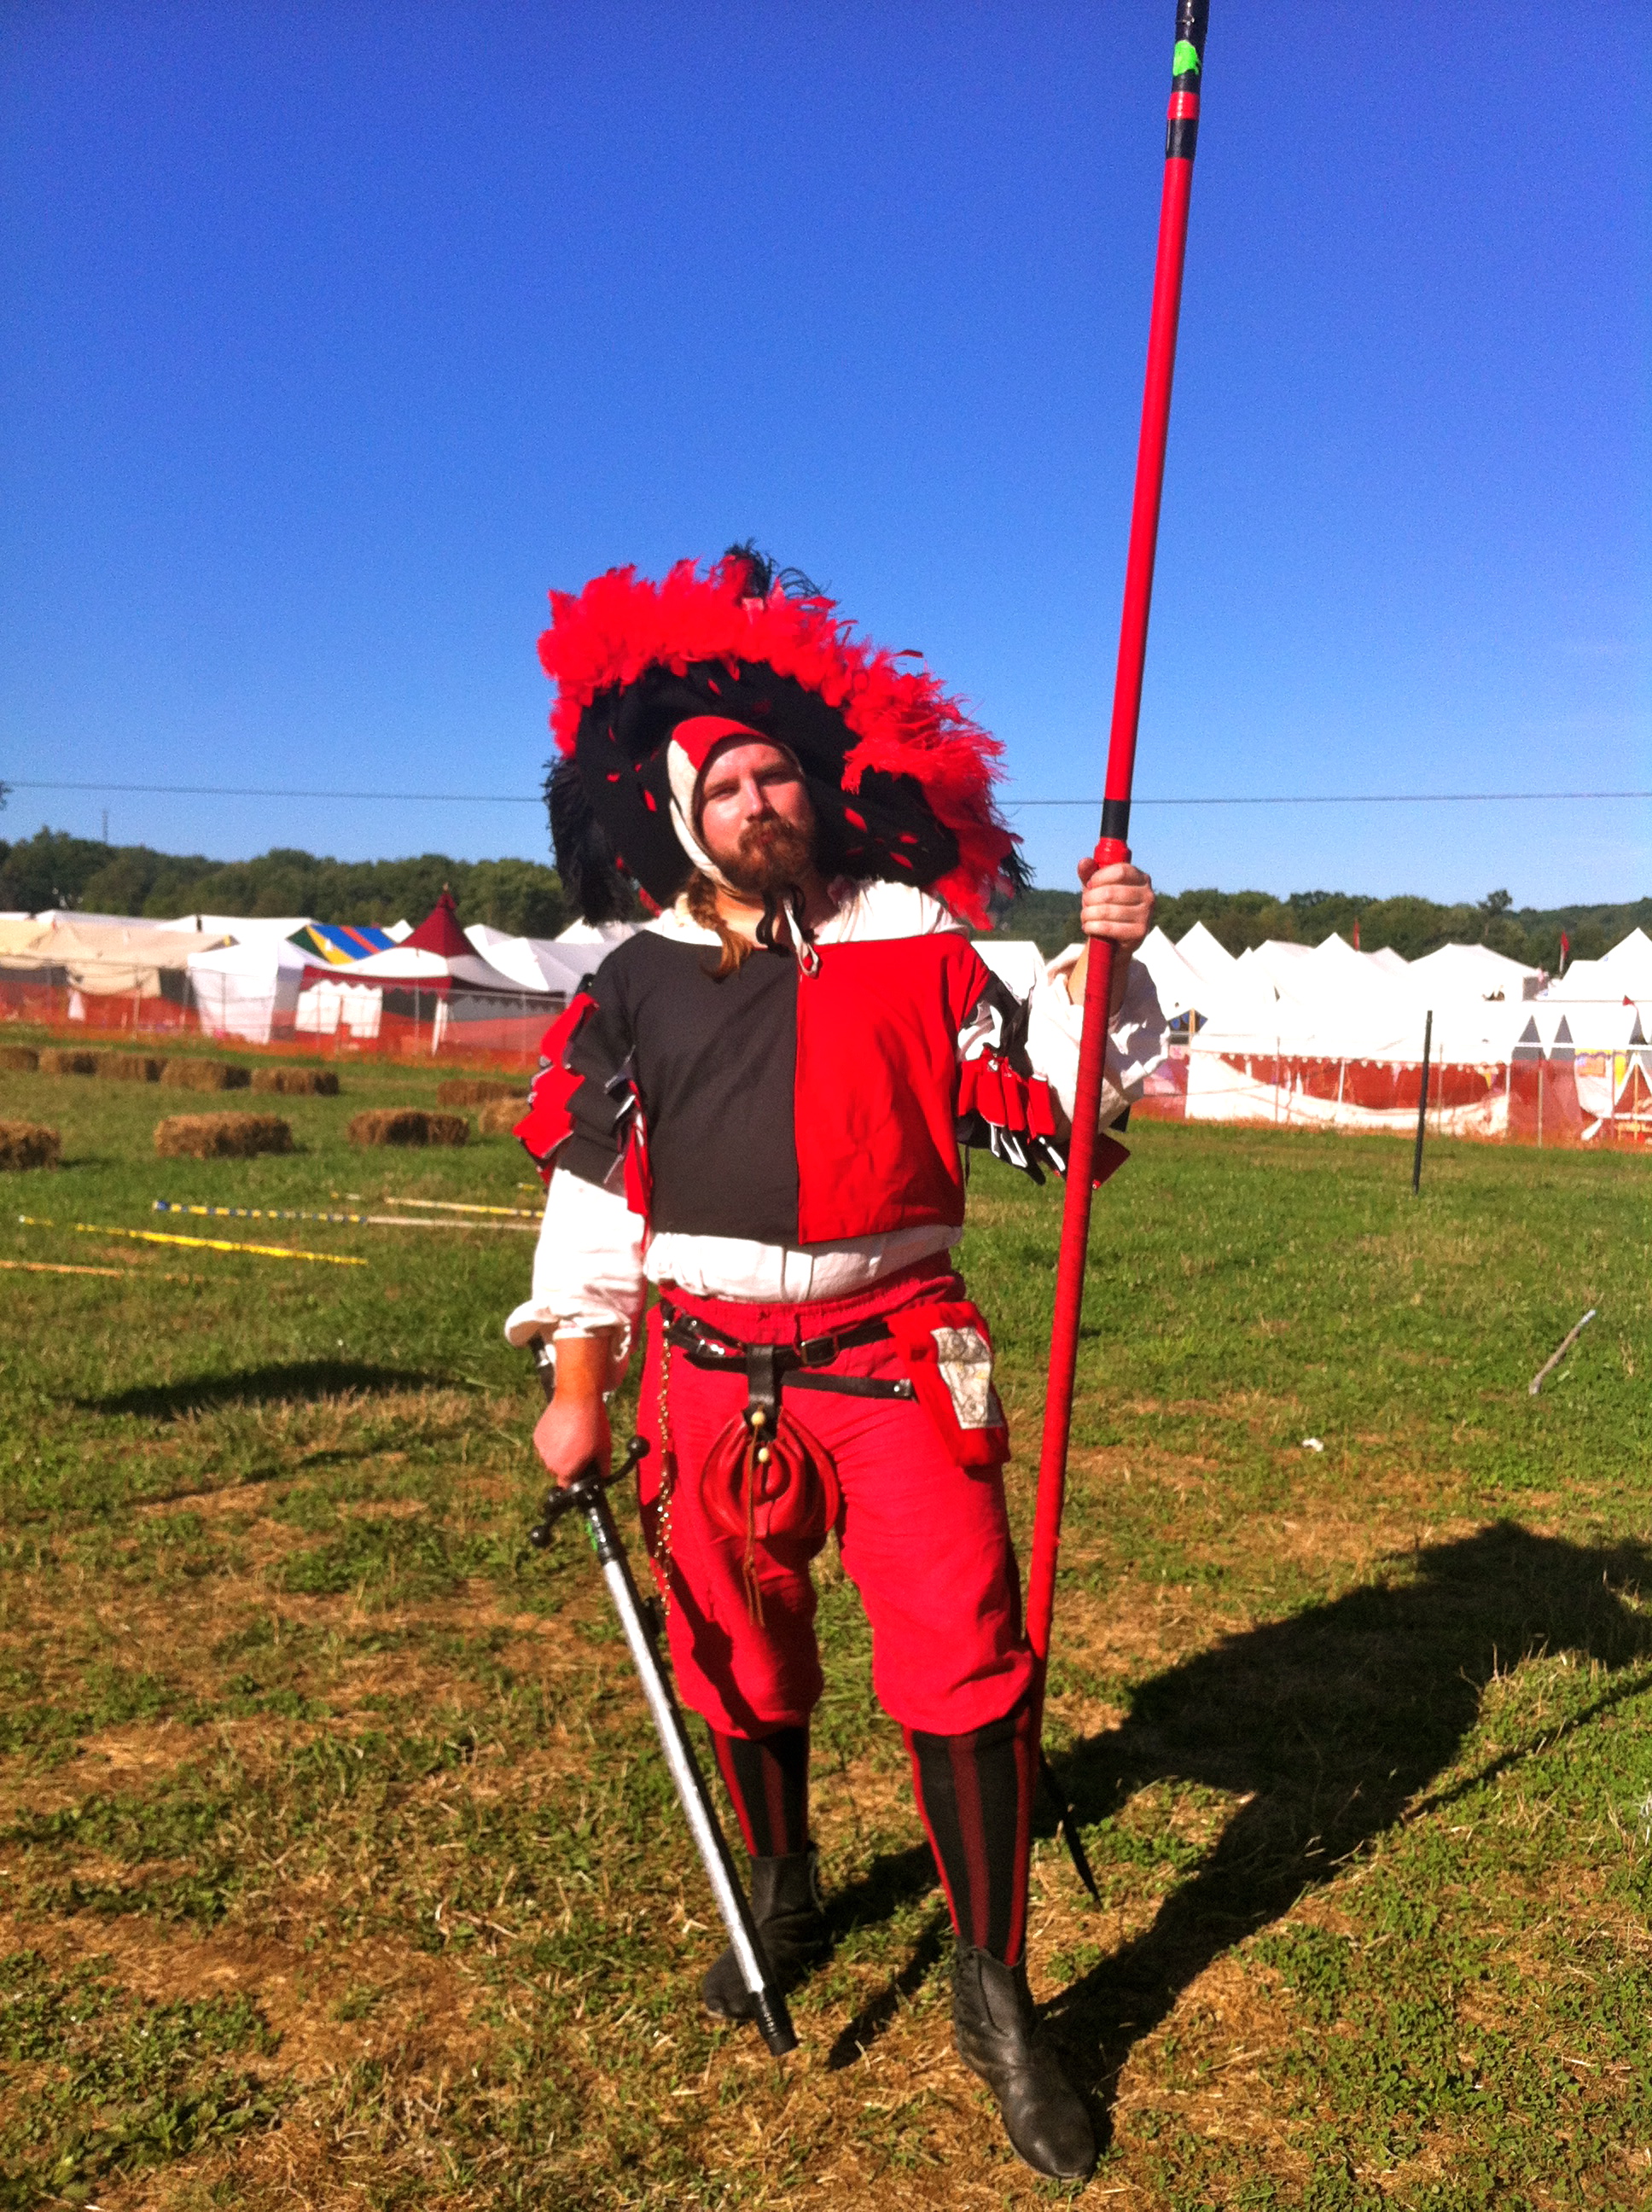
Gregor in his German garb

Our peak experience arrived when Gregor joined us in Pennsylvania. He was tall and carried his armor bravely into battle, looking wonderful in a feathered platter hat. She also made him a new shirt with complex upper sleeves that were both folded and pleated.

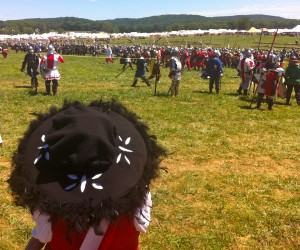
We spent a day or two preparing for the first battle reenactment. When the time came for the first of five battles, the Barony of Cynnabar’s company of thirty joined the Middle Kingdom procession to the battlefield. Music played, drums beat, and banners flew. Our colors were red, black, and white. Over my long red dress, I wore a crested, cross-body banner (baldric) from right shoulder to left hip. I held my long skirt up to avoid tripping, using the same hand that held a parasol aloft as a sun shield. In my other hand I held a pewter goblet but my huge feathered hat dropped down, obscuring my eyes so that I had to push it higher with the water glass sloshing over as we enjoyed the thrill of partaking in pageantry.

With taller contenders marching ahead, I could only see Gregor’s armor and huge feathered hat moving through the camp. Eventually, we ended at the field for pre-battle pictures; that was when Gregor turned around to step into the picture. Genoveva caught sight of the reenactment spirit reflected in his and others’ eyes as we waited for the battle to begin. For as long as I live, and probably longer, I will never forget the surge of beautifully armored men and women recreating history before my eyes.

The first battle of Pennsic XLI occurred on Monday, my last day at the camp. I left the next day to bring Alexander home. This year, Genoveva was Chamberlain to her Highness. Next year, the keyword is ‘more.’ She created a blog to feature articles about reconstructing sixteenth century clothing, and suggested an adjoining table with my artwork at the Arts & Sciences Display. In the future, she plans to meet and help more people who enjoy the event.

She has also begun to make more things, the first of which is a castle privacy screen. She hopes her queen will find this very helpful.

By 2013, she will make a wagon and cool garb. Her pavilion will have new finials, banners, and a mirrored vanity. Gregor will enjoy a portable chair and an armor stand. Alexander looks forward to learning more about tools and the discipline of knightly period valor for children. He enjoys a good blacksmith demo and anything involving engineering.

As for me, I’m researching the period aspects of miniature replicas, figurative clay, painting, fiber, and writing. I haven’t decided which to pursue, but am happy for a few months without the nightly temptation of delicious dinner with family at Beast & Boar. Next year, I will be skinny and join Alexander in eating stirfry.

Author at the Arts & Sciences Display
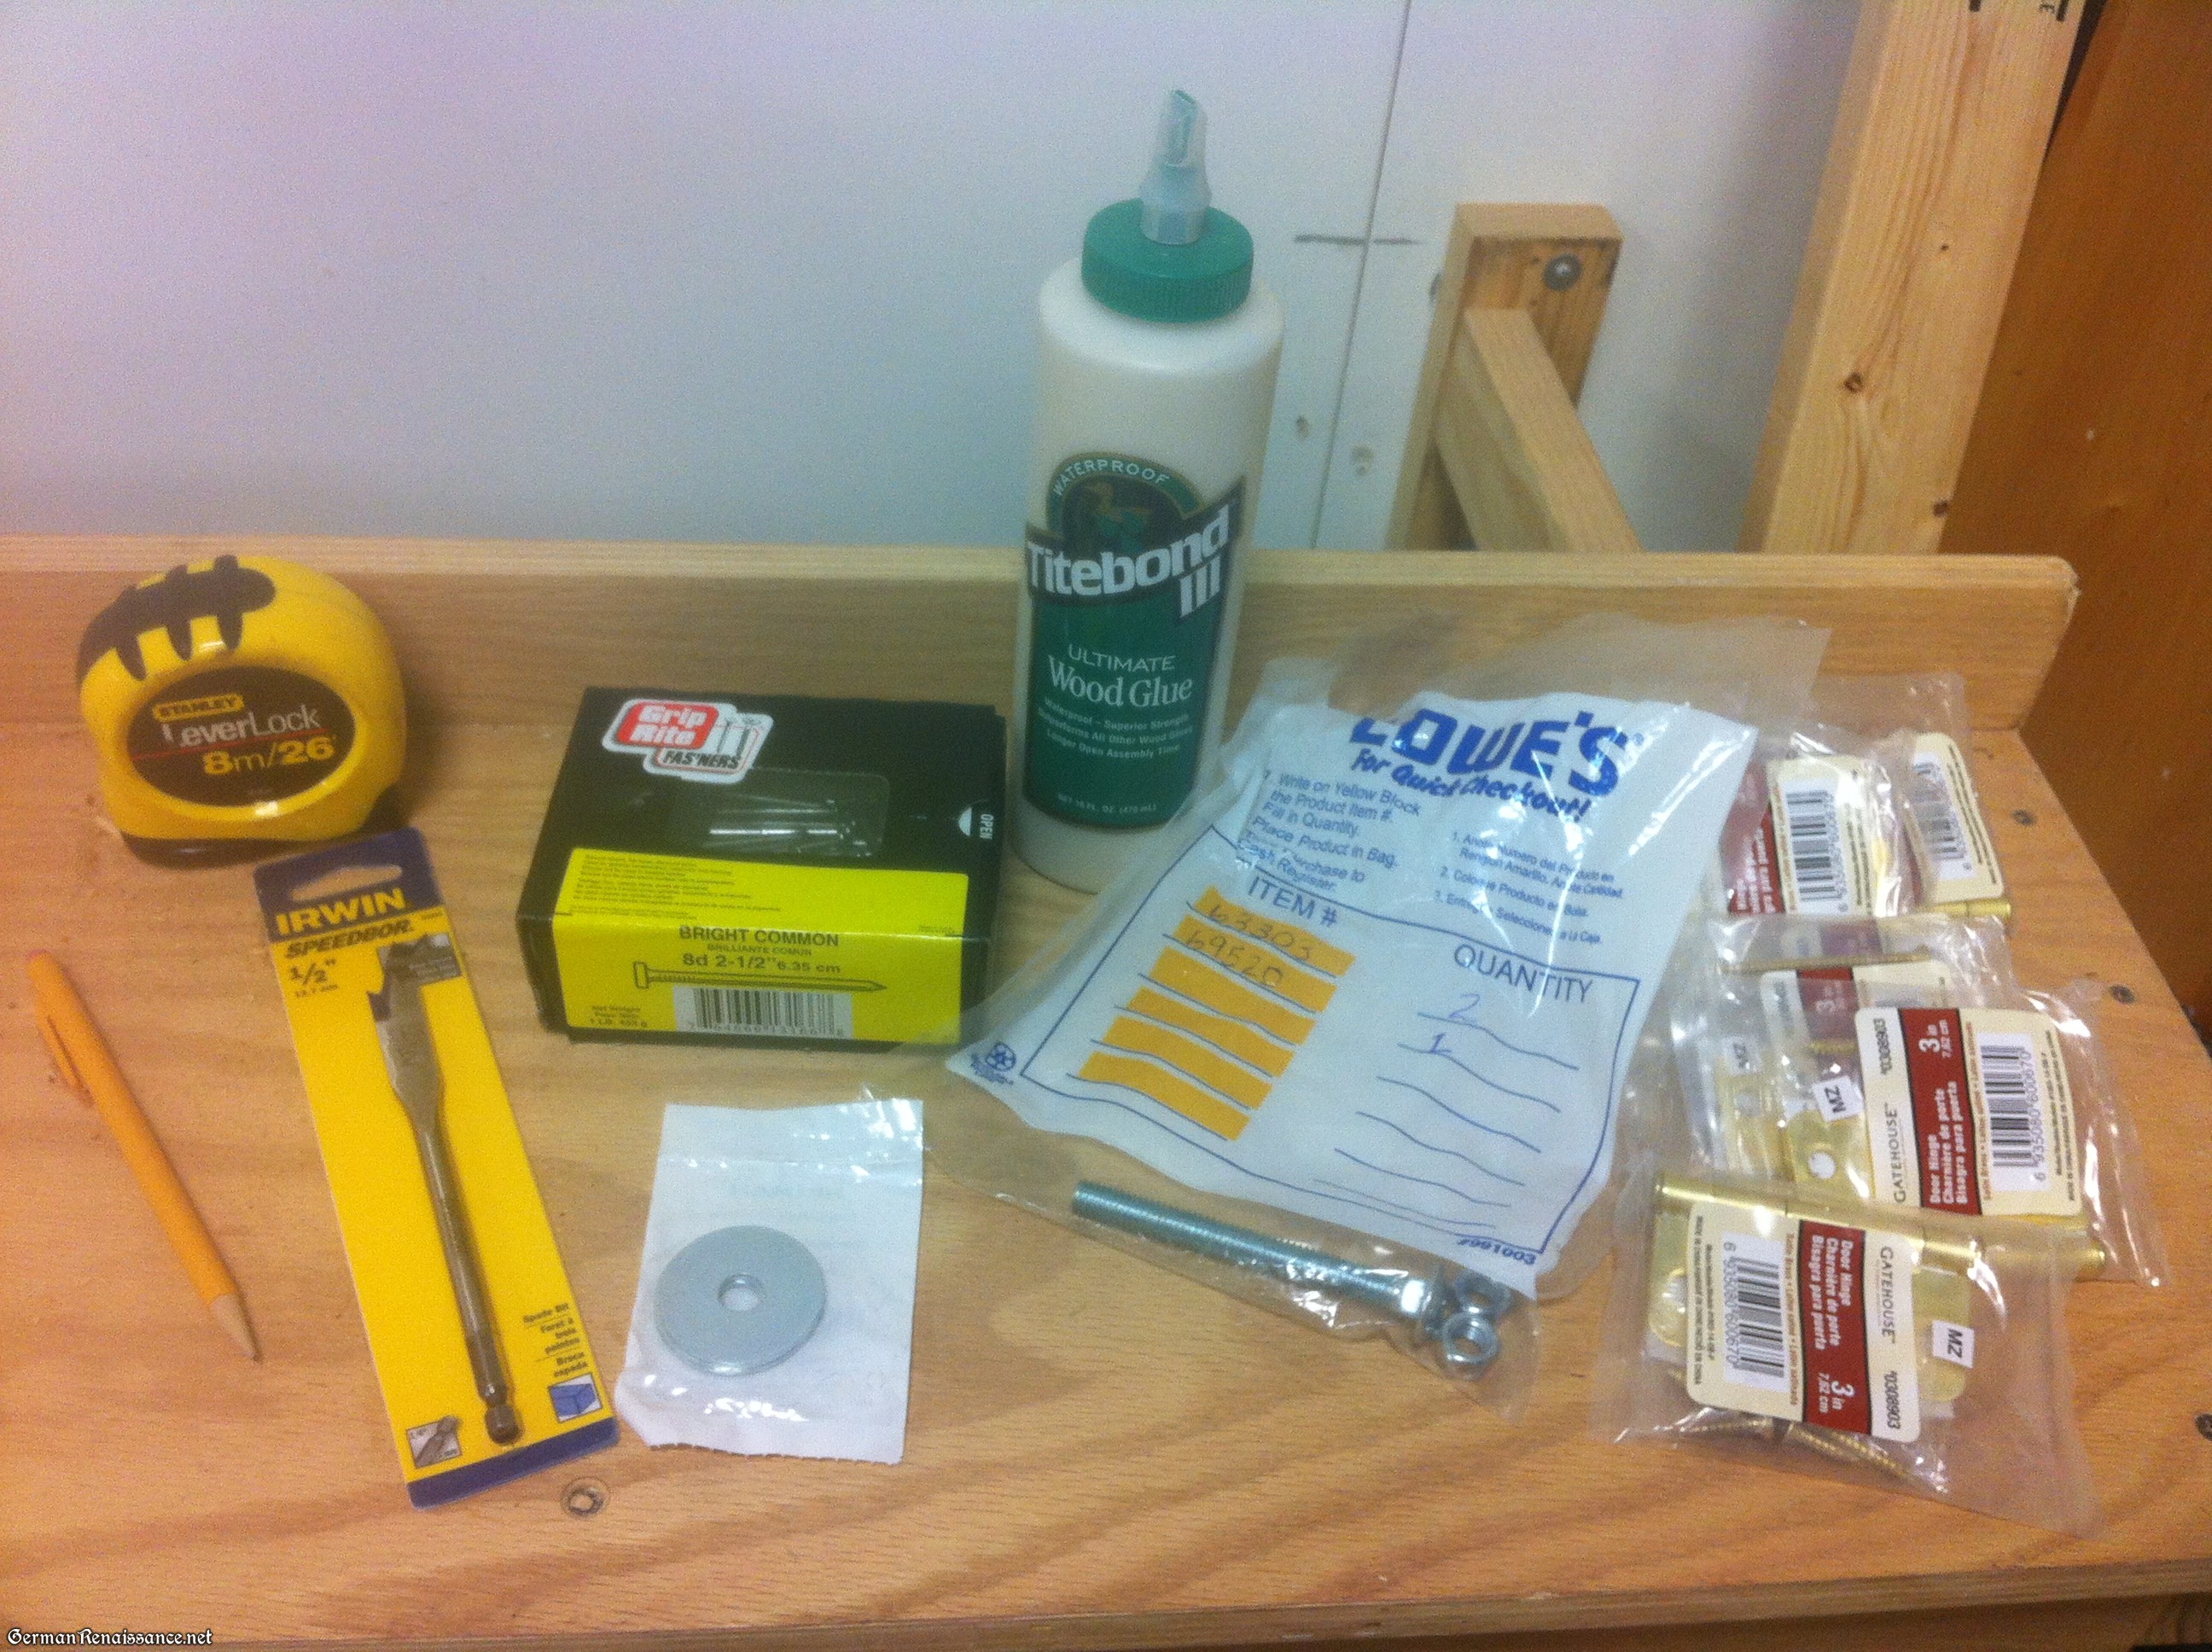
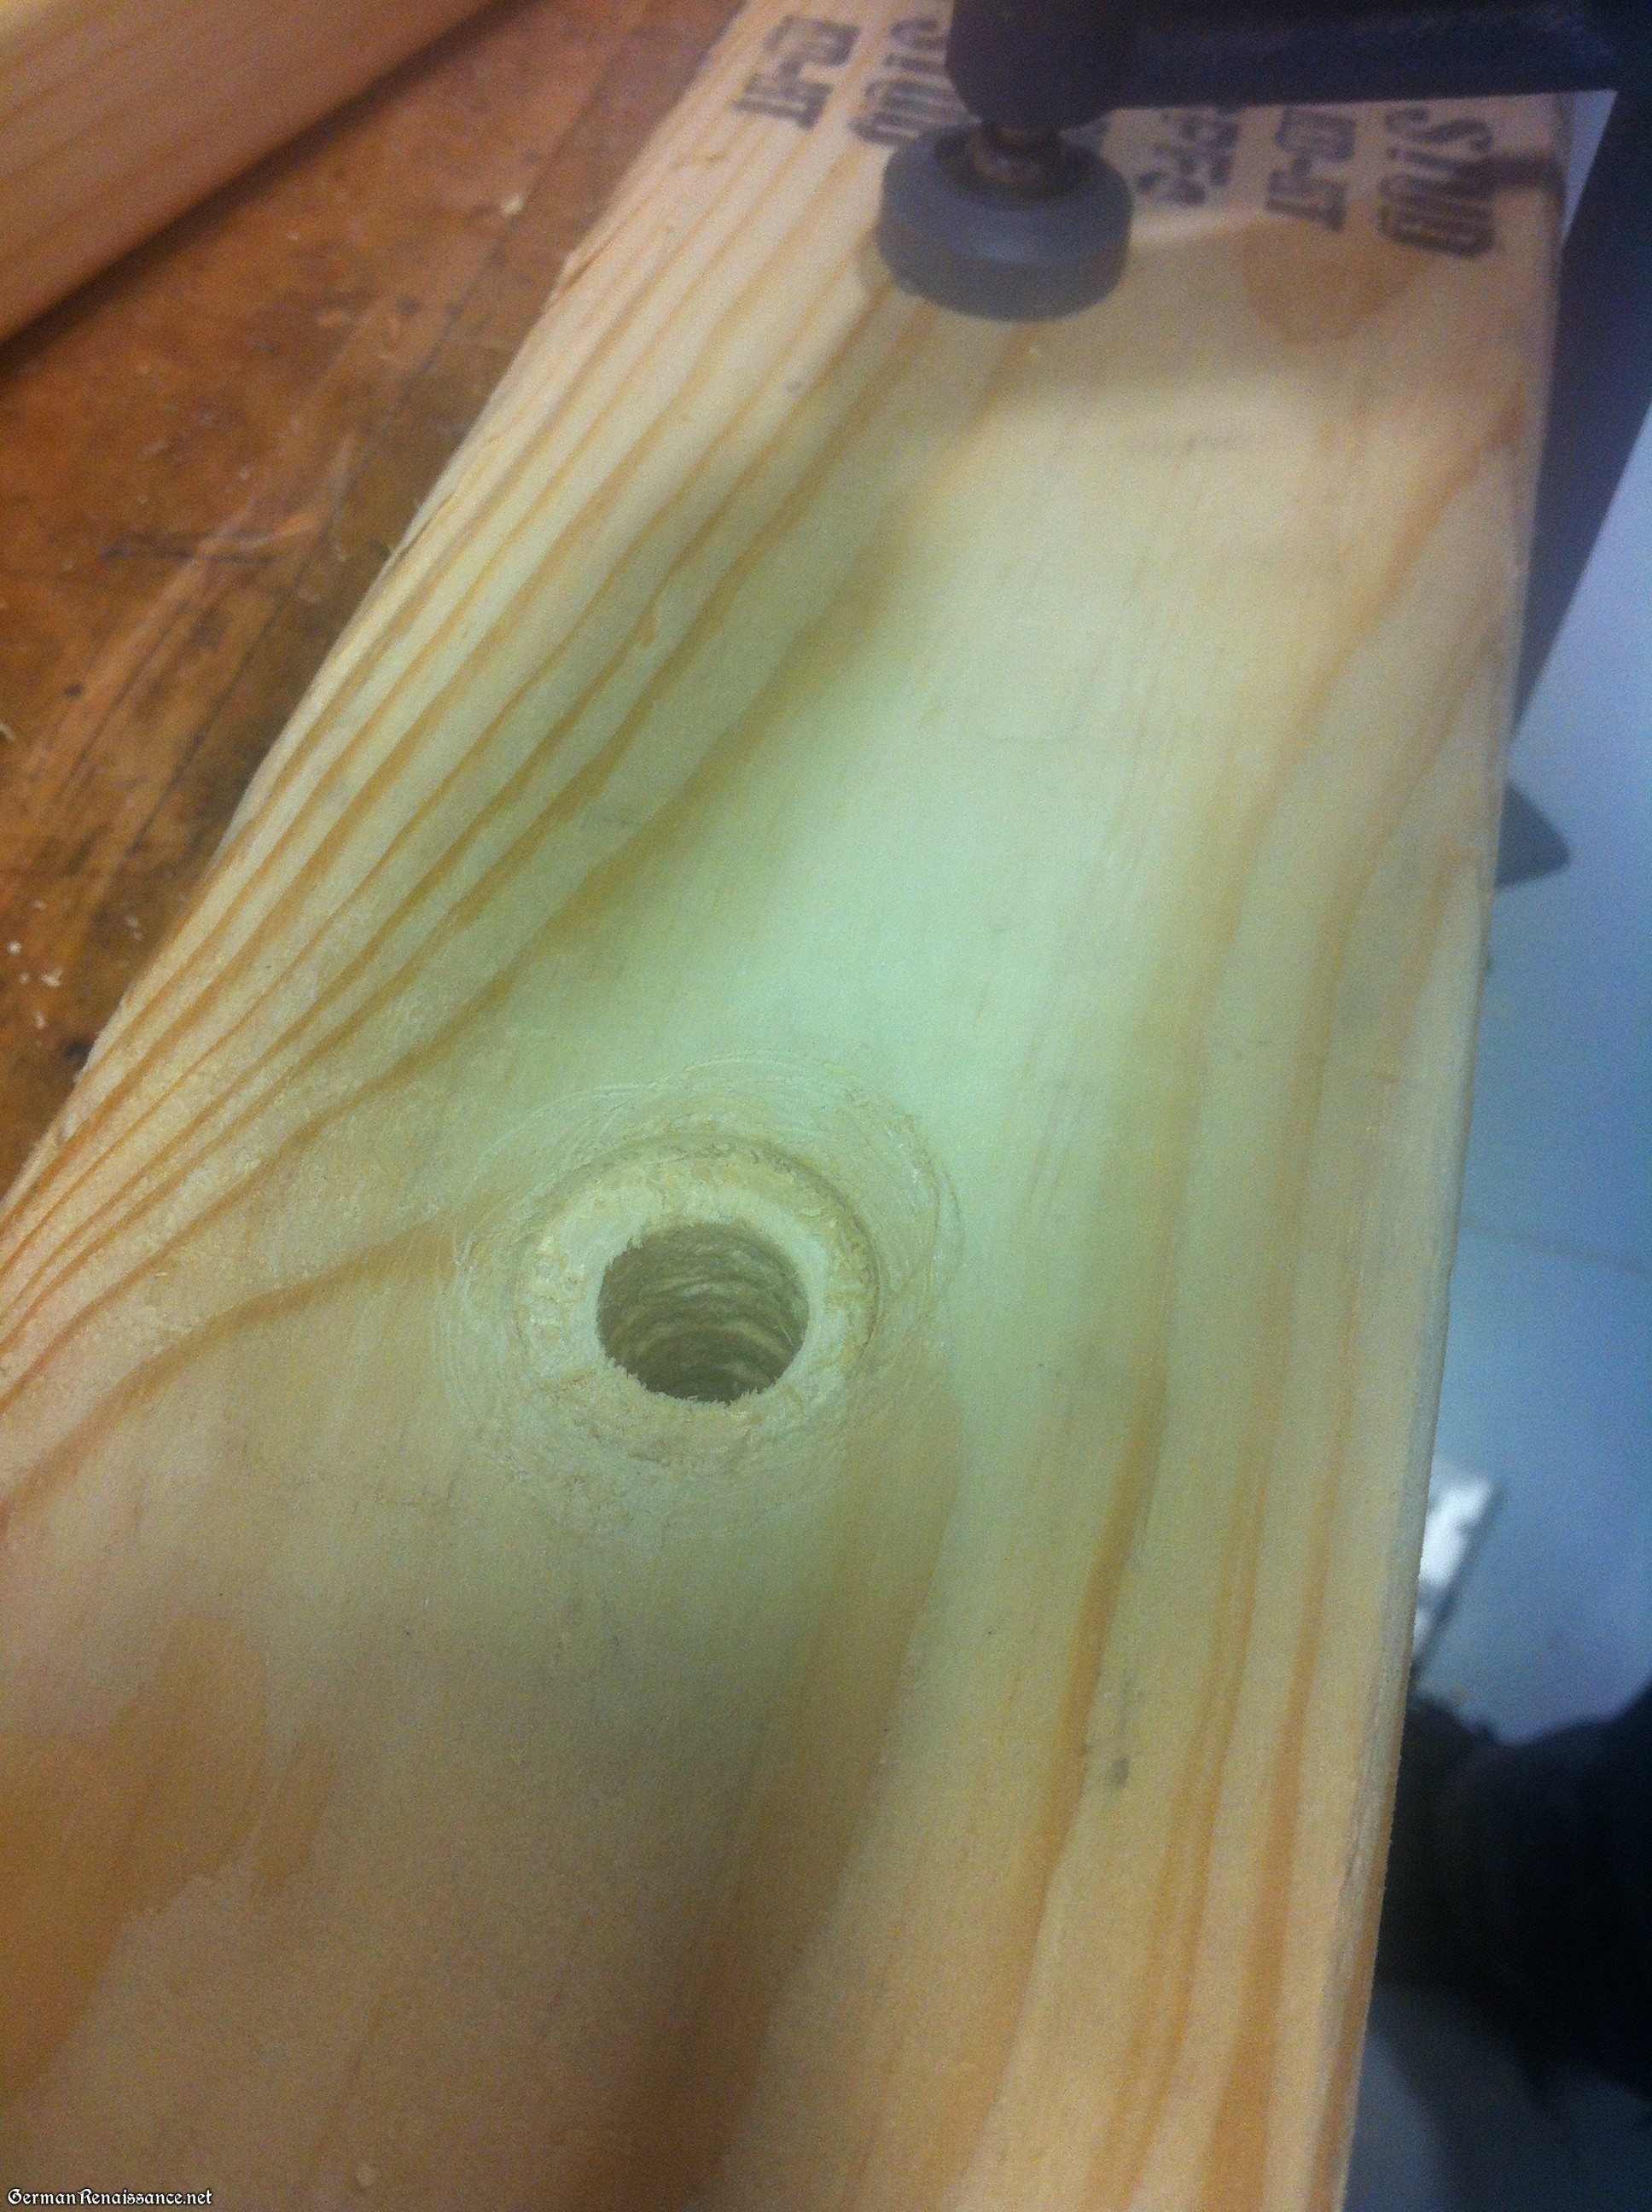
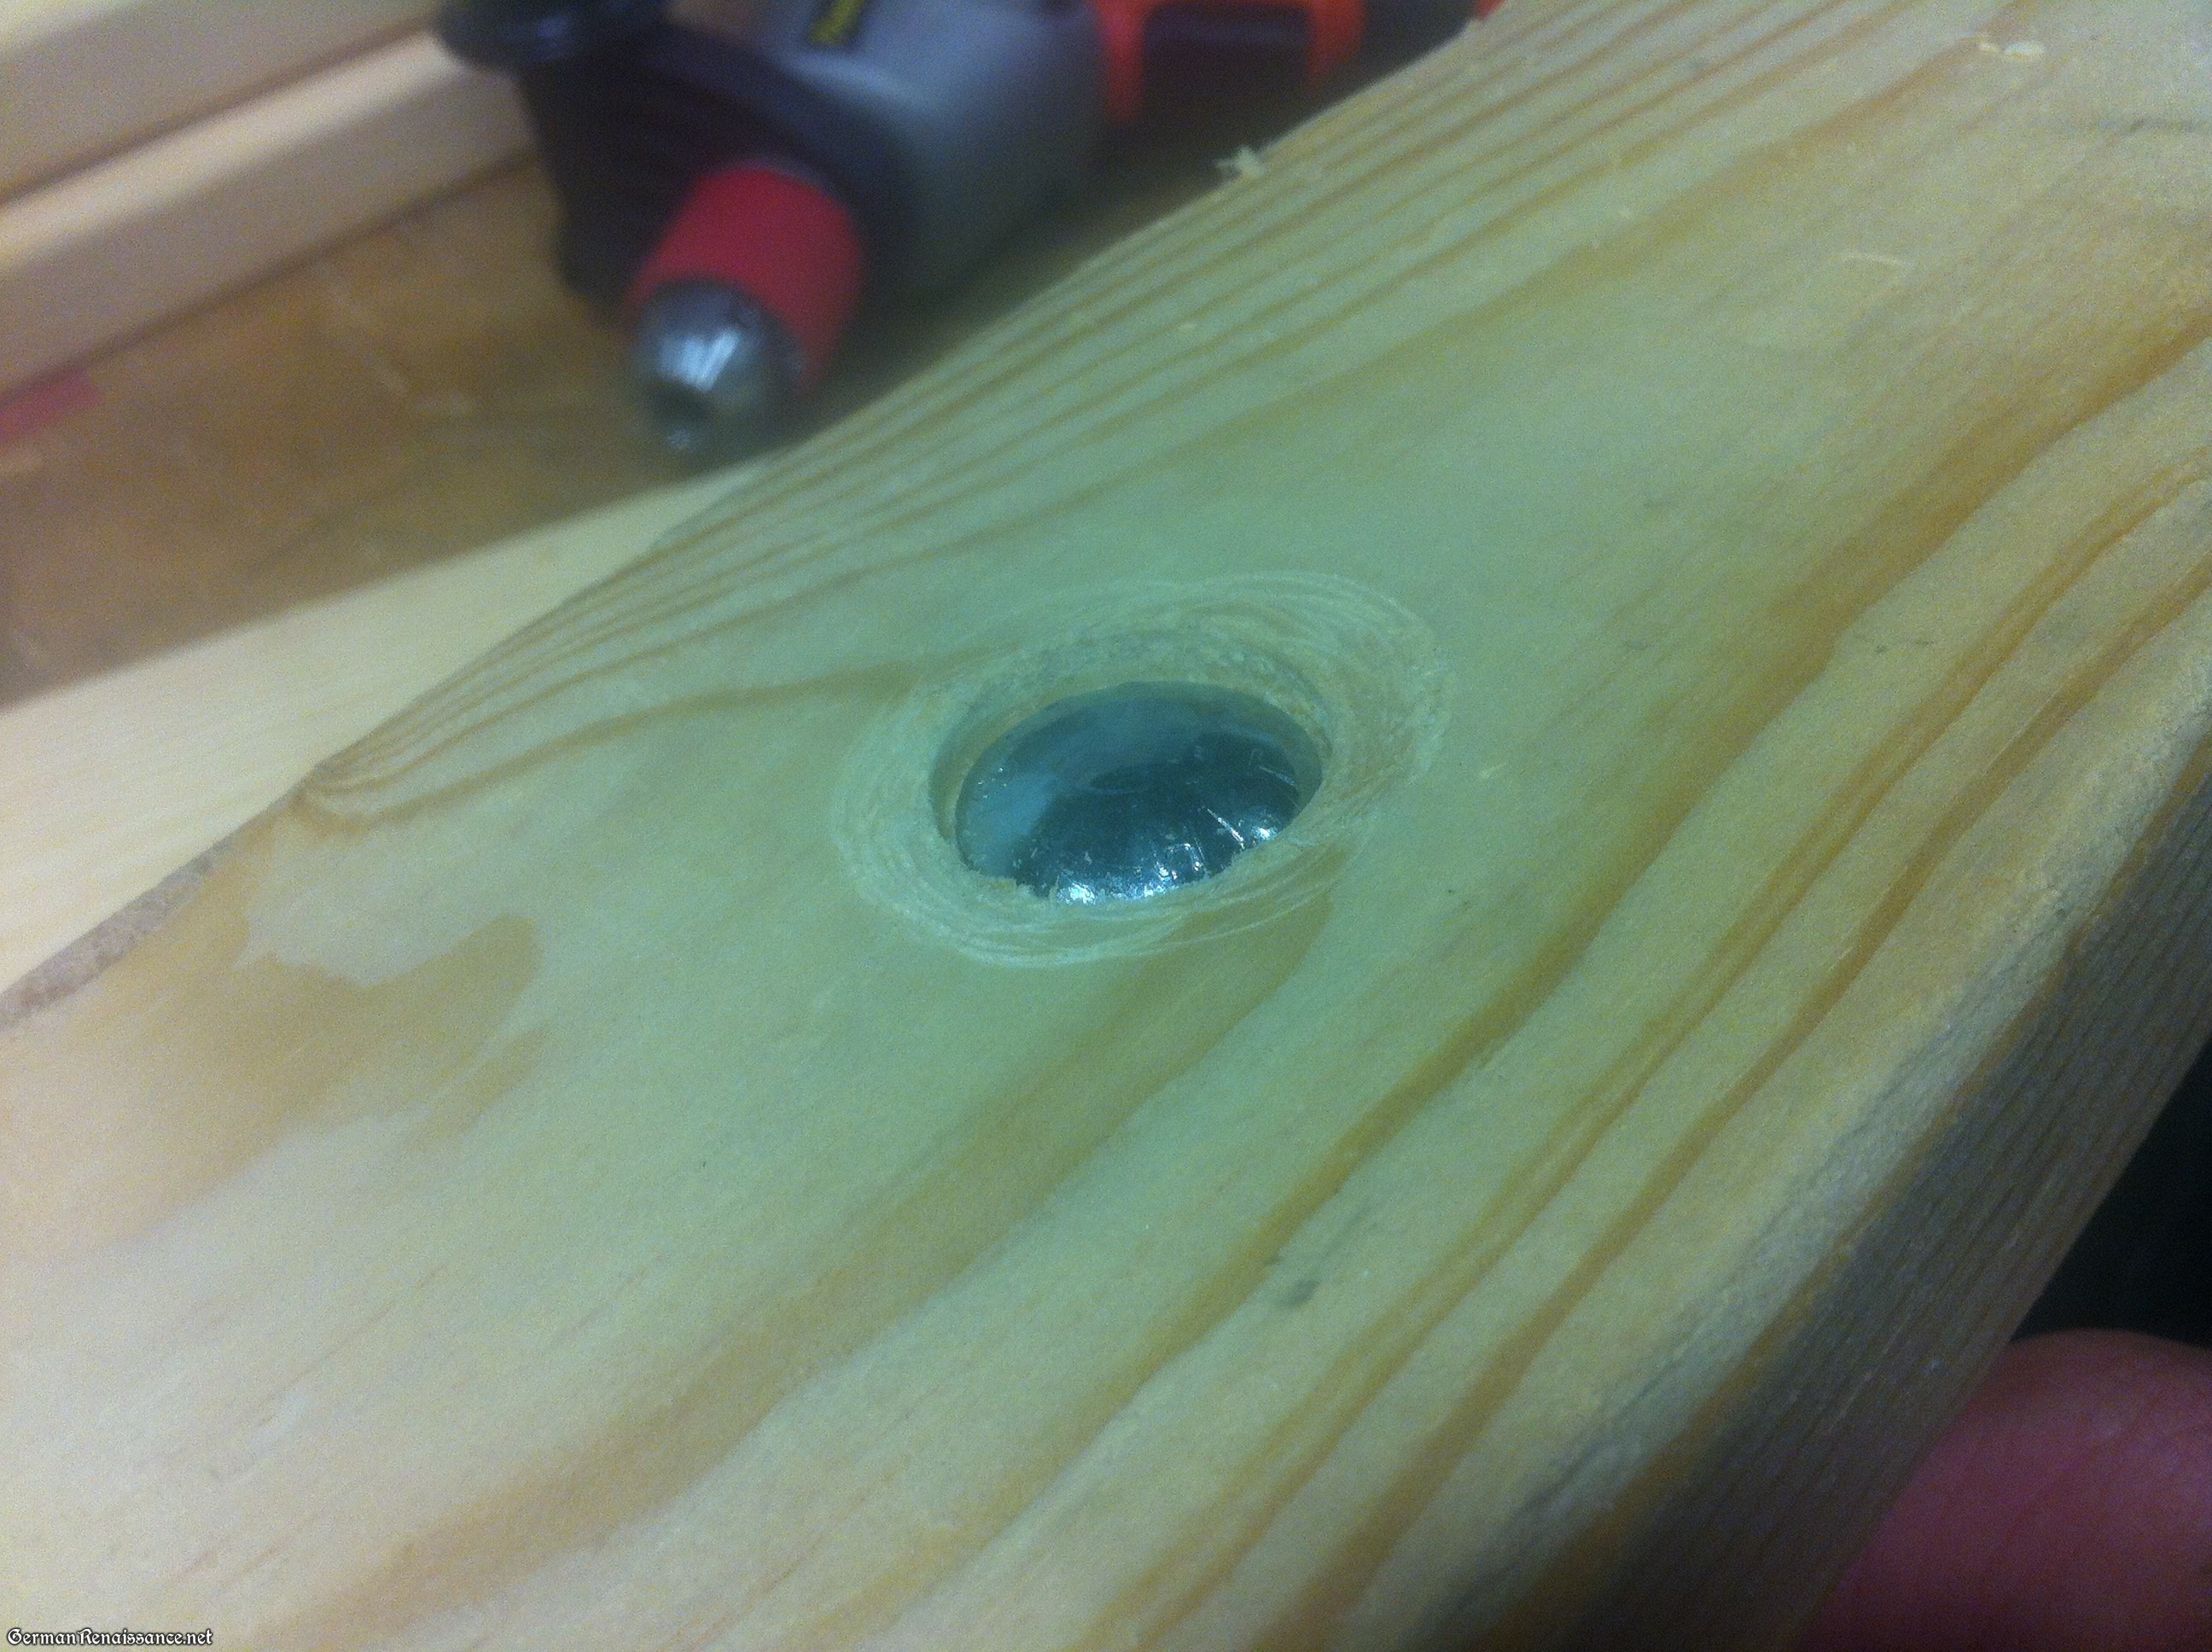
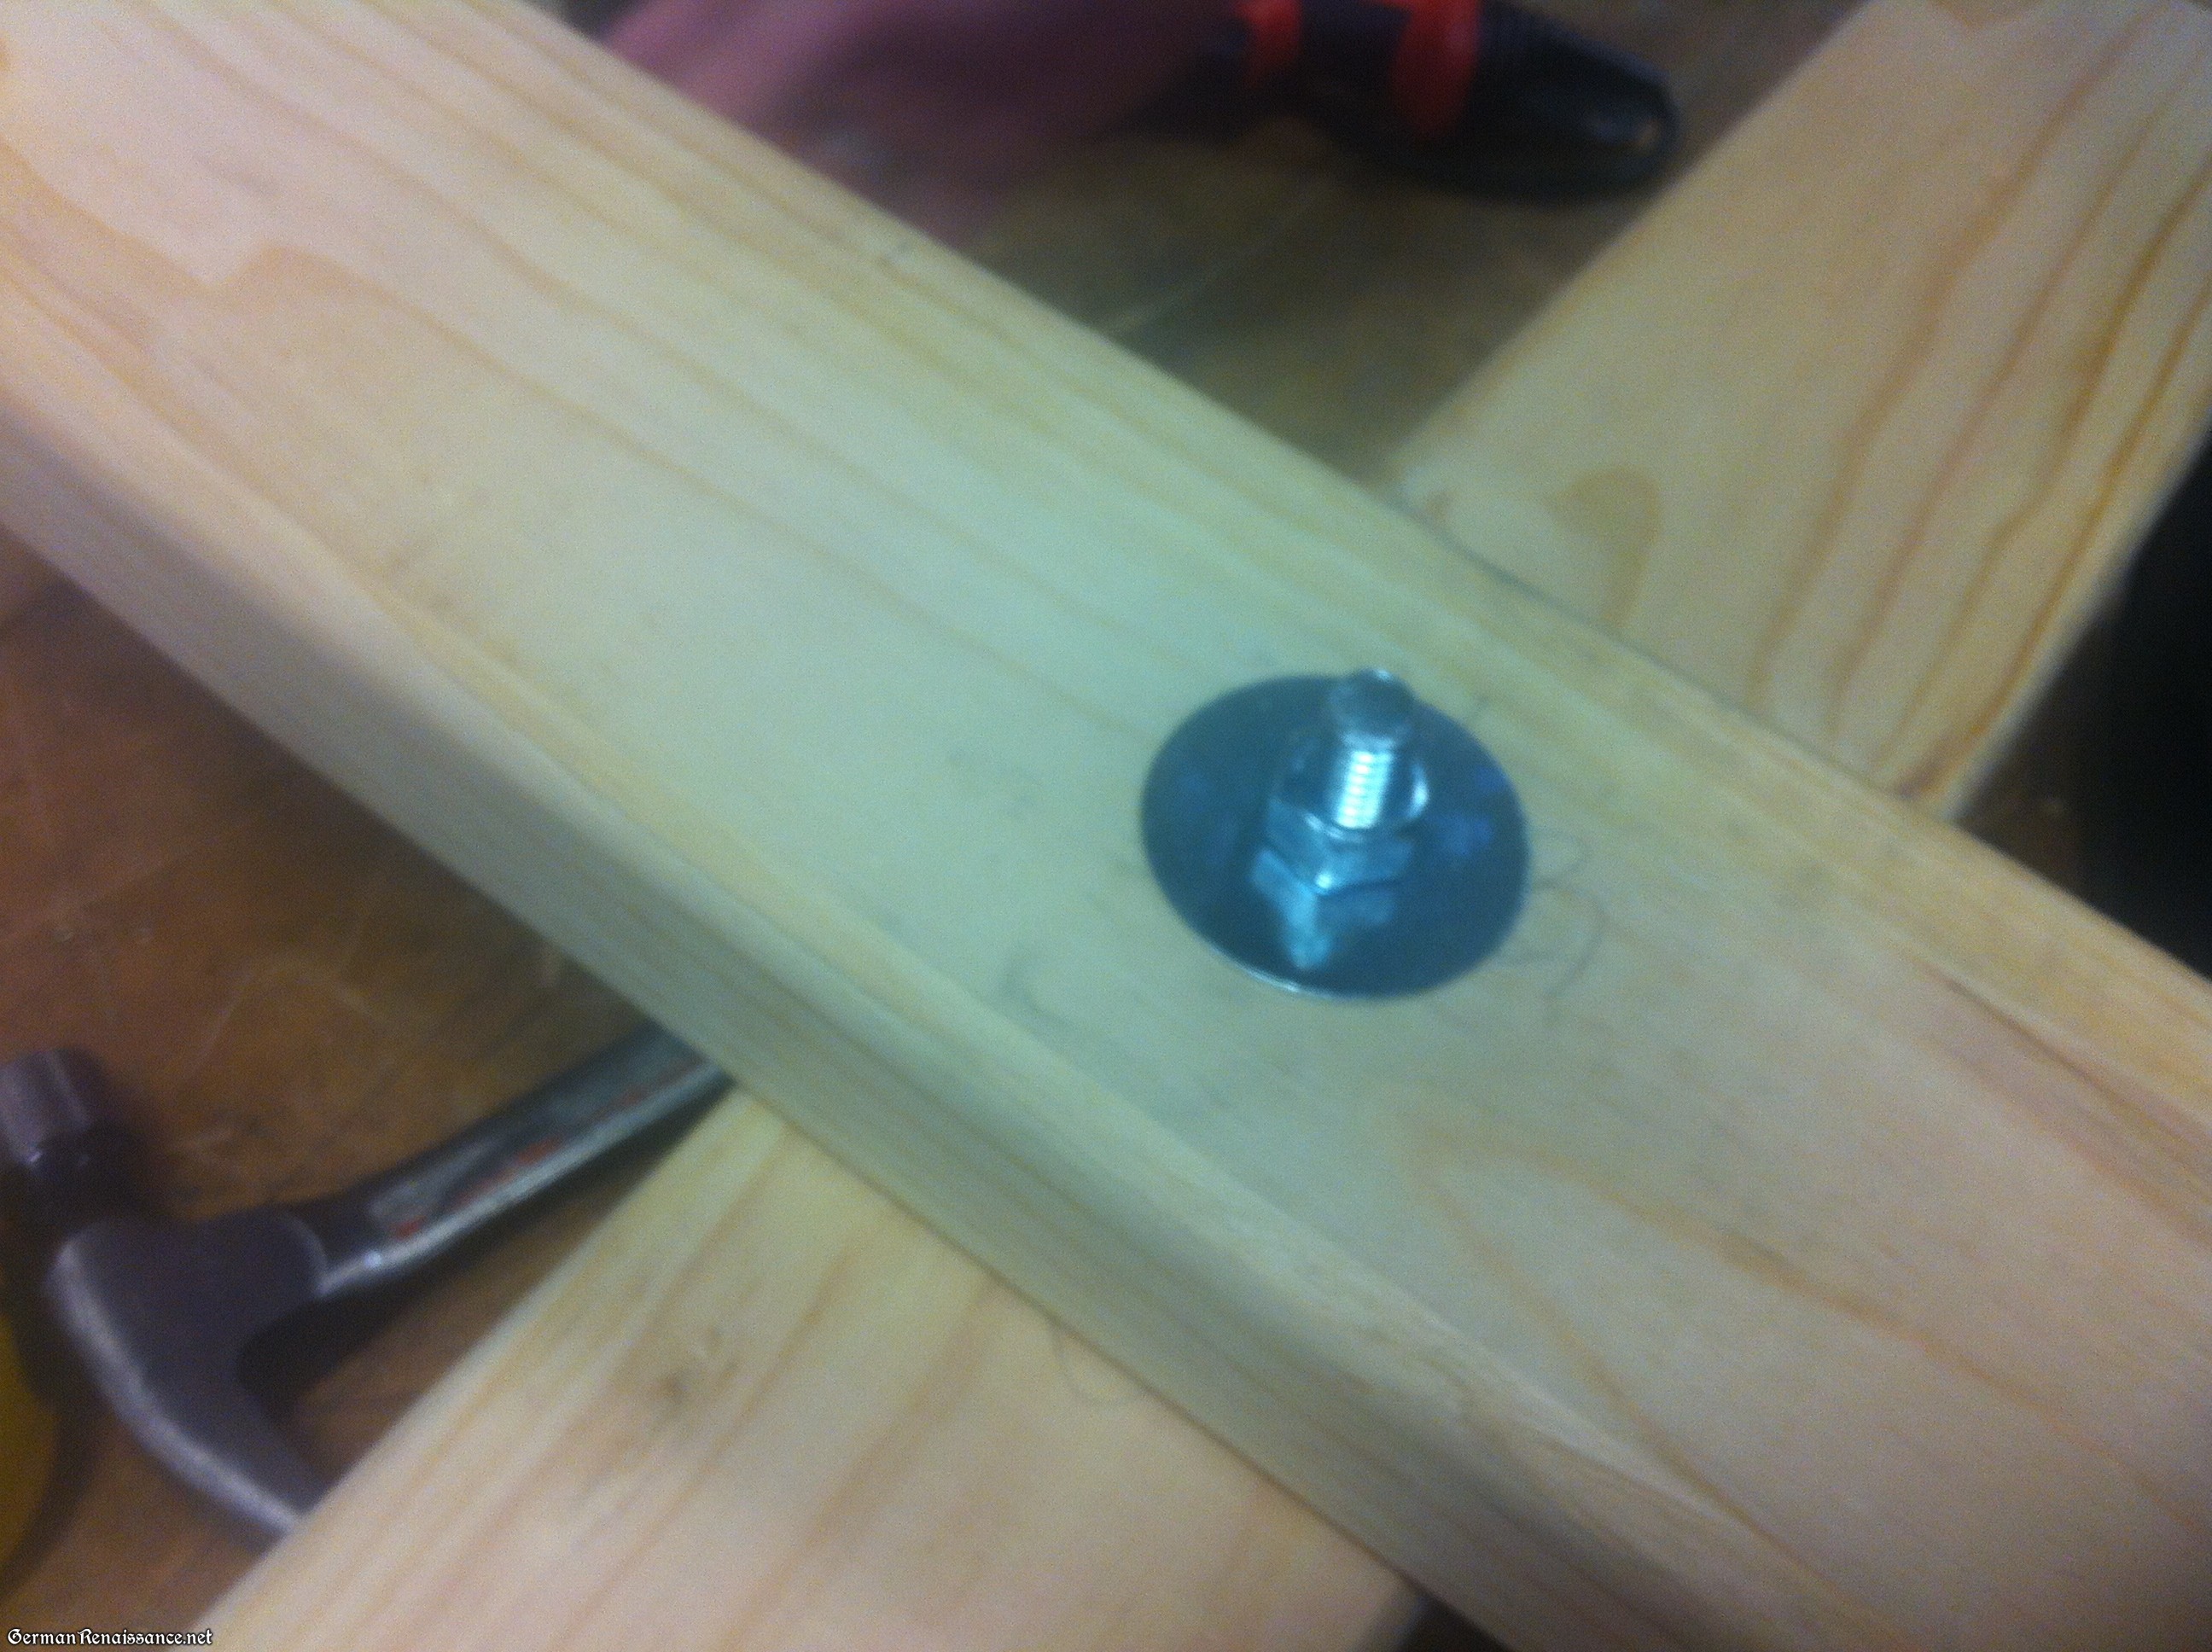
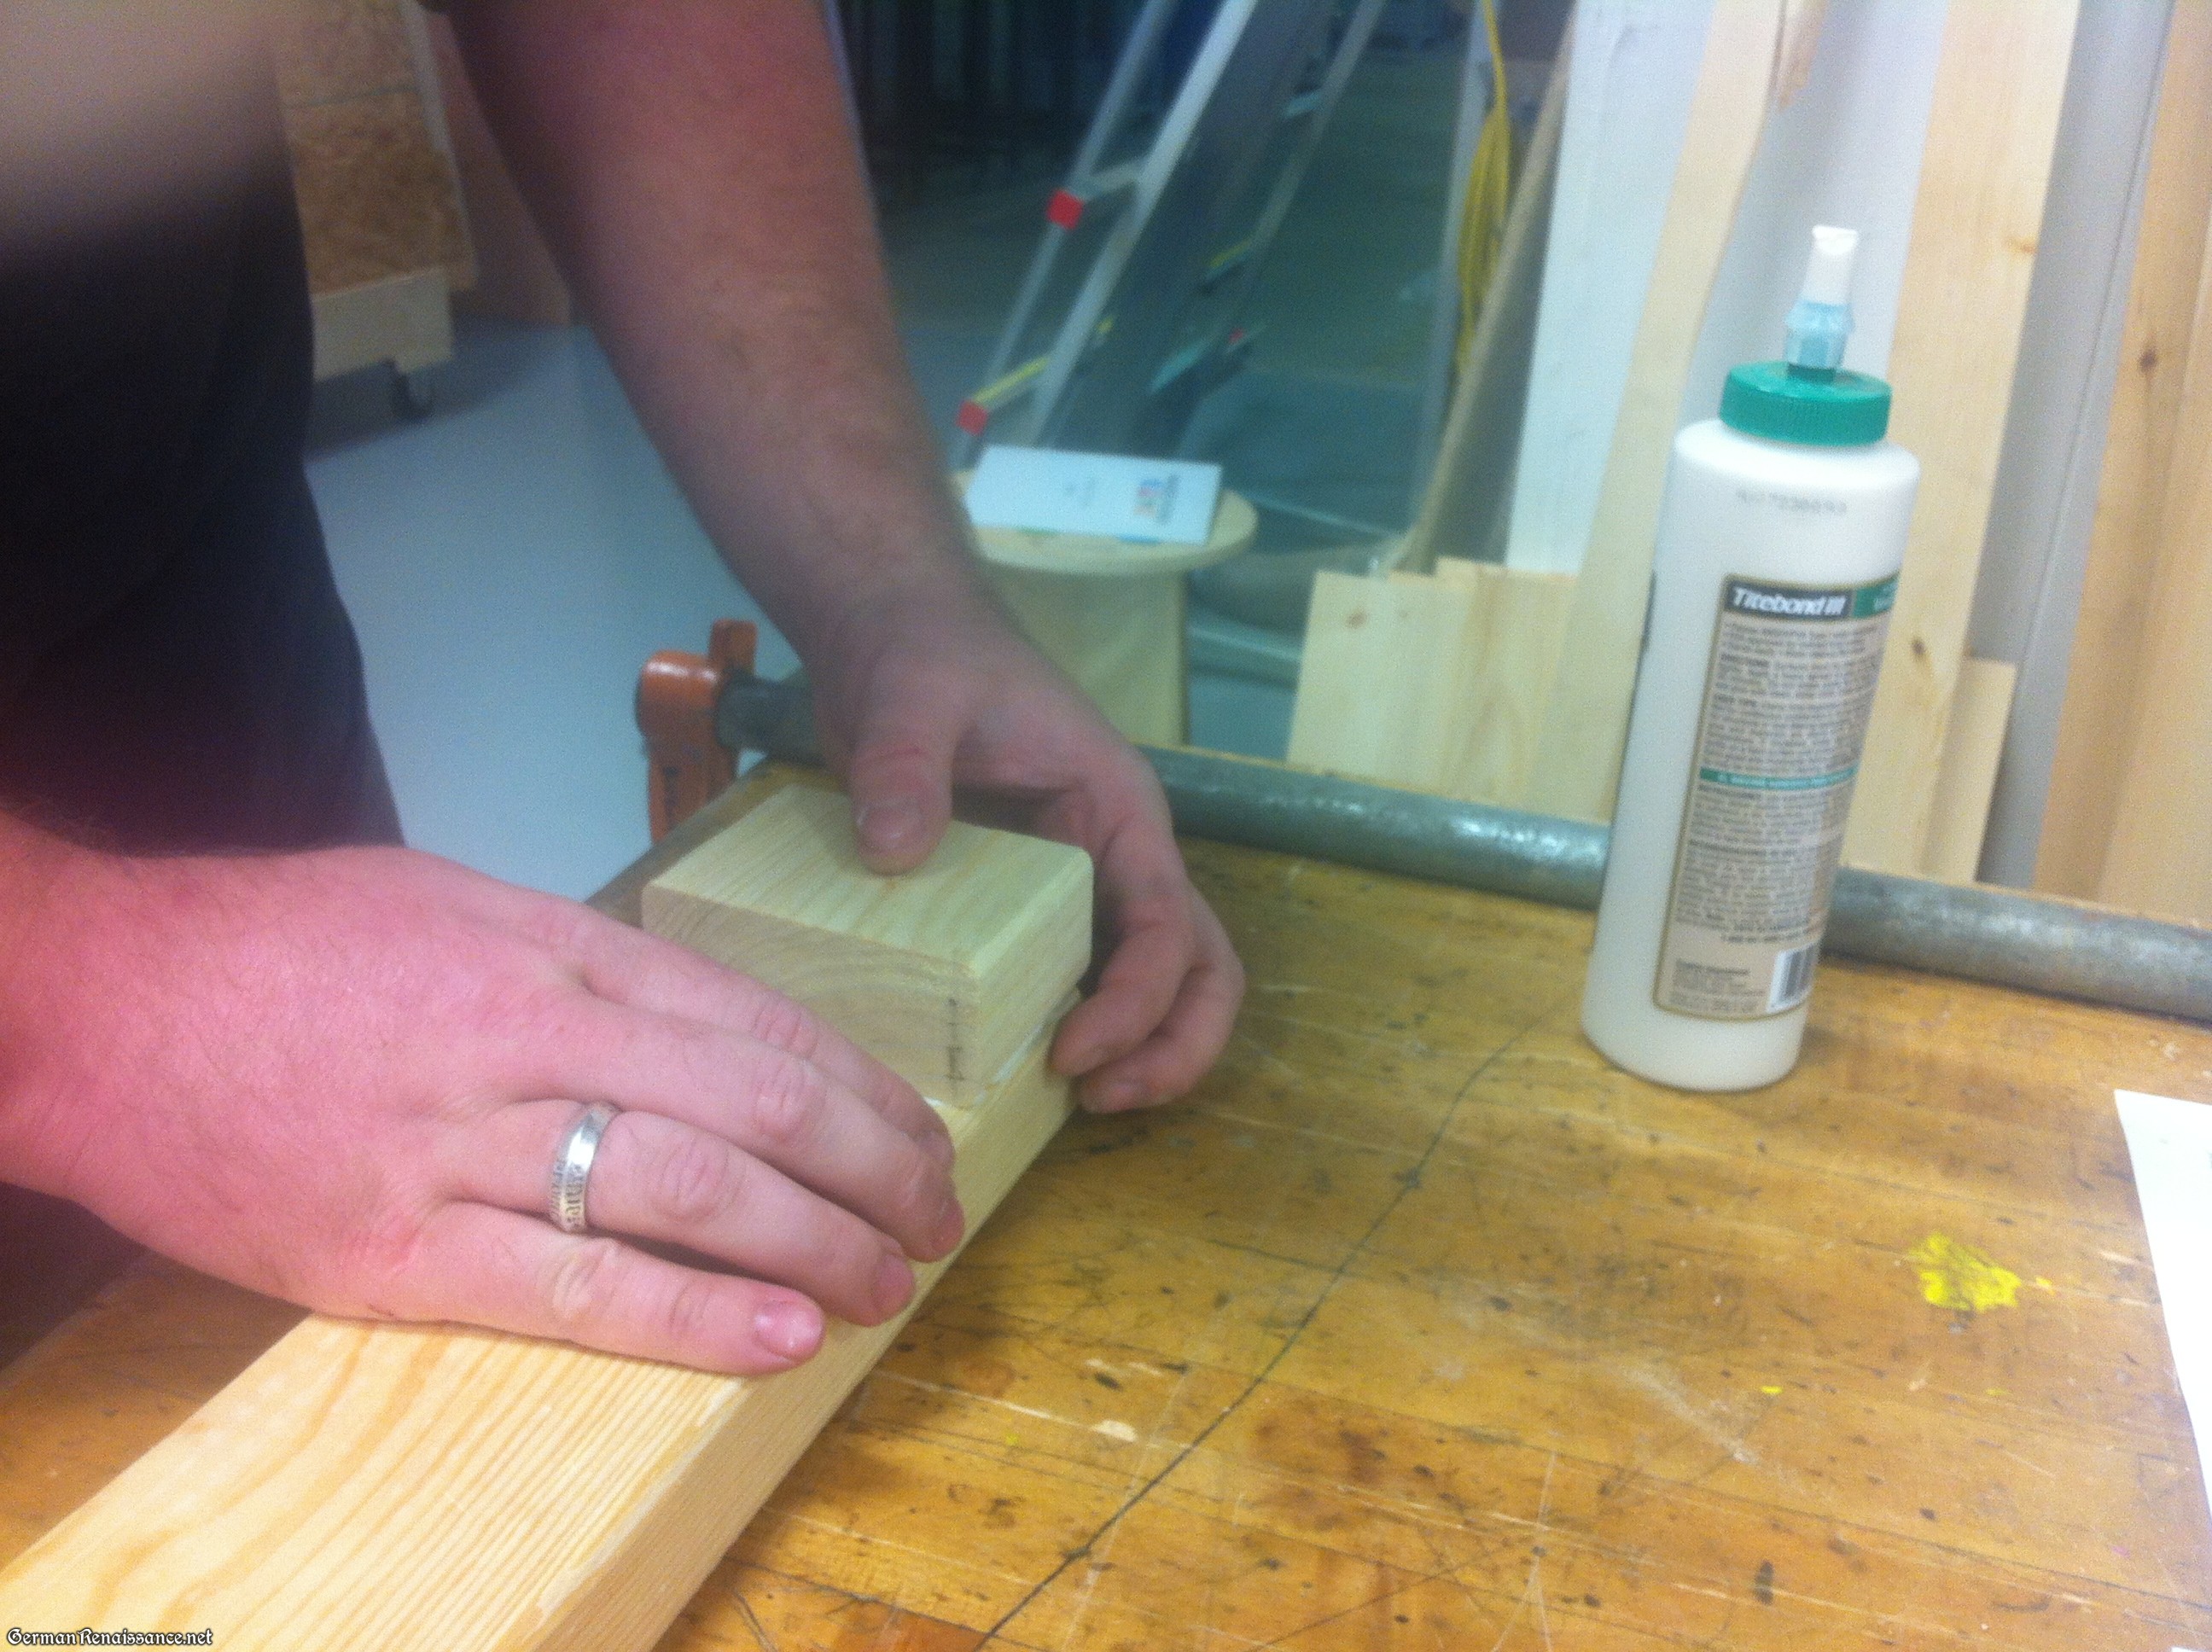
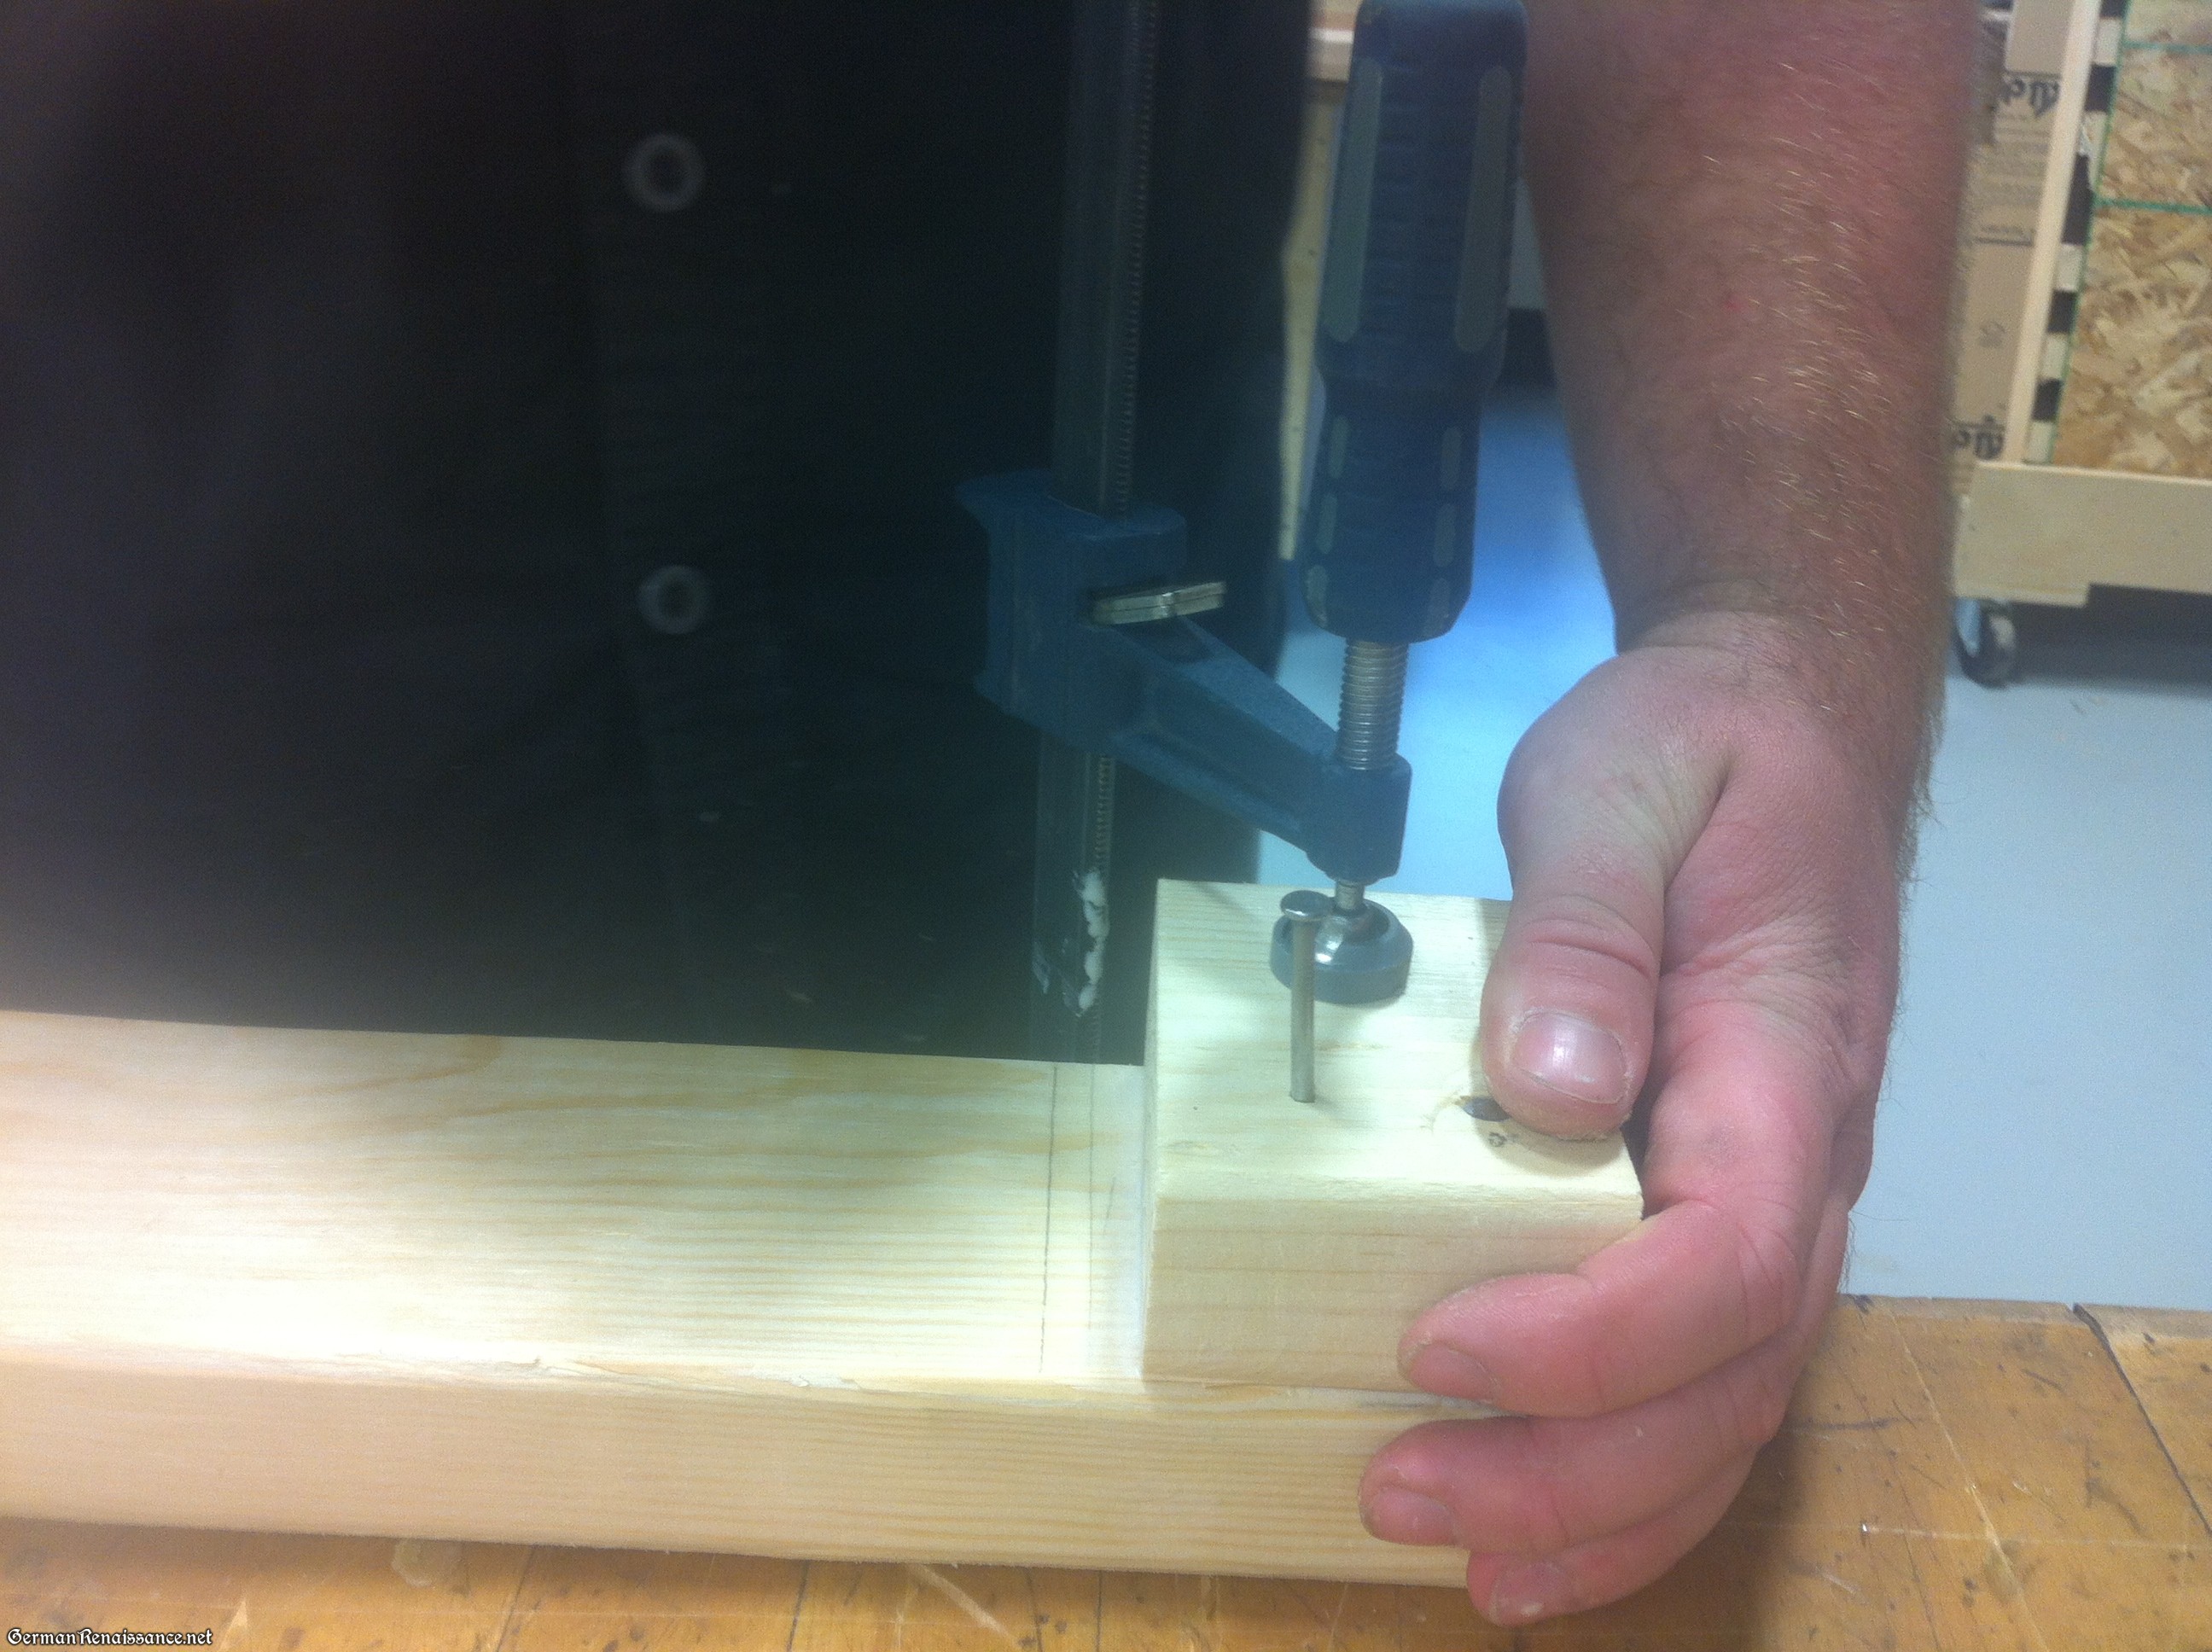
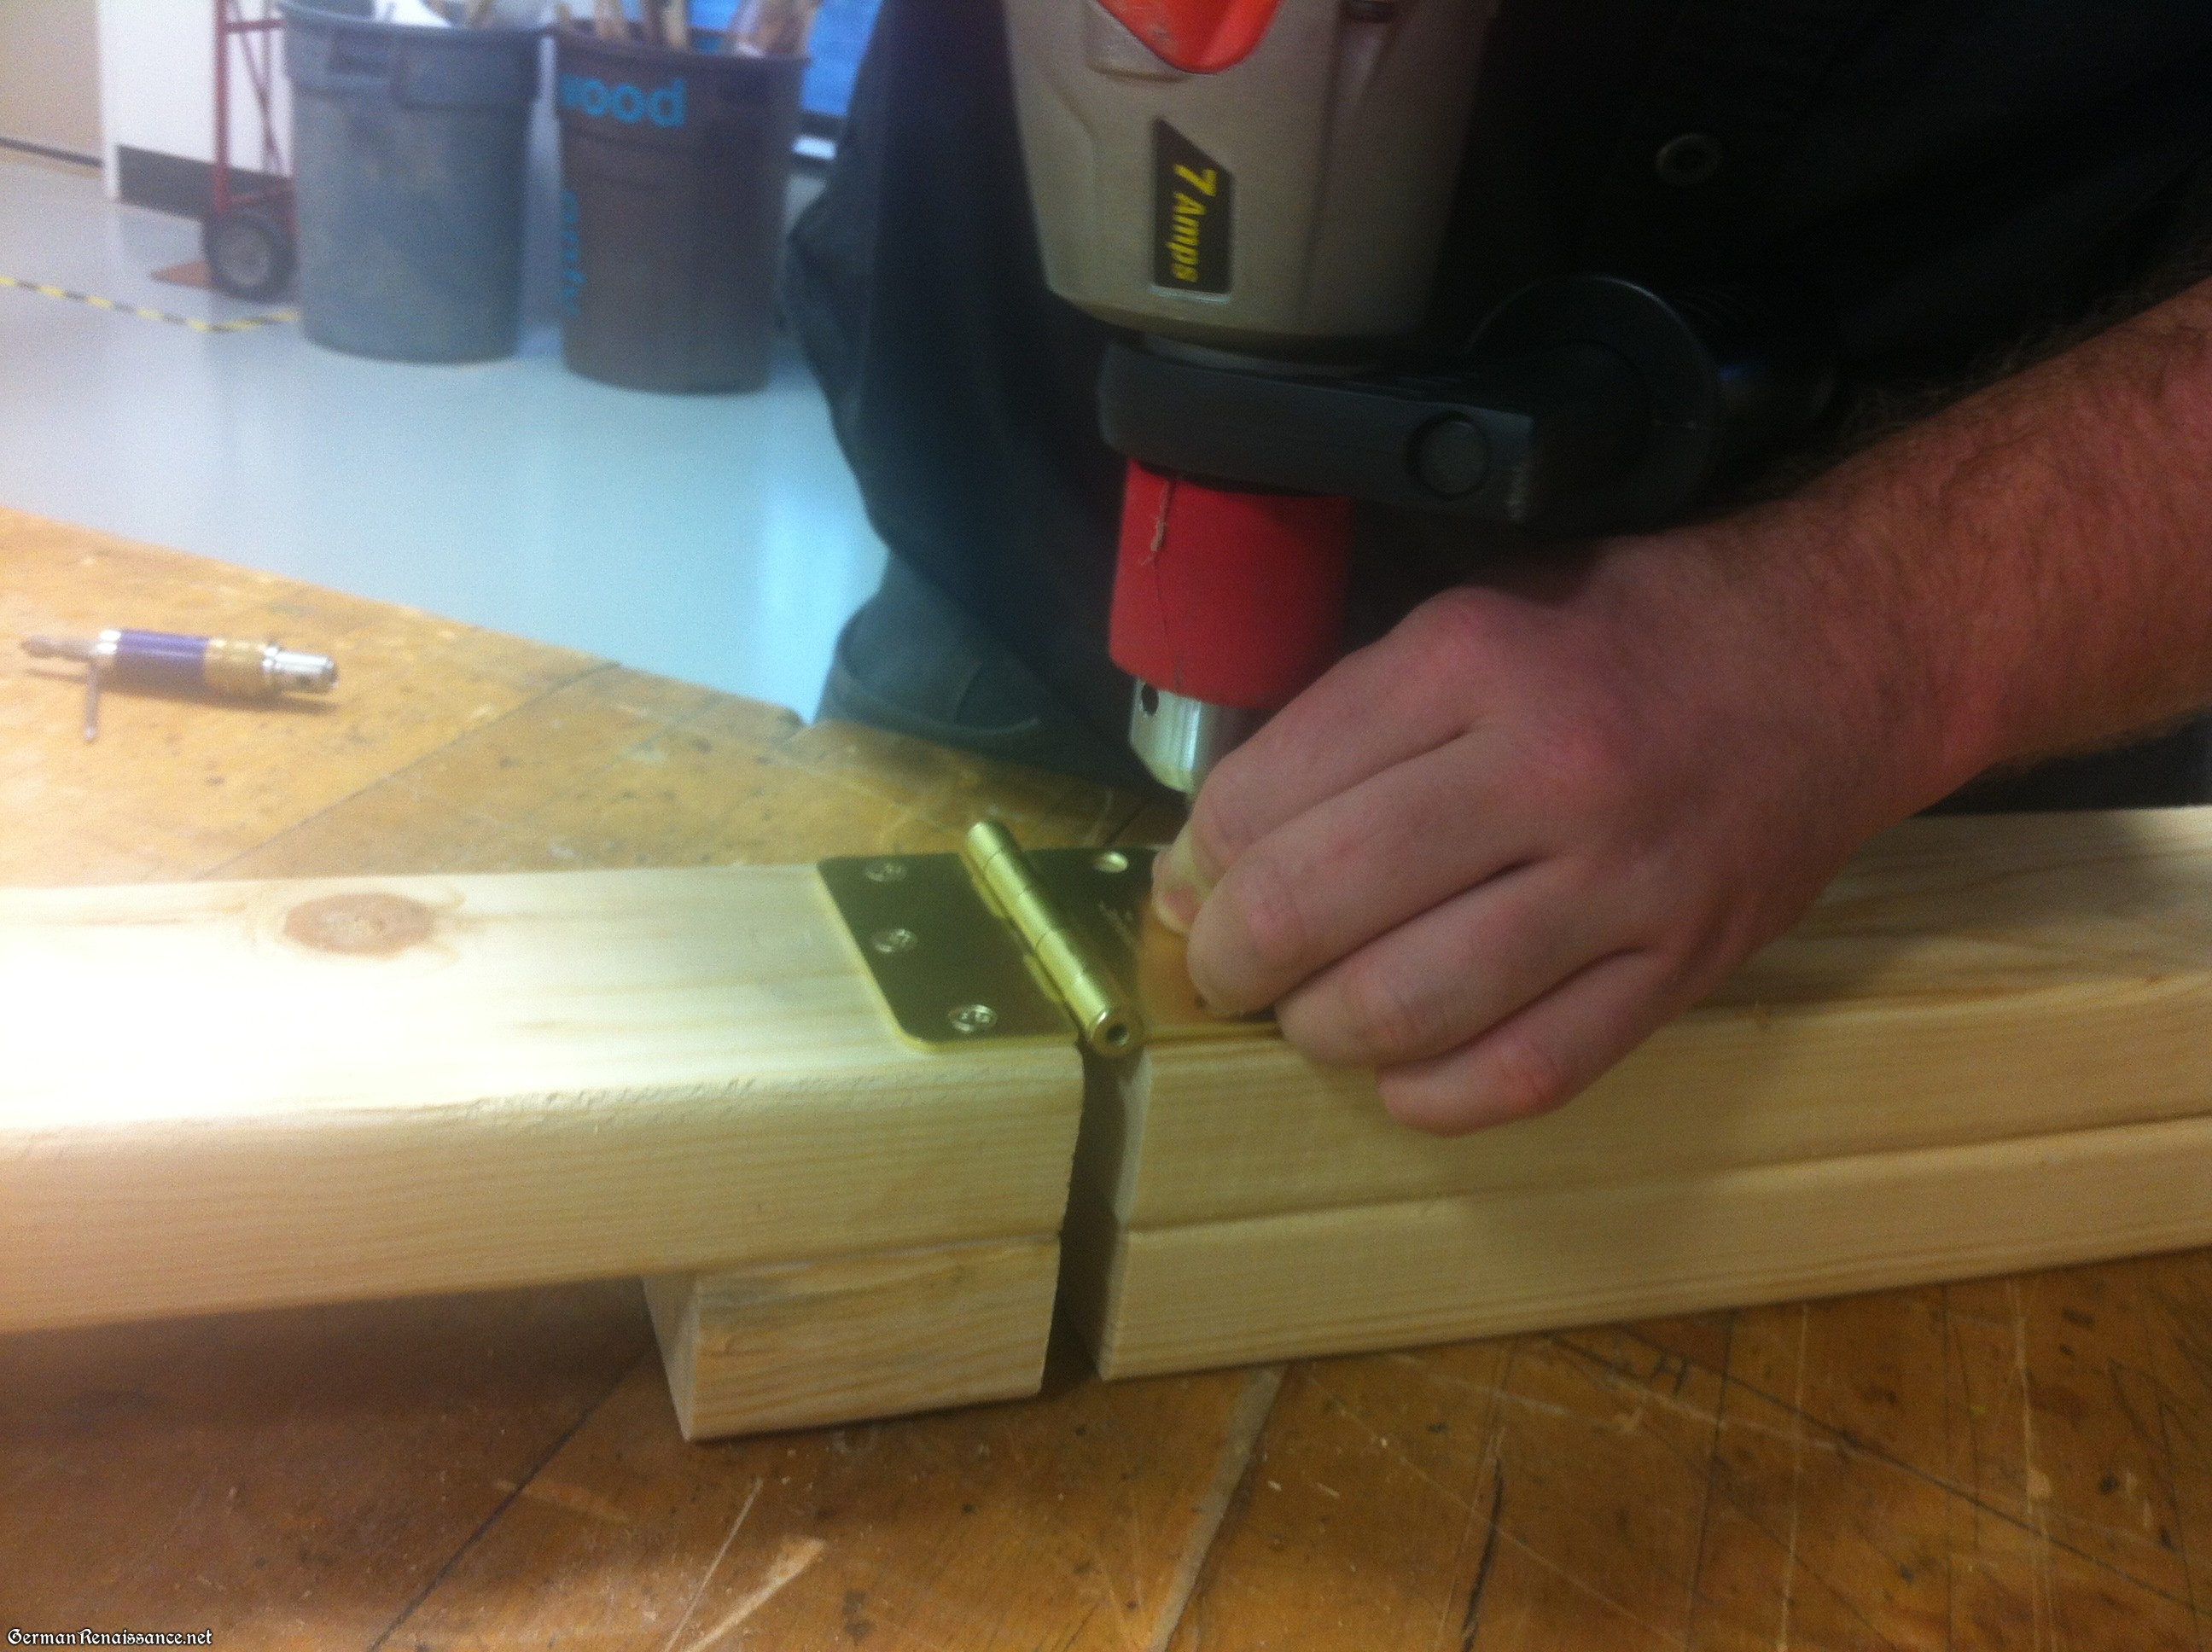
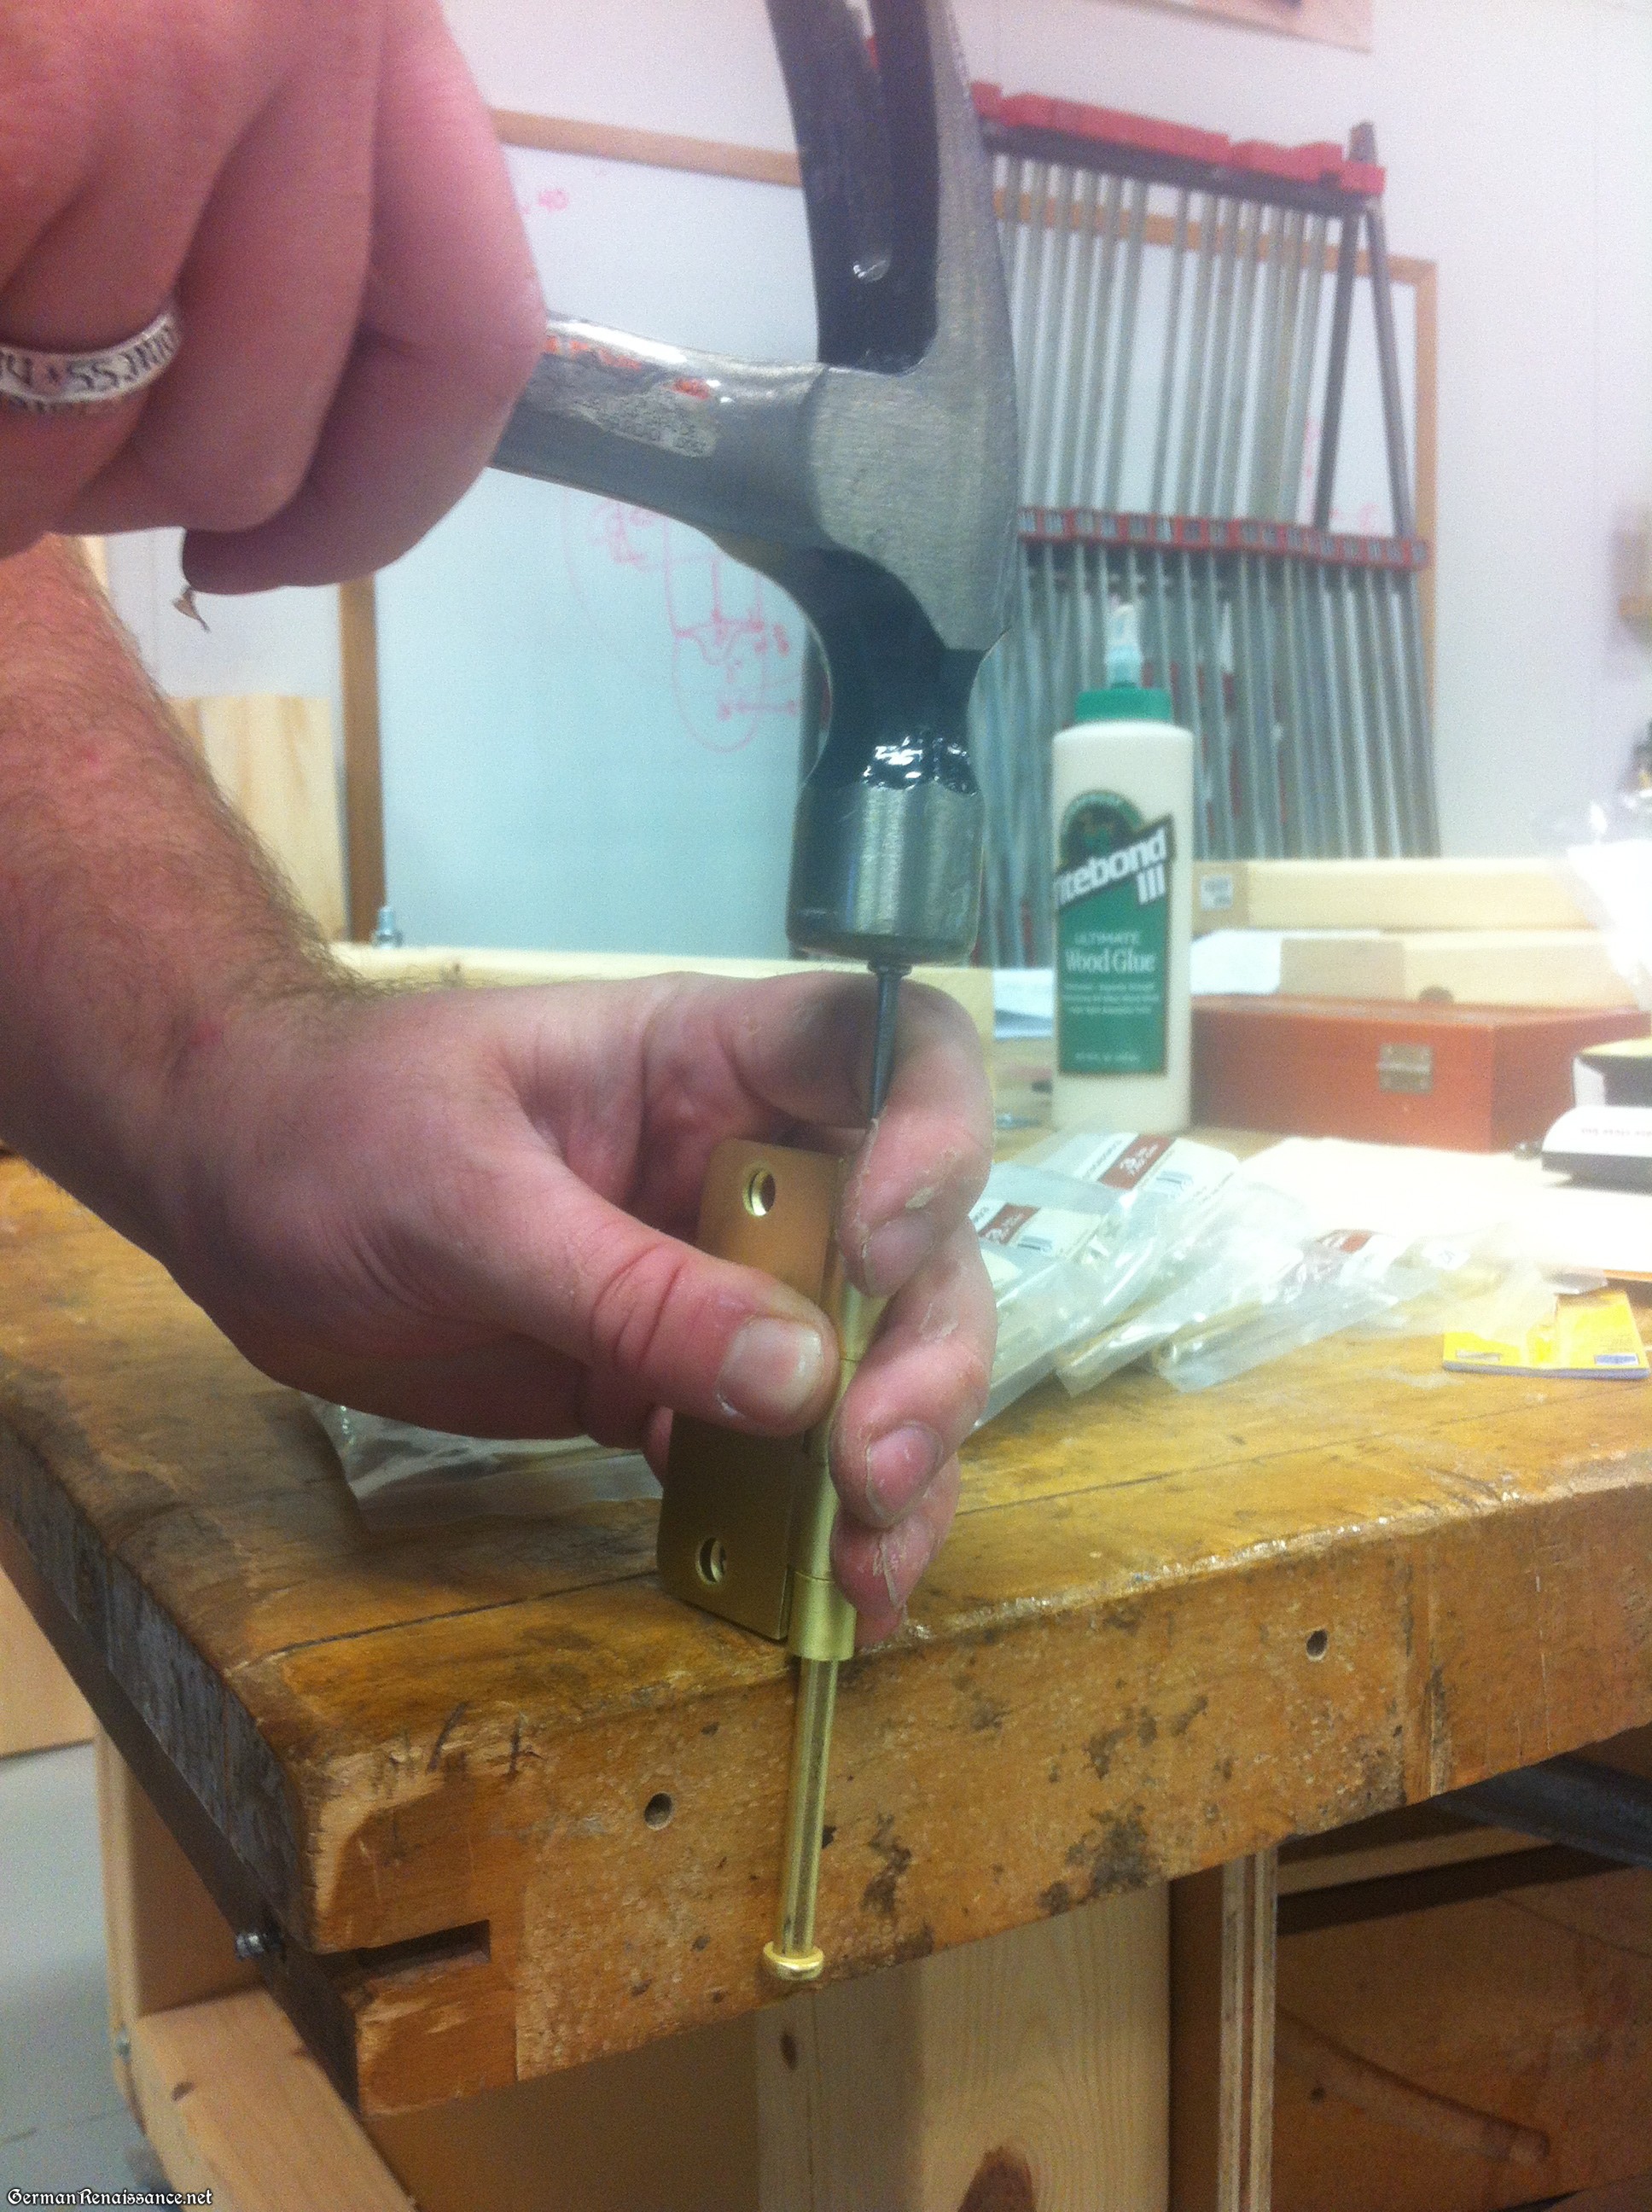
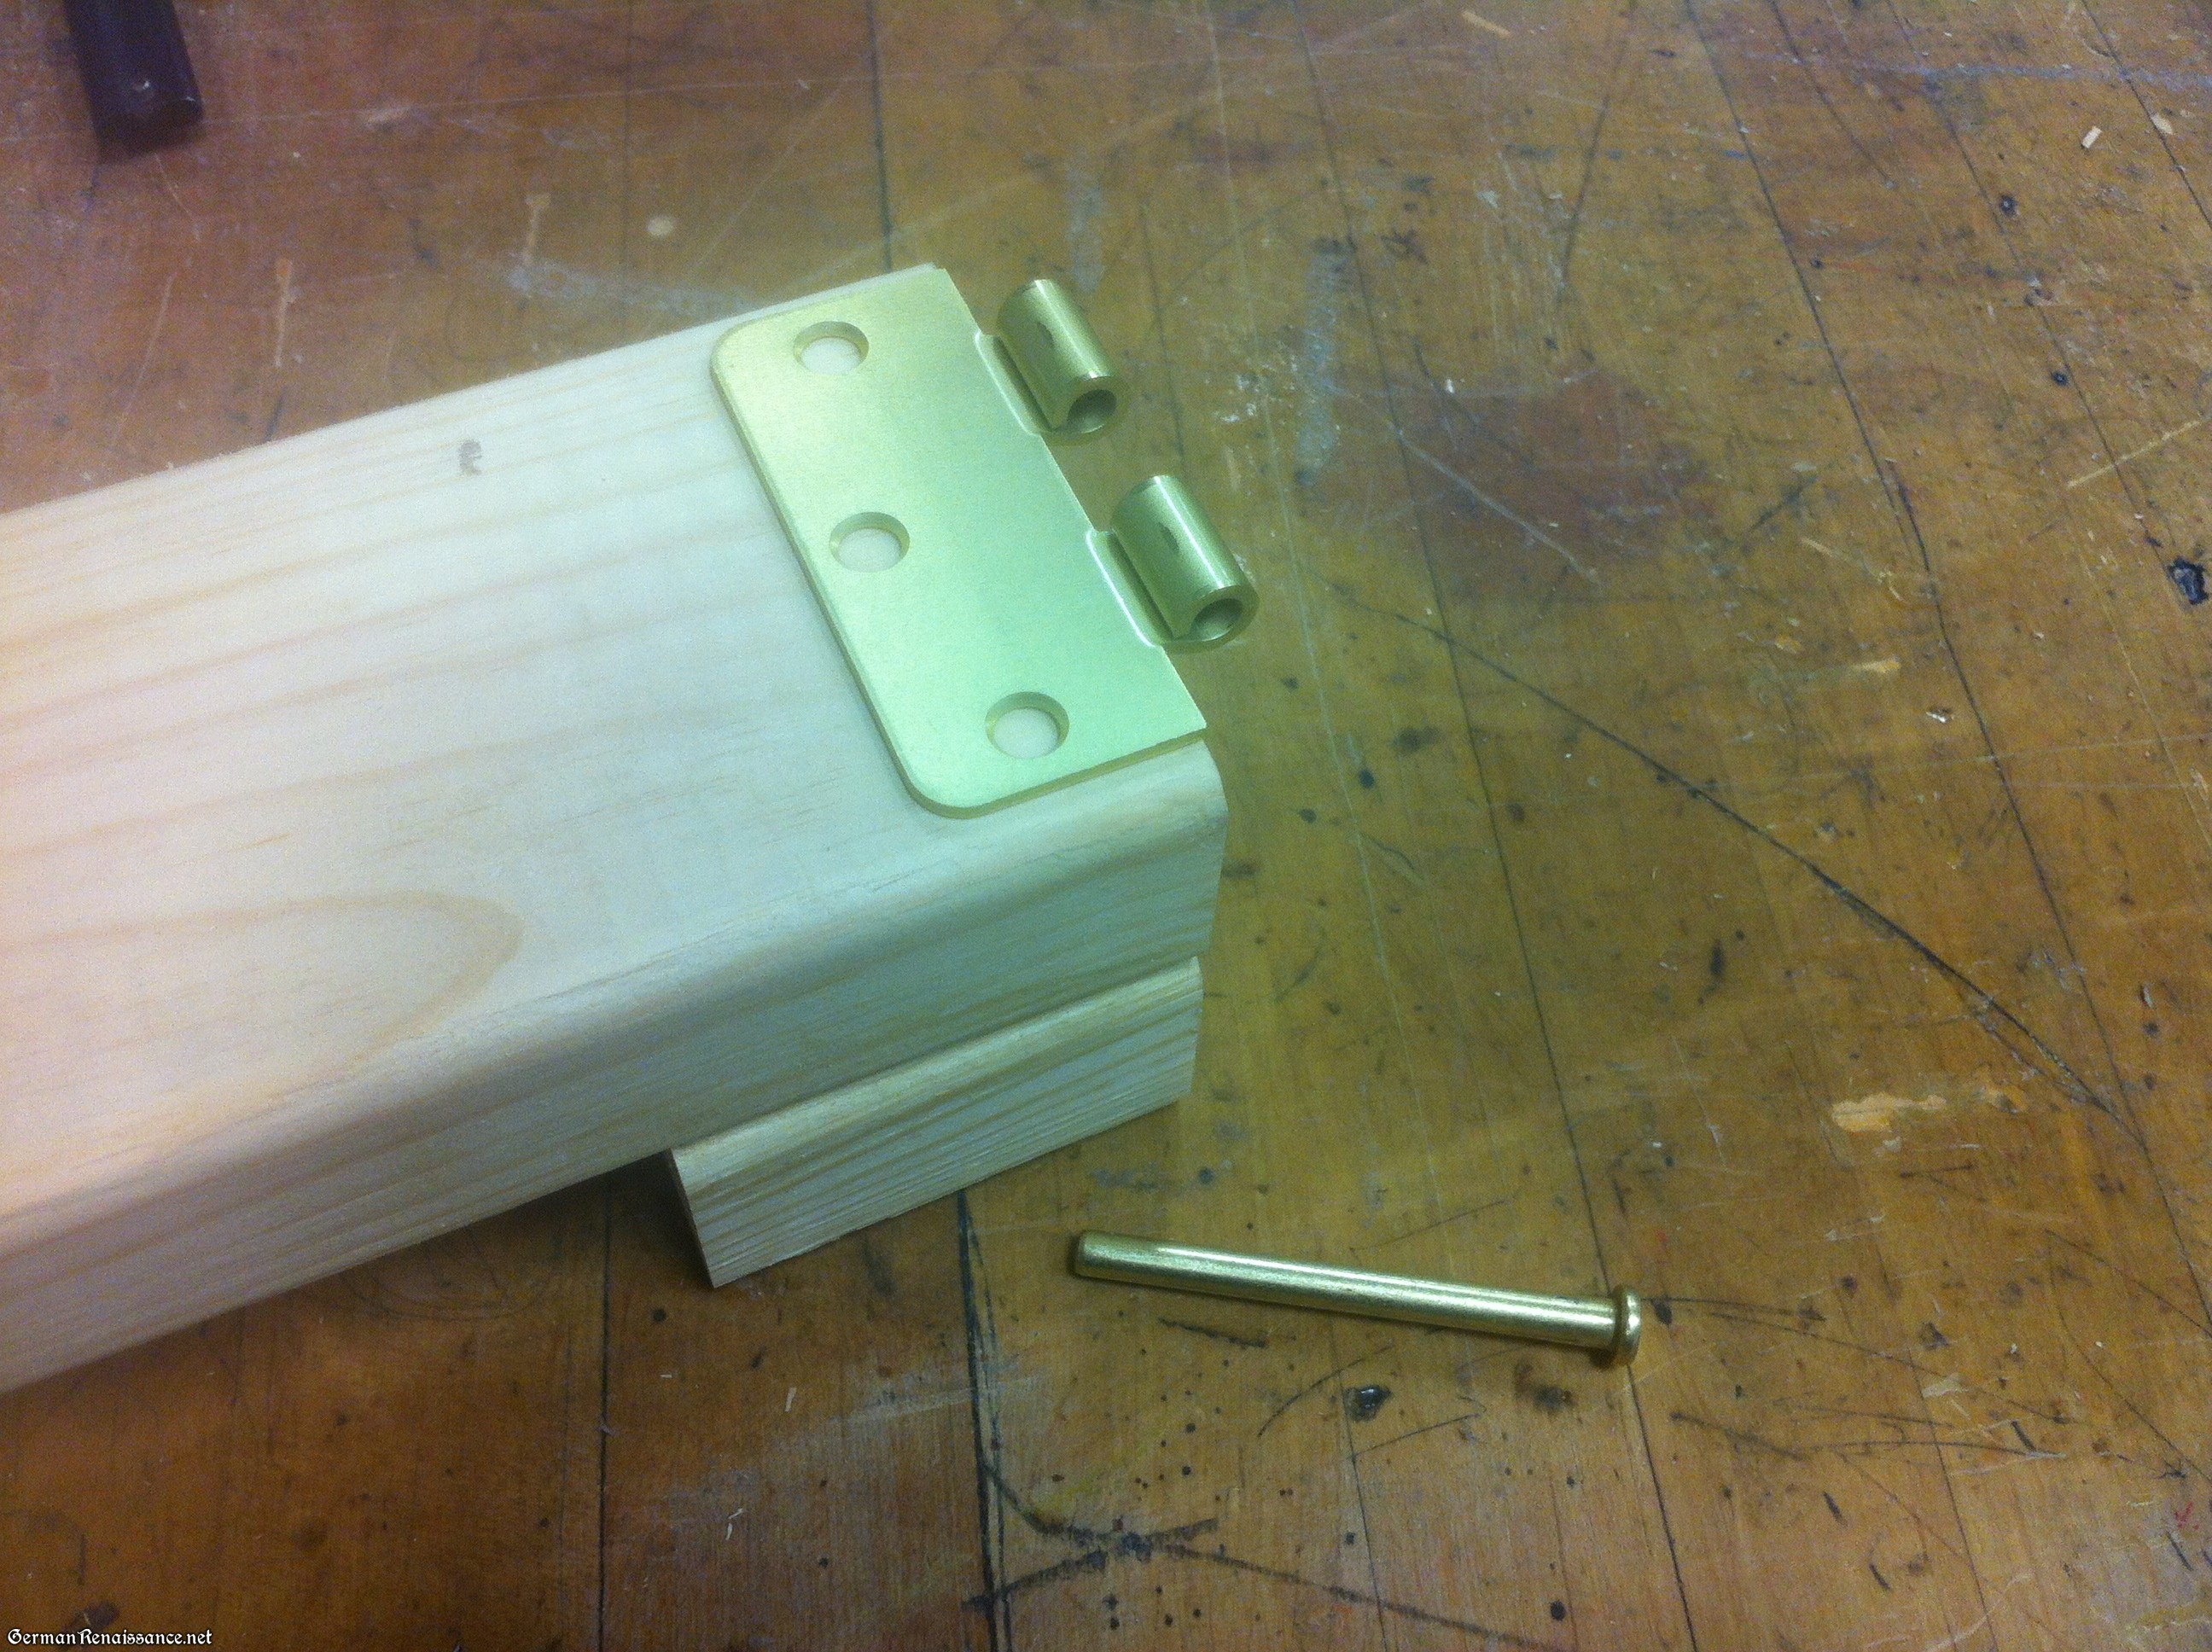
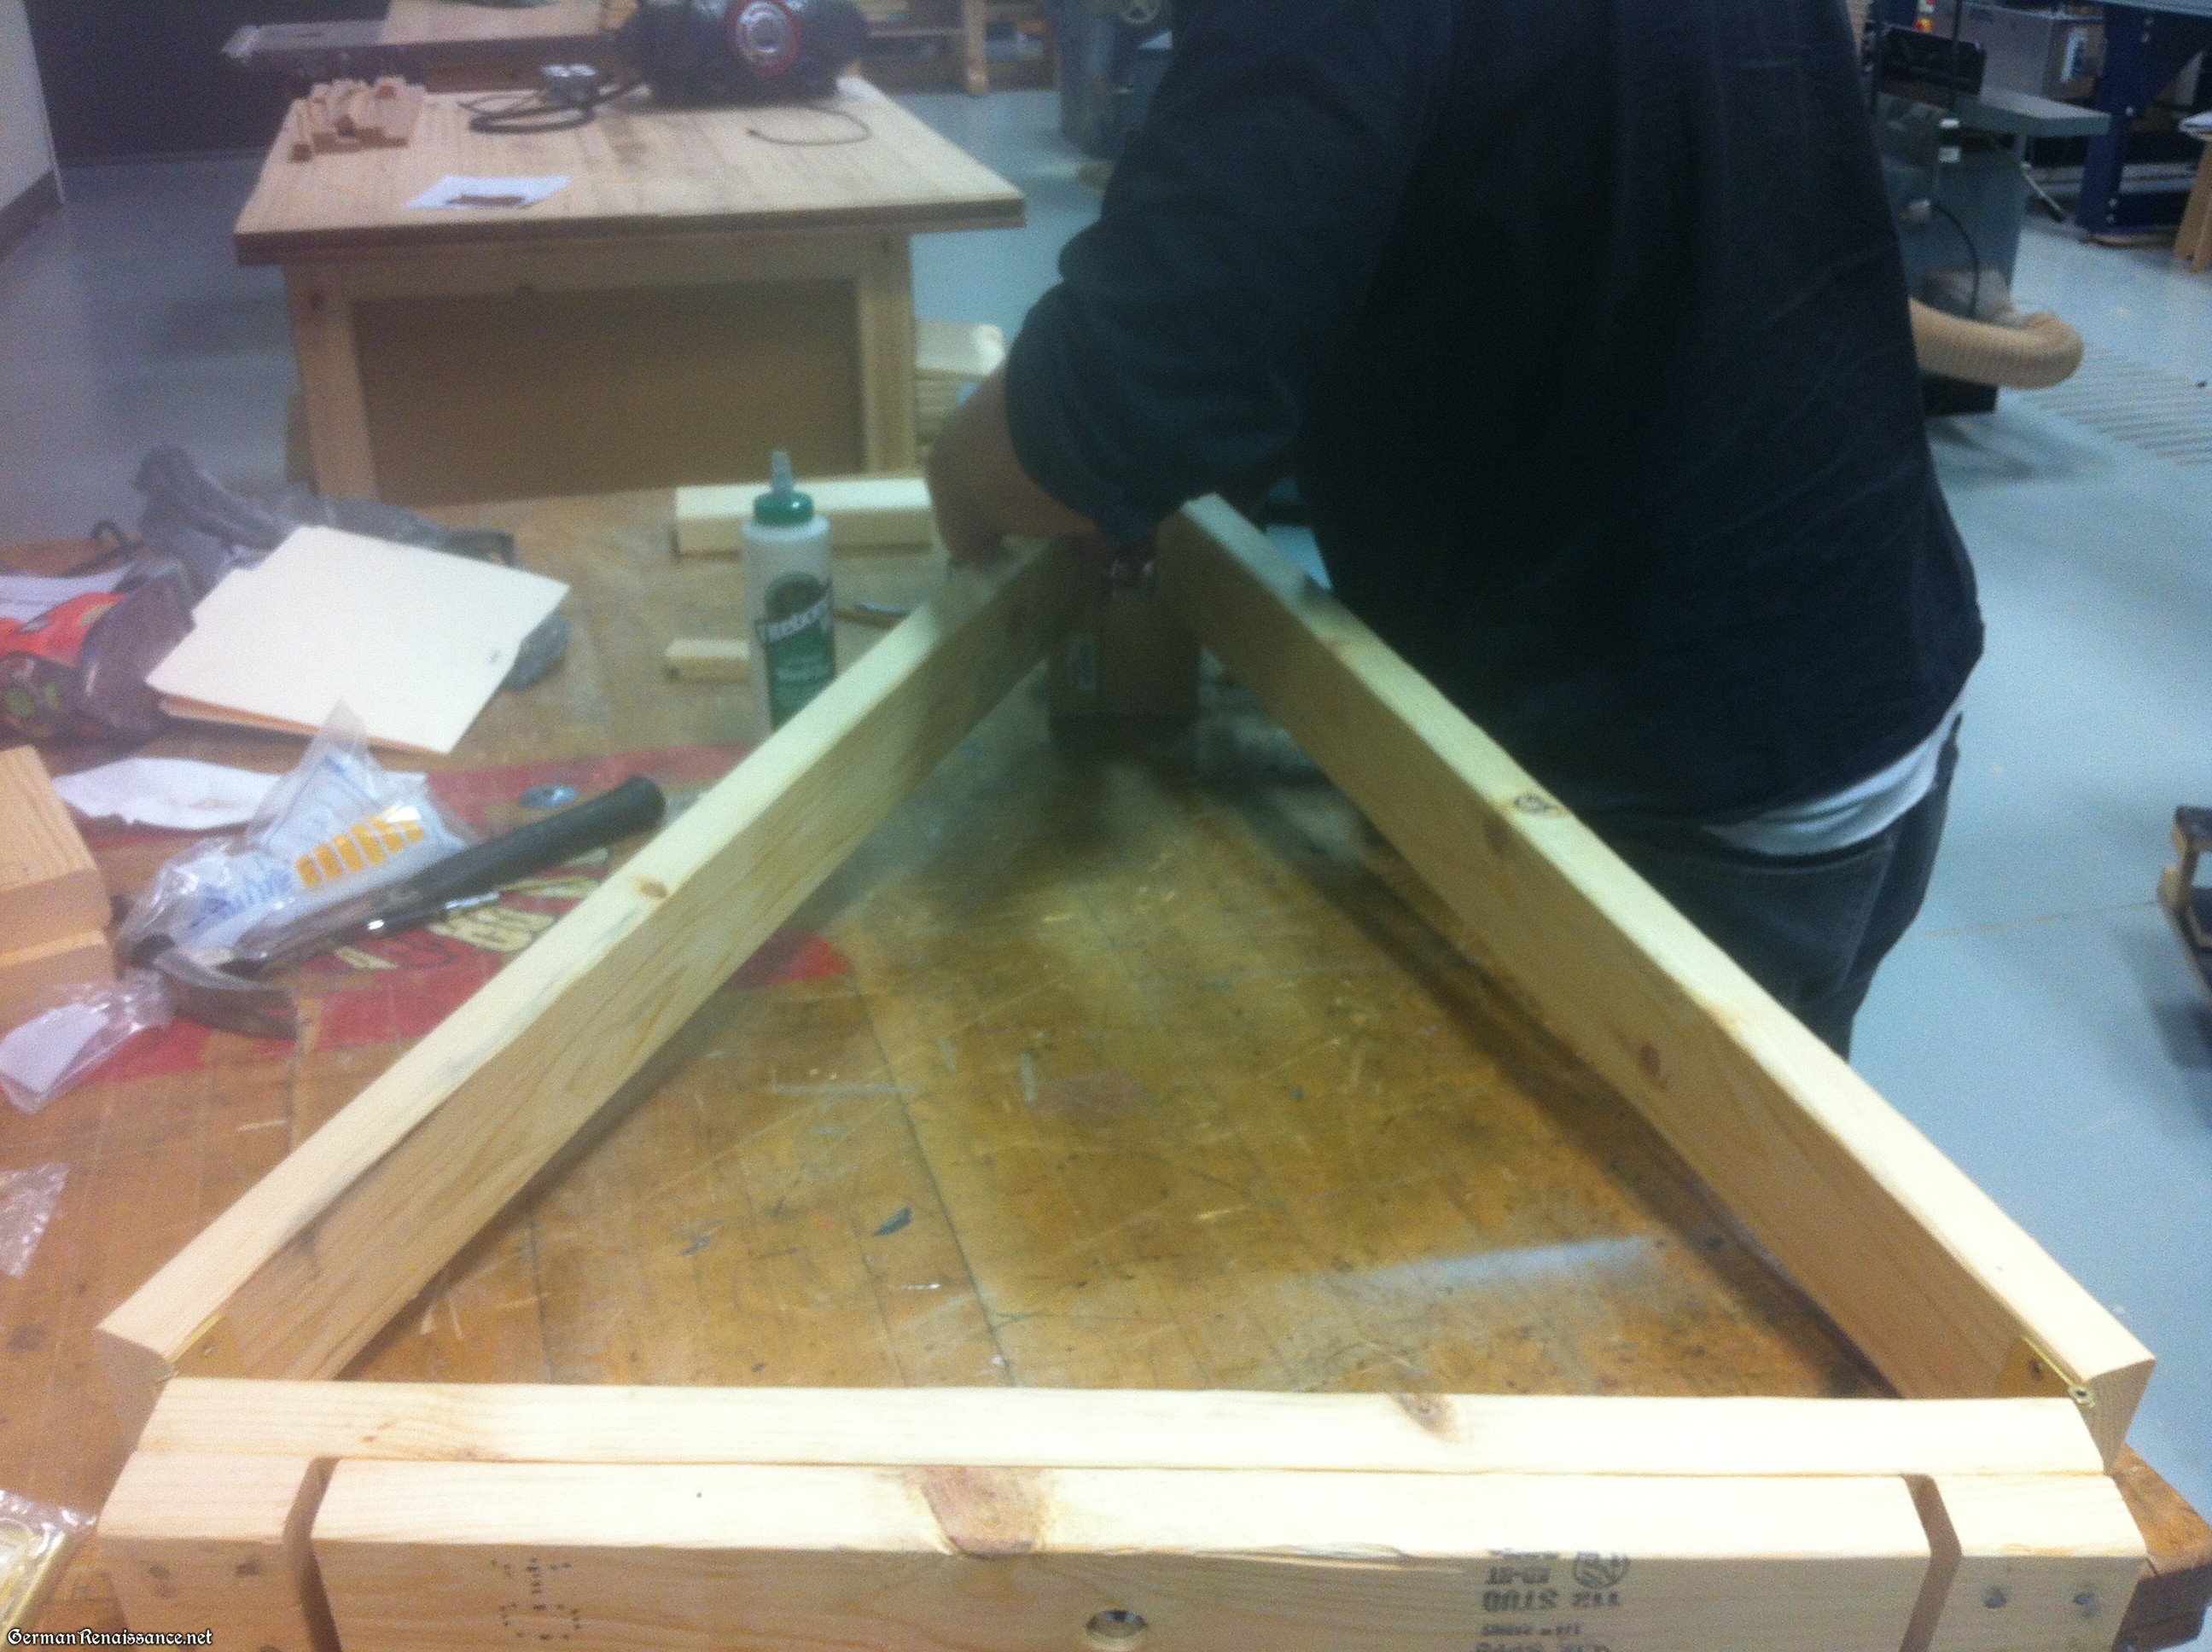
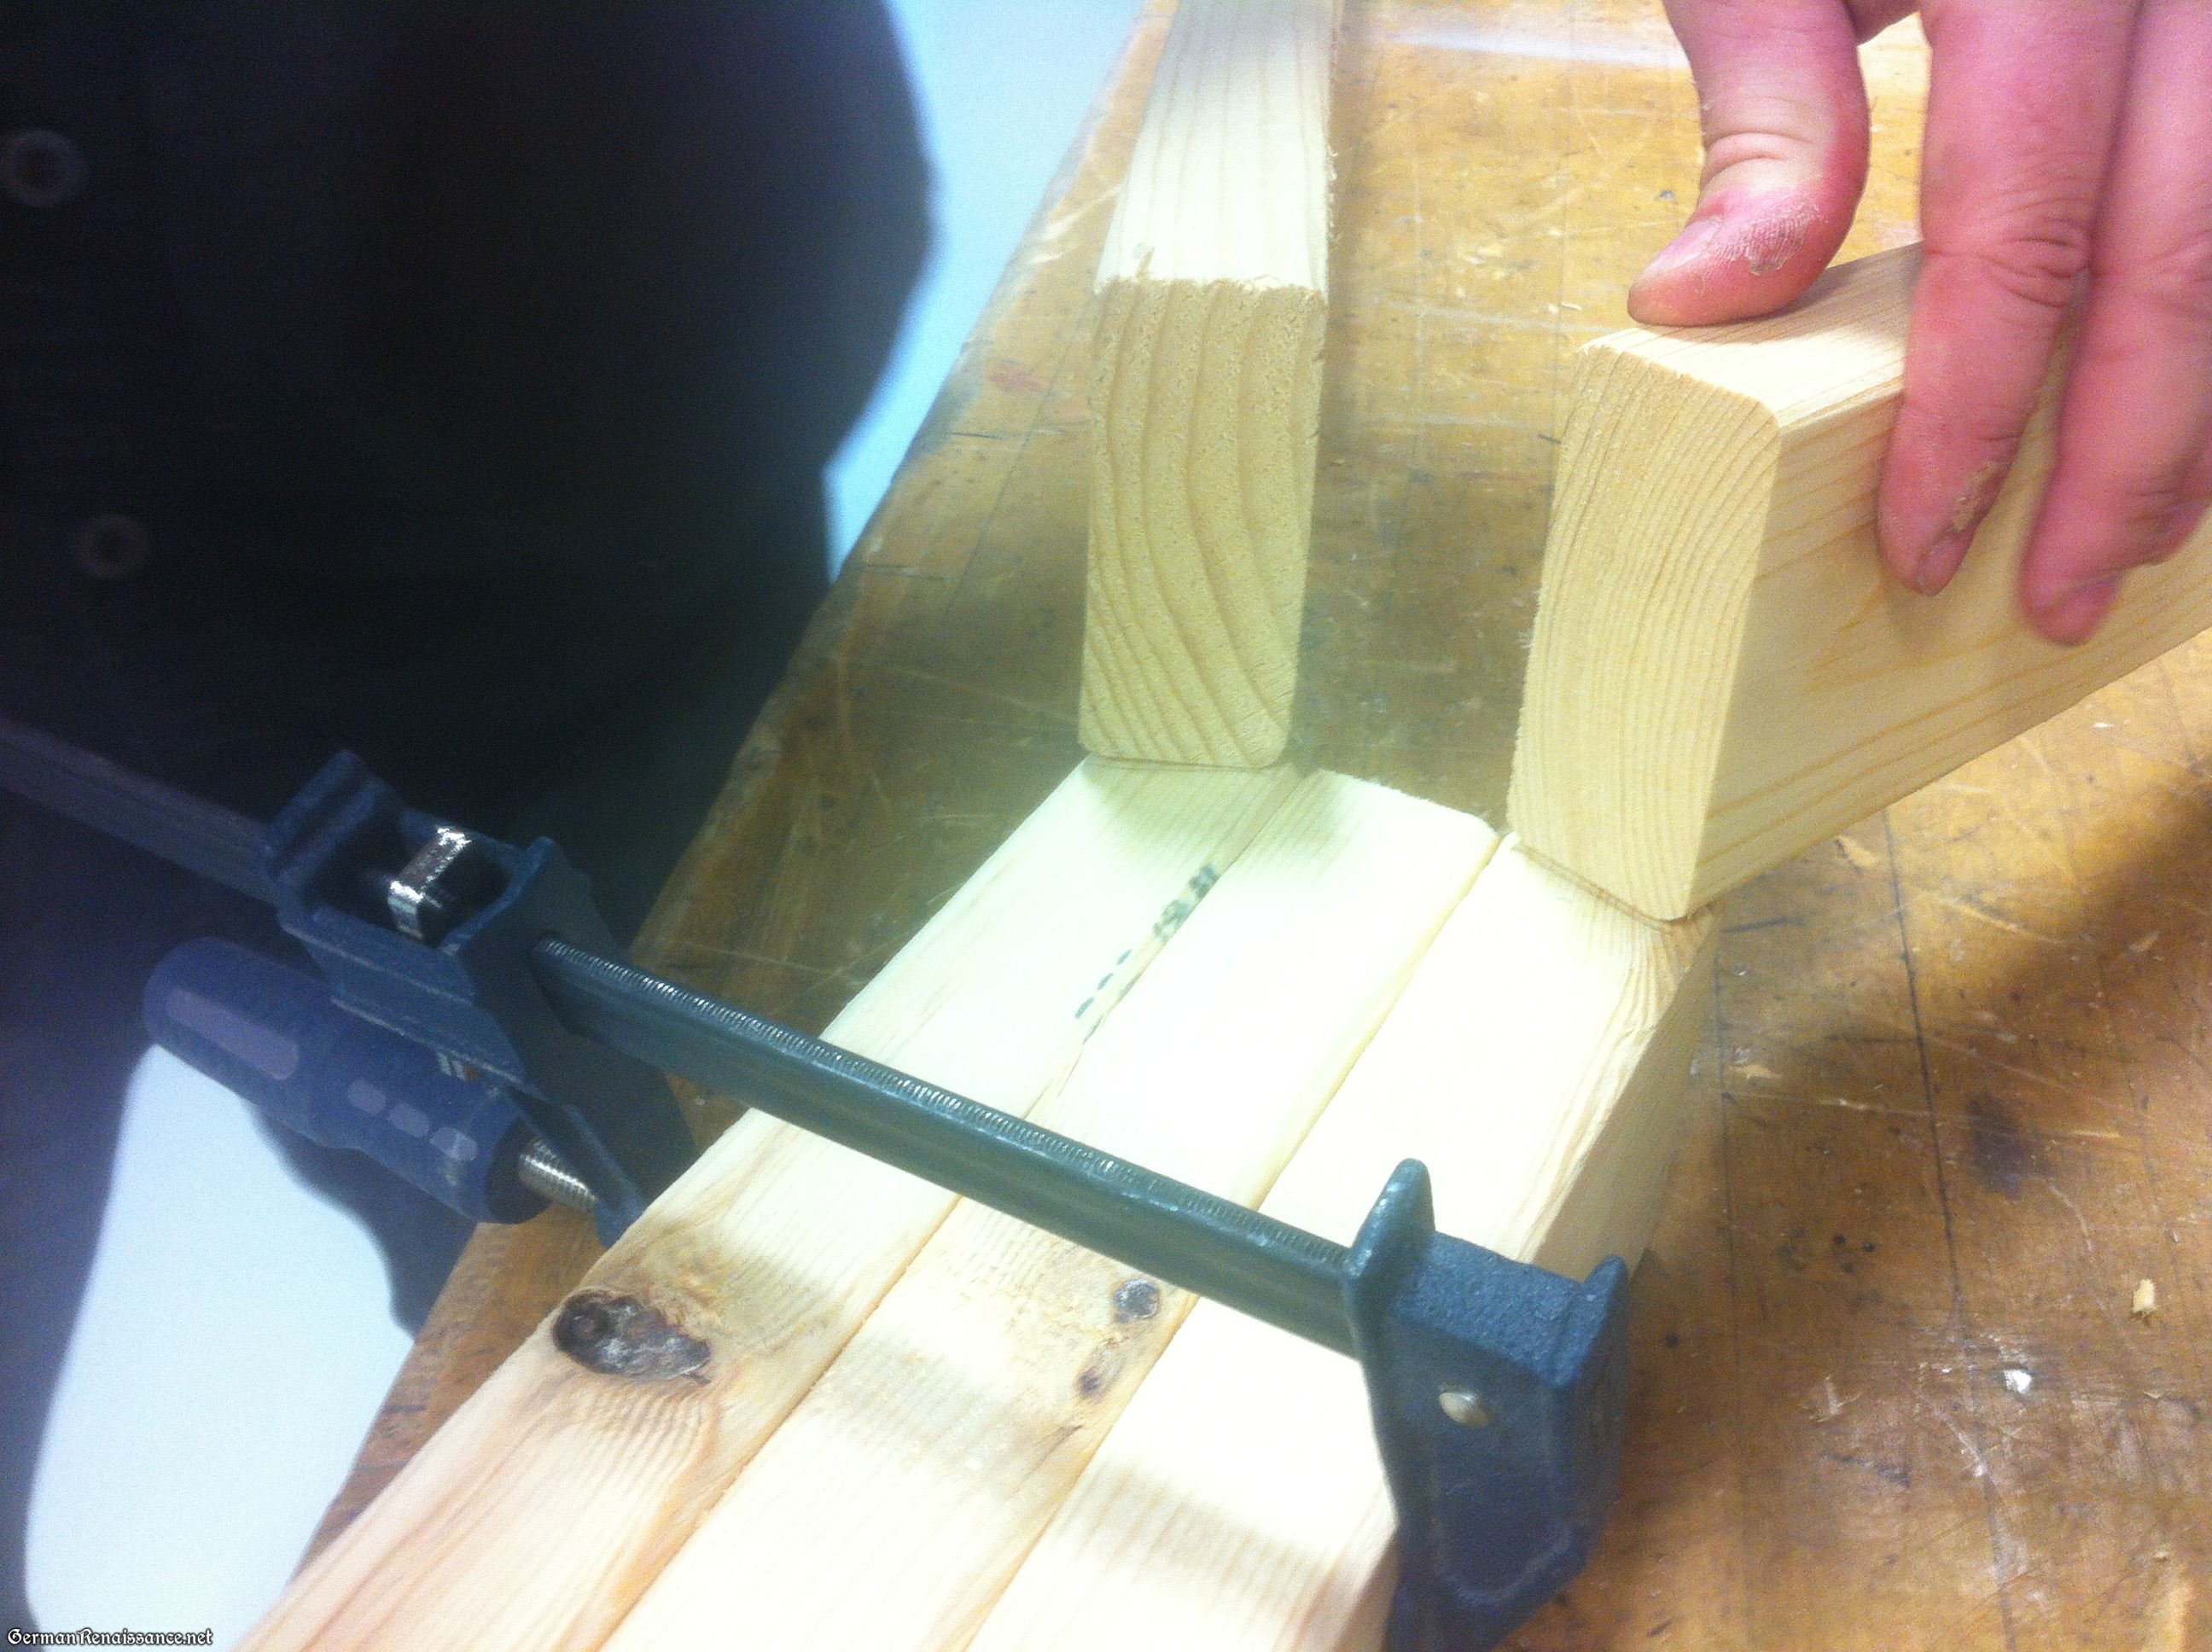
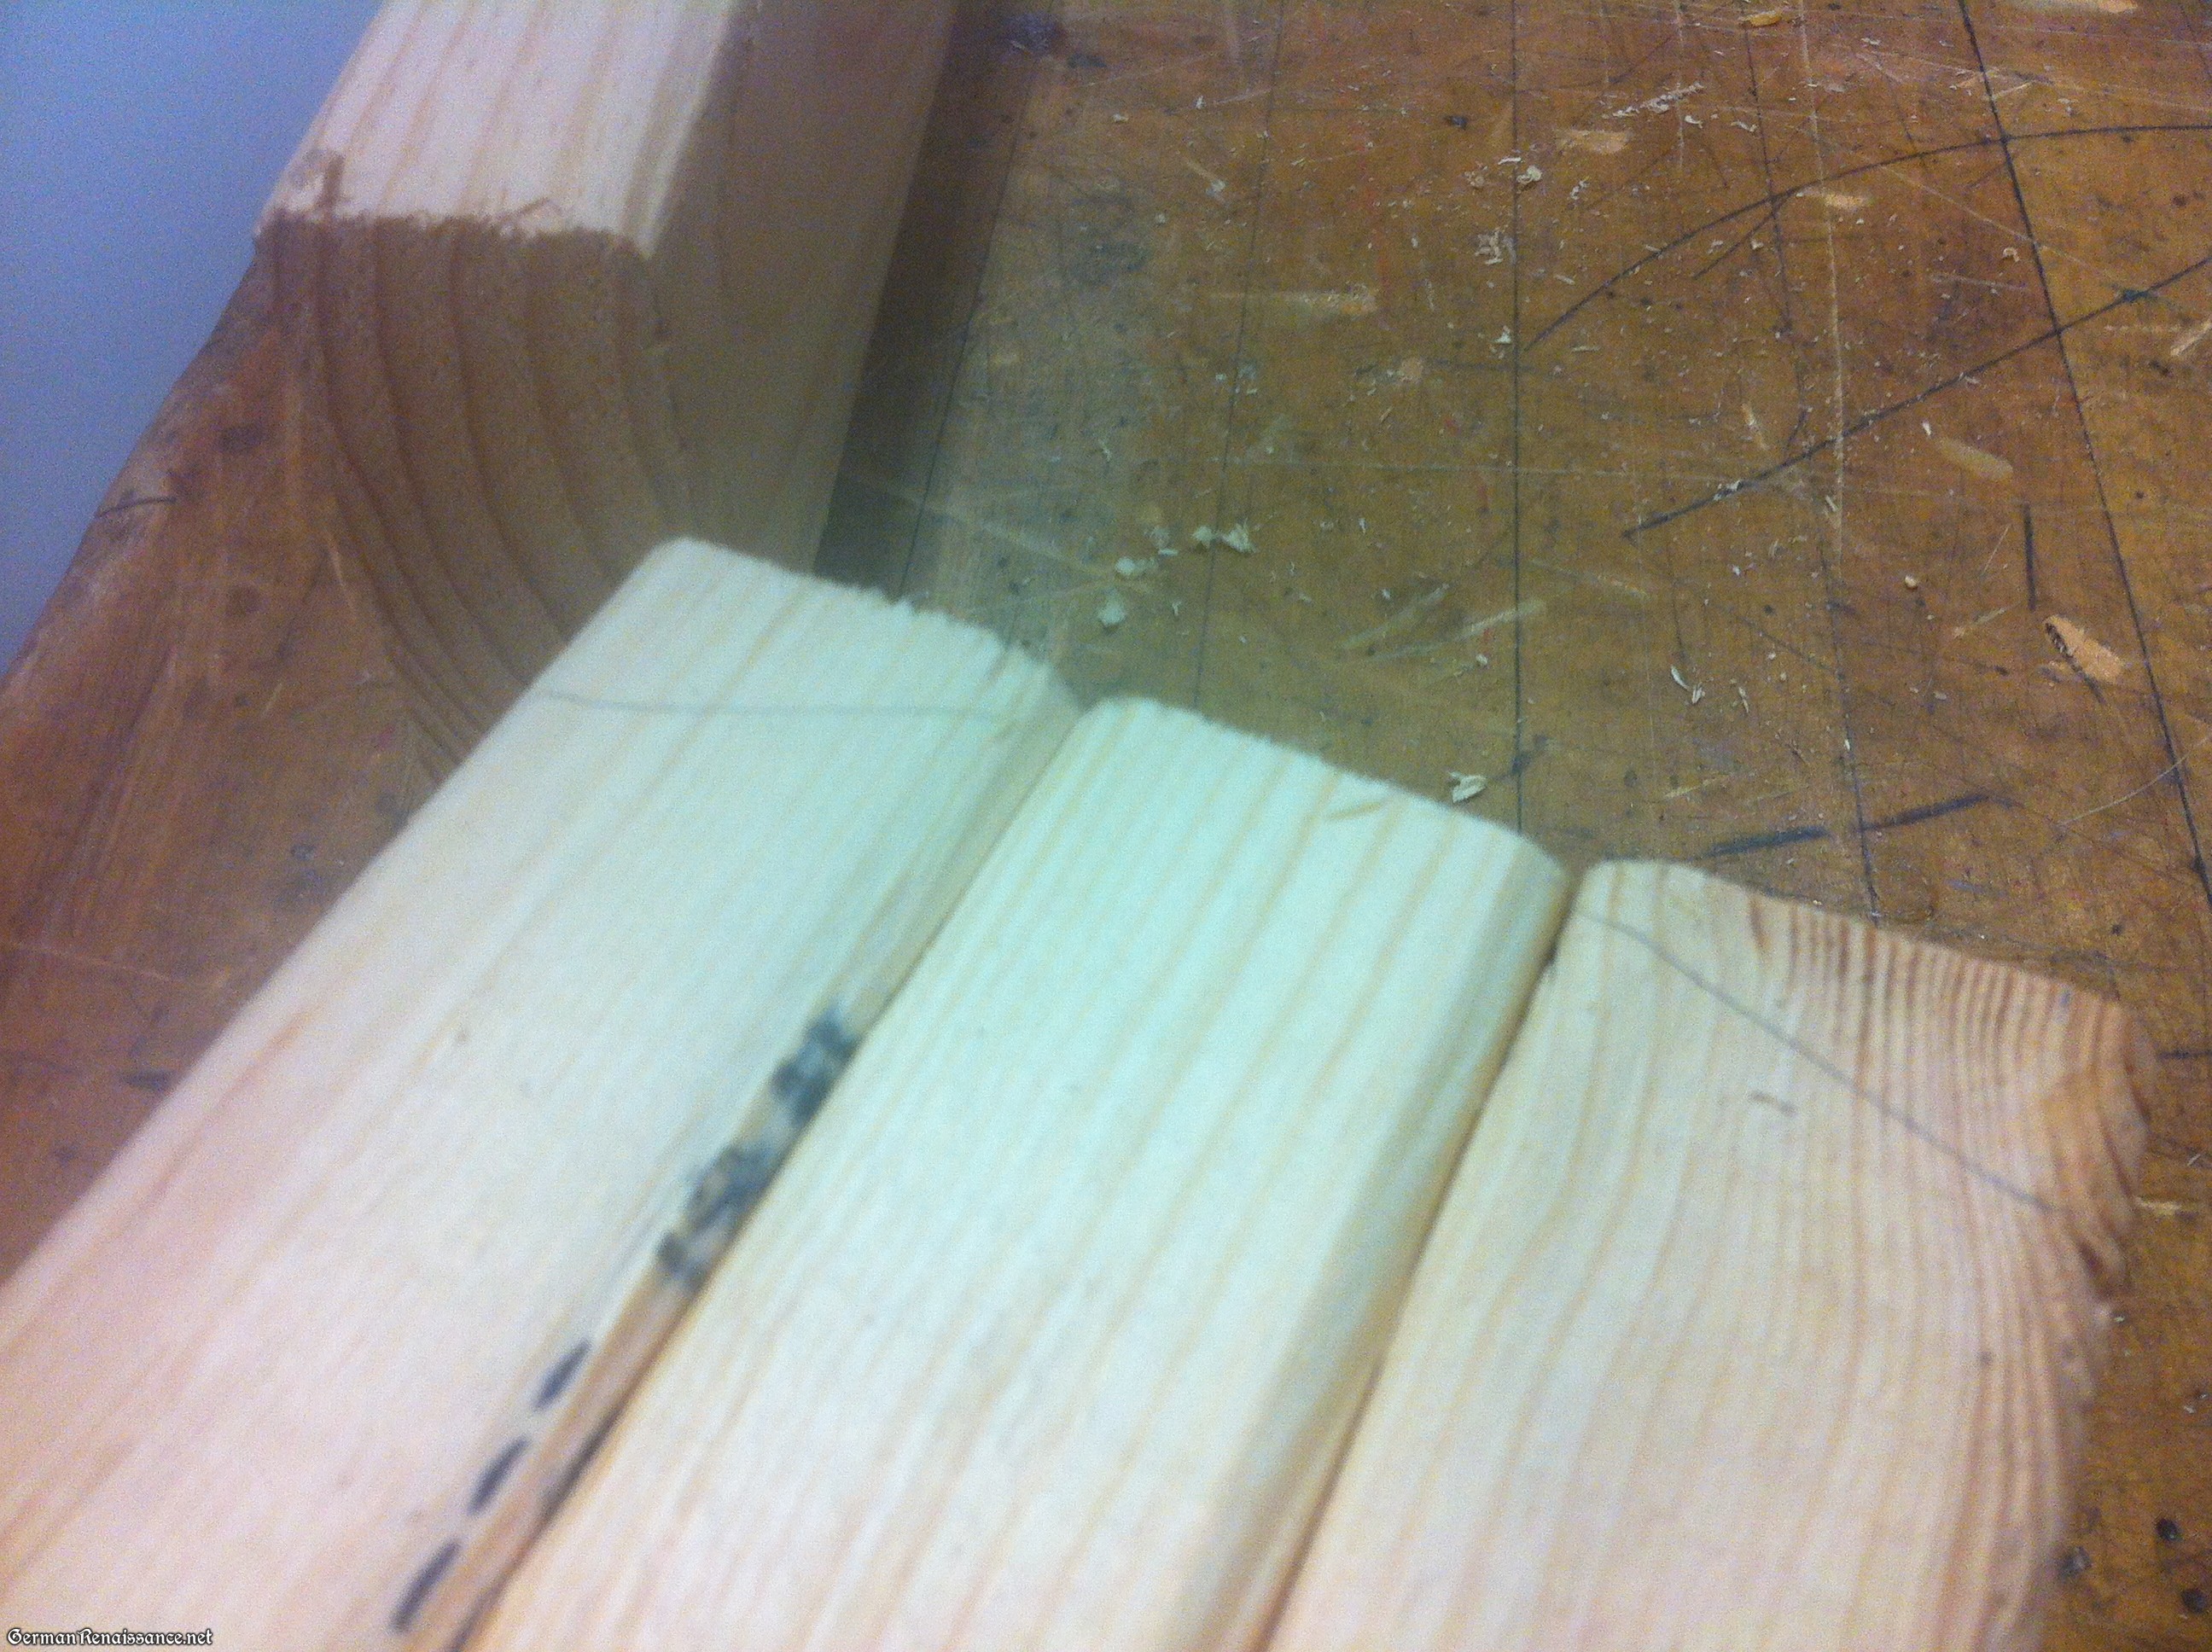
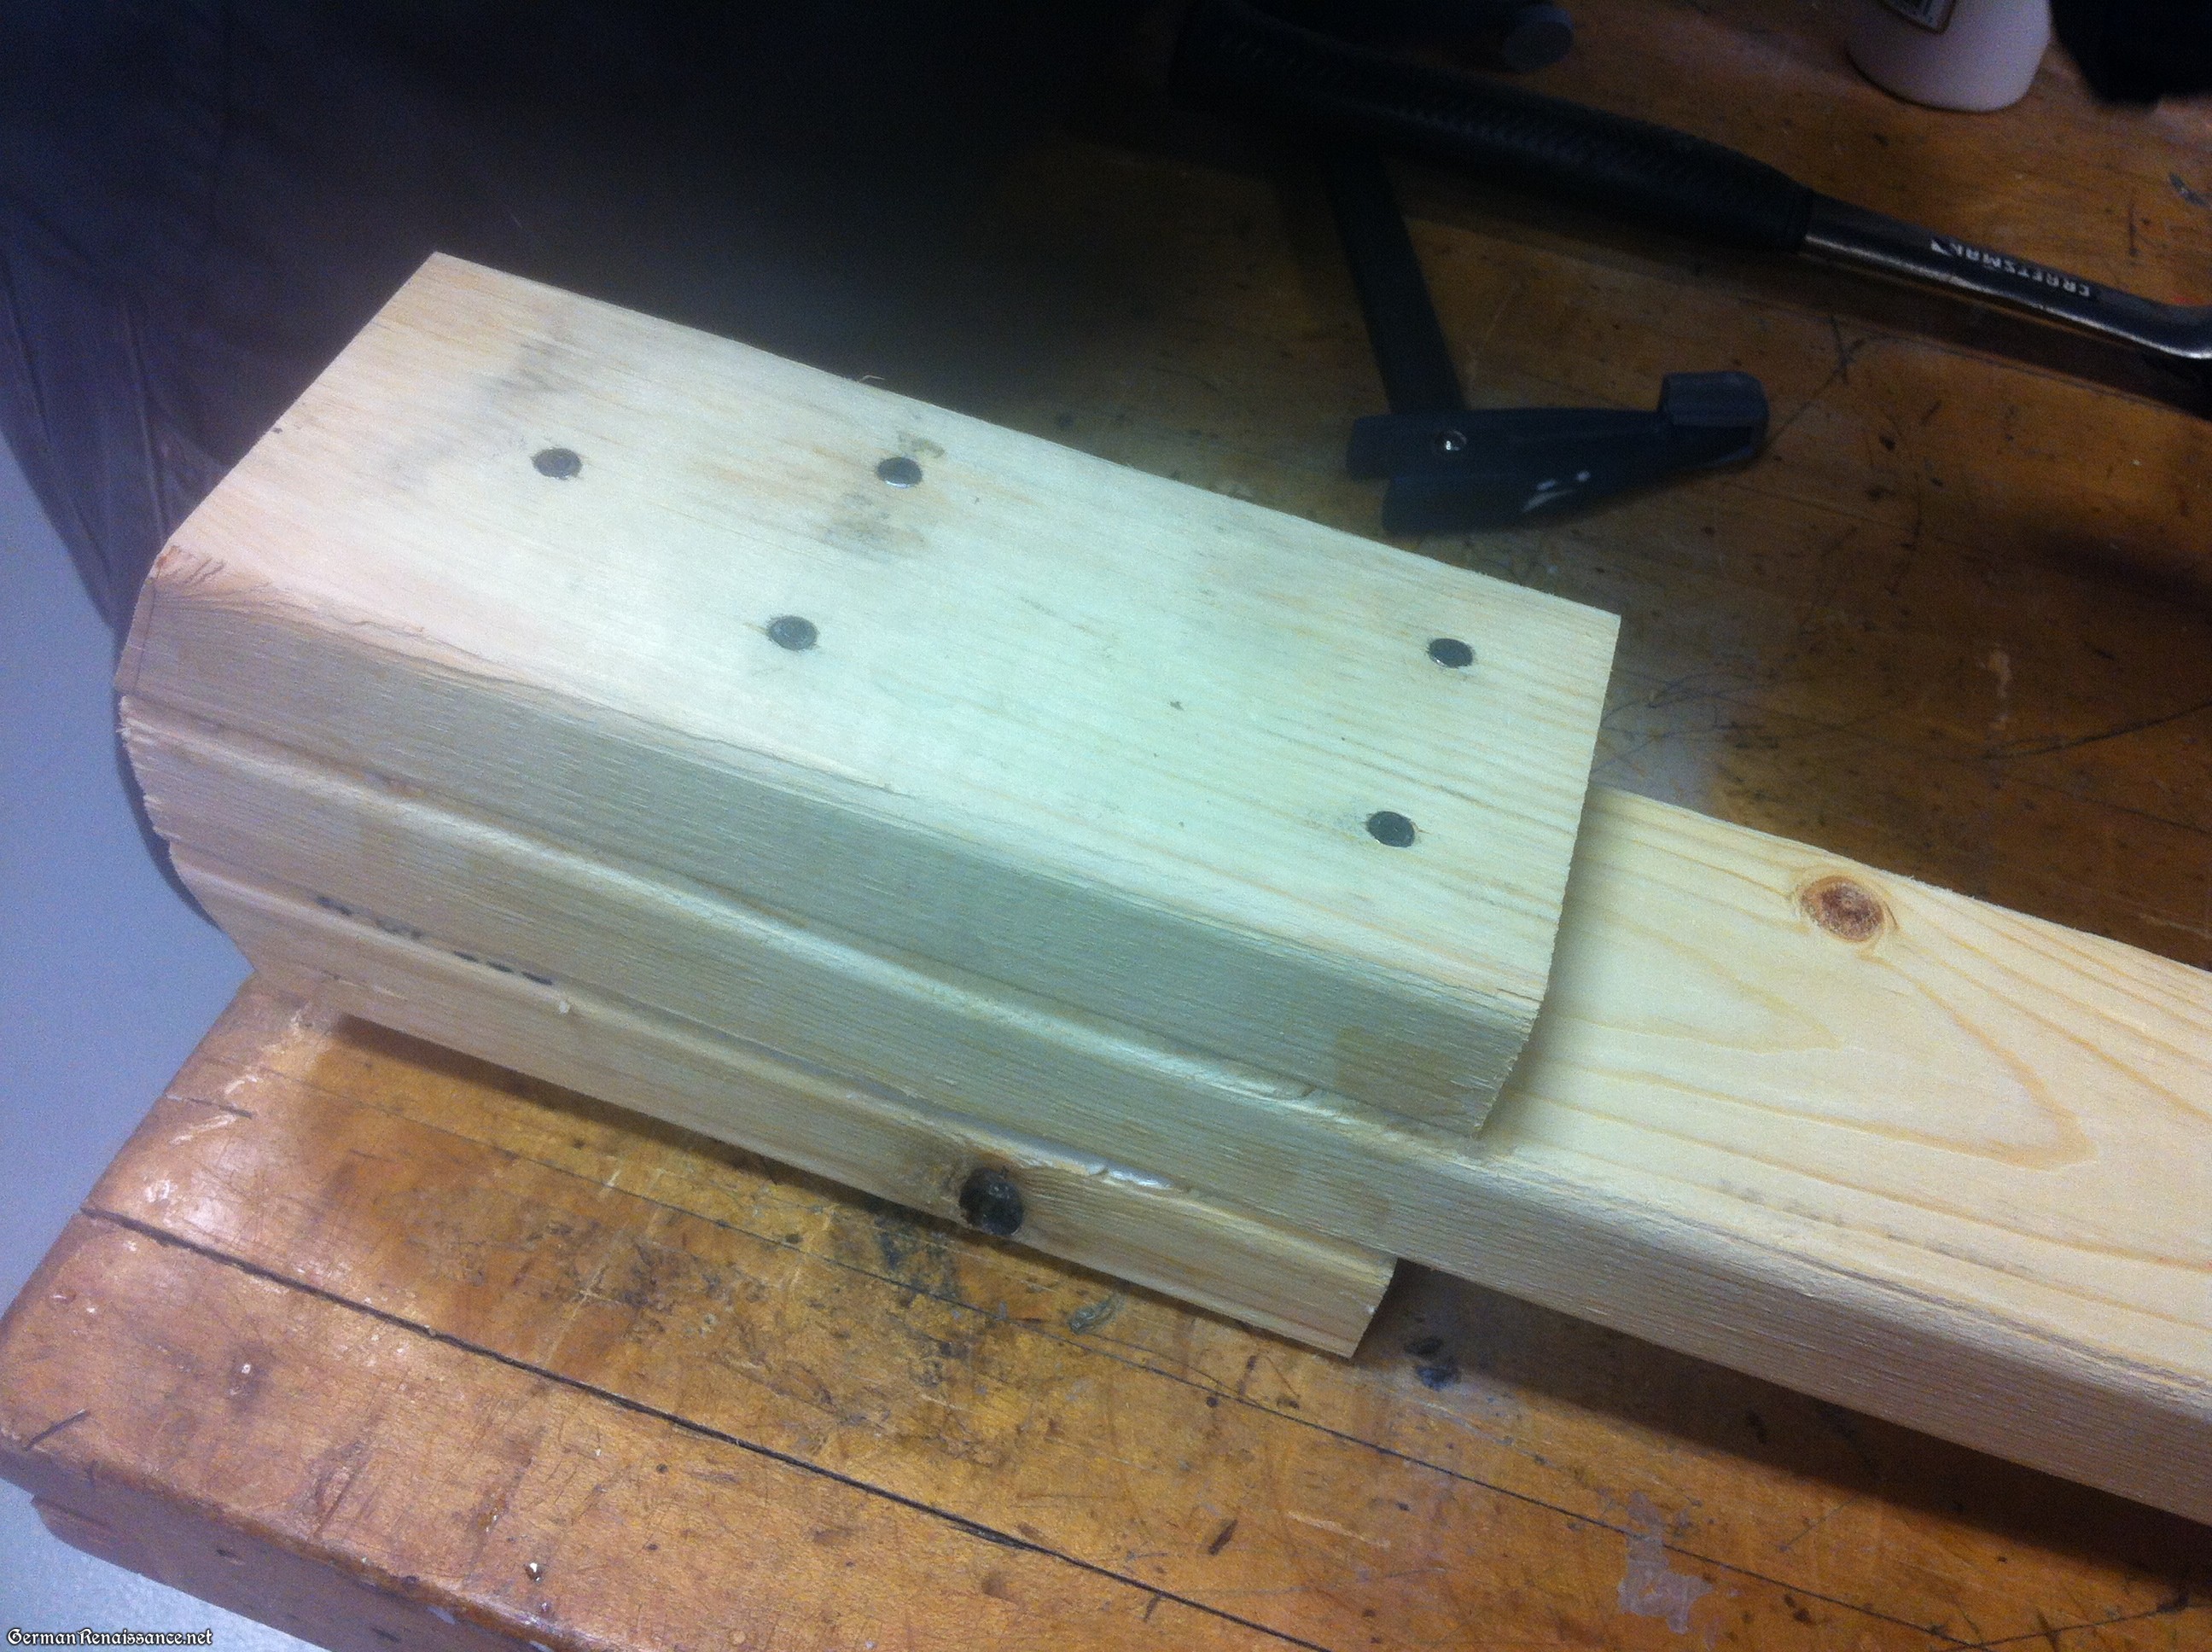
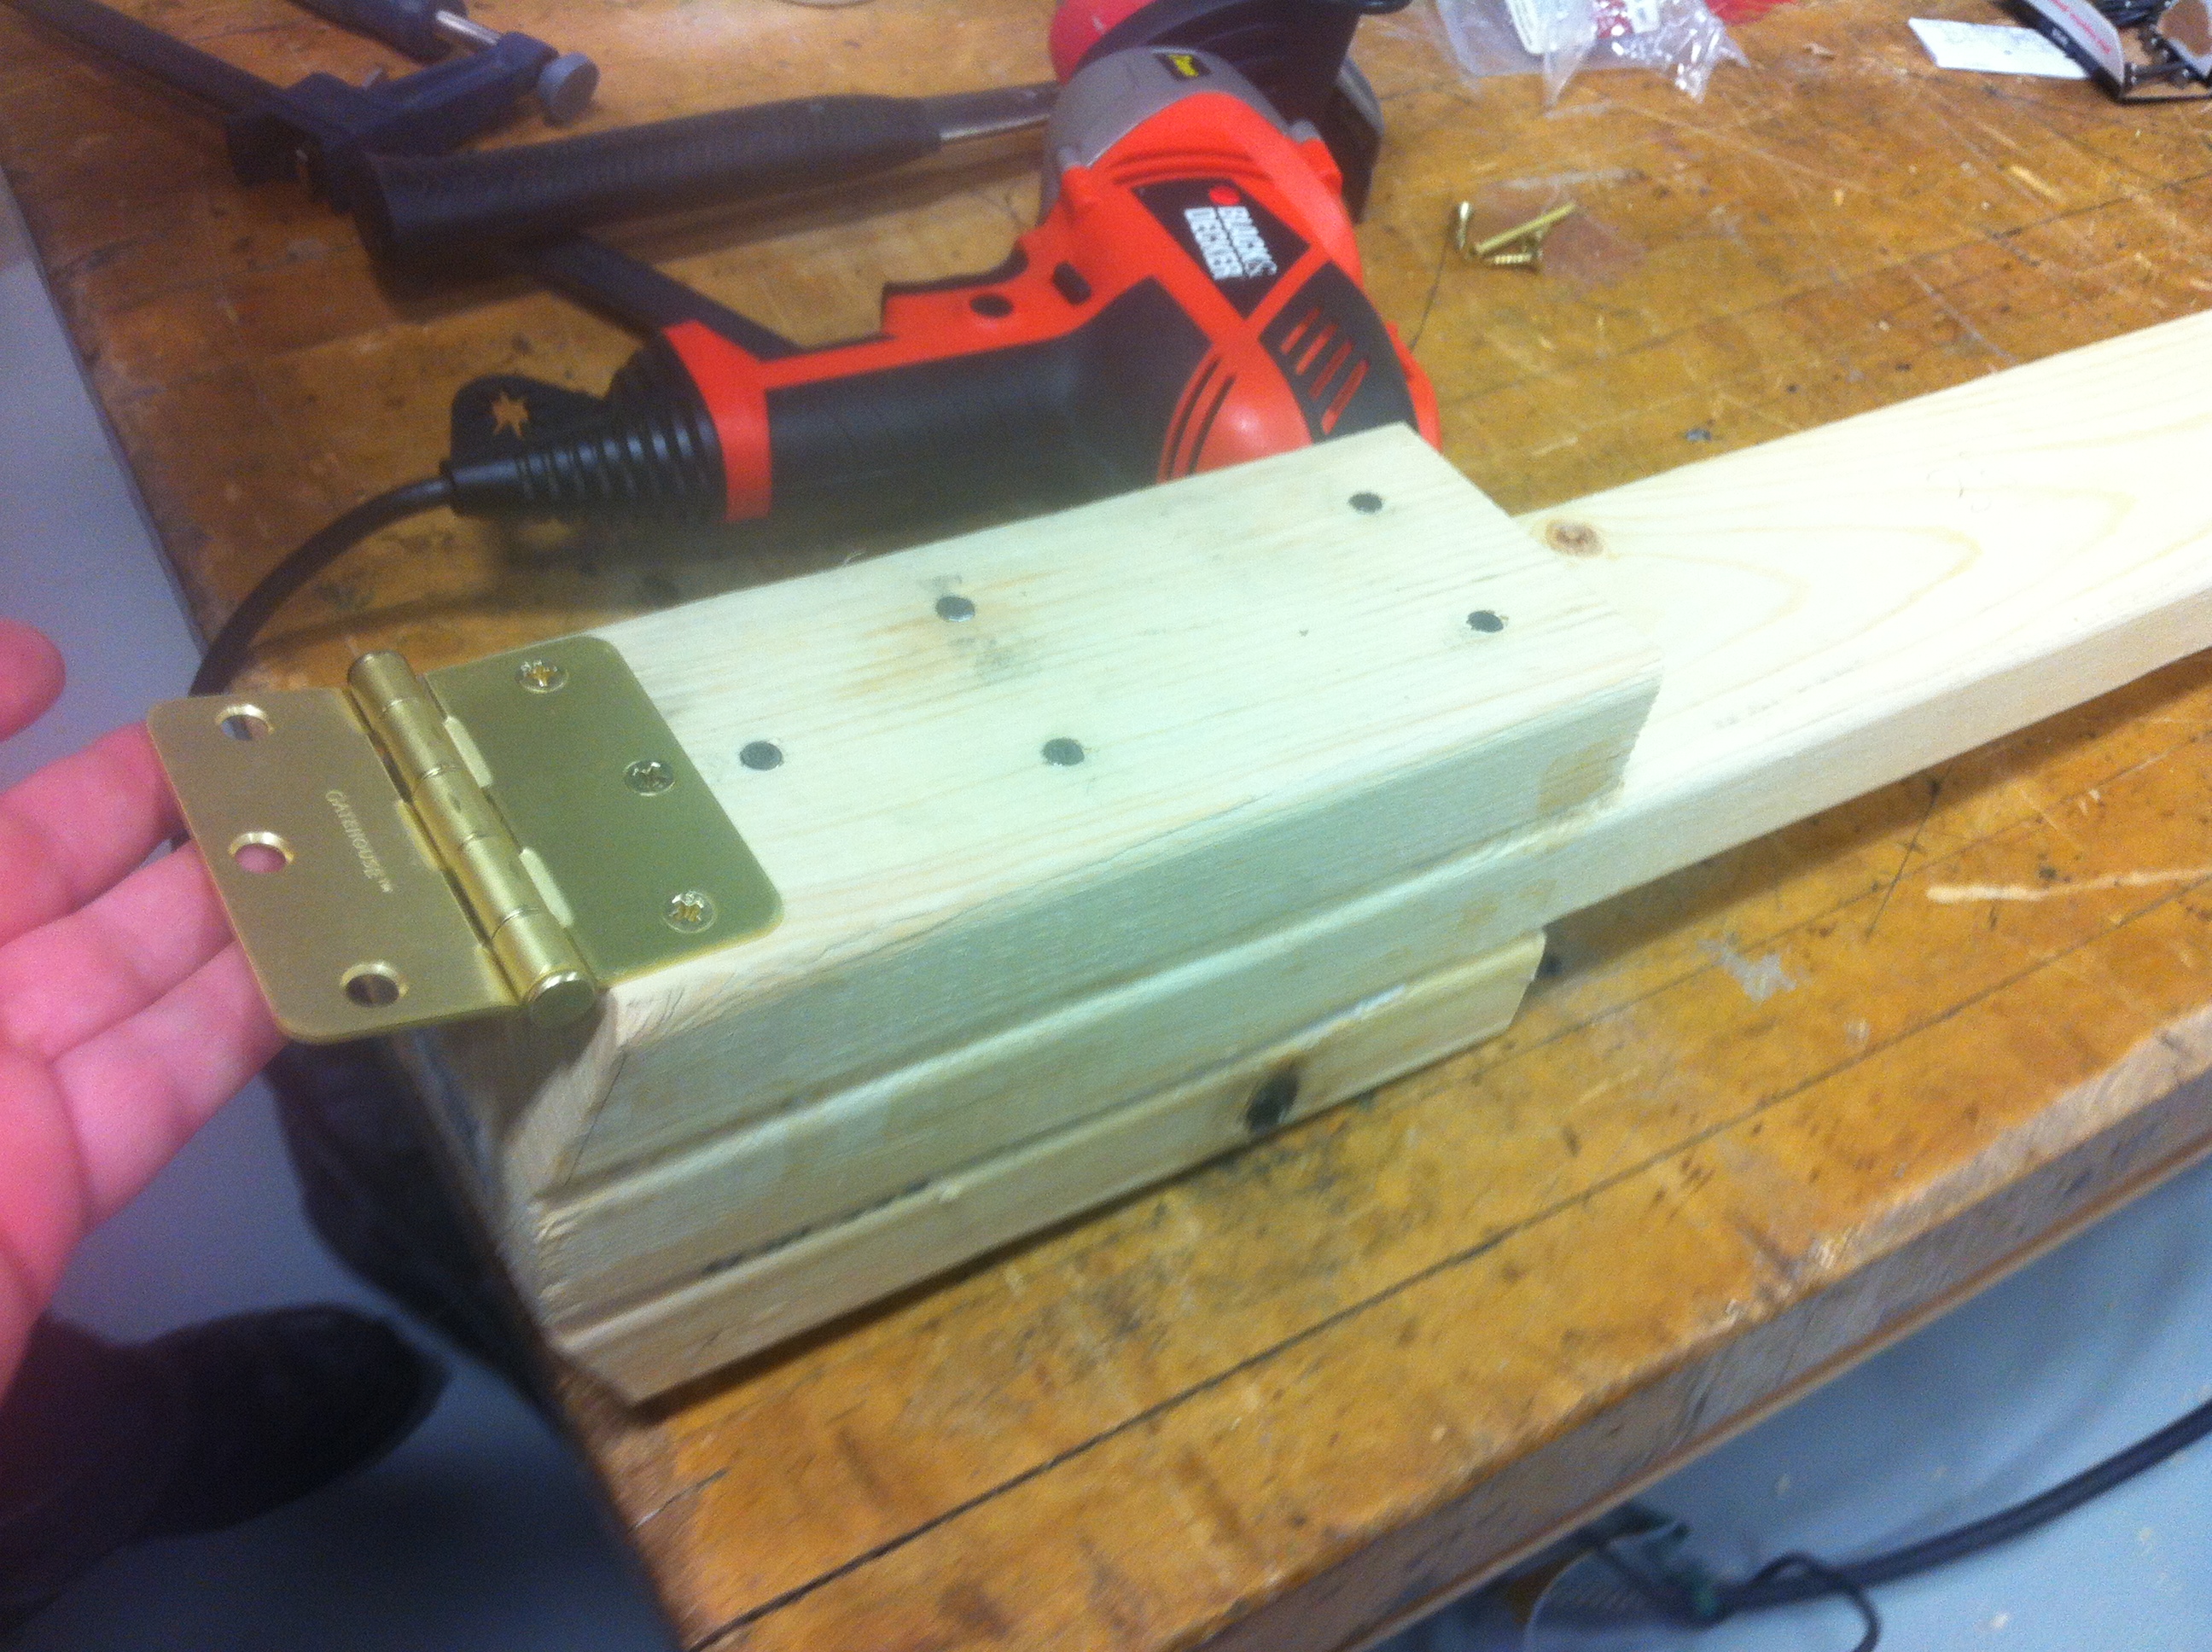
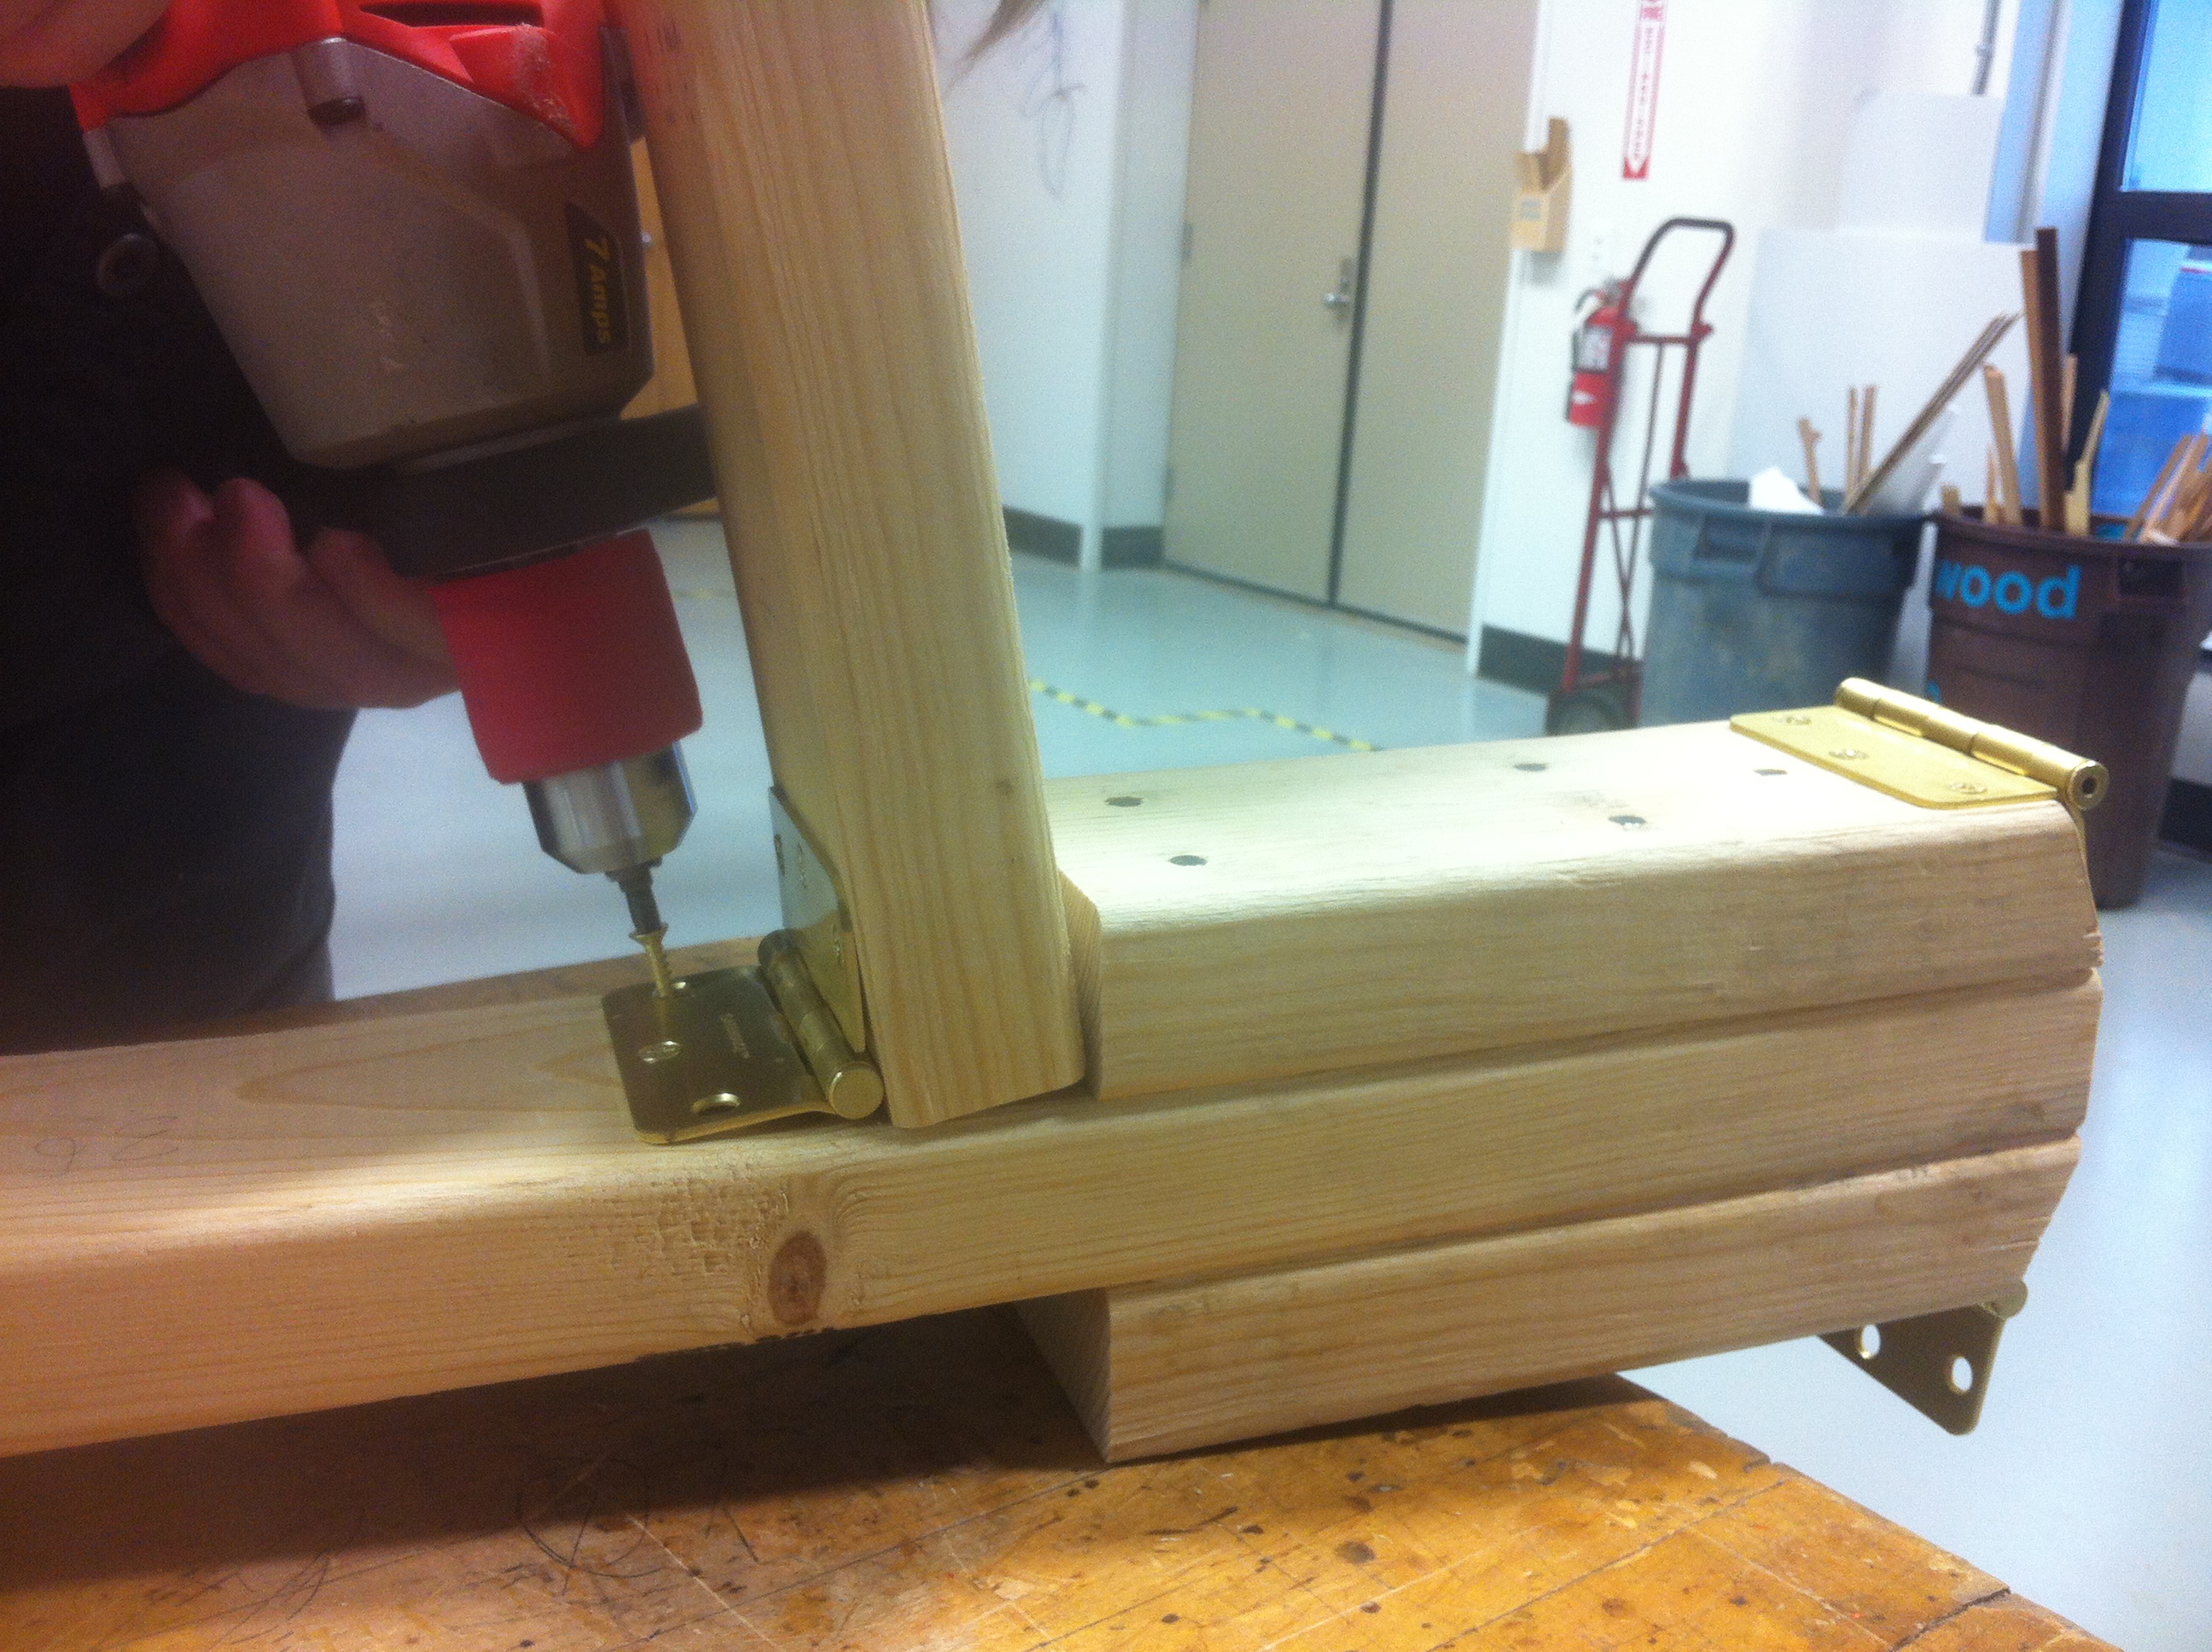
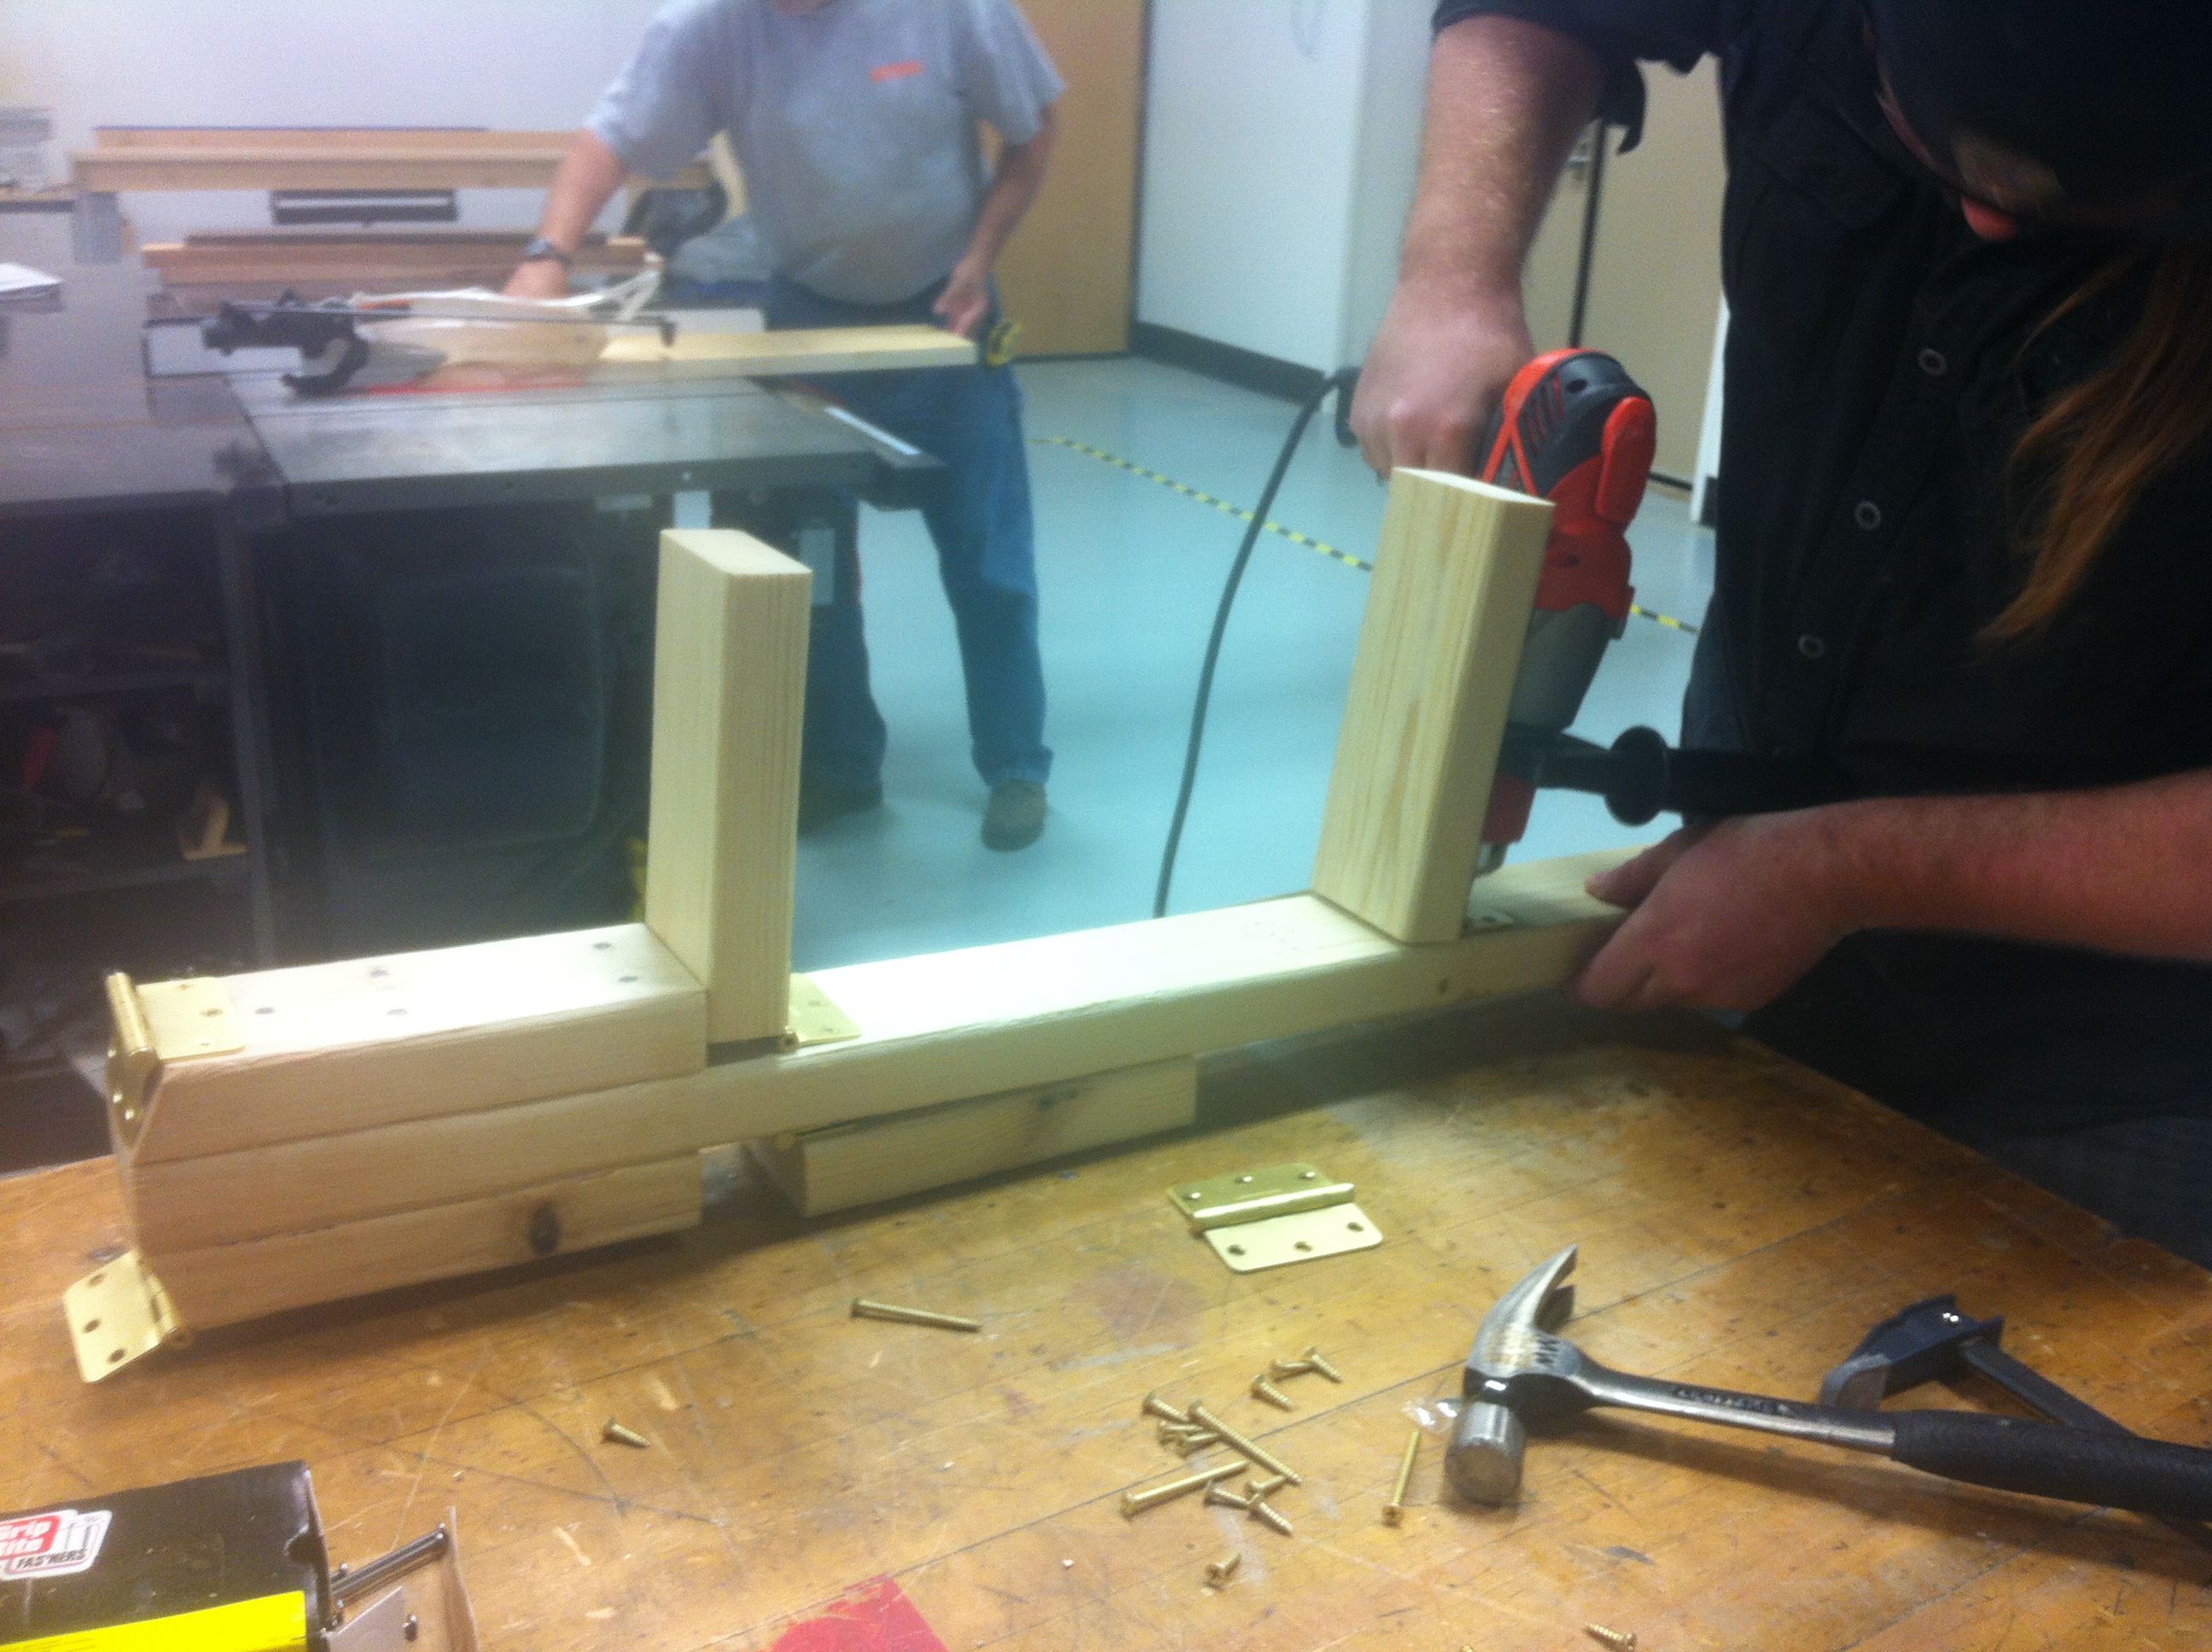
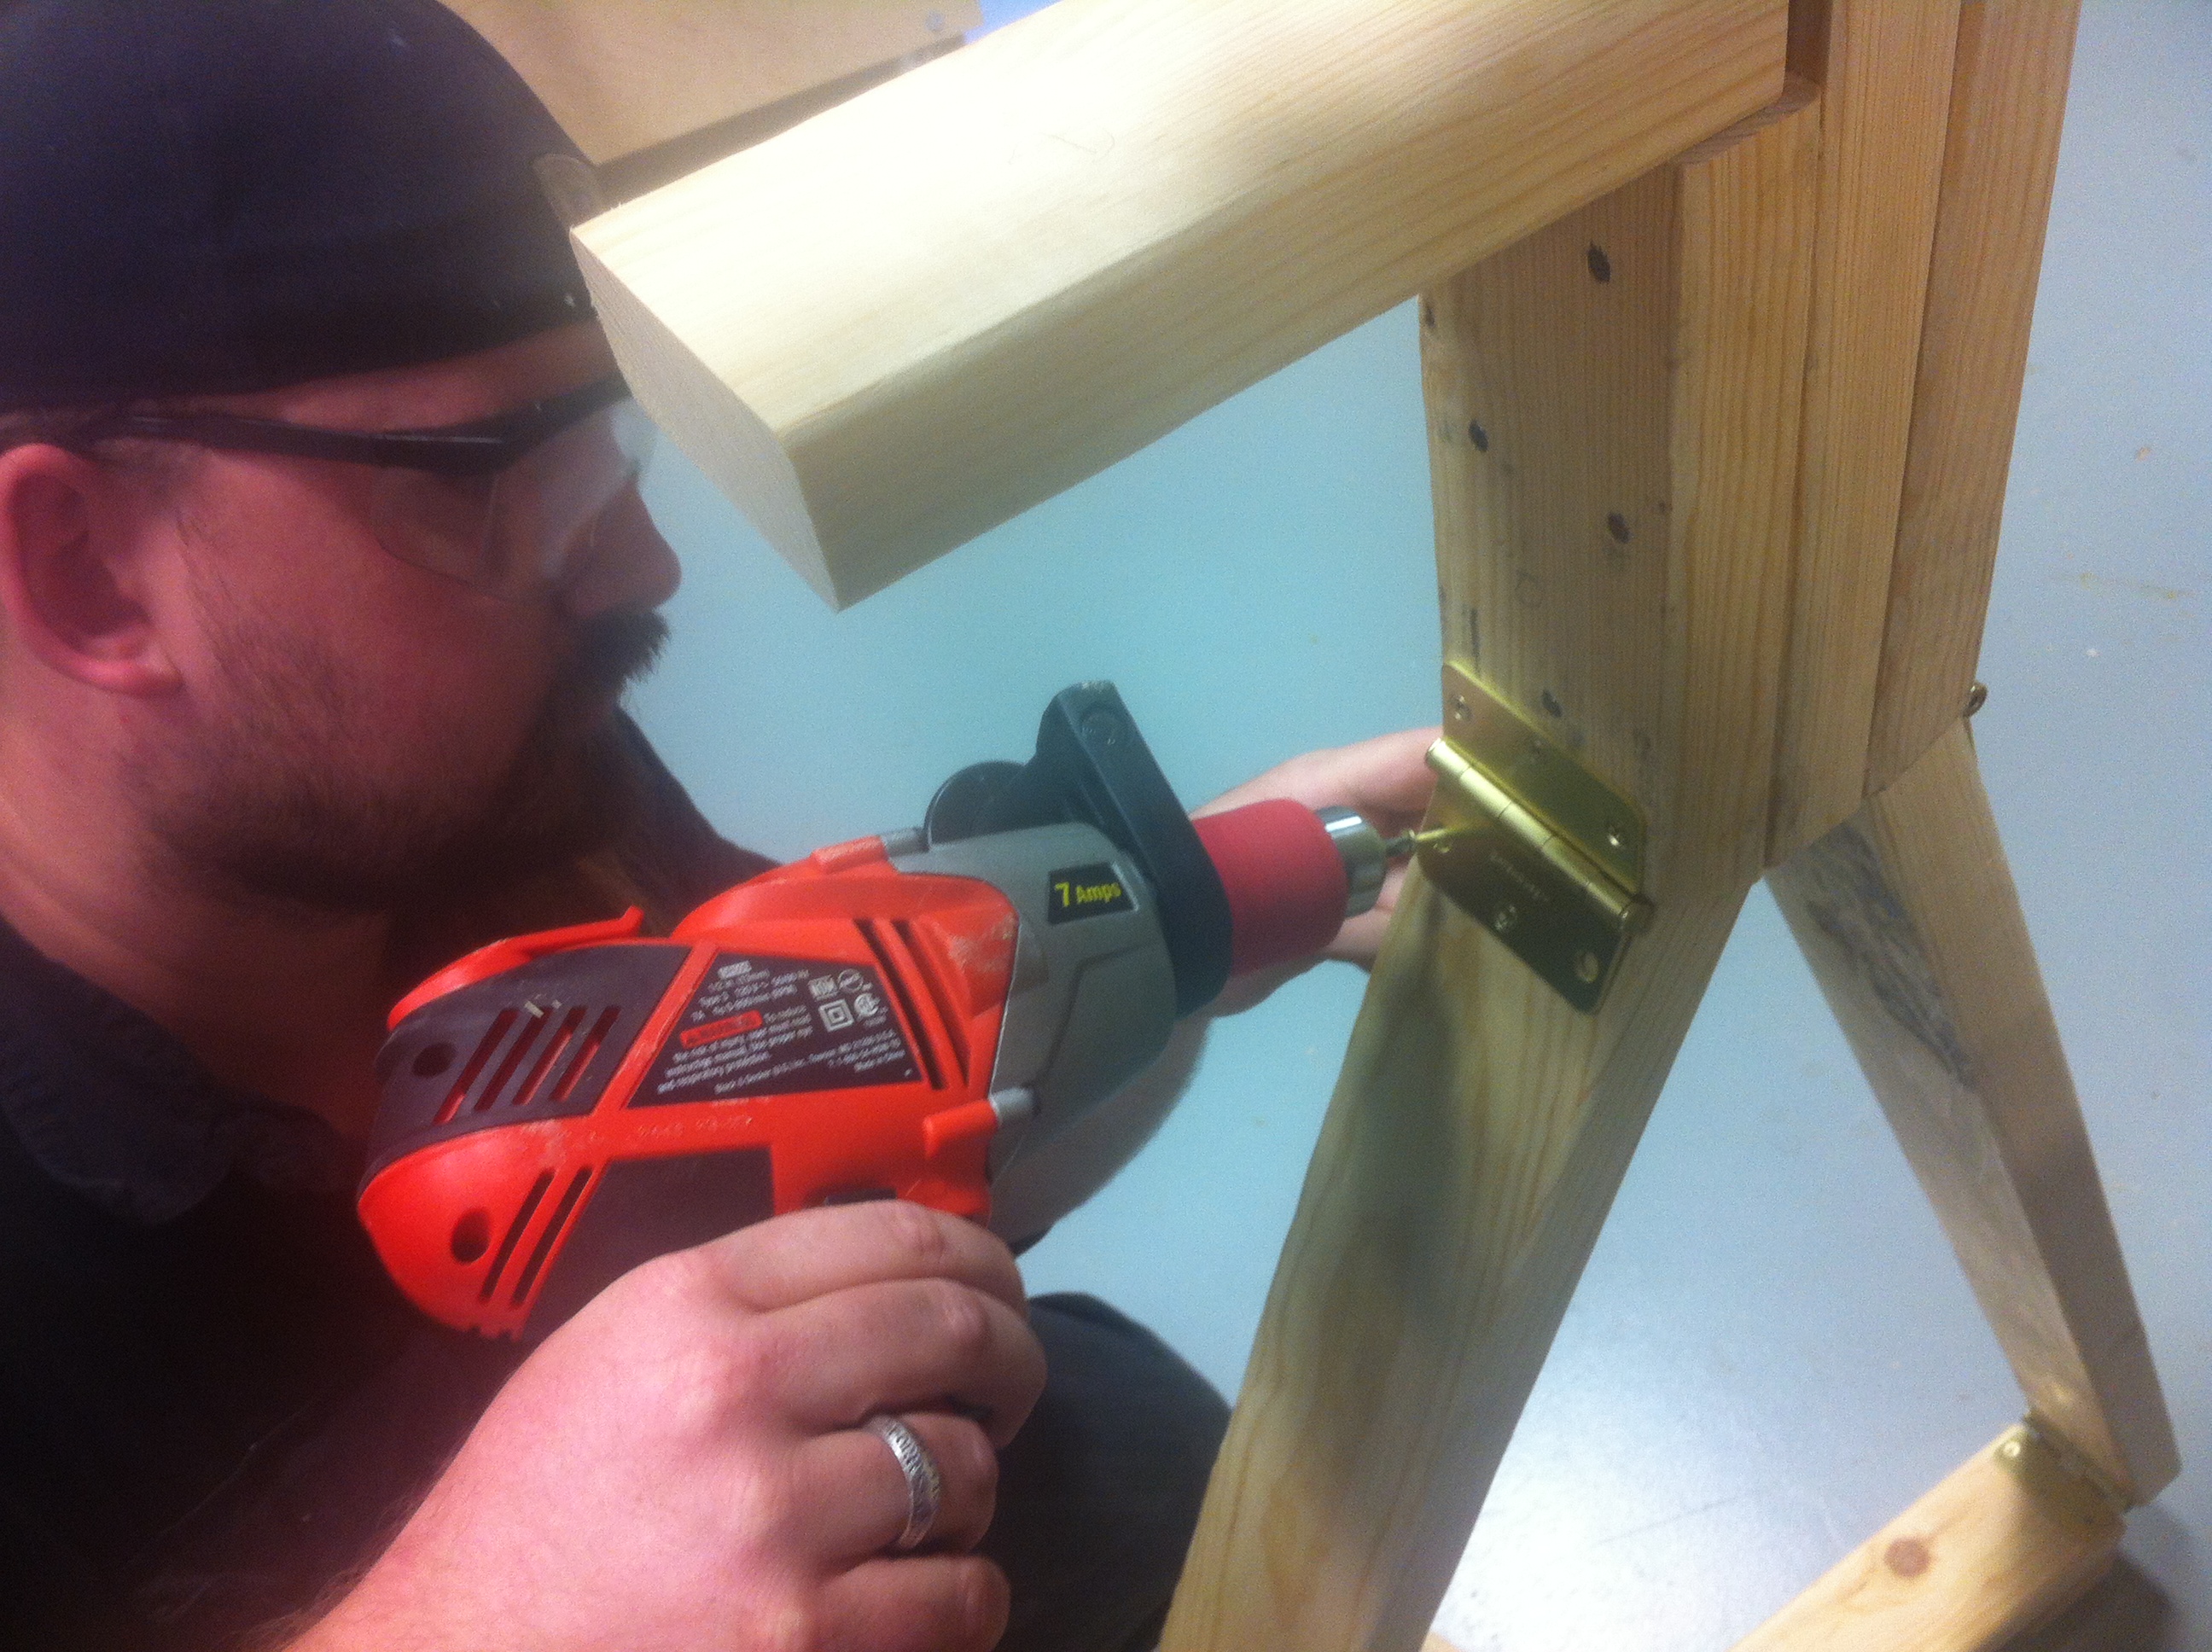
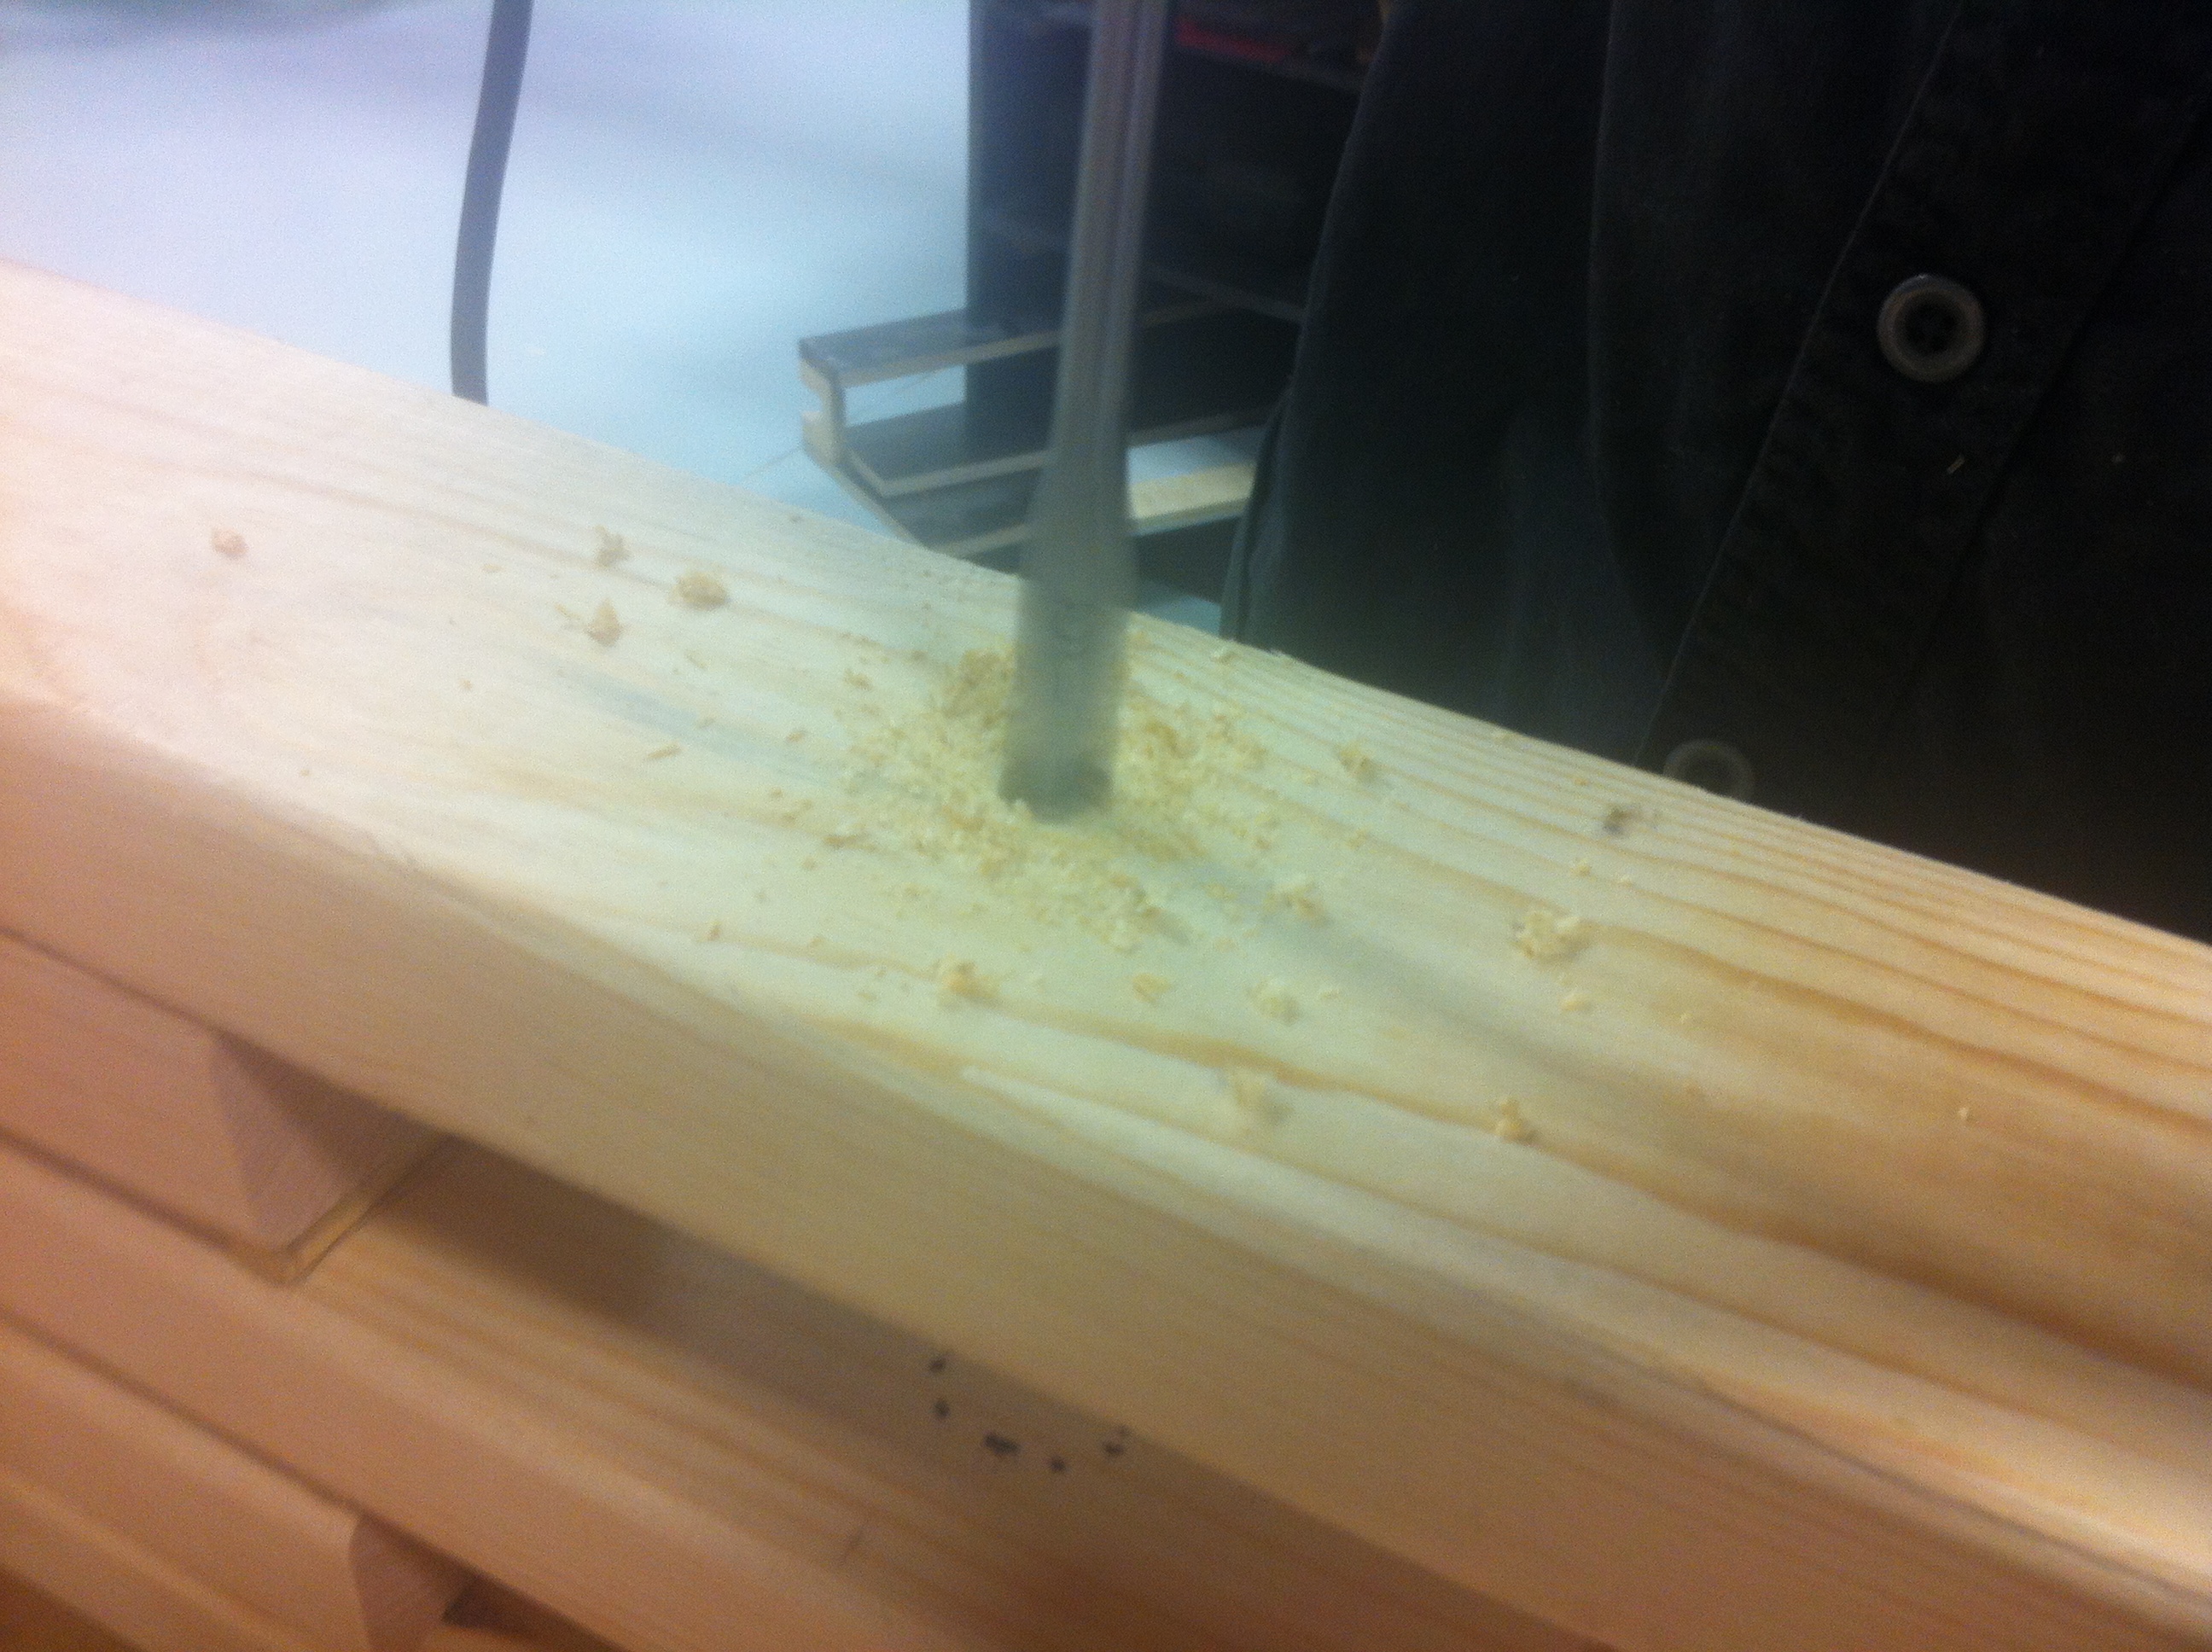
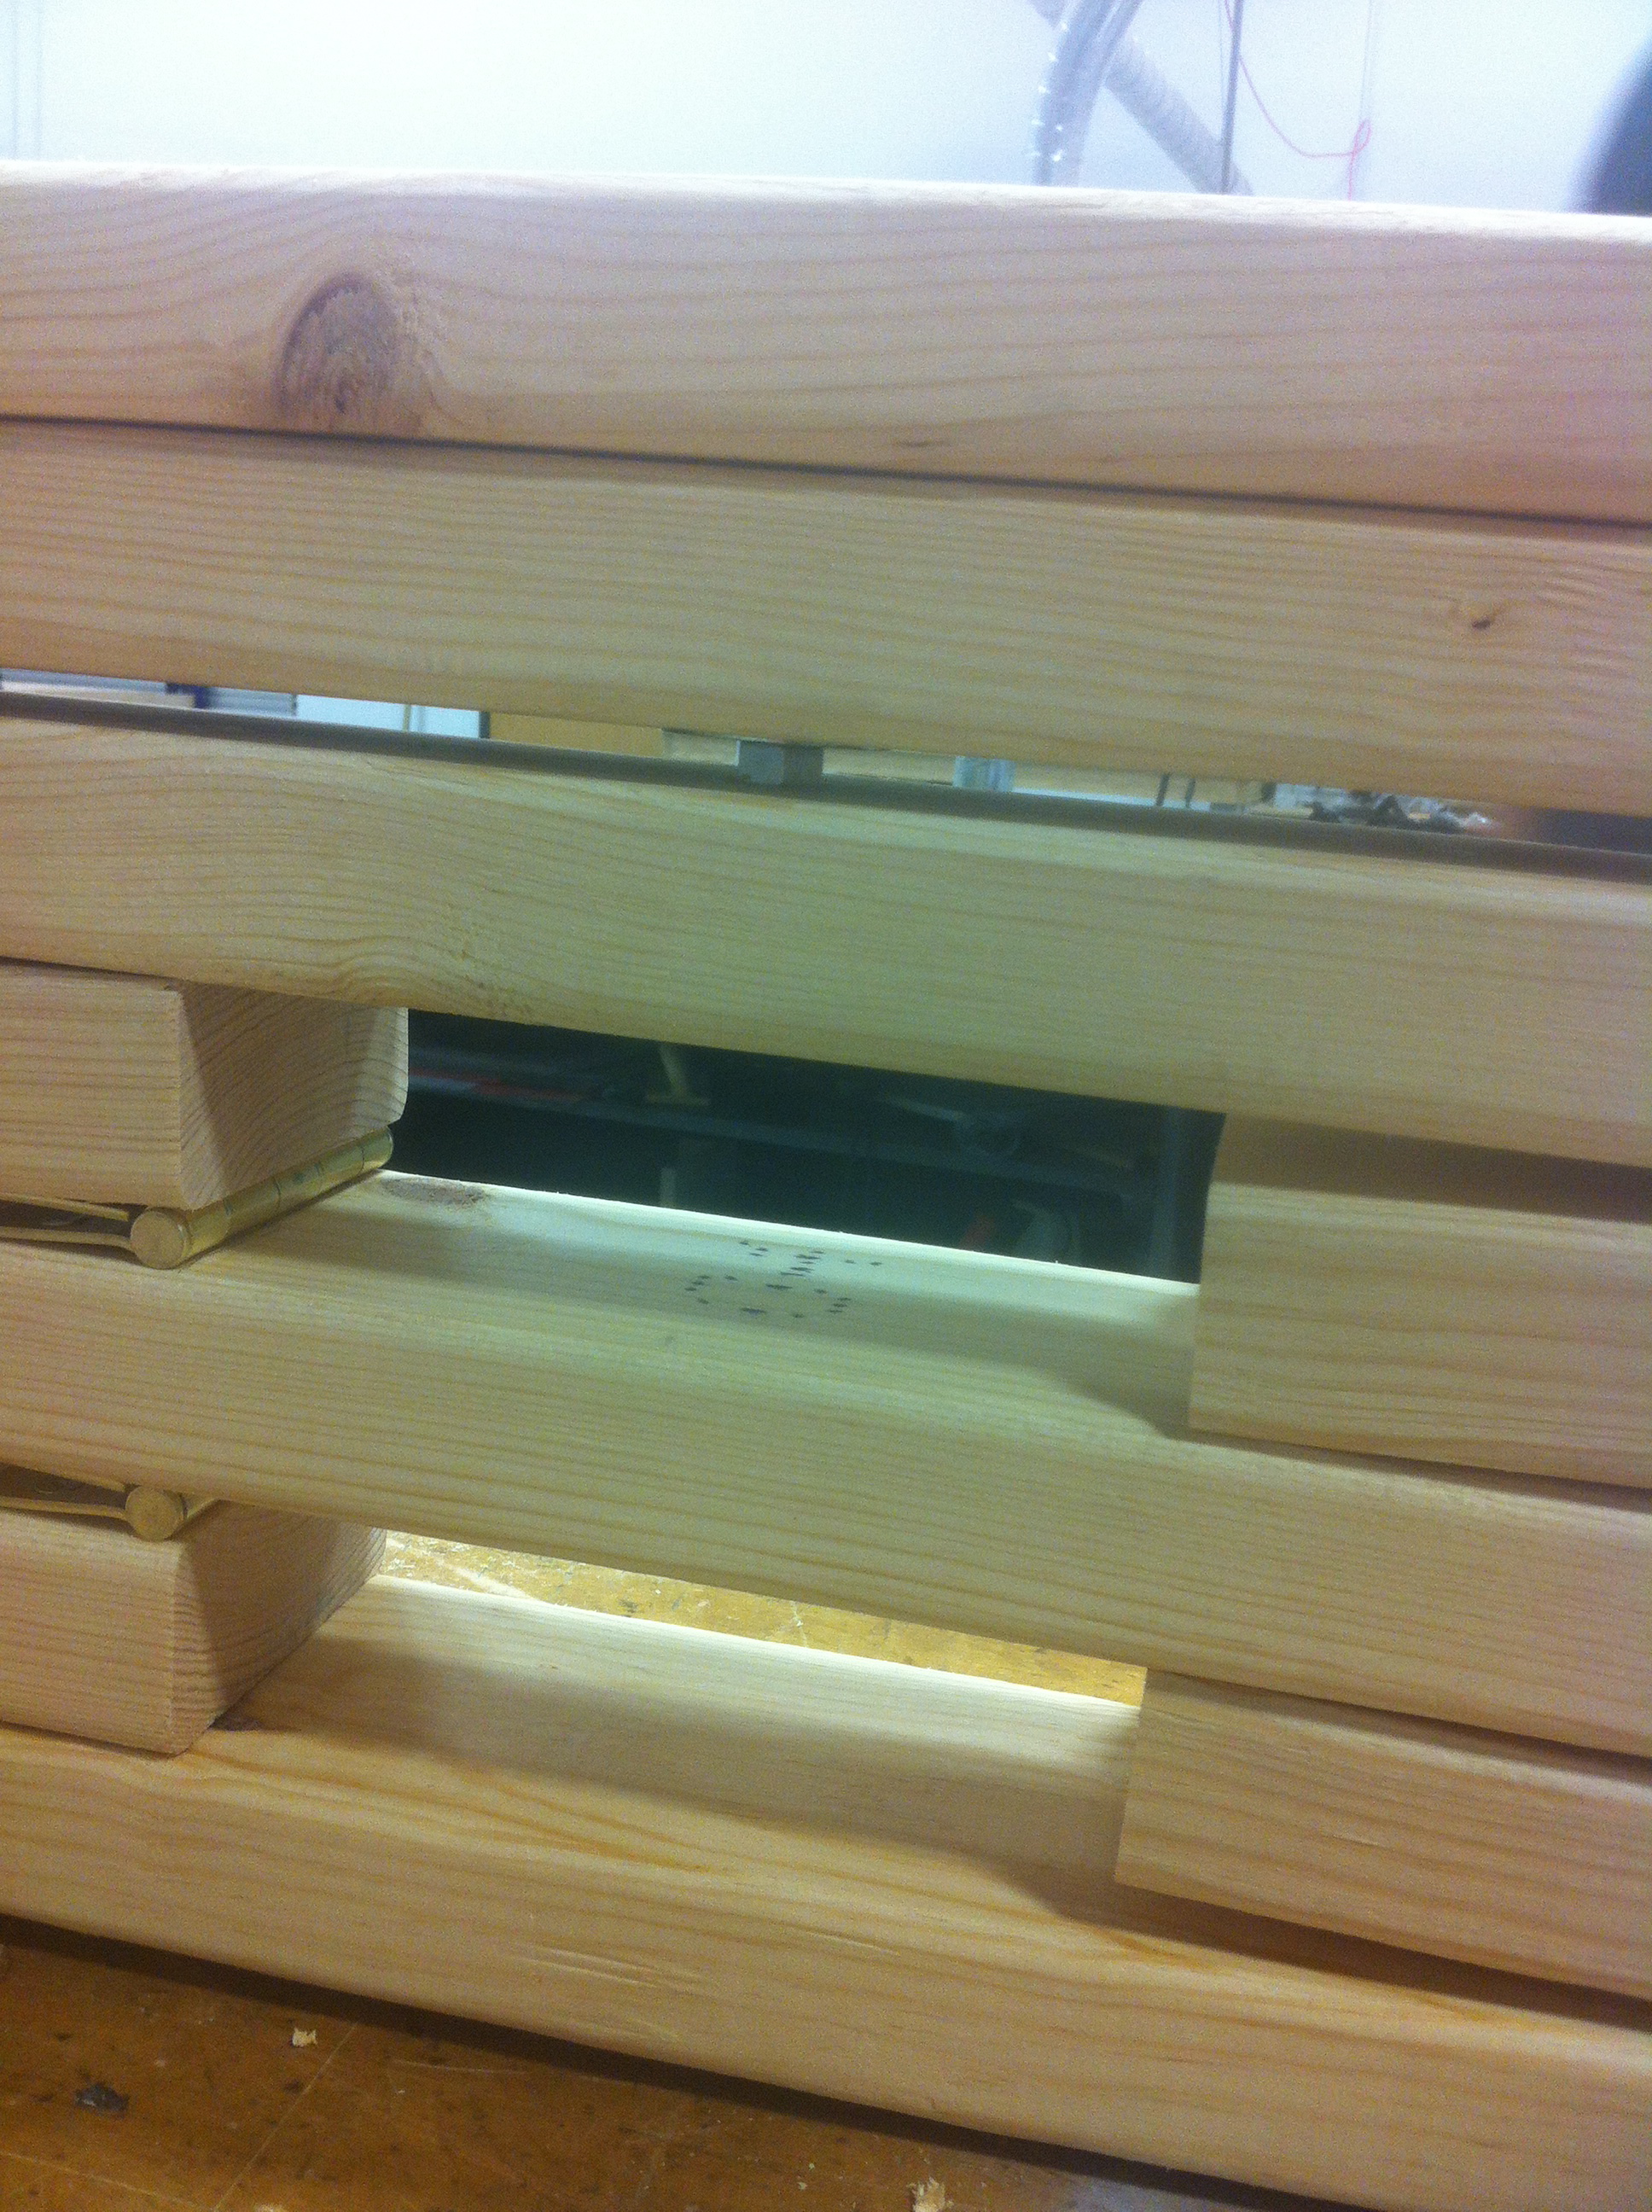
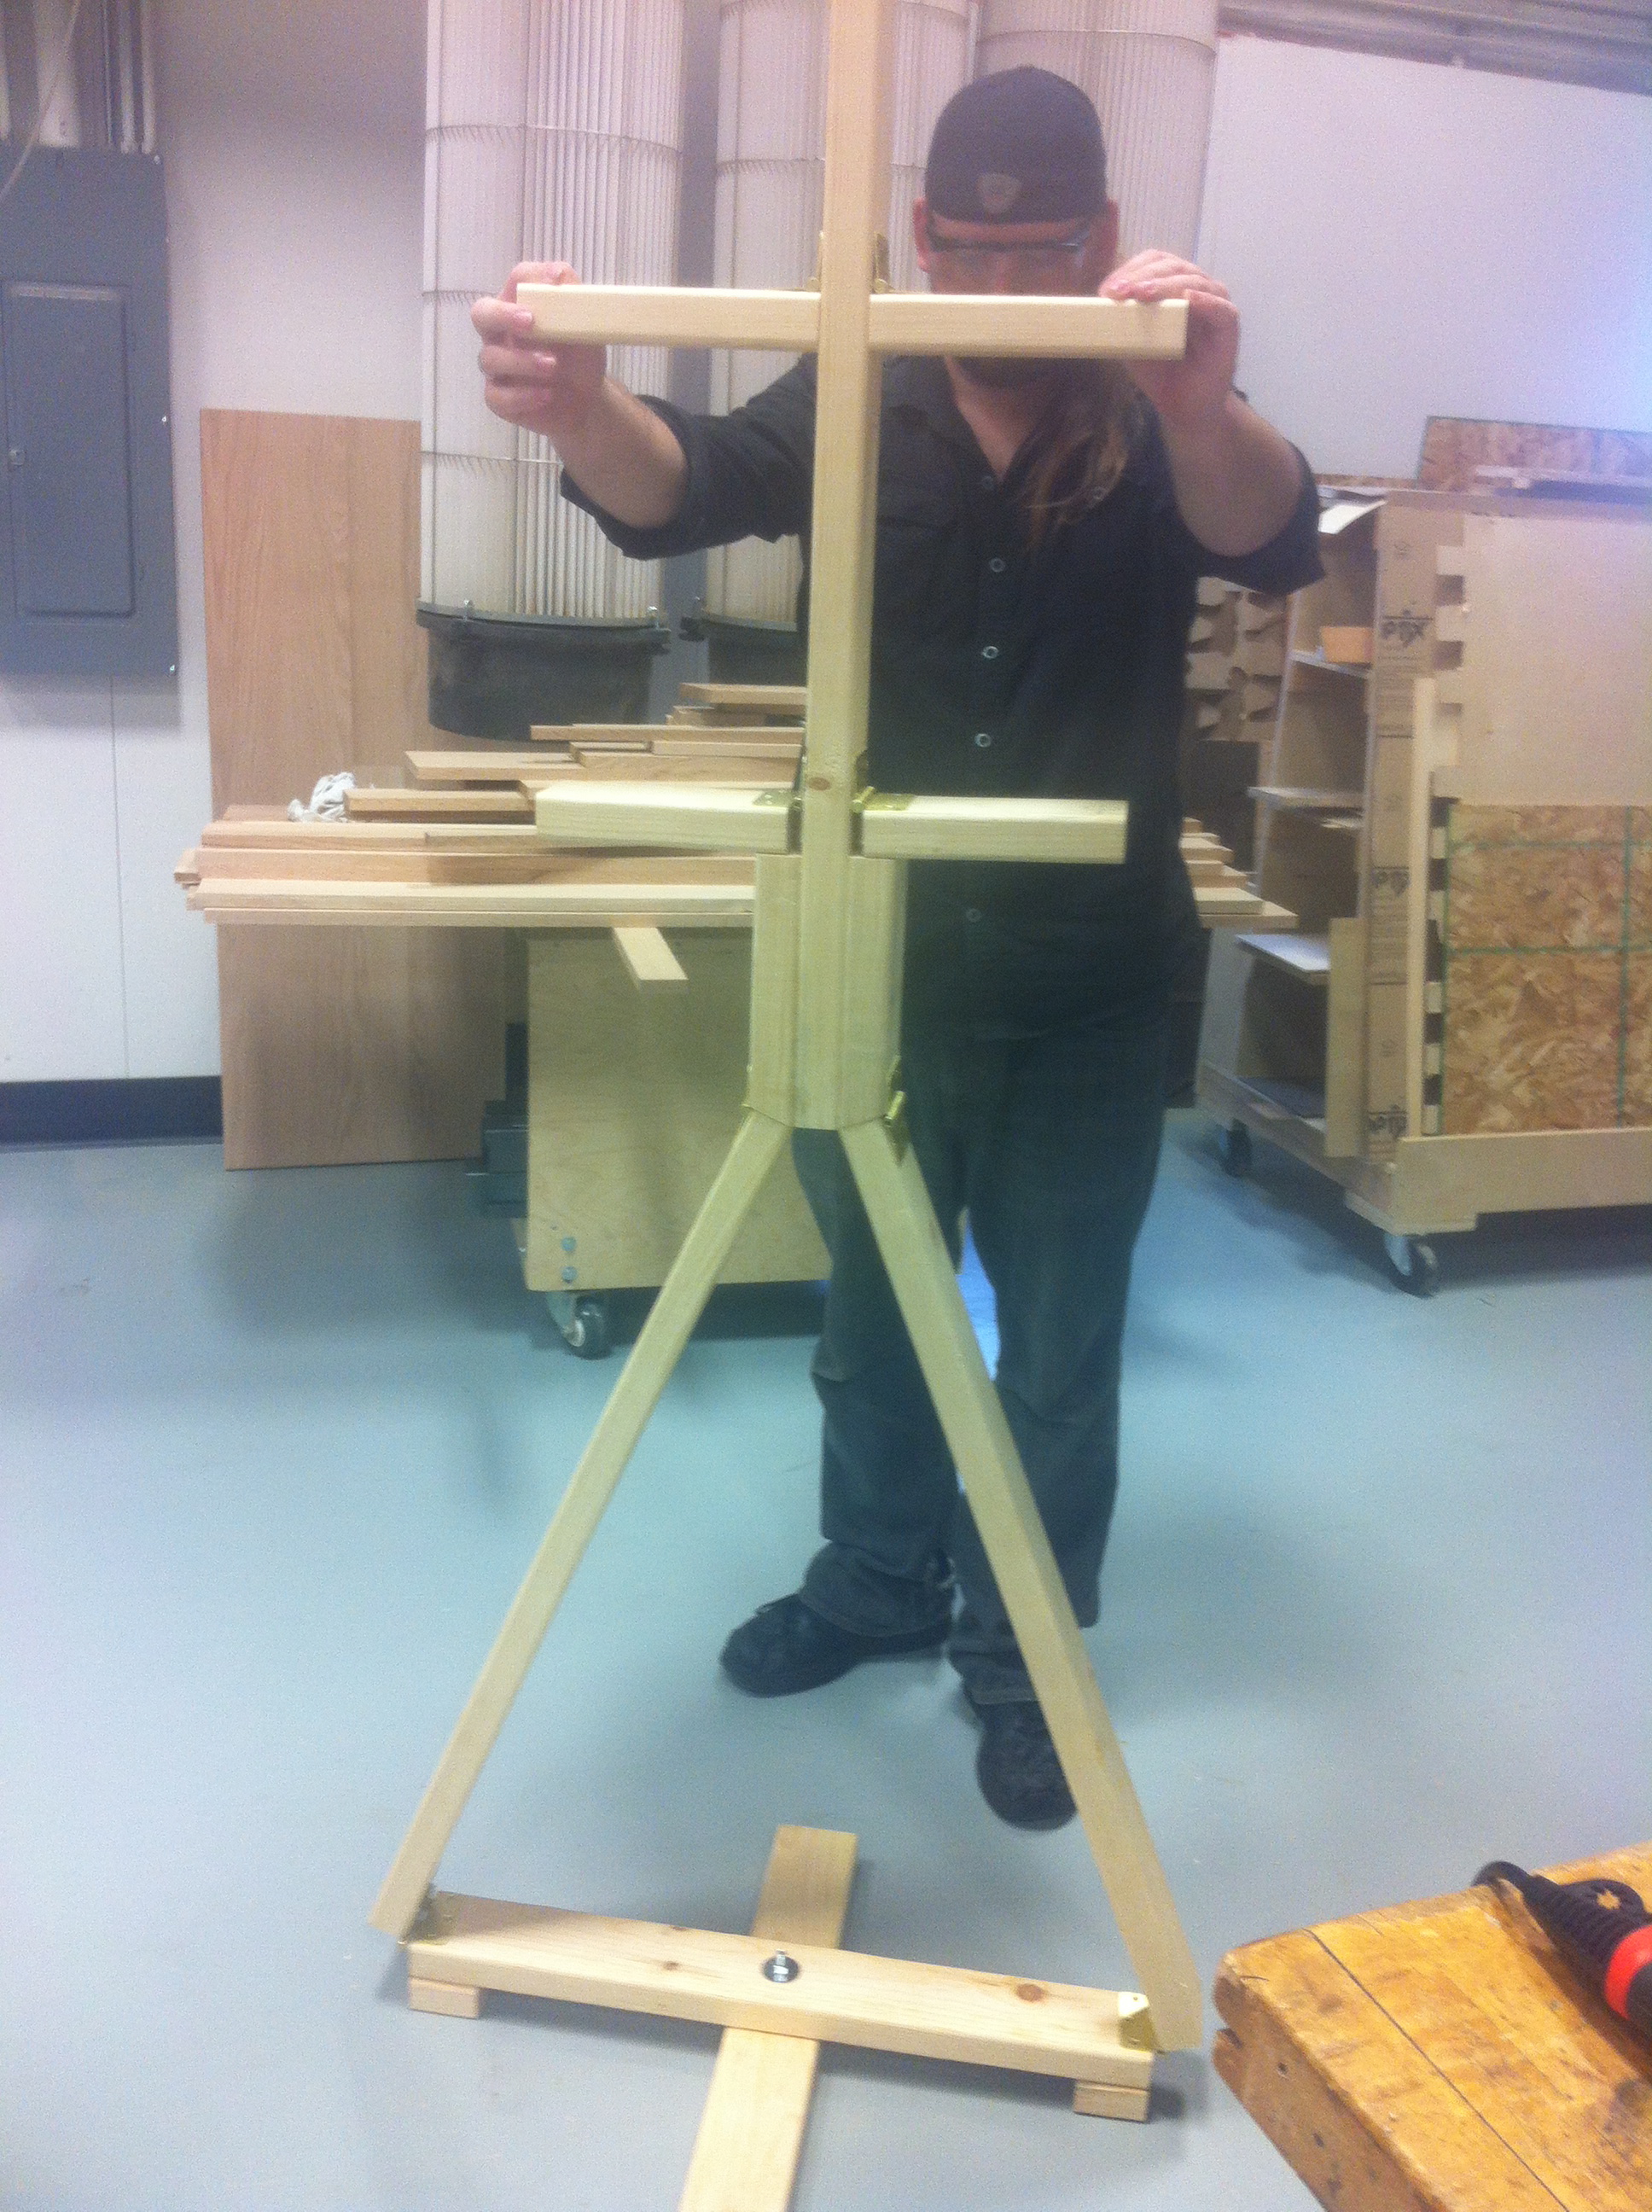
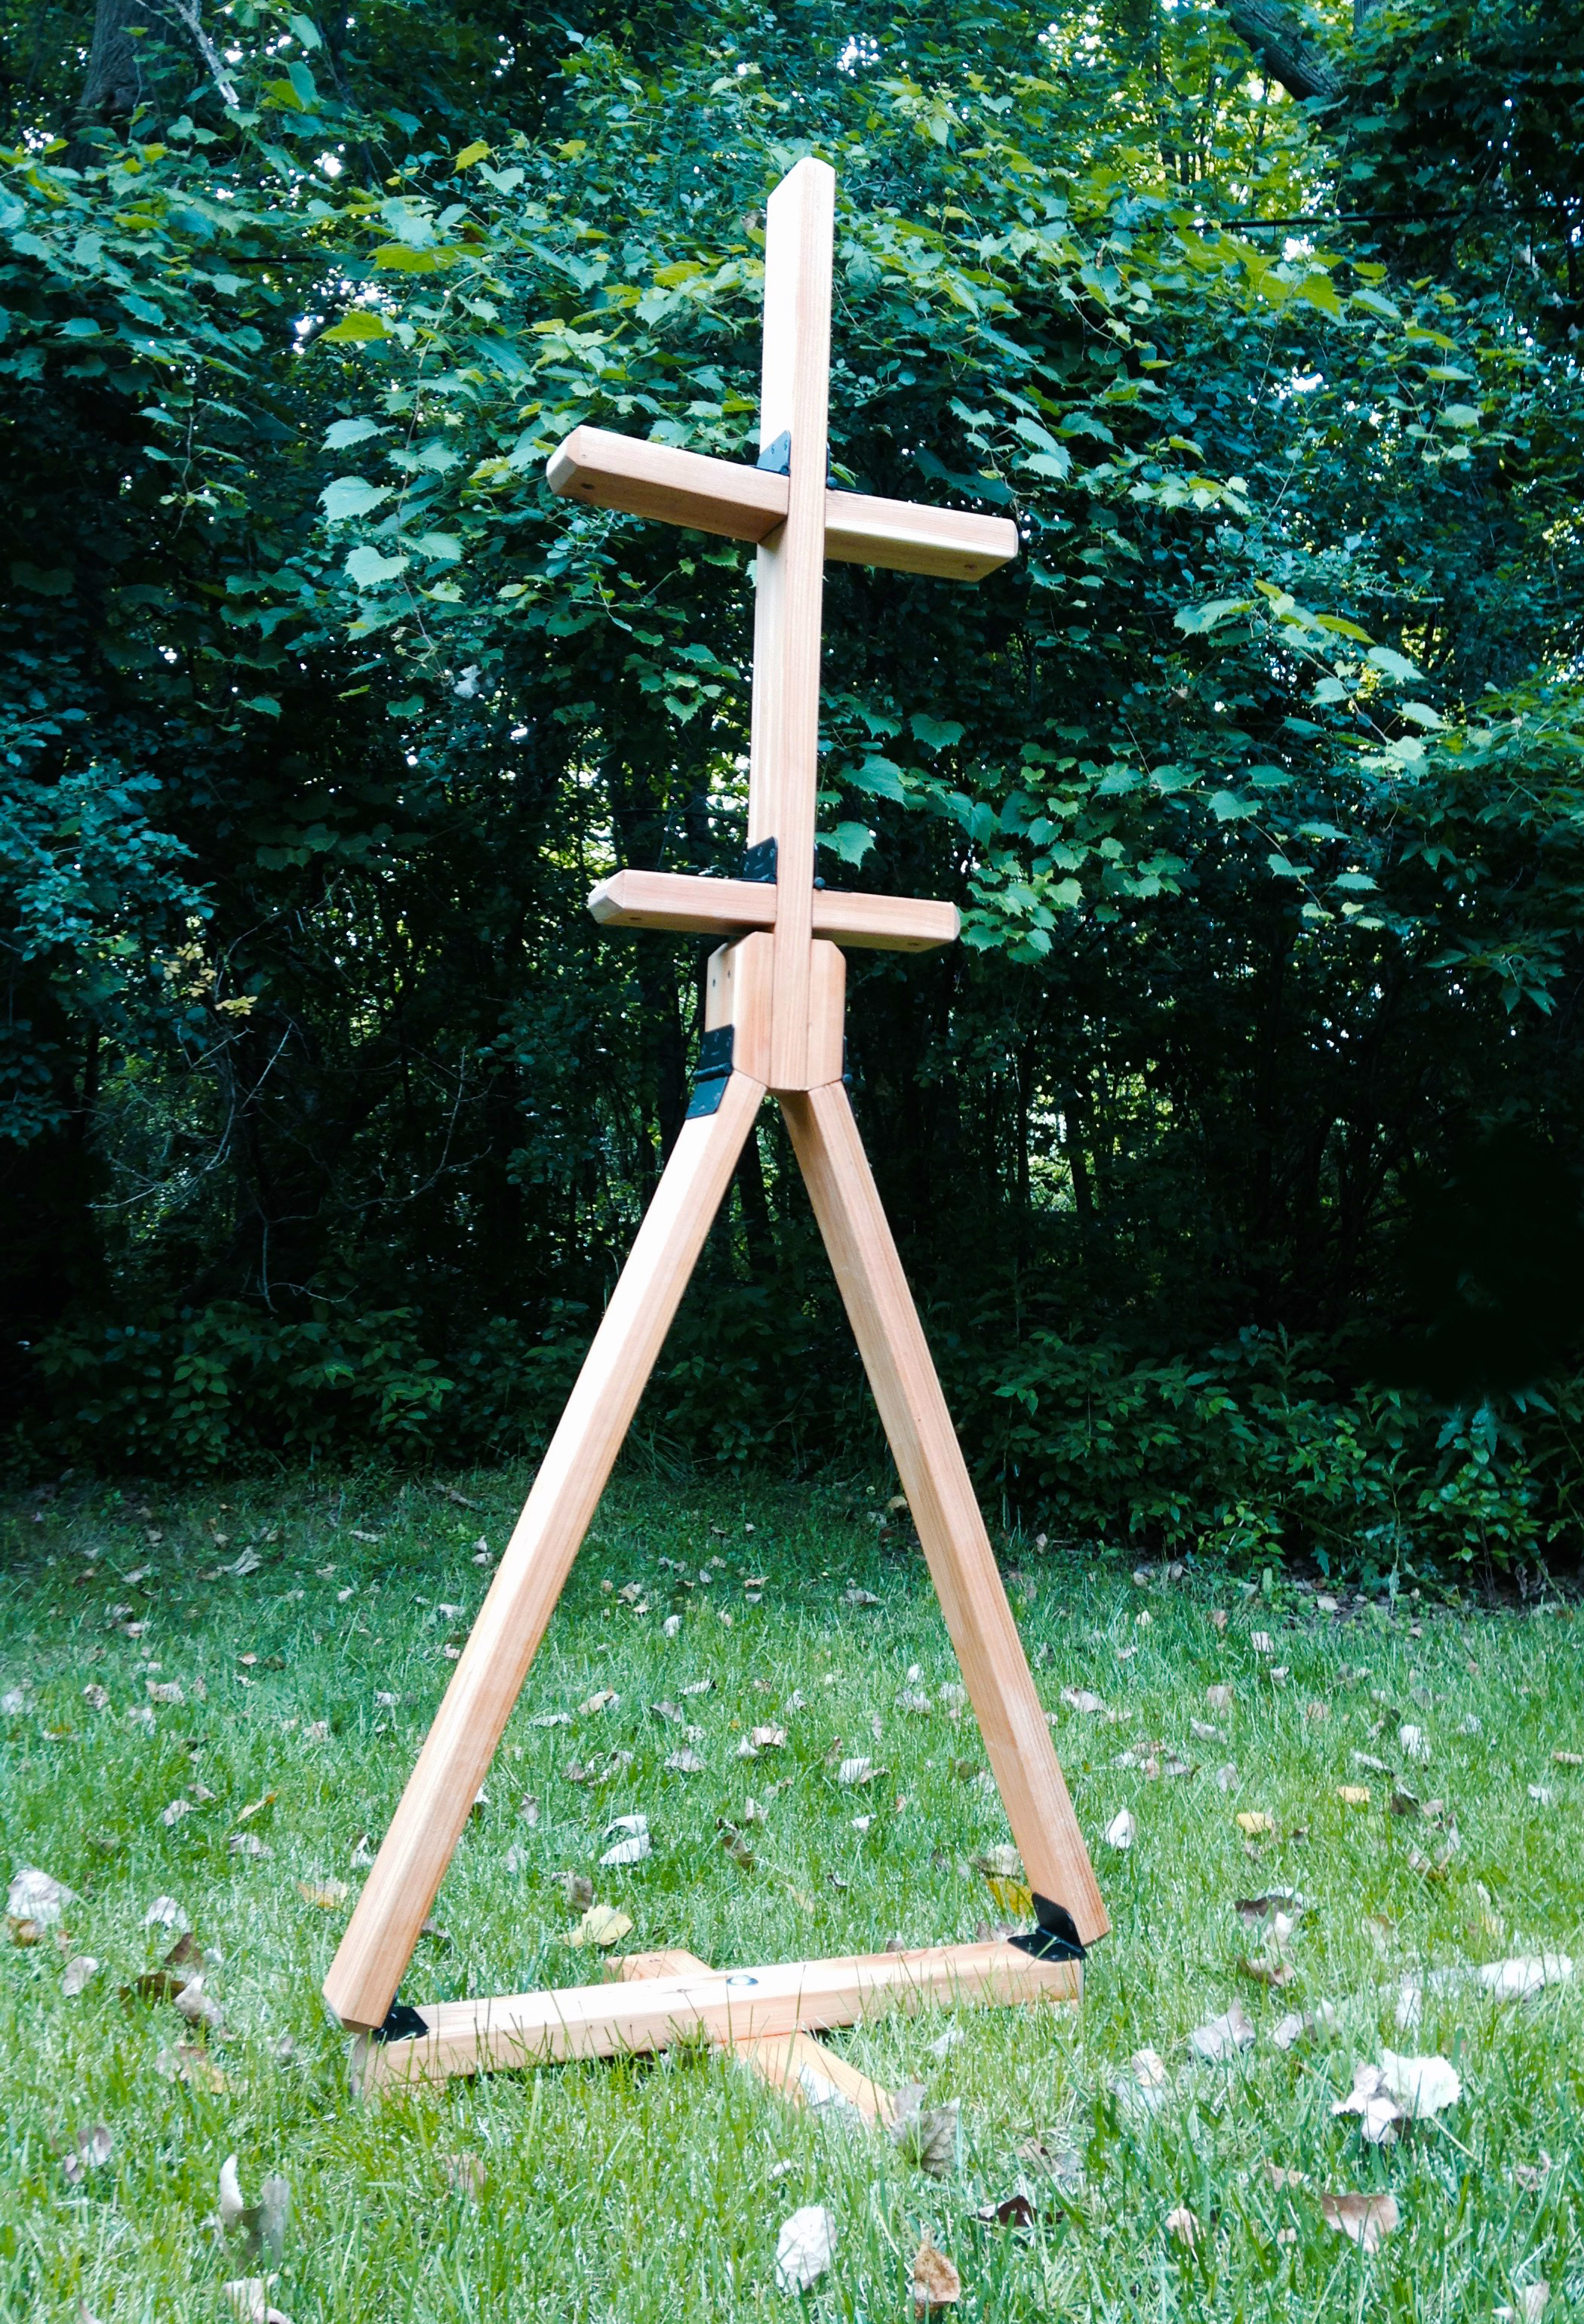
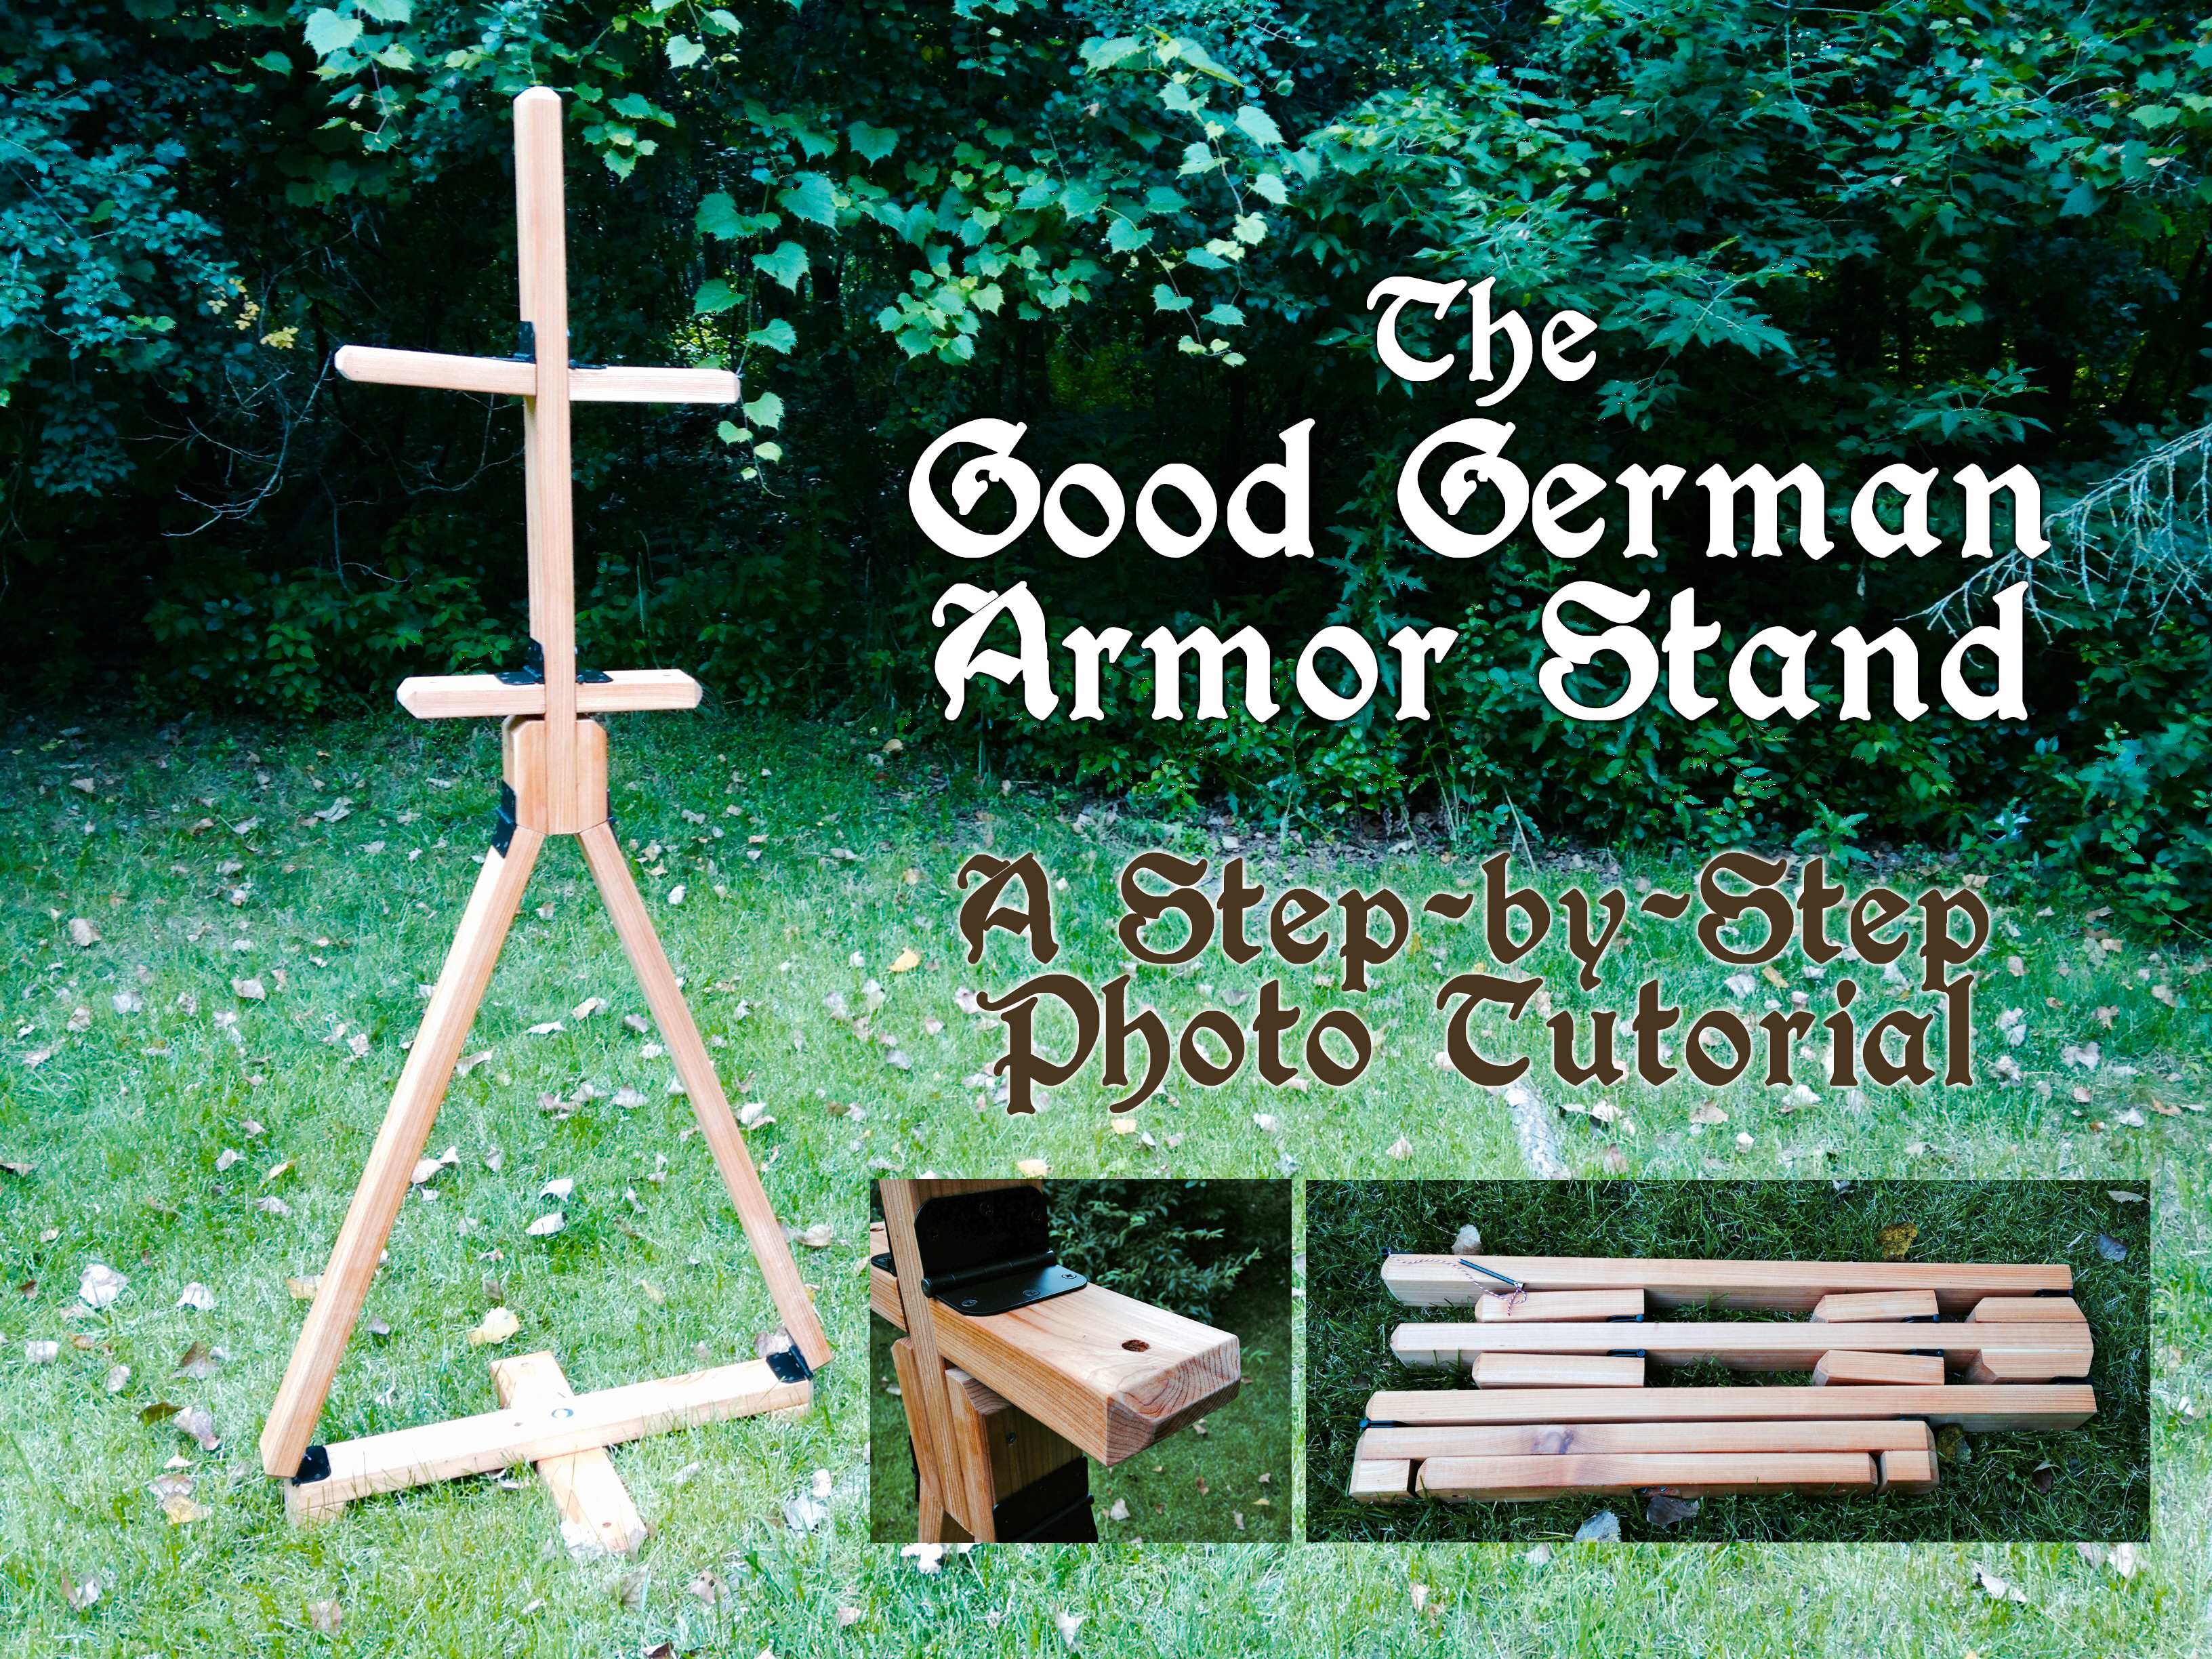
Level Up to Our Second Pennsic: Even Better Than Last Year!

15 August 2012

We’ve done it — we’re now level 2 in the SCA! How do we figure that? If we can survive our second Pennsic, we deserve to level up!

Pennsic last year was epic, but this year was even better! We remembered all sorts of promises and goals we’d set last year after various incidents, including:

Shopping at Pennsic

  • We brought more garb! We both had more stuff to wear. AND this year we set up a proper laundry station and clothesline behind our pavilions, so we could wash things during war … made a big difference! Alas, we still need more. Next year we’ve set a goal of having more Pennsic-appropriate garb, which for us means more linen shirts/smocks and doublets/gowns.
  • We used our space better! Last year we borrowed a 14×14 Regency that was just too small for the three of us. This year we purchased TWO 12 ft. round pavilions that we setup side-by-side — one for us, and the other one for my son and my mother. MUCH better! I had my own little space which no one ever need enter where I managed to put in a small desk and vanity, and I was ever so much happier.
  • We improved our beds. While we used the same double bed as last year, I did NOT bring the cotton futon nor the cotton sheets — last year they held moisture and I was miserable at night. Instead, I brought several foam pads (one camp pad and two pillowtop pads) all covered by microfiber sheets — such a difference! The bed was always dry and comfy. And Alexander has a special “KidCot” with a tent over it — keeps him off the ground (dry) and enclosed (warm and bug-free).
  • We did more. I made it to the A&S Display (awesome), taught an embroidery class, and experienced my first Pennsic Party. Gregor fought in EVERY battle this year (so proud of him). And we were Head Retainers for Their Highnesses, and as a result, we saw new sights.

That said, we still have a fairly long list of things we want to improve upon or make for next year, which I will record here in the hopes we remember!

One of my blackwork class students

  • Leave earlier! We left at 11:00 am, but we should have left before 9:00 am. We had to set the second pavilion up in the dark.
  • Pick classes in advance. I didn’t attend classes early on because I was too distracted, so by the time I was ready, there wasn’t much I wanted to take (except for one class, A Tale of Two Aprons, which was cancelled!)
  • Teach more classes. At least two, if not three. This is such a fantastic opportunity to meet people. Which leads me to my big one…
  • Meet more people! My darned shyness is always getting in the way here, but this is such a great place to meet new people, and I really need to try harder. I want to go to more parties next year, introduce myself to more people, and get more involved. It’s so easy to feel lost in the crowd, and only I can remedy that.
  • Help more. Everyone seemed to think that being Their Highnesses’ Chamberlain was “enough,” but it wasn’t … I wanted to be more involved and be more helpful. I suspect this will come in time. Last year I had nothing to do, and I remember being really bummed about that, and I went home and fixed it by volunteering for various things. So this year I had more, but I still felt like I had more to give.
  • Make more stuff. Things we want to make by next year include: a break-down wagon, a vanity with drawers, mirror, and small bowl, an armor stand, another chair for Gregor, more cool garb, and finials and banners for our pavilions.

Highlights of this year at Pennsic include:

Gregor looked great!

  • Marching out to the field twice with Cynnabar, music playing, drums beating, banners flying … just love this.
  • Welcoming Gregor back after every battle.
  • Being interviewed by Channel 10 during the A&S Display.
  • Introducing my mom to both Pennsic and the Society!
  • Discovering that one of my class students had a connection with me in the mundane world, and neither of us knew it!
  • Going to a party with Ceara and sharing some of Straum’s meat … (get your mind out of the gutter!)
  • Watching my 7-year-old haul 130 lbs. of ice back to camp by himself. So proud of him!
  • Having good enough garb that I got compliments and photos taken of me
  • Being sketched by three lovely ladies in the market … quite delightful!
  • Getting the Award of the Tower’s Foundation from my Barony, our mid-level award for service … wow!
  • Going to bed early and getting up late … 😉
  • Retaining for Their Highnesses when two lords were made into knights and watching their faces …. I cried!
  • Being able to help Their Highnesses and Their Excellencies during court
  • Rounding up retainers, scheduling them, and giving them little tokens as thank-yous … my first time doing this and it went smoothly.
  • Shopping with Her Highness one afternoon … the crowds parted for us!
  • Watching it hail … and having our pavilions and shadefly weather the storm!
  • Drinking mudslides with the ladies in camp!
  • Getting a pity beer from Hjorlief while out “wandering” with Ceara

    Watching the Midrealm Dragon Kite above the field

  • Seeing the gorgeous dragon kite flying above the battlefield
  • Wearing striped stocks the ENTIRE war!
  • Sitting with my creations at the A&S Display … what fun!
  • Marveling at how good Gregor looked in his doublet, his hat, and his new helmet.
  • Celebrating Alexander’s 8th birthday with a ‘smore cake of his own creation, complete with lighted toothpicks for candles!
  • Being of help to my fellow campmates in various ways … love being helpful!
  • Dancing under the shadefly during the big thunderstorm that popped up during Drunken Court
  • Receiving Eggbert, a little green knitted dragon from Gregor <3

Suffice it to say we had a wonderful time. We were sad to see it end and we can’t wait for next year!!

Pennsic Prep: Project Tutorials

19 July 2018

Every year since my very first Pennsic I’ve taught classes. This will be the first year I do not, as I will be Deputy Mayor for Cultural Affairs (woohoo!) and I felt I should keep my schedule as free as possible. But I still want to help and I love to teach. So this year I’m sharing ALL the PDF handouts for every class I or my family (Lord Gregor and Lady Alexa) have ever taught at Pennsic, which includes a lot of Pennsic project things you might like to do now before you arrive. Enjoy!

Pennsic Project Tutorials

Screen Shot 2015-07-27 at 11.12.48 AM

Portable, Folding Armor Stand (see the blog post for more detail)

Make a Canvas Dayshade (see the blog post for more detail)

Painting Your Pavilion

Portable Clothes Rack (see the blog post for more detail)

A Working Camp Sink (see the blog post for more detail)

Breakdown Hand Cart

Breakdown Gothic Chairs  (see the blog post for more detail)

15th c. Trestle Table ( (see the blog post for more detail)

Breakdown Camp Kitchen

Honeycomb Pleatwork Apron

Drawnwork Hemstitch Hankie Handout

Pleatwork BookScreen Shot 2015-07-27 at 11.15.03 AM

Blackwork Embroidery Book (see the blog post for more detail)

Round Pavilion Papercraft (sides-straight-template)

Round Pavilion Papercraft (sides-sloped-template)

Round Pavilion Papercraft (top-template)

Chain Mail (Youth Activity)

How to Make Butter

Heddeby Leather Pouch


Despite our lack of classes this year, we’re still making things! We have a brand new four-poster bed, new finials for our new shade fly, a new pup tent for Alexa, a new coronet box, and tons of new garb!

Four poster bed at Pennsic Coronet Box by Gregor

Enjoy!

Genoveva, Gregor, and Alexa


Organizing SCA Recruitment Events: Preparations, Printables, and People!

24 September 2014

To My Fellow Chatelaines and My Most Esteemed Successor,

This is my third year as our baronial chatelaine and it’s getting about time for me to make way for another to serve our newcomers and our barony. In my three years, I’ve learned a great deal about being a chatelaine, and specifically about organizing recruitment events. Before I go, I thought it would be good to write up a little “procedures” on organizing recruitment events for new and aspiring chatelaines. I’ve tried to be specific for my successor(s) as well as general so that these procedures can be applied to recruitment events throughout the Kingdom and beyond. Please feel free to ask me any questions—I will always be a chatelaine, officeholder or not.

Genoveva
Chatelaine for the Mighty Barony of Cynnabar


recruitment-event-photo3

Organizing SCA Recruitment Events: Preparations, Printables, and People!

An SCA recruitment event, also known as a “demo,” is many things: a social gathering, a demonstration of what we love about our Society, and an event in its own right. As its organizer, you are a recruiter, planner, and autocrat, all tied up with a smile and a bow. The recruitment event serve to promote the SCA in your community as well as bring together potential newcomers with members of your group. It’s an opportunity for great things — and relationships — to begin.

In my barony, I organize four types of recruitment events:

  1. Community events and demonstrations (i.e., Saline Celtic Festival and Ann Arbor Public Library)
  2. Student-oriented recruitment festivals (i.e., Festifall, Northfest, and Winterfest)
  3. Stand-alone focused recruitment events (i.e., Cynnabar Mass Meeting)
  4. Casual meetings (i.e., Newcomer Workshops)

All four types of events have three things in common: preparations beforehand so it’s well organized, printed materials to promote and educate, and people to both demonstrate and to attend. You can use these “Three Ps” to organize every recruitment event. Let me walk you through how I do it using the Mass Meeting event we held last night as example:

Preparation for a Recruitment Event

The Cynnabar Mass Meeting is a stand-alone recruitment event held on the University of Michigan campus in Ann Arbor, and thus it is focused toward students at the University of Michigan, but it welcomes everyone in the community who may be interested in joining us.

9-12 months before – Find a place and date for your event! Rooms for a September event at U of M should ideally be booked nine months in advance (January/February) for best pick. If you’re looking for place, this is not dissimilar from finding an event site, and should be done far in advance. Check your local libraries and parks for free or low-cost event sites. Pay attention to the size and convenience of your venue. If you want to attract students, make sure it’s easily accessible; if you want to attract families, make sure there is plenty of parking.

Important: Be familiar with the SCA Demo Policy: In order to be covered by SCA insurance, demos must be approved by the sponsoring group’s Seneschal. In Cynnabar, this means we bring the demo up at a meeting to see if the group wants to support it, and if so, we approve it. Be sure you give yourself enough time to bring it before your group and have it approved.

4 months before: Request any necessary support from your group. That may be going through your approval process for the demo, or it may be requesting funds for brochures or other printed materials. Also, if you need a special insurance certificate from the SCA to provide to your site’s owner, now’s the time to request it to avoid any extra fees. (Here’s information on SCA insurance, and here’s an example of a letter I sent to request a certificate: CelticFestInsuranceCertReq2014.)

3-6 months before – Put your event out there! I add it to our baronial calendar, add it to our list of demos and events at our group’s web site, and create a Facebook event page for it. I also post a “Save the Date” notice to my group’s mailing list and Facebook page, and mention it at our meetings to maintain awareness of it. Why? I’ll talk about it a bit more later, but your PEOPLE are important, and your people need to know about it and plan to attend well in advance.

Note: If you’re thinking about having any sort of audio-video presentation at your demo, such as a video, now’s the time to start thinking and planning for it. Our group brought up the idea of a recruitment video in June, so we were able to get footage at Pennsic to make the video itself in August. I was able to make the video over a weekend, but my superpower is speed and that may not be yours — give yourself lots of time to work on it! Here’s our video: https://www.youtube.com/watch?v=046bs9DY7QY

At least 3 months before: Invite, invite, invite! You need people at your event and they won’t magically appear just because you scheduled a demo — you must invite them, repeatedly. Remember, it takes about seven impressions for someone to fully register what the SCA is and why they might want to get involved. Here’s how we invited people:

  1. Mentioned Mass Meeting in every communication with a new person, and encouraged them to attend
  2. Passed out colorful Mass Meeting flyers at our student recruitment fairs (Festifall and Northfest)
  3. Taped up Mass Meeting flyers on boards around campus and the community
  4. Asked members of my group to invite their friends and family
  5. Make notes and reminders to the Facebook event page to help remember
  6. Sent personal e-mails to every newcomer inviting them (two weeks before)
  7. Sent reminder e-mails to every newcomer (two days before)

Note: The invitation to attend the recruitment event can be “sweetened” by asking for RSVPs in exchange for a little gift. Last year I gave out canvas drawstring bags in Midrealm colors to anyone who RSVPed; this year we gave personalized, illuminated scrolls (more on that later). Having a reward for RSVPing helps them commit and attend!

mass-meeting-scroll-sample

1 month before: Determine what you can demonstrate. I may have a general idea in advance (like if we have room for a fighting demo), but I usually save the details until I get closer and have a better idea of who is attending. I should also note that I do not sweat the little details — I trust my group to bring awesome things to show and demonstrate. Mostly I look for an overview and try to cover the main things that our group excels at (combat, archery, A&S, heraldry, dance, and music). Because we had room for a dance demo in addition to fighting demos, I specifically enlisted the help of our dance mistress in organizing the dance and music folk. I also specifically enlist our group marshals to organize fighting demos (this year I live with our armored group marshal, so easy peasy). This year’s RSVP gift — the personalized scroll — required that I enlist the help of various scribes in advance, too. Finally, this is the time to confirm that your site’s facilities meet your needs, such as any tables and chairs you may need for your demonstrations.

One week before: Prepare your printed materials. Running out of toner the night before is zero fun. You may need to employ your local copy or office supply shop to make copies of brochures, so allow time for that as well. I list all the printed materials I use for demos a bit later. This is also a good time to make a schedule for your event, if applicable, as well as plan where you’ll put things in your room/site at this point — I like to make a diagram, like this:

recruitment-event-layout

1-2 days before: Remind EVERYONE. E-mail, post, chat, whatever it takes to make sure everyone you are hoping will attend remembers. Also get together all the things you’re bringing — here’s my checklist:IMG_7632


  • Banner
  • Signboard
  • Contact (sign-in) sheets
  • Cookies and napkins
  • Video on iPad and speakers
  • Photo display board
  • Printed materials (brochures, cards, sheets)
  • Nametag
  • Things to display (costumes, embroidery, leathercraft, woodcraft)
  • Extra paper, pens, pencils
  • Tablecloth(s)
  • Duct tape!


1-2 hours before: Arrive early. I cannot overemphasis how important this is to me personally. When I get somewhere early, I worry less and things go smoother. Whenever I am in charge of something, be it an event or a class, I always try to arrive early.

Here are some photos from the event last night:

IMG_7729

IMG_7722

IMG_7720

IMG_7726

IMG_7738

Printed Materials for Recruiting Events

I have made a lot of printed things over the past several years and now bring most, if not all, to recruitment events. I introduced a new one at last night’s Mass Meeting that I particularly like. Here’s a list of all my printed materials, as well as links to download and/or make your own:

  • Brochures: The Cynnabar brochure is a re-designed version of the official SCA tri-fold flyer found at http://www.sca.org/officers/chatelain/pdf/trifoldtemplate.pdf. Our version includes photos I took personally, as well as our most recent group photo. I prefer this personalized version over the generic version, but what’s important is that you have it. I have brochures on tables, as well as put brochures in the signboard placed 20-30 feet away (for those who want to read about us before they approach us).
  • Social Cards: This is a folded business card that we set out on tables. We also have folks keep these in their pockets to hand out as necessary. Here’s a generic, fillable version you can use for your group.
  • Demo Cards: These are cards you hand out to your group’s members to help them at the demo — one side has tips and reminders, the other side has a space where you can put important dates and information. I wrote up a blog post on the demo cards here.
  • Nametags: I make twill nametags so they go with our garb better—here’s the tutorial and PDFs for those.
  • Signage: Having signs around the room for various things helps everyone, newcomers and oldtimers. Here’s a PDF file with signs that you can print on card stock and fold in half to set on tables: event-signs
  • Newcomer Sheets: My latest printable is a set of individual sheets that I set around the room/site near the related activity/demonstration. They explain more about the activity and offer the locations/days/times of our related practices/workshops for that specific activity. When I greet newcomers, I give them the first page (“Welcome to the Society!”) and a folder, and tell them to pick up the other sheets places around to create their own newcomer’s handbook. I only have eight pages made so far — many more could be created! I took the text from the Newcomer’s Handbook at sca.org as well as the Newcomer’s Portal. The photos are all mine. Here’s a PDF of the pages so you can see what I’ve done—if you like this idea and what to do this, let me know and I’ll upload a fillable version for you to put your own information in.
  • Sign Up/Contact Sheets: Always have a bunch of copies of these so you can contact people later. Here’s a PDF of the one I use.
  • Flyers: Even though you probably already distributed/posted a bunch of these, I recommend you bring some to your event and pass them out near an entrance to your site/building to encourage more people to come! Here’s a PDF of a small, 1/4 page flyer we used last night.
  • Scrolls: I mentioned earlier that we had one of our scribes illuminate a scroll — I took this illuminated scroll, scanned it, and printed into onto a piece of parchment. Then we had two more scribes personalize each scroll with a newcomer’s name so they could take it home as a souvenir. I thought it was a big hit! Here’s a PDF of the scroll to use as inspiration for your own (note that it is two-sided).

IMG_7725

That’s a lot of stuff, I know, and you may not need all of it. But I find these things really help!


People for Recruiting Events

I’ve already touched on this a lot, but there is no recruiting event without people—your group’s people and the potential new people! The biggest tip I can provide here, beyond what I’ve mentioned, is personal invitations. When I personally ask someone from our Barony to attend and help out, they know they are needed and appreciated, and I find they are much more likely to try to make it to a demo. Not everyone likes demos, but most people like to know they matter, and this is an excellent time to remind them of their importance to your group.

Personal invitations to newcomers also really help. Even though we passed out a Mass Meeting flyer to nearly everyone who visited us at the student recruitment fairs, I still made a point to send a personal e-mail to each one to invite them to Mass Meeting. I really feel this makes a difference. It takes time, yes, but it’s worth it. Tip: I used Google Spreadsheets to enter each recruits e-mail address, name, and notes, then I used a mail merge to send out a personal e-mail with their name, location of where I met them, and relevant notes. This is how I sent out nearly 200 personal e-mails not once, but twice. Try it!

If your group doesn’t do a lot of demos, you may also want to schedule a workshop or meeting to talk about the demo. This is an opportunity to educate your group on what a demo is and what they can do to present a positive face to our newcomers. I don’t have to do this in Cynnabar, as our group is well-acquainted with demos.

IMG_7720

Finally, when your event is done, don’t forget to follow-up with your newcomers, thank your people for helping out, and plan another recruitment event, such as a newcomer’s workshop for all the new people to attend!

Speaking of which, a HUGE THANK YOU to Cynnabar for turning out so splendidly for our Mass Meeting last night. I’m continually amazed by your skills and talents, and your willingness to share those with new people. You are each an inspiration to me.

Let me know if you need more information or have questions!

Our Epic Pennsic: Videos, Photos, and Memories!

20 August 2011

We’re home from our first Pennsic War! The Midrealm didn’t win, but we certainly feel like victors! We successfully prepared, survived, and enjoyed a 10-day long SCA event/camping trip filled with both amazing and challenging events. If you want just the highlights, check out this short video I made of our “Epic Pennsic” — it even has a soundtrack and some battle footage.

As is to be expected, our Pennsic was not perfect. But I believe strongly that mistakes can be the best path to success (if you learn from them!) so it’s all okay. Here are the bumps in the road we encountered:

  • Strapping stuff to our car rack was NOT easy! We’d chosen to put our futon up there and it kept flapping up when we got up to highway speeds. We had to stop three times to re-strap it, and that put us behind schedule. Solution for next Pennsic: Buy or rent a small trailer so we don’t have to put stuff on the roof!
  • Arriving too late in the day to set up camp before dark! This was related to the point above, as stopped to re-strap really slowed us down. Solution for next Pennsic: Plan to leave by at least 9:00 am.
  • Putting the tarp under the canvas pavilion as if it was a modern nylon tent with a floor resulted in a moat around the inside perimeter of our tent after a rainfall on the first night. It was sprinkling and getting dark fast when we arrived, and we didn’t understand that the tarp had to go OVER the edges of the pavilion so that the rain would run off the canvas into the ground, not into the tarp. Had we not been pressed for time when setting up, we could have probably figured that out. This is one of those cascading issues. But we learned fast! Solution for next Pennsic: Set the tarp up the right way to start with, and think carefully about where water will go when it lands on the canvas.
  • Not enough garb! Gregor laughed when I told him I thought we needed at least one outfit for each day. He changed his tune once we got to Pennsic. We need more! Doing laundry was too time-consuming. Solution for next Pennsic: Try to have at least one outfit for each day PLUS a few extra for clothing changes due to heat, humidity, or rain.

That list isn’t so bad, really! Much worse things could have happened, such as my painter’s canvas shade fly collapsing due to all the rain. But, amazingly, it stayed up for the entire time and provided MUCH needed shade. I am glad I took a chance on that, but next year we’ll have a proper shade fly that keeps out water, too.

Some of my personal highlights of Pennsic XL are:

  • Retaining for the king, His Majesty King Arch, immediately after Opening Ceremonies. I’d never retained before, so I totally winged it … and it worked out fine. I got to see the Heroic Belted Champions Battle and Belted Champions Battle up close. I got to see the broken arrow that starts the war! I got to see Her Majesty Queen Runa give out awards (tokens?) to the Belted Champions on the field. It was a terrifying but thrilling experience for me! Definitely pushed me out of my comfort zone, and that’s a good thing.
  • Camping with Cynnabar. Everyone was kind and welcoming, and helped us feel like part of the group. The showers were awesome, as were evenings around the fire. And my son even had another 7-year-old to play with, which I wasn’t expecting. Cynnabar was also VERY convenient to shopping, food, and the battles — a really prime spot. We are very fortunate!
  • Going to a vigil for a knight-to-be with Their Excellencies, Cynnabar’s Baron and Baroness. They invited us along one evening, which we really appreciated. So not only did we get a chance to speak with them for an extended period, during which they patiently and candidly answered our questions about the SCA, but we also were able to witness a vigil. Very cool!
  • Seeing all my camp furniture in action. Everything worked and stood up to the rain, wind, dew, and heavy use we gave it. That made me feel great!
  • Volunteering for guard duty at the Midrealm Royal Encampment. We did it twice, and it helped us newbies feel like we were involved and useful. I highly recommend this for other newcomers.
  • Walking with Gregor when he was in his full plate armor. This was an unexpected experience. I mean, yeah, I thought he looked cool, but I didn’t realize how unusual his armor was until people stopped and stared, took pictures, and gave him kudos. It was a little like walking with a celebrity. He did look really good!
  • Talking a stroll at twilight around Pennsic. Gregor and I went exploring one evening and walked down around the lake. There was a mist everywhere and it was pure magic. At one point when we’d paused to stare across the lake at the encampments, a woman stopped to tell us how she and her husband stopped every year on that exact spot to take it in, and how she and her husband had met at Pennsic 20 years ago.
  • The Cynnabar’s Got Talent show. Lots of fun, but let’s just say that Ermenrich is lucky Gregor didn’t challenge him in defense of my honor. Ha ha. ‘Nuff said. 🙂
  • Getting my first SCA award — the Award of Elephant’s Heart! This was totally unexpected and it made me really happy!

I could go on and on, but then I’ll never get any new blog posts up. So I’ll just end it here with some of my favorite photos. And this …. I can’t wait for next Pennsic!

Gregor ready for inspection before war

The OTHER Cynnabar Shield Wall

The Pennsic Battle Horn blowing at the start of the field battle

Gregor on Midrealm Royal Encampment guard duty

A Dressmaker’s Pell: Making My Own Dressform from Duct Tape!

3 July 2011

Last night’s pattern making went well, but this morning I decided I needed a way to see the muslin dresses better. I guess I wasn’t quite confident to cut out my linen without knowing that the dress really is constructed right. So this morning I got up and researched dressforms. I learned they are expensive to buy, but cheap to make if you have a bit of patience and a few easy-to-obtain supplies. So I went out and got a 60-yard roll of duct tape and some fiberfill (about $20 altogether). I put on an old t-shirt and began covering my torso carefully with duct tape.

Taping myself up

Notes: The t-shirt I chose was close-fitting, but not super tight. And it was important it be a bit long so I could continue the duct tape down over my hips. You want to tape yourself closely, but not so tight that it compresses or changes the shape of your body at all. This is NOT the time to suck in your tummy! The taping goes much faster and easier if you have a helper, but I did not … and I still managed to do it. The upper back was very difficult, and I couldn’t quite get it all. I just did the major parts (across the shoulders and over the shoulders) and that worked fine until later. For reinforcement, you’ll want to do on layer where the tape is mostly horizontal (wrapping around) and a second layer with the tape vertical — this will help your tape job keep its form after you later remove it.

Tip: If you try to do this yourself as I did, cut off strips of tape in advance and line them up on a safe surface. It makes the whole process go faster!

"Cross your heart"

You’ll want to pay particular attention to your curvy bits so you retain them properly in your dressform. I did the “cross your heart” method on my chest and it worked pretty well for me. You’ll want to use shorter bits of tape to stay true to your curves. I look like I’ve got some sort of weird duct tape armor harness on in this photo!

By the way, you’ll want to wear appropriate undergarments when you do this, or your dressform won’t drape your clothing in the way you want.

After I was all taped up, or at least as much as I could manage on my own, it was time to cut it off. If you have a helper, they could cut the tape and shirt up the back. As I did not, I cut it right down the front.

Note: Do not use your best scissors for this job. The duct tape will leave gummy residue on your scissors … blech!

Cutting off my taped shirt

Tip: Be really careful when cutting the shirt off that you don’t cut anything else you may be wearing. I thought I was doing well until I realized I’d cut a little snip out of one of my favorite skirts. I think I can mend it, but still … what a pain!

Once the duct taped shirt is off, you’ll want to tape the cut seam back up. Be sure this is well taped, because this seam will be under a lot of pressure later. Now you’ll want to stuff your dressform with fiberfill, or something similar. Before I stuffed mine, I mounted it on a pole (thick dowel from Lowe’s) which is screwed to a base made of leftover wood from my trestle table. I then attached a hanger to the top of the pole, making sure the “shoulders” of the hanger were at the same height as my own with my shoes on. It was important to me that the dressform be the same height as me so I could use it to hem my skirts!

My unstuffed dressform on a homemade stand


Once you’ve got your dressform the way you want it (you could also just put the hanger in it, close up the bottom, and not use a stand), it’s time to stuff it! I used cheap polyester fiberfill, but you could probably use whatever you had that wasn’t too heavy. Be sure to pack the stuff in well so you don’t have areas that are too soft or curves that are pushed in (or get pushed in later when you’re putting clothing on it). When I was done with the stuffing (it took me 2.5 bags), I made a neck out of a bit of leftover muslin and some duct tape. I then reinforced the top of the dressform with more duct tape, this time using a tan color (“cookie dough”) so it would look a bit more natural. I double-checked that the dressform was the same height as me, as well as double-checked its measurements against my own. It worked! I dressed it up in the smock I made last night and my farthingale… looks pretty good, I think! And when I tried the kirtle on it, remembering to pin up the straps a bit, I could see that the kirtle pattern I drafted does indeed look good, and I’m ready to make the real thing!

My completed dressform!


As I was making this dressform, I couldn’t help but think of Gregor’s pell and how he made it to his own measurements. Well, this is MY pell! I can use it to practice my art without fear of running myself through with a stick pin!

Me and my new dressform!